


How To Install ISPConfig on Ubuntu 20.04 LTS
Welcome to the tutorial on how to install ISPConfig on Ubuntu 20.04 LTS.
How To Install ISPConfig on Ubuntu 20.04 LTS
Introduction
Welcome to the tutorial on how to install ISPConfig on Ubuntu 20.04 LTS.
ISPConfig is an open-source hosting control panel for Linux distributors. ISPConfig allows administrators to manage websites, email addresses, MySQL and MariaDB databases, FTP accounts, Shell accounts, and DNS records through a web-based UI. ISPConfig supports Linux-based operating systems such as CentOS, Debian, Fedora, OpenSUSE, and Ubuntu.
Before continuing the article, if you need to buy a virtual server or a Linux host, go to the Ded9.com website and see the great plans at great prices.
Possibilities
In the following section, we have provided you with some of the best features supported by ISPConfig:
- You can manage one or more servers from a control panel using the Master/Slave Setup panel.
- Full web server management for both Apache and Nginx servers.
- Email server management with spam filter and antivirus using Postfix (MTA) and Dovecot (IMAP). BIND Server and DNS server management.
- Administrator, vendor, customer, and user email login accounts.
- We are providing website statistics with Webalizer and AWStats.
prerequisites
- To install ISPConfig, you need root access to your server.
- The minimum system required for ISPConfig:
- Processor: 2 vCores
- RAM: 2 GB
- Free space: 20 GB
We use the following terms in this tutorial:
- Username: root (any user with root privileges).
- Hostnames: ispconfig.example.com (you can set them as you like).
- Domain: example.com (you can set it as you like).
- Username: Admin (default user).
Step 1 – Configure hostname and hosts (optional)
We use the nano editor, but you can use your favorite editor:
nano /etc/hosts
Then you see the following output:
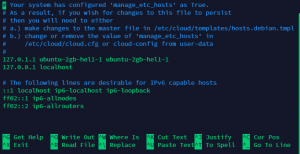
Your service provider may issue a different output base. Now edit the /etc/hosts file:
(For example, we used ispconfig.example.com)
![]()
To save your edits, press Ctrl + X, then Y, and hit Enter.
Now edit the /etc/hostname file to set the server hostname:
nano /etc/hostname
You must restart the server to apply this change:
systemctl reboot
Before continuing, we check the correctness of the hostname:
hostname
Or
hostname -f
Bash
The output appears as follows:

Now update your server using the following command:
apt update && apt upgrade
The pre-installation steps are complete, and now we start installing ISPConfig on Ubuntu 20.04 LTS.
Step 2 – Run the installer for ISPConfig.
This tutorial will install ISPConfig with Nginx, PHP (7.4 and 8.0), MariaDB, Postfix, Dovecot, Rspamd, BIND, Jailkit, Roundcube, PHPMyAdmin, Mailman, Webalizer, AWStats, and GoAcces.
If you want a different configuration, check out all the options listed at the end of this tutorial:
wget -O – https://get.ispconfig.org | sh -s — –use-Nginx –use-php=7.4,8.0 –use-ftp-ports=21-22 –lang=en –no-quota –unattended-upgrades
Bash
After a few seconds, the Installer will confirm the installation of ISPConfig. Type “yes” and press Enter:

Remember the admin and mySQL password.
After successful installation, you will see the admin password and MySQL root. Store your ISPConfig passwords safely. To enter, you need:

Step 3 – Enter ISPConfig
Your server is now up and running.
You can log in to the following address:
https://your-ip-or-url:8080/
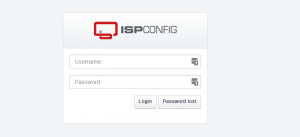
Use your information to log in. The default username is admin, and the password is displayed in step 3.
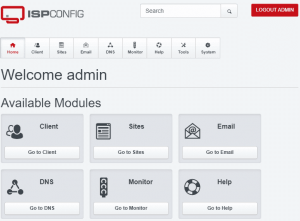
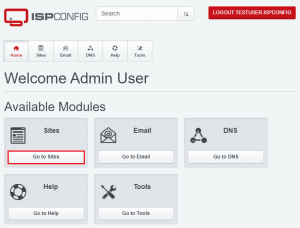
Your setup is now done! Now you can create a user website and host your website. The ISPConfig dashboard looks like this:
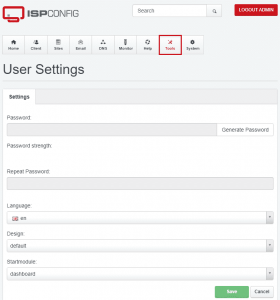
Step 4 _ Important settings
Change the password in the Tools tab:
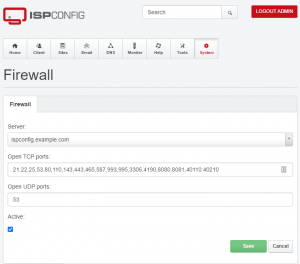
Start the firewall in the System tab, and click Add Firewall record. Click:
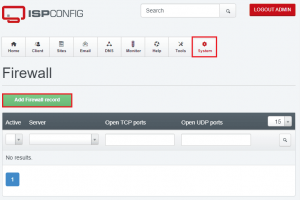
According to your needs, you can update or change the port.
Note: Before updating, make sure the ports are open on your server:
Step 5 – Add customer/client
After completing all the above steps, you can add your first customer:
Go to the client section:
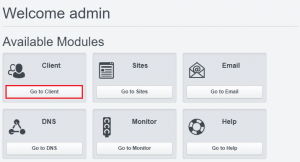
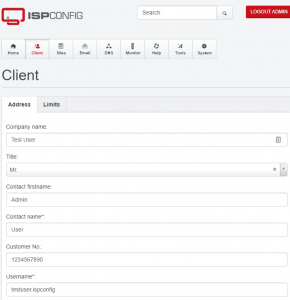
Now go to Add new client:

Fill in all the details like username, password, and basic information about the customer:
Step 6 – Add a site
So far our work is done, and we have added a new client. Now login as user and click on Go to Sites:
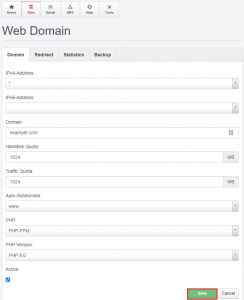
Fill in the details like Domain, Space, Traffic Quota, PHP Version, and hit Save:
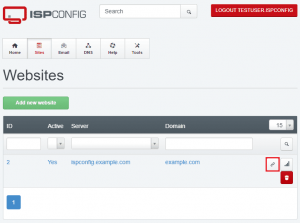
Sites are listed under the Go to Sites tab. Click to see the open site icon in a new tab:
ISPConfig Ubuntu
Your web page will look like this:
Conclusion
In this tutorial, we learned how to install ISPConfig on Ubuntu 20.04. ISPconfig makes a great combination with Hetzner VPS. We suggest you definitely try these two!