


Why Photoshop not Install? 10 common Installation Problems with Solutions
Photoshop Installation problems can be caused by a variety of factors, such as inconsistencies in startup items, incorrect data in the Windows registry, and hardware conflicts.
Installation Problems Follow these troubleshooting steps to fix many installation problems:
- Jump or empty dialog box
- Immobilizes the mouse or screen cursor, blue screen or unexpected restart of the phone
- Errors such as one of the following:
- “This program has performed an illegal operation and will be shut down. If problem persists, contact local program. ” : This app has performed an illegal operation. If the problem persists, contact the app vendor.
- “MS Setup Toolkit API Error, Bad Arg 3: AddSectionFiles to CopyList.” Microsoft Toolbox Launcher Interface Error:
- “Not enough disk space on target drive while decompressing to [path].” : Not enough disk space on the drive.
- “Setup is unable to initialize the setup program. There may be a scripting error. ” : It is not possible to start the program. There may be a programming error.
- “Setup is unable to load the installation script file.” : Unable to upload installation script file.
- “Unable to create a directory under C: \\ Windows \ System. Please check write-access to the directory. ” : It is not possible to create a directory under the desired path. Please check access to write to directory.
- “X: \ unavailable.” : X drive letter not available for your CD-ROM.
- “Device not ready.” : The device is not ready.
- “Error reading CD-ROM.” “Error reading device X: \”: Error reading CD-ROM and Error reading device X,
Note: For serial number problems, find your serial number and contact us.
before start
For best results, follow these tips:
- Do things in order. Follow the troubleshooting process as described in this article.
- Install after each process. Once you have completed a task, reinstall the software to see if your problem is resolved. If not, go to the next troubleshooting step.
- Follow the results. Keep notes of what you learned from the process, as well as errors and other problems. This information will be useful for better guidance when contacting Adobe Technical Support.
- Restart the system after each attempt to install or encounter an error. Always restart your computer after each installation failure or error to update its memory. Continuing to work without restarting the computer can complicate the problem.
Note: Some of the procedures presented in this article come with a User Account Control dialog box that asks your permission to continue. Read the details in that box to determine if you want to continue. If you select the cancel option, you can not proceed to the troubleshooting step.
Before troubleshooting Installation Problems
1. Make sure your system meets the minimum requirements
To install Photoshop Elements or Premiere Elements, your system must meet the minimum system requirements.
To check system information such as processing speed and system RAM, select Start> Control Panel> System.
2. Delete pre-installed program files
Follow the steps below to delete files left over from the previous installation process:
1. Move all personal files (such as images, videos, or third-party plugins) from Photoshop Elements, Premiere Elements, and the Elements Organizer folders and their subfolders to backup folders for safe storage.
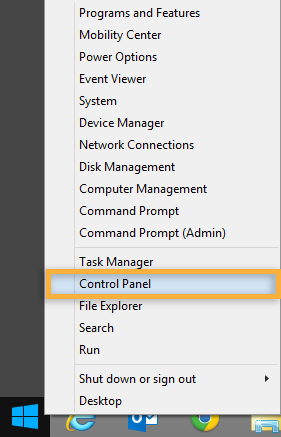
2. In this taskbar, right-click on the Start menu and select Control Panel (Windows 8 or 10) or Start> Control Panel (Windows 7 / Vista).
Note:
The procedures in this article are based on the default Windows user. If your account is customized, some procedures will be different. For example, Control Panel routing from Start menu can be Start> Settings> Control Panel instead of Start> Control Panel.
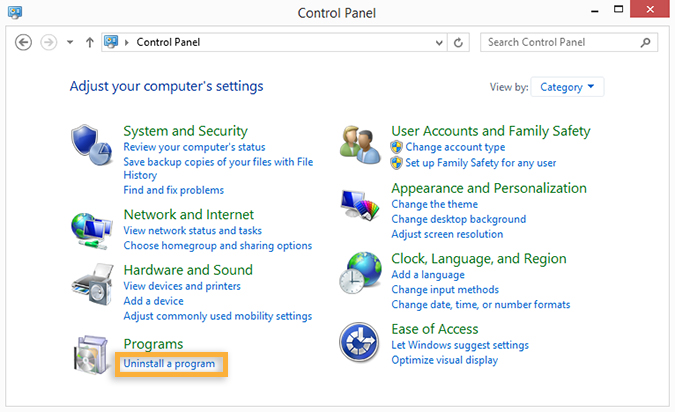
3- In Windows 10 and 80, if you see the control panel through the category, click on Uninstall a Program in the Programs category. If you see through the icons, click on Programs and Features.
In Windows 7, select Programs> Programs and Features and double-click Uninstall a Program.
In Vista, select Programs> Programs and Features.
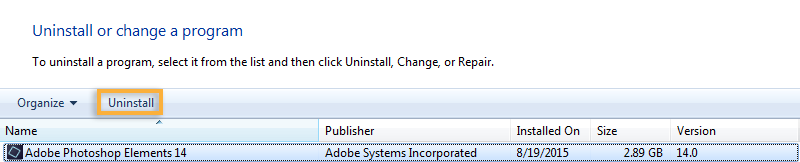
4. Select Adobe Phtoshop Elements or Adobe Premiere Elements and click Uninstall. Follow the on-screen instructions to uninstall the program.
5. When the program is uninstalled, close the control panel and return to the location of the hard drive where the program was originally installed. If the installer did not delete them, delete the Photoshop Elements or Premiere Elements and Elements Organizer folders (they are installed by default in Program Files> Adobe).
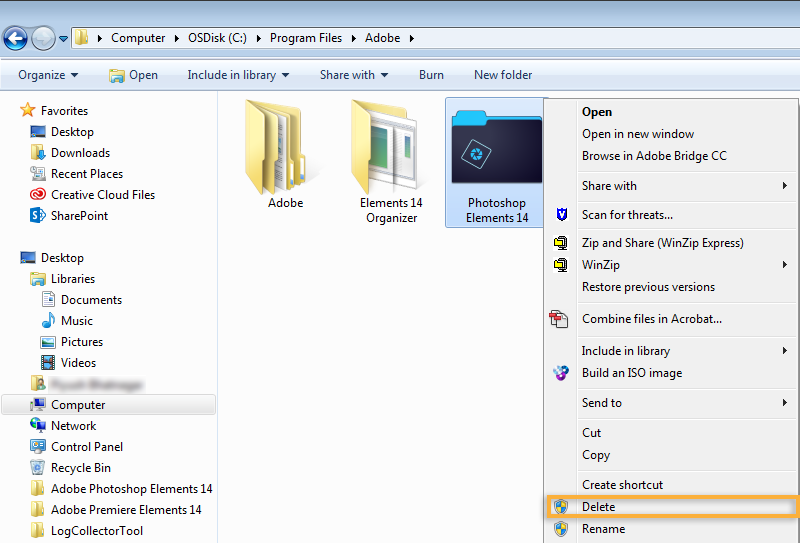
6. If the Confirm Folder Delete dialog box appears, click Yes.
7. Empty the trash and restart the computer.
3. Check the CD drive and CD-ROM for Installation Problems
Dust or contamination on the CD can interfere with installation and prevent the CD-ROM drive from detecting the CD. Check the Photoshop Elements and Premiere Elements CDs for dirt, dust, or fingerprints. Gently sweep the CD outwards from the center with a lint-free soft cloth.
Make sure the CD-ROM drive can read other CDs. If it does not work, check the CD compartment or tray driver for contamination and clean it with a lint-free cloth. If the CD is still not readable, contact your CD-ROM or PC manufacturer.
And If your disk appears to be damaged, contact your dealer to replace it.
4. Install Photoshop Elements or Adobe Premiere Elements on the desktop.
Some system components, such as device drivers and anti-virus programs, have problems installing. They can cause the installation to fail or fail. To prevent this problem, install the program on the desktop.
1. Copy the Adobe Photoshop Elements or Adobe Premiere Elements folder from the disk to the desktop.
2. Open the Photoshop Elements or Adobe Elements folder on the desktop.
Double-click the Setup file or (Setup.exe) and follow the on-screen instructions.

Note: Some of these procedures require finding hidden files and folders or finding files using their full name, such as Setup.exe or Sample_filename.ini. By default, the Windows browser displays identifiable files, folders, and extensions.
5. Install current Windows service packages and other updates
Moderate troubleshooting for Installation Problems
If the work in the previous section did not solve the problem, try the following intermediate troubleshooting methods:
1. Install Photoshop Elements or Adobe Premiere Elements in a simplified way
Device drivers and software that automatically downloads to Windows can be incompatible with Elements Installer and cause installation problems. (Automatically downloaded software includes screensavers and anti-virus tools.) To prevent this incompatibility, reinstall Photoshop Elements and Premiere Elements while Windows is in simplified mode. In this case, non-standard device drivers and boot software are disabled.
To reinstall in simplified mode, do the following:
1. Insert a Photoshop Elements or Adobe Premiere Elements disk into the disk drive.
2. Copy the Adobe Photoshop Elements or Adobe Premiere Elements folder to a disk on the desktop.
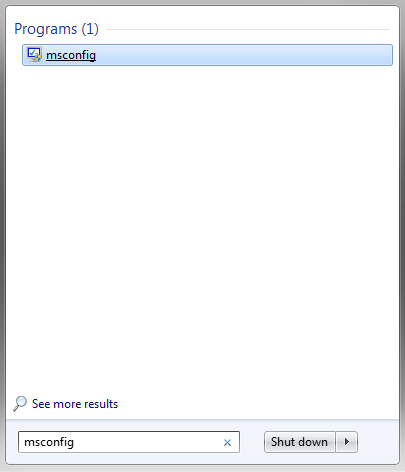
Select 3-start, type msconfig in the search text box and press Enter. (In Windows 8, right-click the Start button and select Search.)
4. On the Startup tab, click Disable all. (Windows 8 does not have the Disable all option and you must disable each item individually.)

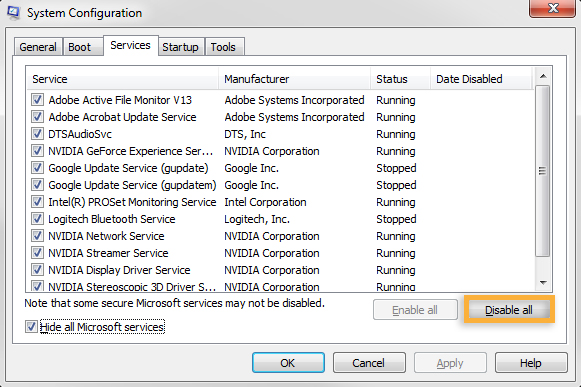
5. In the Services tab, select the Hide All Microsoft Services option and click Disable All, then click OK.
6. Click Restart in the System Configuration dialog box.
7. Double-click the Setup file or (Setup.exe) in the Photoshop Elements and Adobe Premiere Elements folder that you copied to the desktop in the second step. Then follow the on-screen instructions.
8. Start and type msconfig in the search text box and press Enter.
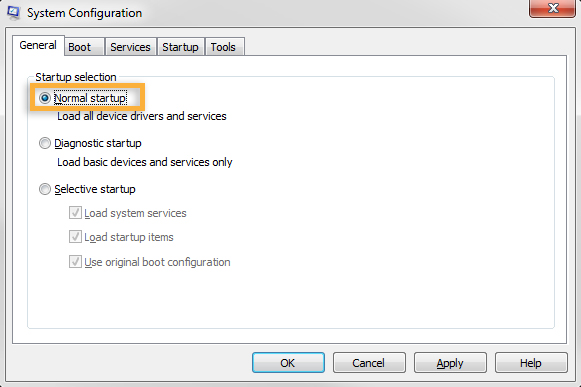
9. In the General tab, select the Normal startup option and click OK and restart the computer.
Note: If reinstalling in a simplified manner does not help, try the installation and running process on a computer or other hard drive.
2. Install as administrator for Installation Problems
Security settings in Windows 7, 8, 10, and Vista sometimes prevent programs from being written to protected file locations or registry keys. Administrator settings as Administrator bypasses these security settings and allows it to write in protected areas.
To install Photoshop Elements or Adobe Premiere Elements as an Administrator, do the following:
1. Insert a Photoshop Elements or Adobe Premiere Elements disk into the disk drive.
2. Copy the Adobe Photoshop Elements or Adobe Premiere Elements folder to a disk on the desktop.
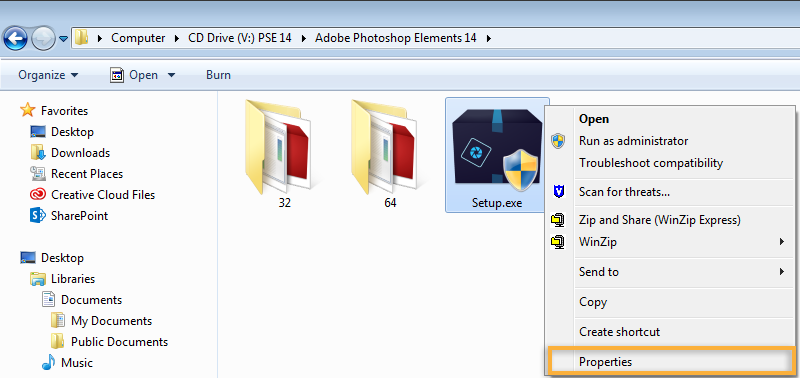
3. Right-click on the Setup file (or Setup.exe) and select Properties.
4. On the Compatibility tab, select Run this program as an administrator.
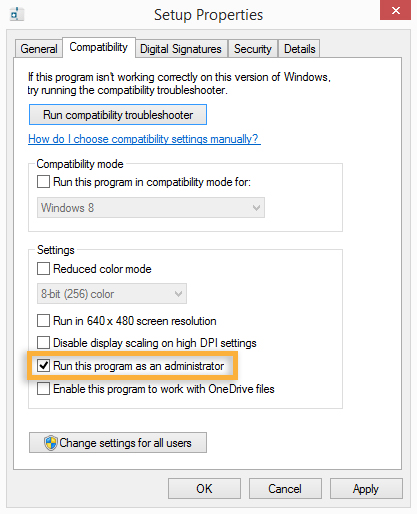
5. Click OK.
6. Double-click the Setup file (or Setup.exe) and follow the on-screen instructions.
3. Install the hard drive in a folder in the main directories
Create a folder at the level of the main hard drive directories. Make sure the folder name is 8 characters or less (for example, C: \ PSE or C: \ PRE) and does not contain special characters such as “#”. Also make sure that the path on which Windows is installed does not contain special characters.
4. Install in a new account
Create an account that has the same permissions as the account you use when a problem occurs, because if the problem persists, the original account may be damaged. Read the guide to creating a new user or contact your system admin for help setting up an account.
5. Disable UAC (Account Control)
For details, read the guide to activating and deactivating account control.
6. Update the video card driver for Installation Problems
Many video card manufacturers frequently update their software drivers. If you have not recently updated your video card driver, contact the video card manufacturer or download one from the manufacturer’s website to obtain an updated driver. To determine the manufacturer of the video card, see the card details in Device Manager. You can usually tell if the video driver is out of date by detecting changes in color depth and resolution of the video card. You can also tell if the graphics hardware acceleration is out of date.
- To change the color depth and resolution of Photoshop Elements and Adobe Premiere Elements, see the options for color depth and resolution change in Windows 8 or 7 and Vista. Photoshop Elements and Premiere Elements require a minimum screen resolution of 1024 x 768.
- To disable GPU acceleration, see Graphics GP Disabling section in Microsoft Windows Support. Depending on your video card, this feature may not be available on Windows 7, 8, or 10.
7. Verify device drivers that are compatible with Windows
If updating the video card does not resolve the issue, verify all other device drivers that are compatible with your version of Windows (Windows 8, 7, and Vista). Device drivers are software files that allow Windows to communicate with devices such as scanners, mice, and keyboards. Contact the device manufacturer to make sure you are using the latest driver.
8. Disable Windows Aero
Read the Windows Aero Deactivation Guide for details.
9- Manage temporary files in the best way
Windows and programs store active data in temporary files (with .tmp extension) created on the hard drive. Old or extra temporary files can interfere with this function.
See the Windows 10, 8, or 7 Vista guide for details on deleting temporary files using the Disk Cleanup tool.
10. Set the virtual memory pagination file to the default size
Windows 10 or 8
For Windows 10 and 8, resize the virtual memory and use these options:
Initial Size: Enter a number equal to one and a half times the amount of RAM installed on the computer.
Maximum Size: Enter a number equal to twice the value of the Initial Size.
Windows Vista
See the guide for setting up a virtual memory paging file for Windows 7 or Vista by default.
11. Optimize the hard disk by repairing and defragmenting
12. Virus the system
Use existing antivirus software (such as Symantec Notron Antivirus or McAfee Virus Scan) to check for system viruses. Virus infection can damage the software and cause installation errors.