


Video Tutorials for layers in Photoshop and all the important points you need to know!
Before we look at what layers are and how to use them, let’s first look at working in Photoshop without layers. This explains why layers are so important.
layers in Photoshop, We will start by creating a new document in Photoshop. To do this, go to the File menu in the menu bar at the top of the page and select New.
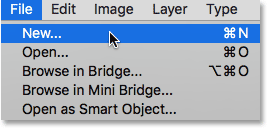
Go to File> New
This opens the dialog box for creating a new file. No special size required for our document, enter 1200px for Width and 800px for Height. You can set the resolution to 72 pixels / inch. Lastly, make sure the Background Contents are set to White so that our new document has a nice white background. Click OK. Your new color document will appear on the screen
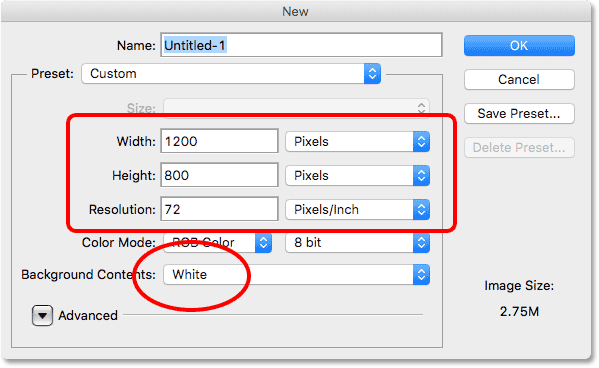
Create new dialog box.
Square shape
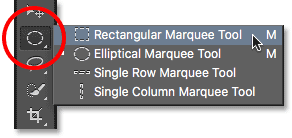
Now that our new document is ready, let’s draw some simple shapes. First we draw a square and for this we will use one of the main tools for selecting Photoshop. Select the Rectangular Marquee tool from the top of your Tools panel on the left side of the screen
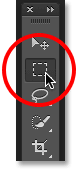
Select the Marquee Rectangle tool.
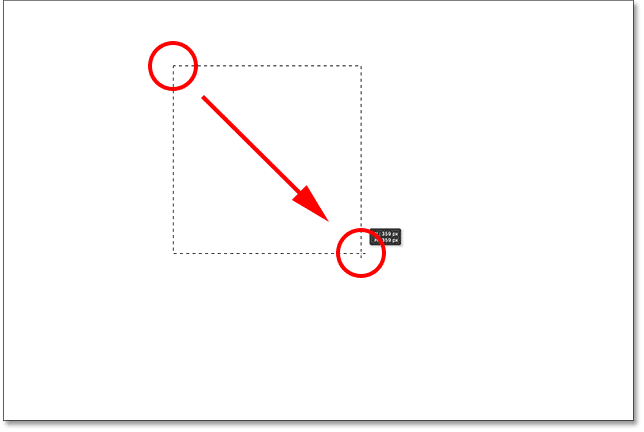
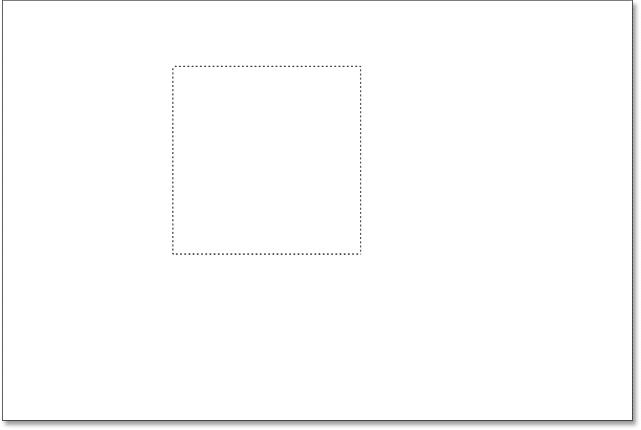
To draw a square with the Rectangular Marquee tool, click on a dot to the left of your document to specify the starting point. Then, holding down the mouse button, hold down the Shift key and swipe down diagonally to the right. Normally, the Rectangular Marquee Tool draws the selection of a free rectangle, but by pressing and holding the Shift key, we tell Photoshop to turn the selection into a complete square.
After drawing, release your mouse button, then release your Shift key. It is very important to release the mouse button first, then the Shift key, otherwise your whole square will return to the free rectangle.
Now that we have drawn our design, let’s fill it with a color. To do this, we will use the Fill Photoshop command. Go to the Edit menu at the top of the page and select Fill
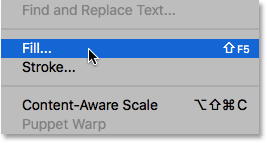
Go to Going to Edit> Fill.
This opens the Fill dialog box. Change the Use option to Color at the top of the dialog
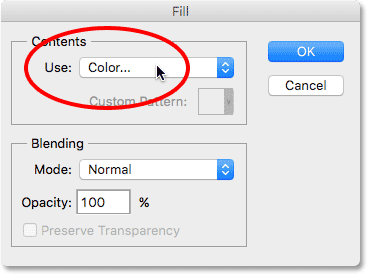
Change the use of color
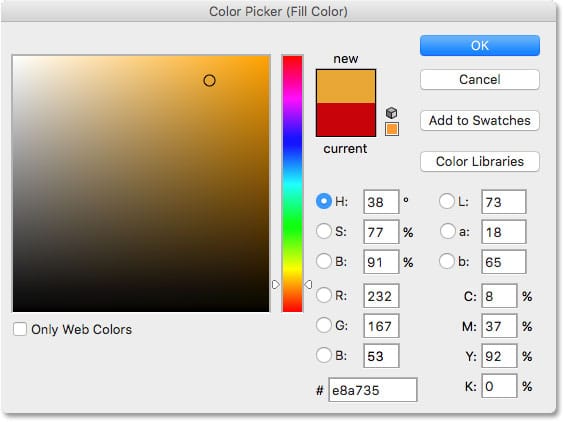
As soon as the color is selected, Photoshop opens the Color Picker pop so we can select the color we want to use. You can choose any color you like. I will choose a shade of red
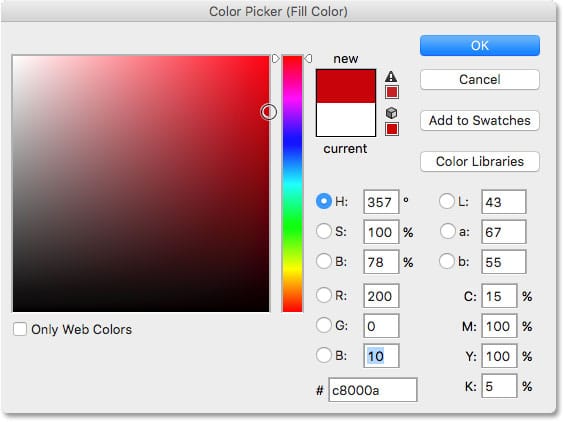
Select a custom color from the color selection panel.
Click OK when you select a color from the Color Picker, then click OK to close the Fill box. Photoshop fills the space with the color of your choice.
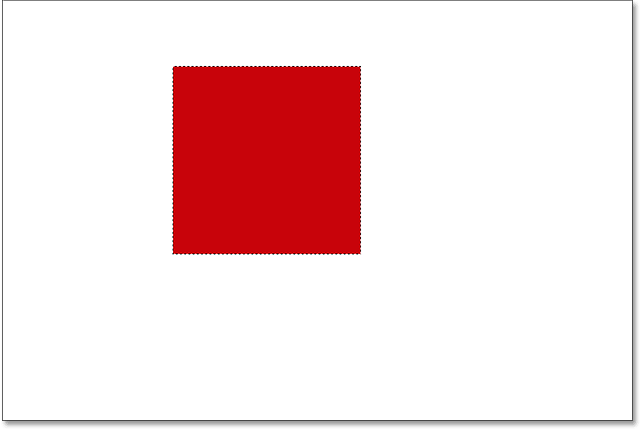
Document after filling the selection with red.
We no longer need the dashed line around the square, so let’s delete it by going to the Select menu at the top of the page and selecting Deselect.
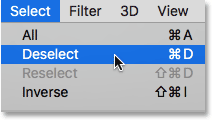
Go to Select> Deselect.
Draw a round shape
Now let’s add another shape to the document. We have already added a square, so this time we add a round shape. To do this, we will use another major Photoshop selector tool, the Elliptical Marquee tool.
The Elliptical Marquee tool is located behind the Rectangular Marquee tool in the Tools panel. To select it, right-click on the Rectangular Marquee Tool, then select the Eliptical Marquee tool from the menu that opens.
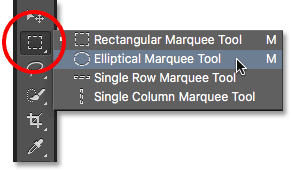
Select elliptical selection tool.
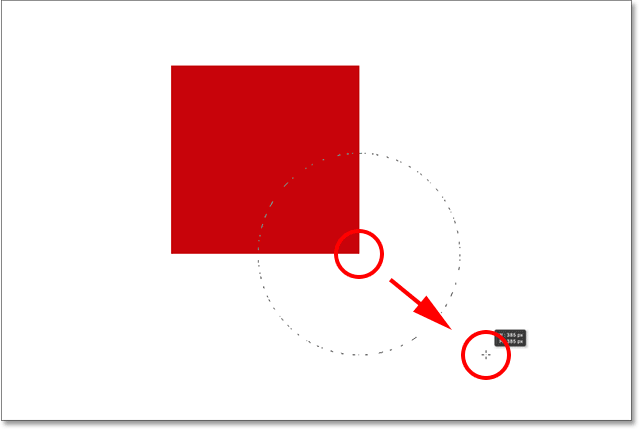
Let’s draw our round shape so that it overlaps the square. Click in the lower right corner of the square to select the starting point. Then, by pressing your mouse button and Shift on the keyboard, drag it down from the starting point.
Typically, the Elliptical Marquee tool draws elliptical selections, but by holding down the Shift key while dragging, a complete circle is drawn. Holding down the Alt key tells Photoshop to drag the shape out from where we first clicked.
Draw the shape approximately to the size of a square. When done, release the Shift key and the Alt key, then release your mouse button.
Once you’ve drawn your circle, go back to the edit menu at the top of the page and select Fill to fill the selection with a color. The Use option at the top of the Fill dialog box must be set to Color beforehand.
Click the OK button to close the dialog box, Photoshop fills the selection with the same color you last selected, and we want a different color for the round shape, so click on the word Color, then the desired color Select again from the list of options.
In this step, Photoshop color selector will open again, this time choose a different color. I choose orange.
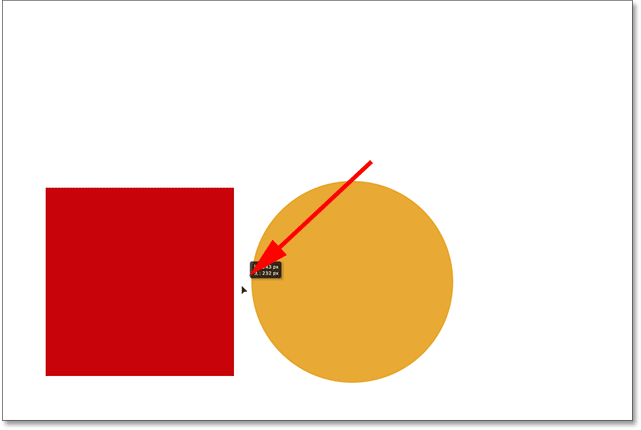
Click OK to close the Color Picker, then click OK again to close the Fill dialog box, in which Photoshop fills the selection with color. To remove the selection dashed line, go to the Select menu at the top of the page and select Deselect, as we did last time. We now have two shapes, square and circle.
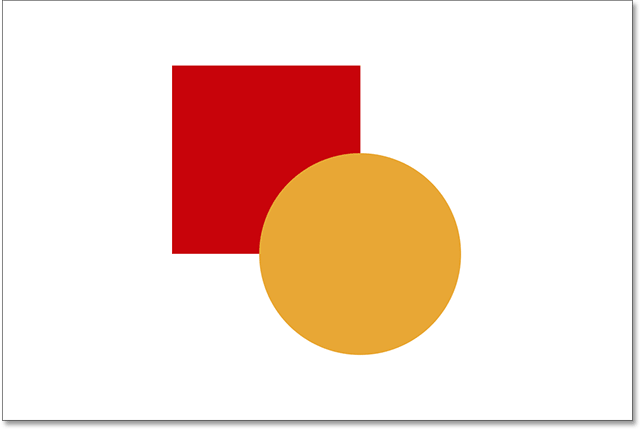
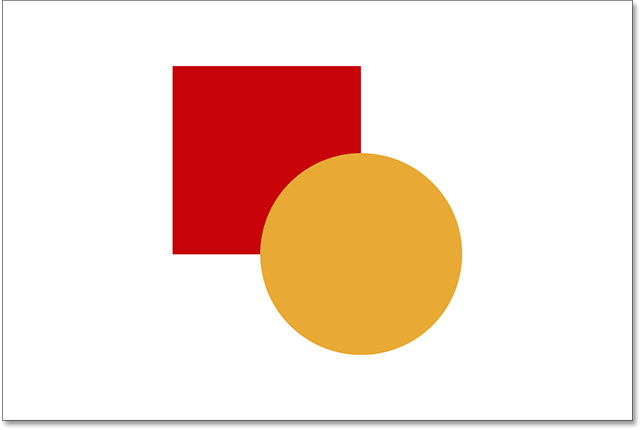
Both forms are added to the document.
Problem…
We have drawn our shapes and everything is great. But now that I look at it, I’m not sure if I’m satisfied with anything. See how the orange shape overlaps the red color? It may be better to have the red shape in front of the orange shape. I want to change them. That should be easy enough, right? All I have to do is take the red color and move it to orange.
Wait a minute, how do we do that? … How?
The simple answer is, I can not. There is no way to change the shape of red and orange because the color orange is not red in any way. This is just an illusion, and those pixels that were initially filled in red in the square changed to orange when filling the circle.
Everything is glued together in the shape of a square and a circle and a white background.
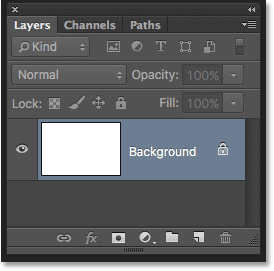
Let’s take a look at the Layers panel to see what happens. The Layers panel is where we see the layers in our document. Photoshop automatically creates a default layer for us. The default background layer is named because it acts as our composition background.
If we look to the left of the layer name, we see a small image. This thumbnail is a layer preview. This is a small preview of the contents of the layer. In this case, we see both the shape as well as the white background. Since we did not add any other layers ourselves, Photoshop has put everything we have done so far on this default Background layer
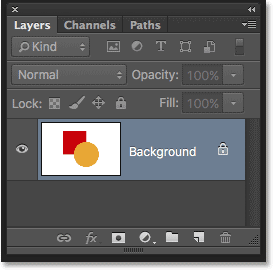
The Layers panel shows everything in the Background layer.
And this is a problem. Everything we did was added to a layer. If we want to change something, having the whole composition on a single layer, we do not have many options. We have to reverse the movements or we can pull everything again and start again. None of these options look very appealing. There has to be a better way to work in Photoshop, a way that gives us the freedom and flexibility to change our composition without having to go through steps or start over.
Fortunately, there is! The solution is to use layers. Let’s try this again, but this time using layers!
First we delete the two added shapes. Since everything is on a single layer, we can easily do this by filling the layer with white.
Navigate to the Edit menu at the top of the page and select Fill again. When the Fill dialog box appears, change the Use and Color options to White
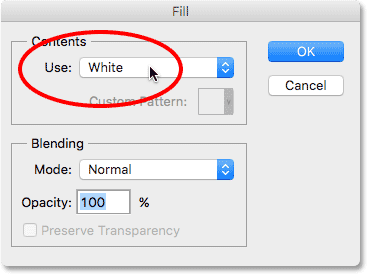
Go to Edit> Fill and change it to white.
Click ok to close the dialog. Photoshop fills the document with white, and we’re back to where we started
Once again this document is filled in white.
Layers panel
I mentioned a moment ago that the Layers page is where we go to see the layers in our document. But in fact, the Layers panel has many more features. In fact, it is the command center and command center for the layers. If there is something in Photoshop that is related to layers, the Layers panel is where it does it. We use the Layers panel to create new layers, delete existing layers, rename layers, move layers, brighten layers in the document, add layer masks and layer effects. This list goes on. And all this is done from within the Layers panel.
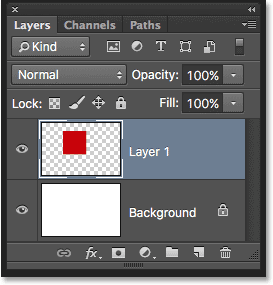
As we saw earlier, the Layers panel shows us that we now have a layer in the default layer of our document. The preview thumbnail to the left of the layer name shows us that the Background layer is filled with white
When we first added our two shapes to the document, they were both added to the Background layer, so it was not possible to move them independently. The shapes and white background were all glued together on a flat image. This method of working in Photoshop, where everything is added to a layer, is technically known as “wrong” because when you have to go back and make changes, it becomes a “problem” (another technical term). ) Becomes.
Let’s see what happens if we create the same design as before, but this time we put everything on our layer.
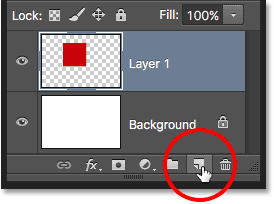
Our white background is currently in the Background layer, so we want to add a new shape on top of it. To add a new layer to the document, we simply click on the New Layer icon at the bottom of the Layers panel (the second icon from the right)
![]()
Click on the New Layer icon.
A new layer appears above the Background layer. Photoshop automatically names the new layer Layer 1. If we look at the preview thumbnail to the left of the layer name, we see that it is filled with a checkerboard pattern. The checkerboard pattern is Photoshop’s way of showing transparency. In other words, it tells us that the new layer is empty and at the moment, there is nothing on it
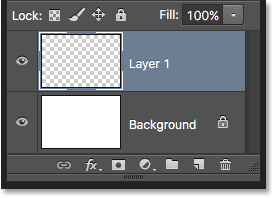
A new blank layer called “Layer 1” appears above the Background layer.
Notice that Layer 1 is highlighted in blue. This means that the layer is currently active. Everything we add to the document at this stage is added to the active layer (Layer 1), not the Background layer. Let’s add our first figure, just like before. Since our first shape was square, we had to select the Rectangular Marquee tool again from the Tools panel.
The Tools panel shows us the last tool we selected from the group. By “group” I mean all the tools that are grouped together at the same point. Since the last tool we selected from the group was the Elliptical Marquee tool, it is now visible in the Tools panel. To return to the Rectangular Marquee Tool, right-click on the Eliptical Marquee tool and then select Rectangular Marquee Tool from the popup menu.
Using the Rectangular Marquee tool, draw a square similar to the previous version by dragging and holding the Shift key, and when done, release the Shift key and then release your mouse button.
Go to the Edit menu at the top of the page and select Fill.
When the Fill dialog box opens, change the Use option to Color, then select a color for the square from Color Picker. I will choose the same red color I chose last time. Click OK to close Color Picker, then click OK to exit the Fill dialog box.
Photoshop fills the selection with the color of your choice. To remove the selection line from the shape, go to the Select menu at the top of the screen and select Deselect. Now I have filled in my first form, full of red, just like before

We have a square shape that sits against a white background, just like in the past. But now the Layers panel tells a different story. The preview thumbnails show that the Background layer is still filled with white, while the square is now on top of a completely separate layer (Layer 1). This means that the white background and square shape are no longer part of a flat image.
They seem to exist in the document, but they are really two completely separate elements
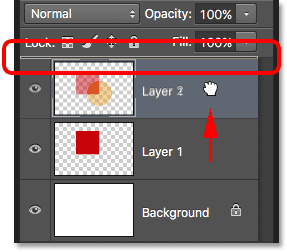
We add our second figure. Again, we want to put it on our layer, which means that we must first add another new layer to the document by clicking on the New Layer icon at the bottom of the Layers panel.
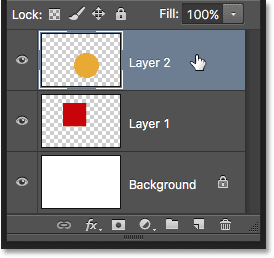
A new second layer, Layer 2, appears on top of Layer 1. Normally, we should rename our layers because names like “Layer 1” and “Layer 2” do not tell us anything about each layer. But for our purposes here, they are good. Note that once again, the checkerboard pattern in the preview thumbnail tells us that the new layer is currently empty.
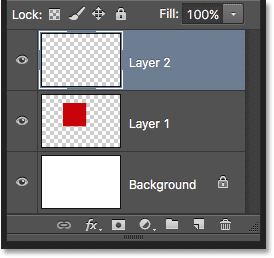
Also note that Layer 2 is highlighted in blue, meaning that the layer is now active.
Anything we add to the document is added to Layer 2. Select the Elliptical Marquee tool from the Tools panel behind the Rectangular Marquee tool and draw a circle like we did before. Make sure some of the shapes overlap. Then go back to the Edit menu and select Fill. To open the Color Picker, select the Color for the Use option again and select a color for the shape. I choose the same orange.
Click OK to close Color Picker, then click OK to exit the Fill dialog box. Photoshop fills the selection with color. From the Select menu, select Deselect to remove the selection outline from around the figure. And now, we’re back to square one

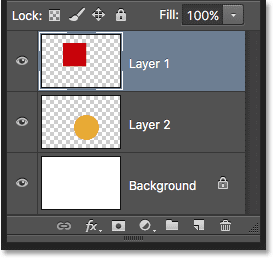
Looking at the Layers panel, we see that the square shape remains in Layer 1 while the new shape is placed on Layer 2.. (White background, square shape and round shape) The layers are now separate and completely independent of each other

Each element in this document is now in its own layer.
Change the order of the layers
Previously, when everything was on a single layer, we realized that there was no way to move the square shape, because they were not really two separate shapes. They were simply areas of pixels of different colors mixed with areas of white pixels in a flat image. But this time, with everything in our layer, we really have two separate shapes with a completely different background. Let’s see how we can use our layers to easily change the order of shapes.
Currently, the round shape appears in front of the square shape in the composition because the round shape layer (Layer 2) is higher than the square shape layer (Layer 1) in the Layers panel. Imagine that in the Layers panel, you see the layers from top to bottom. Each layer appears above the other in the Layers panel in front of it in the document. If the contents of the two layers overlap, as our shapes do, then each layer below the other in the Layers panel will appear behind the other layer in the composition.
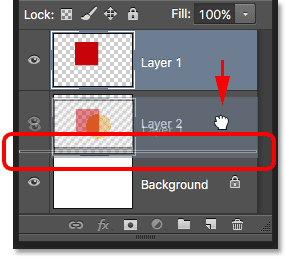
This means that if we want to change the order of our shapes so that the square appears in front of the circle, all we have to do is move the square shape layer (Layer 1) above the round shape layer (Layer 2). To do this, simply click on Layer 1,
Then hold down your mouse button and drag it to the top of Layer 2 until you see a prominent horizontal button directly above Layer 2. Release the mouse stand at this time.
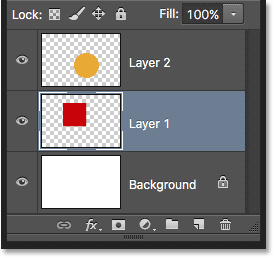
Layer 1 now appears above Layer 2 in the Layers panel.
Now the circle above the layer is the shape of a circle, their order is inverted in the composition.

Without layers, it would not be possible to move one element against another like this. Layers keep everything separate, allowing us to change elements without affecting the whole composition.
I want to change the round shape so that it is in front of the square again. Despite the layers, no problem! Just as we can drag layers above other layers, we can also drag them below other layers.
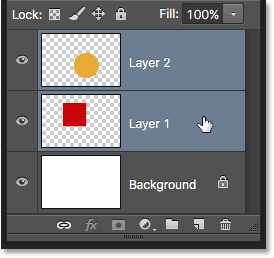
I click on the square layer (Layer 1) and drag it below the round shape layer (Layer 2).
Once again, the highlight bar shows me where the layer moves when I release my mouse button.
And we see the shape of the circle in front of the square in the composition again
Move shapes
What if we do not want the shapes to overlap? They may look better if they are separated. Again, because they are in separate layers, we can easily move them around.
To move the contents of a layer, select Move from the top of the toolbar

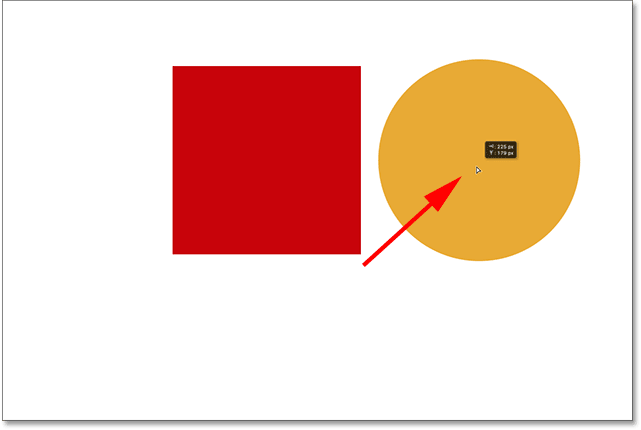
Then make sure you select the correct layer in the Layers panel. I want to move the circle shape to the right of the square shape, so I click on the circle shape layer (Layer 2) to select it and activate it. Again, I know this layer is now active because Photoshop highlights it in blue when I click on it
Select Layer 2, use the Move tool to click on the round shape and drag it to the right of the square
We can even move both shapes at the same time. To do this, we must select both shape layers at the same time. I have already selected Layer 2 in the Layers panel. To select Layer 1, all I have to do is press and hold the Shift key on the keyboard and click on Layer 1. Both layers are now highlighted in blue, meaning that both have been selected
By selecting both layers, if we draw one of them with the Move tool, both shapes will move together
Remove layers
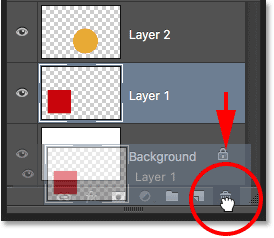
The last point we will look at in this tutorial is how to delete layers. If we decide that we do not need one of the forms, we can remove it from the composition by removing the layer. To select it, click on the square layer (Layer 1). Then, to clear the layer, all we have to do is drag it to the Trash at the bottom of the Layers panel.
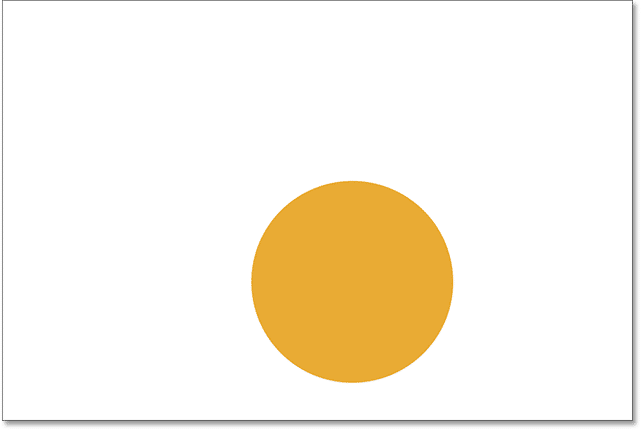
By removing the square layer, only the circle shape remains in the document (albeit with a white background)
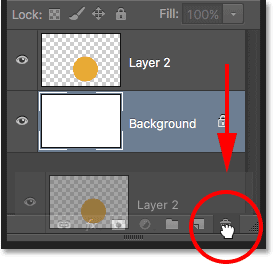
I will do the same with the shape of a circle, and drag the layer to the trash
And now, by removing both layers of the shape, we return to the white background
Both forms have been removed. Only the background remains.