Video tutorial of all Photoshop photo filters that you should know
In this tutorial, we will teach you how to use smart filters in Photoshop. You will learn everything you need to know about smart filters.
Here you will learn what smart filters are and what their advantages are, how to edit them, how to apply multiple smart filters to a photo, and much more. I use Photoshop CC here, but smart filters are available in any version of Photoshop CS3 and above. Let’s get started!
What are smart filters?
With the addition of Smart Objects to CB versions of Adobe Photoshop, this software has become much more powerful than before. The Smart Filter is actually a normal Photoshop filter, but a smart object has been added to it. A smart object keeps the content inside the layer safe; That is, when we convert a layer to a smart object, every change we make does not apply to the content of the layer.
This makes our changes editable and non-destructive. When we apply one of the Photoshop filters to a smart object, the filter automatically becomes a non-destructive, editable smart filter.
Other features of smart filters include: Pixel image quality – this is one of the most important features of smart objects, smart filters can be turned on and off, change in blend mode and opacity, you can change the combination modes Use filter masks and use filter settings for interesting effects, complete control over which filter is applied.
As mentioned before, smart filters are not malicious, which means that we can easily experience different filters and all their settings. So if you do not use this feature of Photoshop, you have lost one of the best features of Photoshop. So let’s see how they work!
How to apply a smart filter in Photoshop
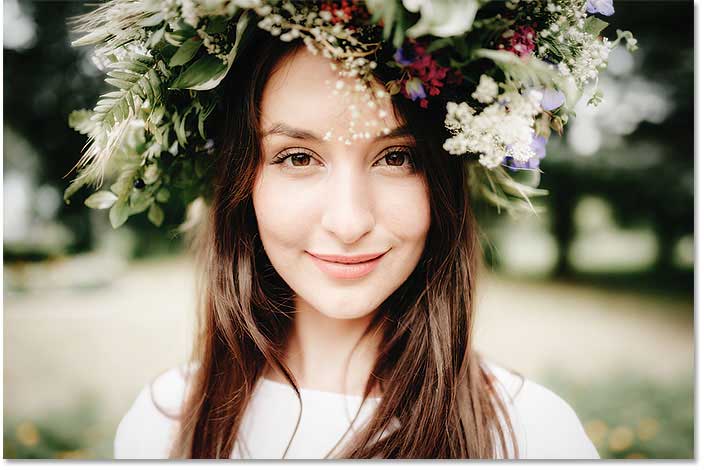
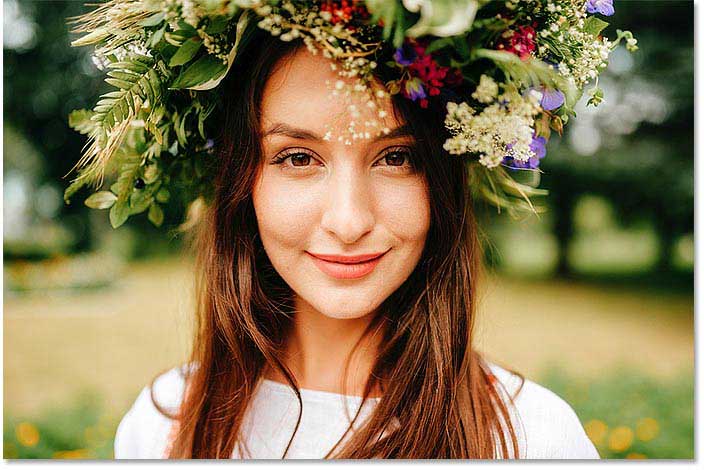
In this tutorial, I use the image below that I downloaded from Adobe Stock. Since our goal here is to learn about smart filters, not to create a specific effect, you can easily use any photo.
Convert a layer to a smart object
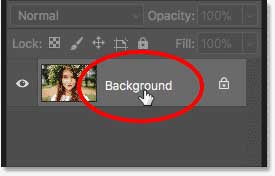
Before we can apply the smart filter, we first need to turn our photo into a smart object, in the Layers panel we see the photo in the background layer:
To convert a layer to a smart object, click on the Background name to rename it:
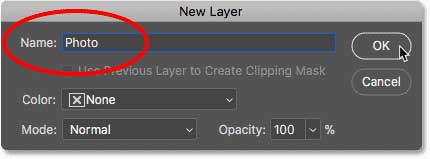
In the new layer, give a better name to the layer, I chose the photo myself, ok to accept:
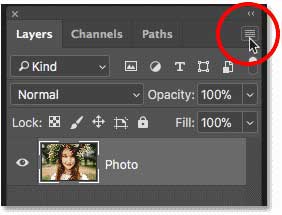
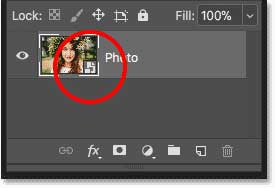
Go back to the Layers panel, you will now see that the name of the layer is photo. To turn it into a smart object, click on the menu icon at the top right:
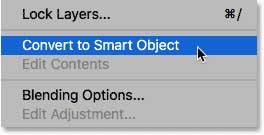
Select Convert to Smart Object from the list:
The Smart Object icon appears on the figure, this tells us that our layer is now a smart object:
Apply a Photoshop filter as a smart filter
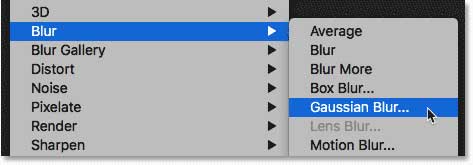
As we turn a layer into a smart object, any filter applied to it from the Photoshop Filter menu automatically turns into a smart filter. Let’s start with a simple example, such as the Gaussian Blur filter. In the menu Bar, go to the filter menu, select Blur, and then select Gaussian Blur.
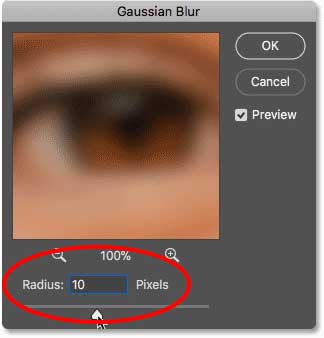
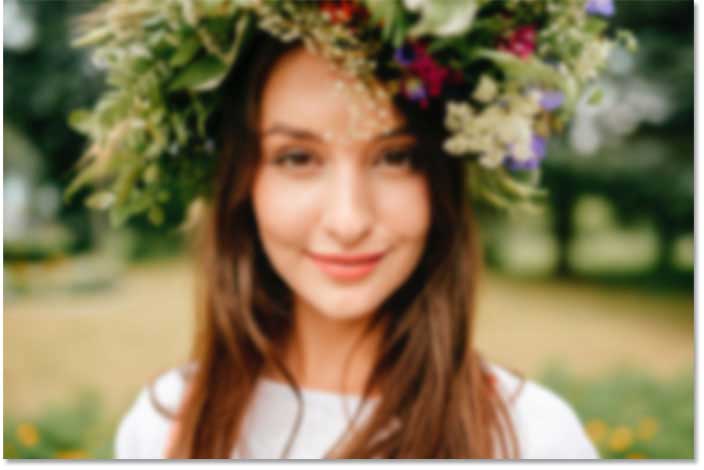
We can use the Gaussian Blur filter to blur the image and use the Radius option at the bottom of the dialog box to control the amount of blur. I set the Radius value to 10 pixels.
Click ok to close the dialog box and after applying blur my photo will look like this:

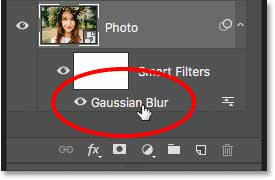
Smart filter view
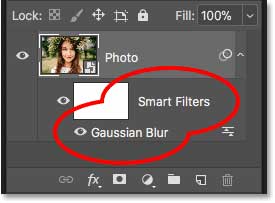
When you return to the Layers panel, the Gaussian Blur filter is listed as a smart filter under the Smart Filter. All we did was turn Photoshop Filter into a smart filter:
How to edit smart filters
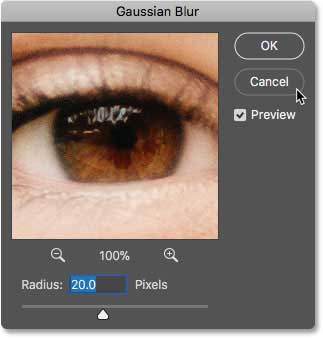
The most important advantage of smart filters is that after applying a smart filter, we can edit it and change its settings. To edit a smart filter, double-click on the filter name:
This dialog box reopens the filter. I increase the Radius value from 10 pixels to 20 and then ok:
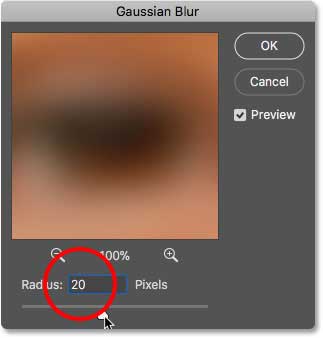
The new settings of My Filter apply quickly to the photo, and because the smart filters are not malicious, the image quality does not decrease. The new filter settings are easily replaced with the previous settings:
Change the blend mode and opacity of the smart filter
In addition to changing the settings, another advantage of smart filters is that we can change the blend mode and opacity of the filter. If you look to the right of the filter name, you will see a small icon, this icon is the Blending Options filter. Double-click on it to open the Blending Options dialog box:

Here we can change the blend mode and opacity of the filter. This is different from the blend mode and opacity in the Layers panel, which controls how well the layer blends in with the underlying layers. Here we affect the filter itself. I change the blend mode of the Gaussian Blur smart filter from normal to Soft Light and set the opacity to 50%. Then I click ok to close the window:
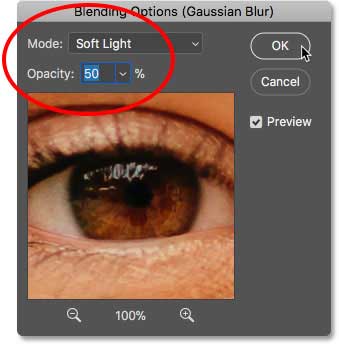
Changes in the blend mode increase the contrast and color of the image and create a soft glow, and by reducing the filter opacity to 50%, I reduce the intensity:
Turn the smart filter on and off
Another feature of smart filters is that we can change them to on and off. To see what your photo looked like before applying the smart filter, you can turn off the filter by clicking on the visibility icon. Click on the same icon again to filter on:
Add more smart filters
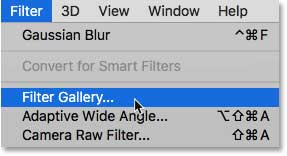
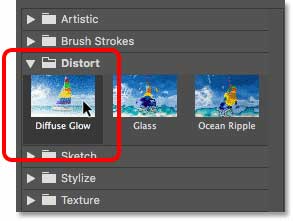
We applied a smart filter above, but we can add a few smart filters to the previous smart object. Now we add the latter, this time from the Photoshop Filter Gallery. In the menu Bar, go to the Filter menu and select Filter Gallery:
The Filter Gallery appears with a large screen, and in the settings on the right, we can select filters:
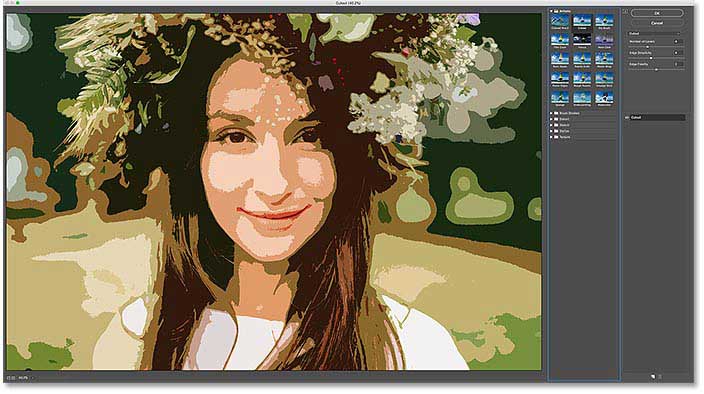
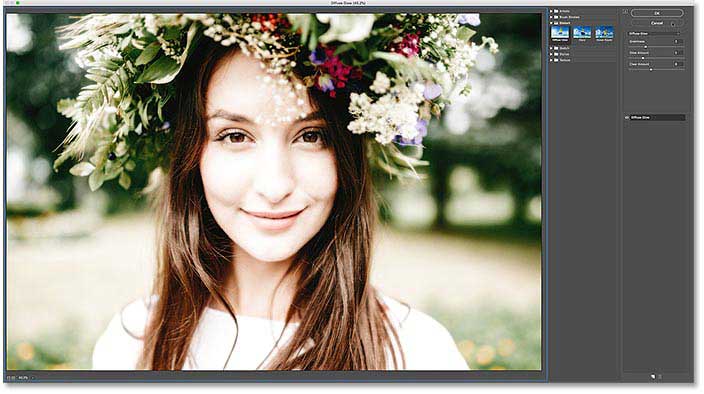
I choose one of my favorite filters, Diffuse Glow, which is in the Distort group of filters. Click on its thumbnail to select:
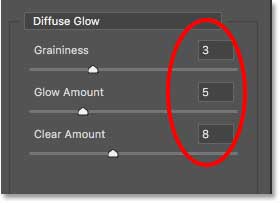
In the Diffuse Glow filter settings, I set the Graininess to 3, the Glow Amount to 5, and the Clear Amount to 8. Then I click ok to close the filter gallery:
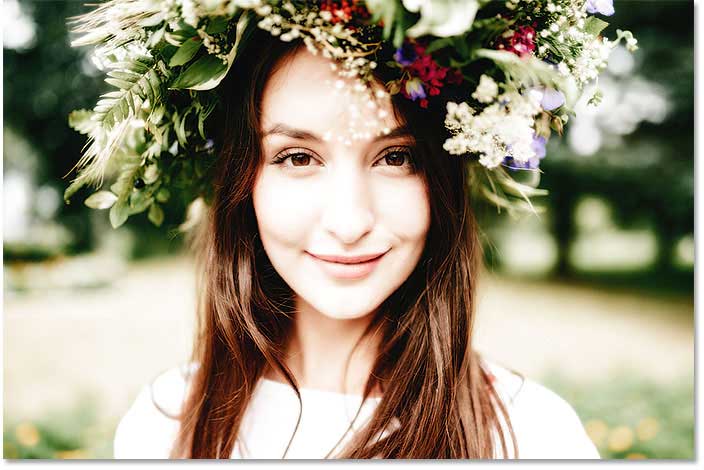
And this is my photo after adding this effect:
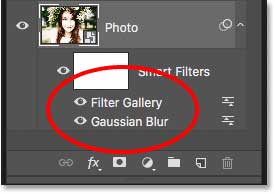
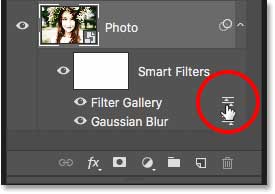
In the Layers panel we will now see 2 smart filters listed below the smart object. Each filter that is part of the Filter Gallery is simply listed as a Filter Gallery instead of the specific filter name we used:
Edit effects
If I want to make different settings for the Diffuse Glow filter, I can double-click the Filter Gallery name to open it again and make my settings; But in this case, I just want to reduce the intensity of the effect, so I double click on the Blending Options icon:
In Blending Options, I set the Blend Mode to Normal but set the opacity to 80%, then click ok:
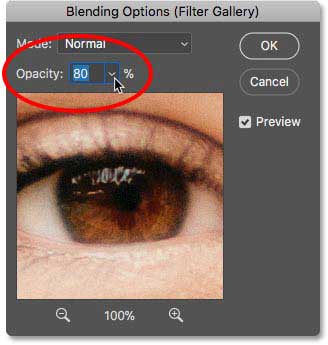
As the opacity decreases, the intensity of the Diffuse Glow effect decreases slightly:

Smart filter command changes
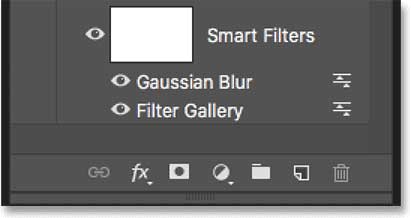
The commands we apply to smart filters are important because Photoshop applies them one after the other, from bottom to top; For example, in my case, first the Gaussian Blur was applied and then the Diffuse Glow filter was applied on top of the Blur effect. We can drag them to change their place in the list.

And now the Diffuse Glow filter is placed first and then the Gaussian Blur is placed on top of it:
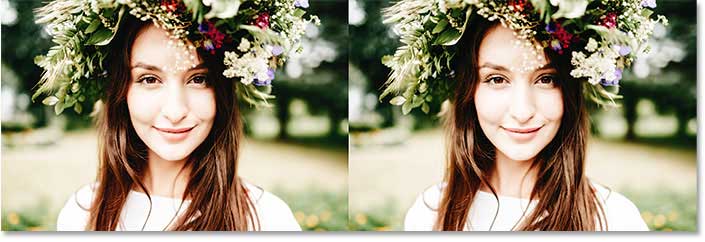
The changes applied depend on the filter you are using. Compare before and after in the image below. When the Gaussian Blur filter is placed on top of the Diffuse Glow, more brightness and contrast is created in the image – the figure on the right – compared to the original image, which is on the left:
Edit multiple smart filters
Double click on the Gaussian Blur filter name to edit it:
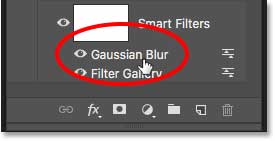
Gaussian Blur dialog box opens again, I click on cancel to close without any changes:
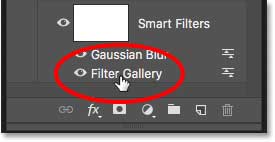
But see what happens if we double-click on the word filter gallery:
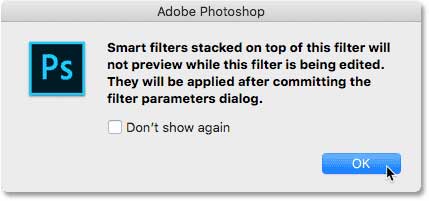
Photoshop opens a message for us, this message tells us that any smart filter placed on top of this filter will be temporarily turned off as we apply our changes. Because as mentioned before, Photoshop Smart applies filters from the bottom up. When you see this message just click ok to accept it:
As soon as the message closes, the filter gallery opens again, I try to cancel again without any changes:
Experiment with smart filters
Since smart filters are not malicious, we can easily test different filters and their settings to see their capabilities. I use Falling Snow Effect, which is a Crystallize filter. To see the change of this effect on the image, go to the filter menu and select Pixelate and then click Crystallize:
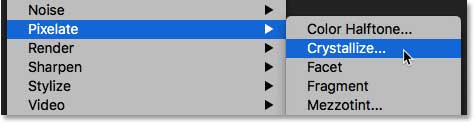
Crystallize filter breaks the image into parts or cells with different colors. To control cell size we use the cell size option below. I set this value to 40 and then ok:
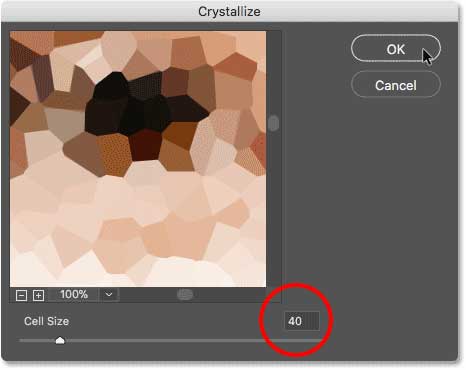
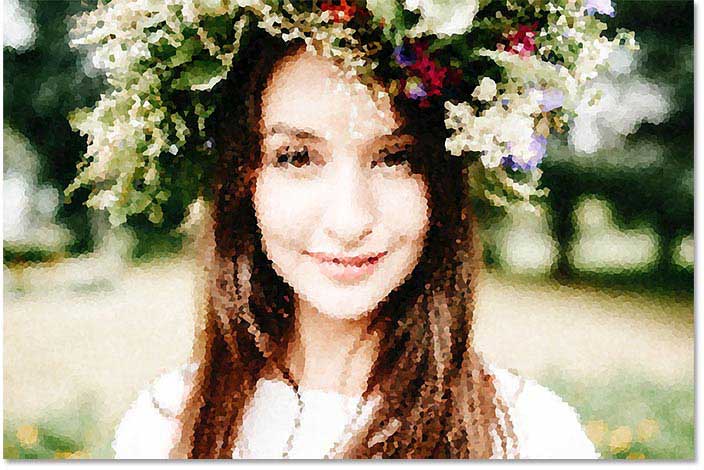
And this is the result of my work, this is an attractive effect:
How to remove a smart filter
If you tried a smart filter but did not like the result, it is not a problem because you can easily remove it. In the Layers panel you can see the Crystallize filter as the third filter on top of the rest:
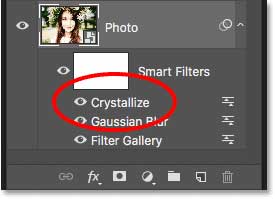
To delete a smart filter, click on its name and drag it to the Trash Bin at the bottom of the layer panel:
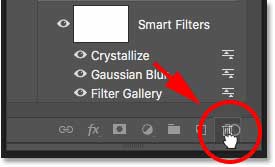
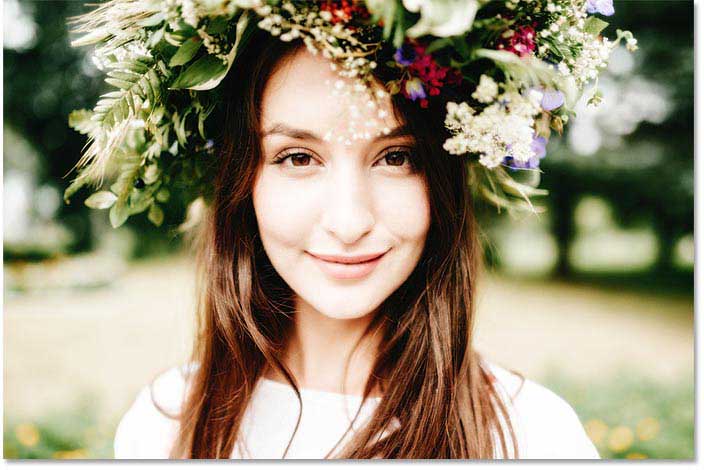
By deleting this filter, the image will quickly return to the same state before applying the filter:
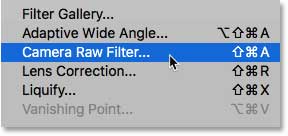
Use Camera Raw as a smart filter
Let’s add another smart filter. This time we add the most powerful Photoshop filter, the Camera Raw filter. This filter is only available in photoshop CC.
Go to the filter menu and select Camera Raw Filter:
The image in the dialog box opens the camera raw filter. This filter provides us with exactly the same photo editing features, and by applying it as a smart filter, the filter settings will be fully editable:
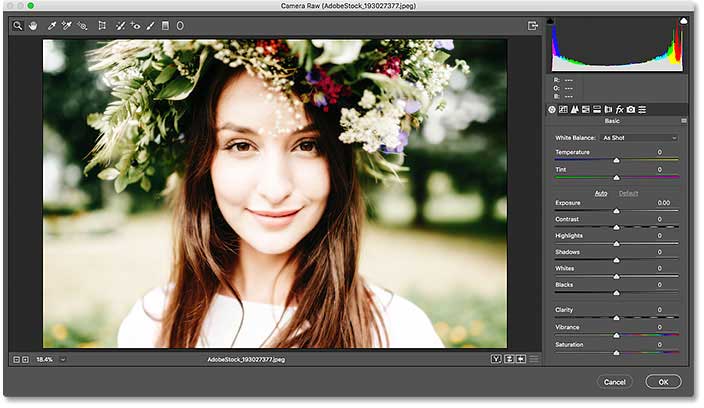
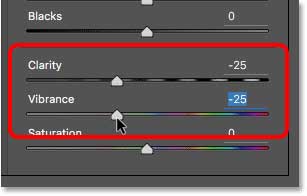
In the main panel on the right, I set the clarity to -25, which makes the effect smoother by reducing the contrast by half; And to reduce the saturation color, I also set the vibrance to -25:
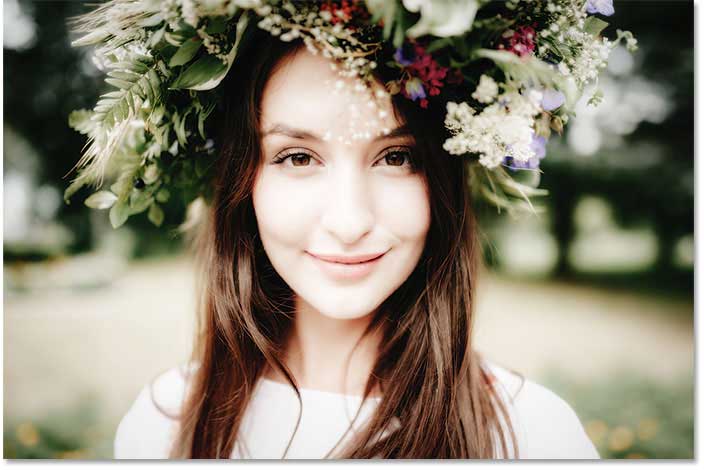
Click ok to close the window and see the result:
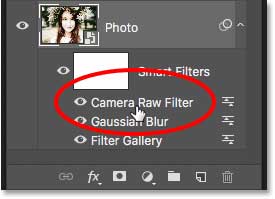
Edit Camera raw filter settings
In the layer panel, we see the camera raw filter above the other 2 filters in the list. To open it again and apply editing on this filter, just double-click on the name Camera Raw Filter:
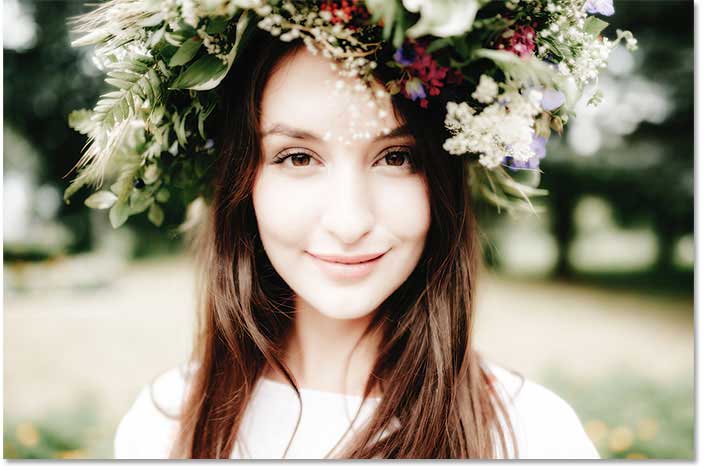
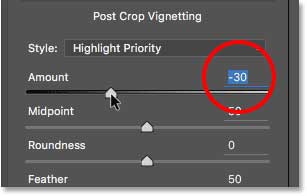
I forgot that I wanted to add the vignette effect to the photo as well. Then in the panel area on the right by clicking on its tab, I change the effect panel:

Then in the Post Crop Vignetting section, I drag the Amount slider to the left until its value reaches about -30:
Click ok to close the Camera Raw Filter dialog box; And this is the result of my work, not only because of the Clarity and Vibrance settings, but also because of the vignette effect in the corners:
Use layer mask-layer mask-smart filter
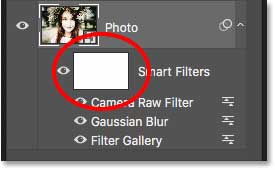
And finally, another big advantage of smart filters over regular filters is that smart filters have a mask layer. The mask layer allows us to specify exactly where the image was affected by the filters. In the layer panel we can see the layer mask thumbnail filled with white next to the word smart filter:
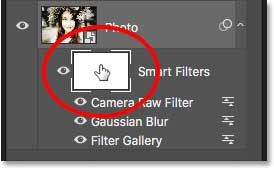
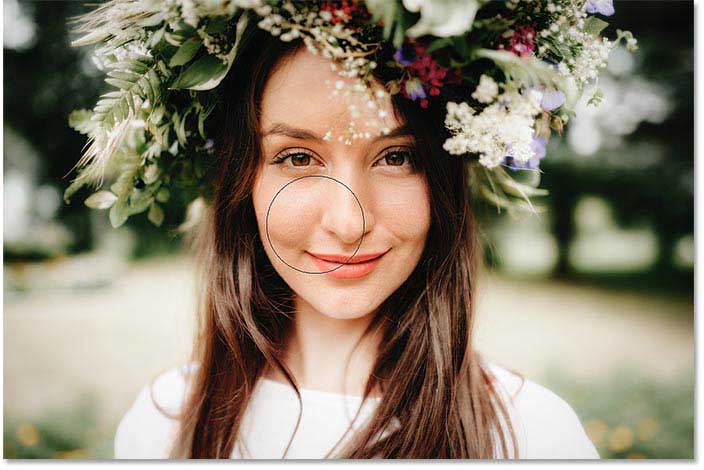
I want to do the brightness of the photo and some details on this woman’s face, so I need to reduce the effect of the smart filter on part of the photo. I can only do this in the mask layer by painting with a black pen. First, click on the layer mask thumbnail to select it:
From the Tool bar, select the Brush Tool:
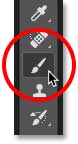
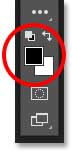
And here I have to make sure that my brush color is black:
Then I use a large brush with a soft edge to paint on the layer of the woman’s face mask.
Painting with a lower opacity brush
Go to the edit menu and select Undo Brush Stroke:
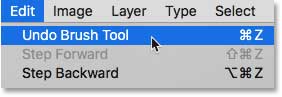
This returns the smart filter to where I painted it:

Then in the option Bar, I reduce the brush opacity from 100% to 40%:
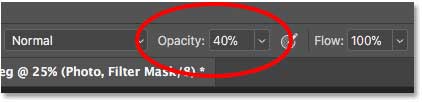
At this time, the opacity decreases to reduce the impact of the smart filter:

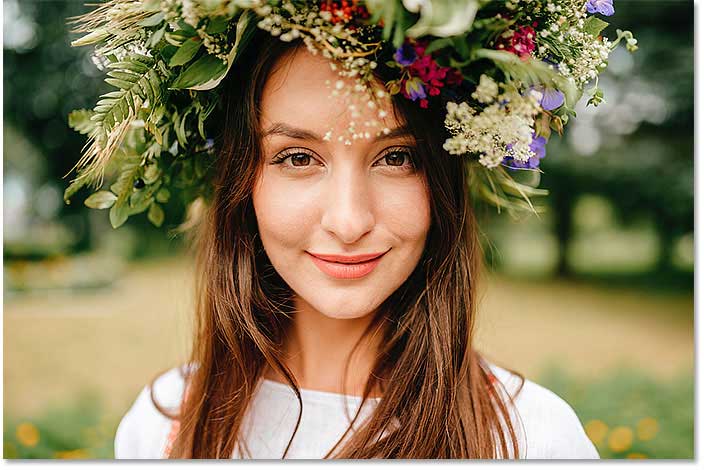
Show and hide all smart filters at once
If you applied multiple smart filters to a smart object and needed to change their status on and off at the same time, click the visibility icon below the layer mask thumbnail:
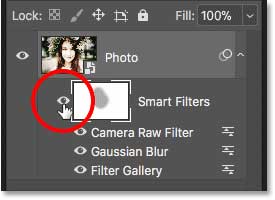
Click on it once to turn off all smart filters and see the original content of the photo:

Now click on it again to return the smart filters and show the effects: