


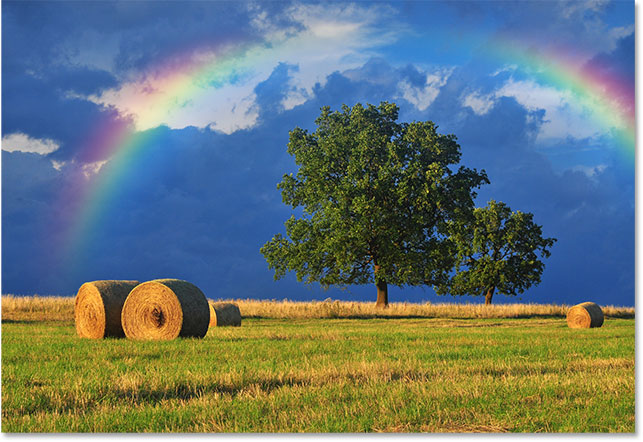
How to add a rainbow to our images in Photoshop?
Step 1 Add a new layer
The first step in creating a rainbow is to add a new layer. This allows us to separate the rainbow and the image. If we look at the Layers panel, we see that the original image sitting on the Background layer is currently the only layer in the document.
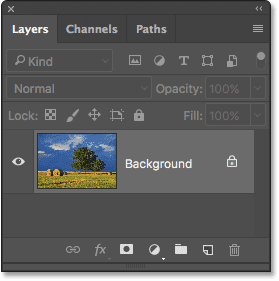
Rainbow, Layers page that shows the image in the Background layer.
Let’s add a new layer. We name the layer at the same time. To do this, press and hold the Alt key while clicking on the New Layer icon at the bottom of the Layers panel.
![]()
Hold down Alt to click on the new layer icon.
This opens the dialog box for creating a new layer of Photoshop. Type the layer name “Rainbow”, then click OK:
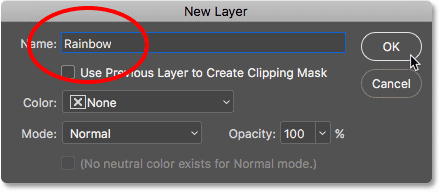
Name the new layer.
If we look at the Layers page again, we see that our new “rainbow” layer sits at the top of the image:
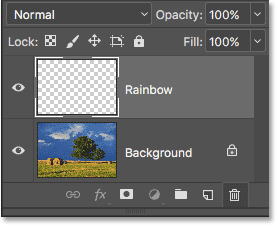
A new “rainbow” layer has been added to the document.
Step 2: Select the Gradient tool
Select Gradient from the toolbar:
Select the Gradient tool.
Step 3: Open the Gradient Picker
Select the Gradient tool by clicking on the small down arrow directly to the right of the Gradient preview thumbnail in the options bar at the top of the screen. This option opens the Gradient Picker. Do not click on the thumbnail itself. If you do this, you will open the larger Gradient editor. We only need the Gradient Picker, so be sure to click on the arrow, not the thumbnail:
![]()
Click the arrow to the right of the Gradient preview thumbnail
Step 4: Upload Gradient Special Effects
When the Gradient Picker opens, you will see thumbnails of the various Gradients we can select. If you have not yet loaded any other gradients, you will only see the default set. The rainbow gradient we need is not part of this default set, but it is included in Photoshop and can be found in the Gradient special effects set. All we have to do is load the special effects in Photoshop.
To do this, click on the gear icon in the upper right corner of the Gradient Picker:
![]()
Click on the gear icon.
Opens a menu with various Gradient options. At the bottom of the menu is a list of additional Gradient sets. Select a set of special effects:
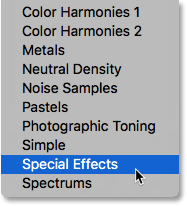
Select a set of special effects gradients.
Photoshop will ask you if you want to replace the current gradients with new ones or simply add new ones to the list. We’ll need one of the main and default Gradients later, so click Add:
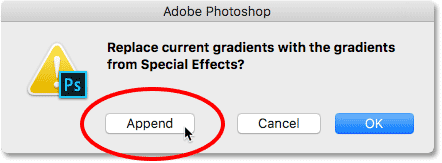
Click on Append.
Step 5 Select Russell’s Rainbow Gradient
In Gradient Picker, select Russell’s Rainbow gradient. This should be the last thumbnail of the list. If you have enabled Tool Tips in your default Photoshop settings (they are enabled by default), the name gradient appears when you move your mouse cursor over the thumbnail. Double-click on the thumbnail to select Russell’s Rainbow gradient and close the Gradient Picker:
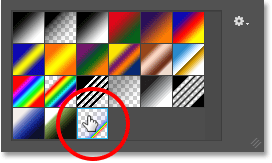
Select Russell’s Rainbow gradient.
If you’re curious about what Russell’s Rainbow gradient looks like, click on the gradient preview thumbnail in the Options bar. This time, you need to click on the thumbnail itself, not the arrow next to it, which we have already clicked on
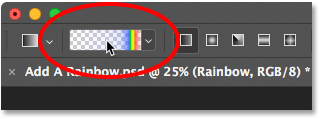
Click the gradient preview image of the Options bar
This will open the gradient editor. The selected current gradient appears in a large horizontal bar in the final half of the editor. Note that most of Russell’s Rainbow gradient is completely transparent. Rainbow colors appear only near the right edge:
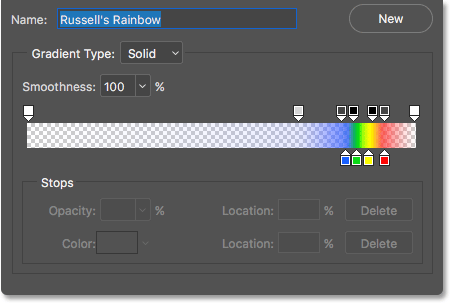
The gradient editor shows us what the Russell’s Rainbow gradient looks like.
We don’t really want to edit the gradient, so click the Cancel button to close the gradient editor without making any changes.
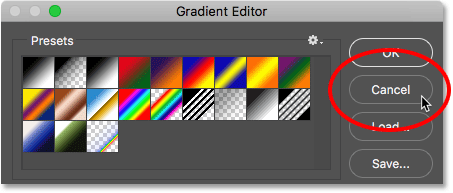
Click Cancel to close the gradient editor.
Step 6: Set the Radial style to “Radial”
By default, Photoshop draws a gradient in a straight line and is known as a linear style. To draw a rainbow, you need to draw a radial gradient instead.
If you look directly to the right of the gradient preview thumbnail in the Options bar, you will see five icons. Each of the symbols presents a different gradient style. From left to right, we have linear, radial, angular, reflective and diamond. To draw a round gradient, select the second Radial symbol from the left:
![]()
Select the Radial gradient style icon in the options bar.
Step 7: Draw a rainbow gradient
Drawing a radial gradient with the gradient tool in Photoshop is a two-step process. First, click on the image to set the starting point. This point will become the center of the gradient. Then, using the mouse button still down, move away from the starting point and center to determine the gradient size. The more we draw, the bigger the gradient will appear.
Although gradient drawing is very simple in Photoshop, it is actually the hardest part when adding a rainbow to an image. This is because the size and position of the rainbow depends entirely on where you dragged the mouse.
To show you what I mean, I click on a random point in the image to set my starting point and center. Then, with the mouse button still held down, draw a short distance from that point. Since we are drawing a round gradient, the direction of motion does not make any difference:
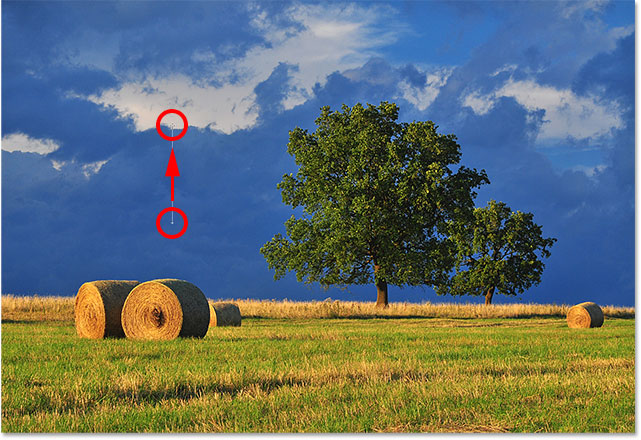
Click to set a center point for the gradient, and then drag to adjust the size.
At first, we only see a slim design that we clicked on. When we release our mouse button, it is time for Photoshop to draw the real gradient, and here, we see the result. The good news is that I have drawn a round rainbow gradient. The bad news is that it is too small
:
The first gradient is too small at the wrong point
Since this is not what I wanted, I cancel the Undo Gradient by going to the Edit menu at the top of the page. Or I can undo it using the keyboard shortcut Ctrl + Z
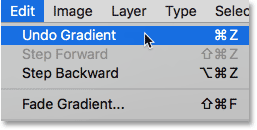
Go to Edit> Undo Gradient
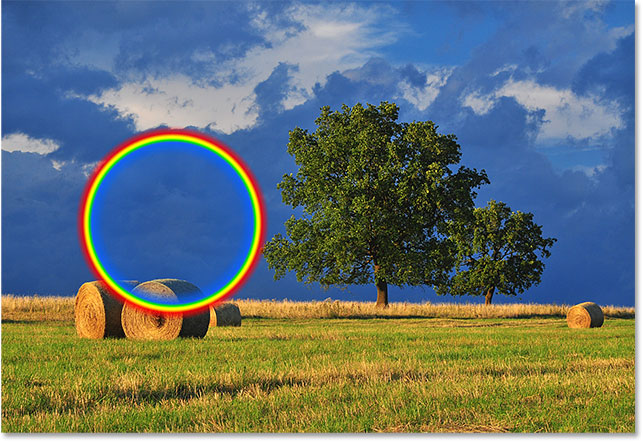
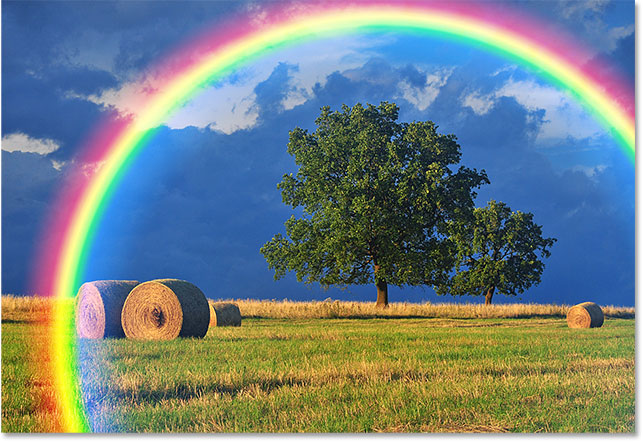
Each image will be different, but what I want for this particular image is for the rainbow to arch over the trees. I start by clicking under the larger tree to adjust the center point of the gradient. Then, holding down the mouse button, I move away from the center point towards the clouds
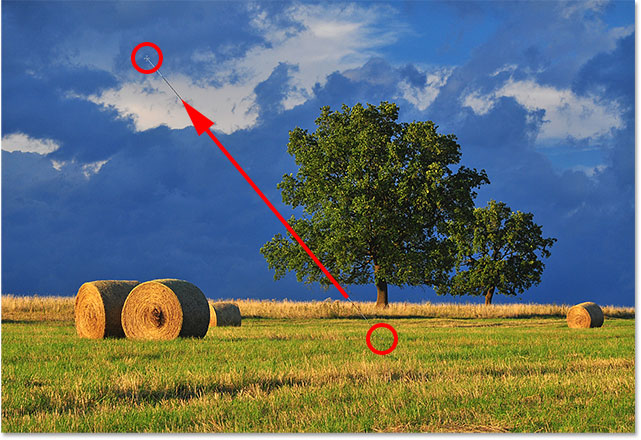
You draw a larger gradient and it starts from under the tree.
I release my mouse button to let Photoshop gradient, and this time I get a much better result:
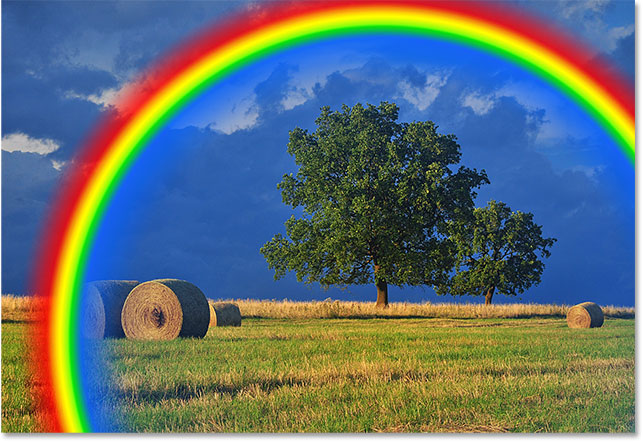
The rainbow now appears in the size and location I wanted.
Step 8 Change the Layer Blend Mode to “Screen”
Well, we have the rainbow in place. Of course, it does not seem very real at the moment. One of the problems is that the gradient seems to be sitting in front of the photo. We need to combine it with the image and we can do this by changing the Blend Mode.
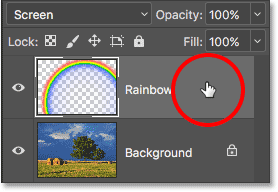
You will find the Blend Mode option at the top left of the Layers panel. By default, the blend mode is set to Normal. Click on the word “Normal” to see a list of other combination modes and select Screen from the list.
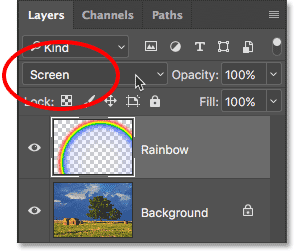
Change the “Rainbow” layer composition mode to Screen
You will get a good result after changing the mode. The rainbow is now better combined with the image:
Result after changing the blend mode to Screen
Step 9: Turn the layer into a Smart Object
Another problem with the rainbow is that the transition from one color to another is not very well defined. We need to soften them, and we can do that by blurring the gradient.
We do this using Photoshop’s Gaussian Blur filter. But before that, let’s turn the “rainbow” layer into a Smart Object. In this way, the Gaussian Blur filter is used as a smart filter, allowing us to go back and change settings if necessary.
To convert a “rainbow” layer to a Smart Object, right-click on the layer in the Layers panel
Right click on the “Rainbow” layer.
Then select Convert to Smart Object from the menu that appears
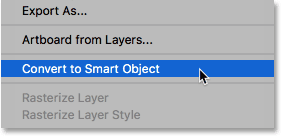
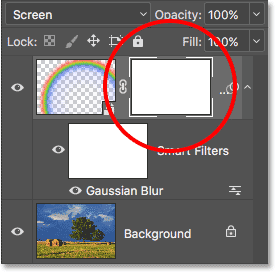
Nothing seems to have happened, but if we look again at the Layers panel, we now see a small Smart Object icon in the lower right corner of the rainbow preview image. This is how Photoshop lets us know that this layer has become a Smart Object:
![]()
The Layers panel displays the Smart Object icon.
Step 10 Apply the transparent Gaussian filter
Now that we have turned the layer into a Smart Object, let’s apply our filter. Go to the Filter menu, select Blur, then select Gaussian Blur
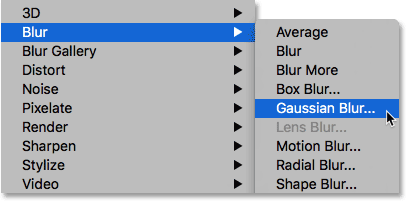
Go to Filter> Blur> Gaussian Blur
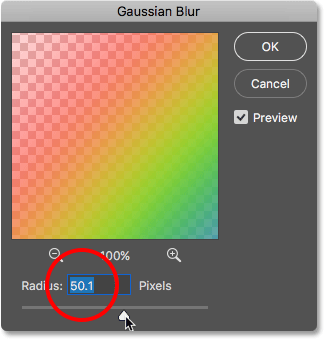
The Gaussian Blur dialog box opens. Notice your image when you drag the Radius slider to the bottom right of the dialog box. The more you drag, the more blurred the rainbow becomes and the smoother the transition between colors.
The amount of blur required depends more on the size of the image, so there is no set amount of input here. I work with a fairly large image, so in my case, the Radius value works well at about 50 pixels. Depending on the size and appearance you are considering, a different value may work better for your image
Gaussian Blur Filter dialog box
When you are satisfied with the effect, click the OK button to close the dialog box. My result after gradient blur is as follows

Result after applying the Gaussian Blur filter
It automatically became a smart filter because we applied the Gaussian Blur filter not to a regular layer but to a Smart Object.
The main advantage of using smart filters over regular filters in Photoshop is that we can always go back and change its settings. If you want to try a different Radius value, double-click on the words “Gaussian Blur” to open the filter dialog box again and try again. You can do this as many times as you like without losing image quality:

Smart filters can be reopened at any time by double-clicking on them.
Step 11: Add a layer mask
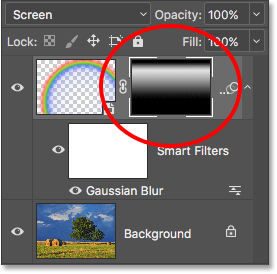
One remaining problem with the rainbow, at least with my image, is that the bottom stretches all the way to the end of the photo and across the earth. We need a way to hide the bottom of the gradient so that the rainbow only appears in the sky. We can do this using a layer mask.
To add a layer mask, click on the Layer Mask icon at the bottom of the Layers panel:
![]()
Click on the Layer Mask icon.
Again, nothing seems to have happened, but we can now see the thumbnail preview image of the “rainbow” layer to the right of the white edge. Notice that the layer mask thumbnail has a prominent white border around it. This tells us that the layer mask is now selected, not the layer itself:
A small layer mask image appears next to the “Rainbow” layer.
Step 12 Set your foreground color to black
At this point, we’re going to use Photoshop’s transparent gradient background to hide parts of the rainbow we don’t want to see. To do this, we must first make sure that the foreground color is set to black.
We can see the current background and background colors of Photoshop at the bottom of the toolbar. Press the letter D on your keyboard to quickly set the background and background colors to default. This will set the foreground color to white and the background color to black. Then, press the letter X on your keyboard to switch colors and black out the foreground color
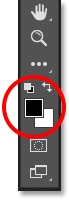
Set the foreground color to black.
Step 13: Select a transparent background gradient
To adjust the foreground black in the options bar, scroll to the top of the screen and once again click on the small arrow to the right of the gradient preview thumbnail:
![]()
Click the arrow next to the gradient preview thumbnail.
This will open the Gradient Picker again. This time, select the gradient Foreground to Transparent by double-clicking on its thumbnail (the second image in the top left row):
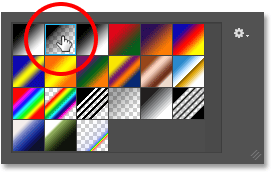
Double-click on the “Transparent Background” gradient.
Step 14 Set the gradient style to “Linear”
Instead of drawing a radial gradient for the rainbow, this time we should draw a linear gradient. To change from radial to linear, tap on the gradient style iconLinear Click on the Options bar
![]()
Click on the gradient Linear style icon.
Step 15: Draw the gradient on the mask layer
By selecting the Foreground to Transparent gradient option, black as the foreground color and gradient style as Linear, we have done all the necessary work. To hide the part of the rainbow that is visible under the sky, it is necessary to draw a gradient from the horizon line upwards.
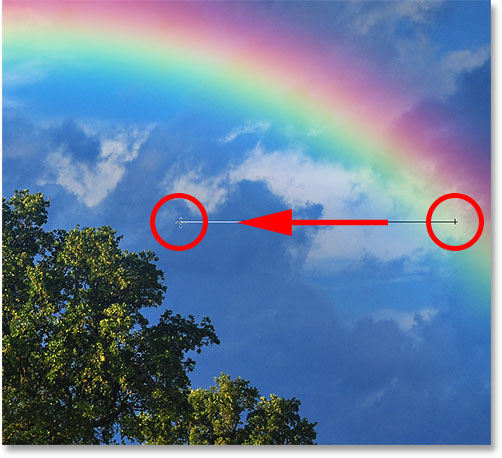
I start by clicking on the point just below the sky. Then, I hold down the Shift key and drag it almost directly above the rainbow. Holding down the Shift key while dragging restricts angles and makes it easier to move straight vertically:
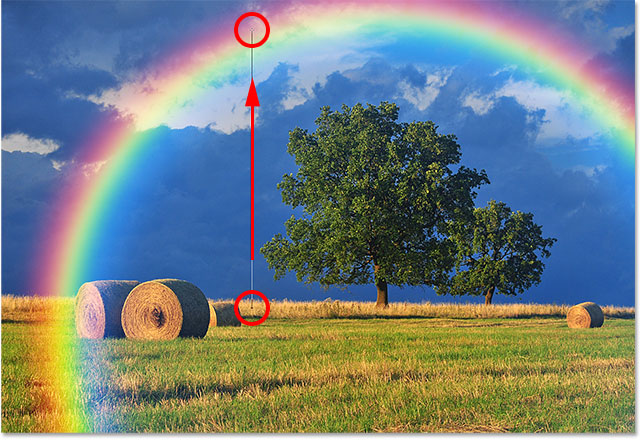
Drag the mouse from the ground to the top of the rainbow.
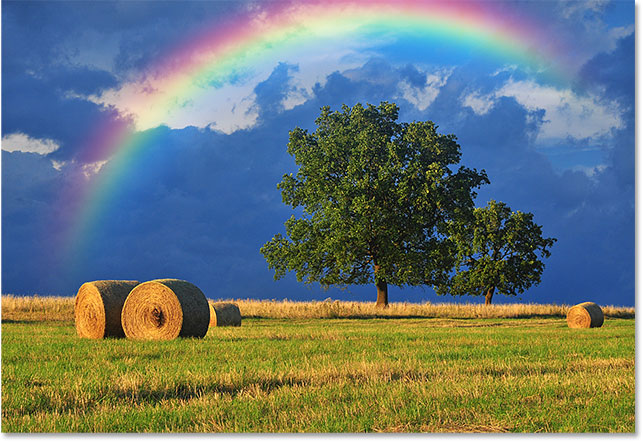
I release the mouse button and then the Shift key so Photoshop can layer the gradient on the mask and the result is as shown below. The lower part of the rainbow (the part that extends to the ground) has completely disappeared from view. The rainbow is then gradually observed, and as we move from the horizon line to the top of the rainbow, the brightness increases:
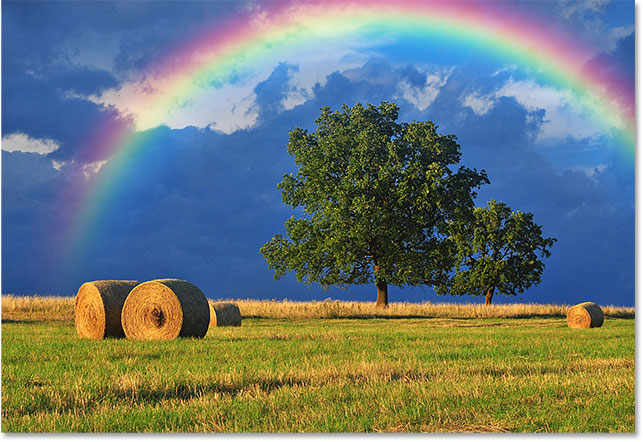
The rainbow now appears only in the sky, and the brightness increases the higher it goes.
If we look at the layer mask image in the Layers panel, we can see the gradient drawn. The black area is at the bottom of the area where the rainbow is now completely hidden. The white area at the top is where the rainbow is 100% visible. The area is gradually clear where the rainbow is gradually seen.
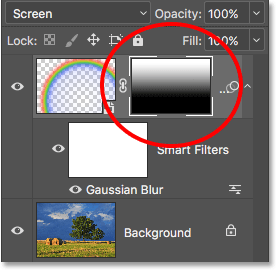
Mask image of the layer that shows the gradient.
Step 16: Hide extra rainbow areas (optional)
You may be wondering why I chose a transparent gradient background here instead of the standard black and white gradient in Photoshop. This is because gradient Foreground to Transparent gives us the freedom to hide other parts of the rainbow if needed.
For example, if my image contained more clouds in the sky above the trees and I wanted the rainbow to appear in the clouds, all I have to do is add another transparent gradient background on the layered mask. Swipe down from the top of the rainbow:
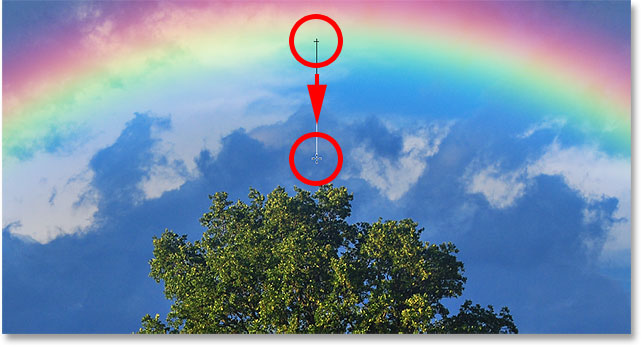
Draw a second foreground with a transparent gradient, this time to hide the top of the rainbow.
When I release my mouse button, Photoshop draws the second gradient and now the top of the rainbow disappears. Note that the bottom is still hidden. The second gradient does not overwrite the first gradient I drew in black and white. Instead, a second gradient was simply added to the first.
The image above shows a layer mask with a combination of two gradients.
There are certainly no clouds at the top of the trees in this image, so I neutralize the second gradient by going to the editor and selecting Undo Gradient, or by pressing Ctrl + Z on the keyboard.

Go to Edit> Undo Gradient
We could also hide part of the rainbow on one side. I draw a gradient in the form of a transparent gradient on the layer mask from the right edge of the rainbow to the center.
Draw a transparent gradient from the right.
I release my mouse button, and the rainbow appears to disappear as it moves toward the sky:
The gradient now appears to disappear to the right.
Here are just a few examples of why gradient Foreground to Transparent can be a better choice than the standard black and white gradient when adding a rainbow. By pressing Ctrl + Z on the keyboard, I quickly neutralize my second gradient.
before and after
Finally, since we have drawn our rainbow on our separate layer, we can easily make a “before and after” comparison. To view your original image without a rainbow, just click on the “Rainbow” layer icon (small eye) in the Layers panel to temporarily turn off the layer
![]()
Click the visible icon to turn off the rainbow.
When the layer is off, the rainbow is hidden:
The original image returns.
To lighten the “rainbow” layer and see the final result, click on the same icon again (on the empty square where it was).