How to Reset Network Settings in Windows 11 & 10: Step-by-Step Guide
Windows 11 has a new feature that allows you to reset your Internet settings and fix connection problems. If you encounter connection problems, you can use the Network Reset button in Windows 11 to reinstall network adapters and set networking components to default settings.
Reset the networking components and reinstall the network adapters
Windows 11 still offers the Network Troubleshooter to help you if you can’t connect to the Internet. But if this causes vulnerability problems, you should reset all settings and networking components to their defaults and reinstall your network adapters. You can also do all these things using the Network Reset feature.
The network adapter controls the interface of an operating system and connects the system to the wireless network. But the smooth communication of the operating system with the WiFi may sometimes face problems. This disorder may cause slow connection, disconnection, disconnection or no connection of the wireless network in the computer system. If your operating system is having problems connecting to WiFi or Bluetooth, resetting the network adapter is the best option to fix the problem.
This post will guide you on how to reset the network adapter and networking components to the default state. The following reasons can cause network problems:
- Change in routing settings or router damage
- Damaged or broken cable
- Server overload
- Network congestion
- Incompatible internet protocol configuration
- Using multiple wireless networks or frequently changing wireless networks: WiFi works best when it works with one or two frequencies and a fixed wireless network. Sometimes frequent
- Changes in the network cause incompatibility with the network adapter.
- Damaged or defective drivers: Errors in the configuration of drivers or network adapters in a set of old drivers will eventually lead to an error message. The new drivers have updated
- troubleshooting capabilities that run with the network adapter to enable wireless connectivity.
Reinstall network adapters and reset networking components to defaults using Reset Network in Windows 11
The network adapter is responsible for controlling the user interface and connecting the device to the desired wireless network. Before you reset your WiFi network adapter, you can try the built-in troubleshooting tool to troubleshoot it. If it doesn’t work, you can easily continue with the network reset method. However, before attempting to reset the network adapter in Windows 11, there are some things you should know.
Resetting will lose all Ethernet information, and you will need to re-enter all passwords.
VPN or other connections must be reconnected to the network.
All changes to the meshing components are ignored.
Network reset in Windows 11
If you want to use the Network Reset feature in Windows 11, follow these steps:
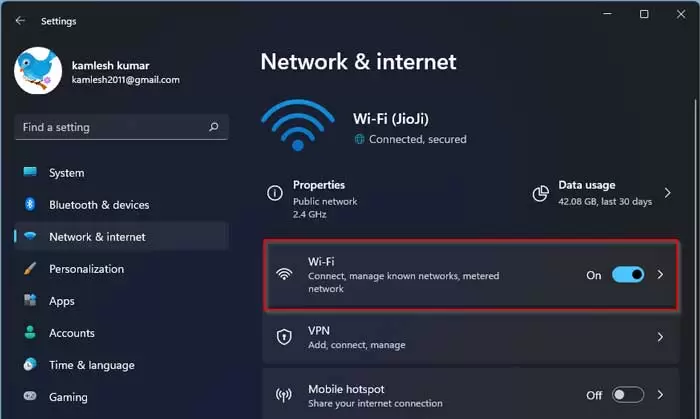
1- Open Windows 11 Settings.
2- Click on the Network & Internet option.
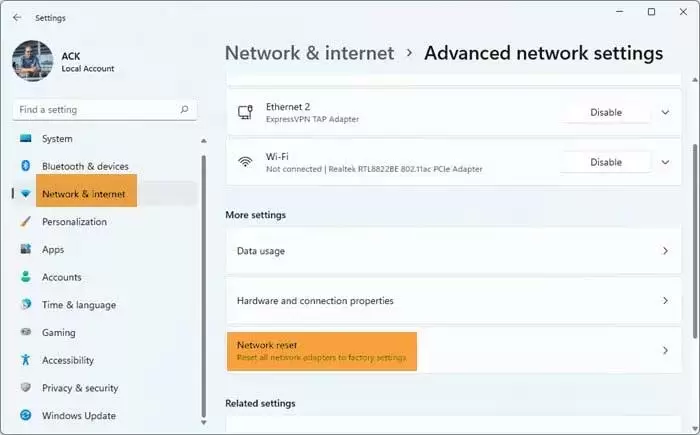
3- On the right side, scroll down to see Advanced network settings and then click on it.
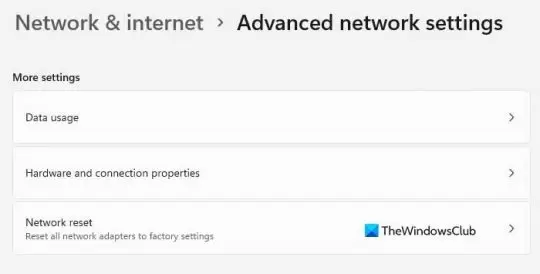
4- Scroll down again on the next page to reach More settings.
5- Click on Network reset here.
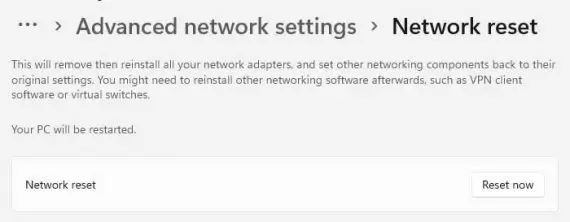
6- On the next page, click on the Reset now button and wait for the process to complete.
7- Reset your computer.
In short, it WiFibe like this:
To reset the computer’s WiFi network adapter, first open Settings. To do this, click on the Start menu and select Settings.
On the next page, select the Network & Internet tab from the left window. Then go to the Advanced network settings option and open it.
Now go to More settings and select Network reset under the menu. Next to the Network reset option, click the Reset now button to reset all network adapters to factory settings.
After making the above changes, restart your computer. This will remove your network adapters and then reinstall them and return other networking components to their original settings. After that, you need to reinstall other networking software, such as VPN client software or virtual switches.
Network reset in Windows 10
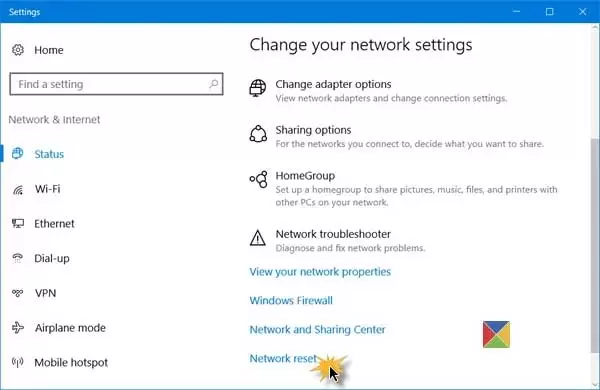
In Windows 10, open the Start menu and click on the Settings icon. Then click onthe Network & Internet option. Then click on the Status link on the left. Here you can see the status of your network. You will also see a link that allows you to open the Network Troubleshooter.
Scroll down to see the Network reset link.
By clicking on it, the following window will open.
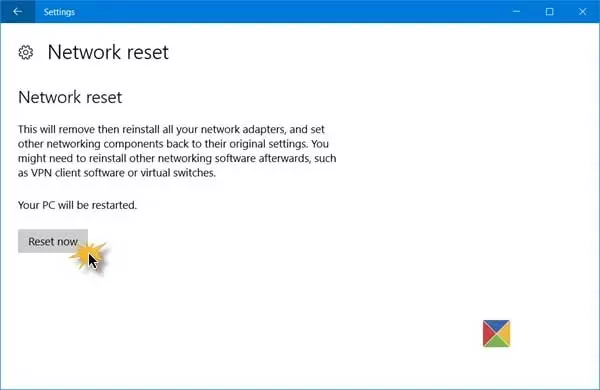
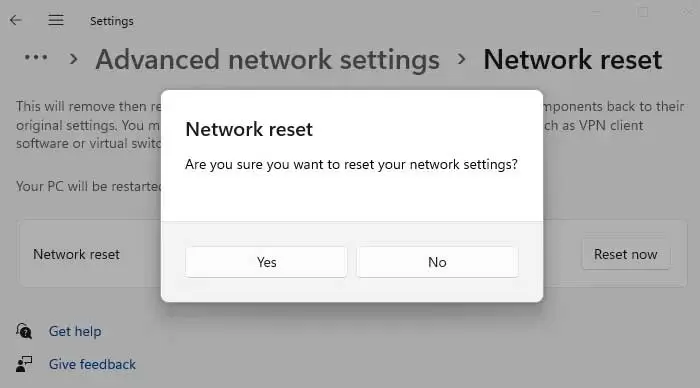
The Network Reset feature first removes and reinstalls all your network adapters and restores other networking components to their initial settings and default values.
When you are sure and ready, click the Reset now button; you may be asked to confirm a message. Click Yes to continue and wait until the task is completed, and after that, your Windows 10 computer will restart.
After starting this tool, if you use them, you may have to reinstall your network software such as VPN or Virtual switches.
FAQ
What does resetting network settings do in Windows?
It removes and reinstalls all network adapters and restores network configurations to default, clearing saved Wi-Fi networks, custom DNS, and proxy settings.
How do I reset network settings on Windows 11?
Go to Settings → Network & Internet → Advanced network settings → Network reset, click “Reset now,” confirm, and restart your PC.
Does resetting network settings affect saved Wi-Fi passwords?
Yes — you’ll need to reconnect to Wi-Fi networks and re-enter passwords after the reset.