


Comprehensive tutorial on working with layers in Photoshop (visual and in plain language)
In the continuation of the Photoshop software tutorial series , we must say that layers are one of the powerful features of Photoshop, as they produce a photo like pieces that are put together.
Effects, you can draw, edit, paste, and paste content with Effects layer without interfering with other components. Simply put, this section allows you to apply any changes to the image without fear of damaging other parts of the image, and finally, if you are not satisfied with the change, delete that layer, the original image of the hand It will remain untouched for you.
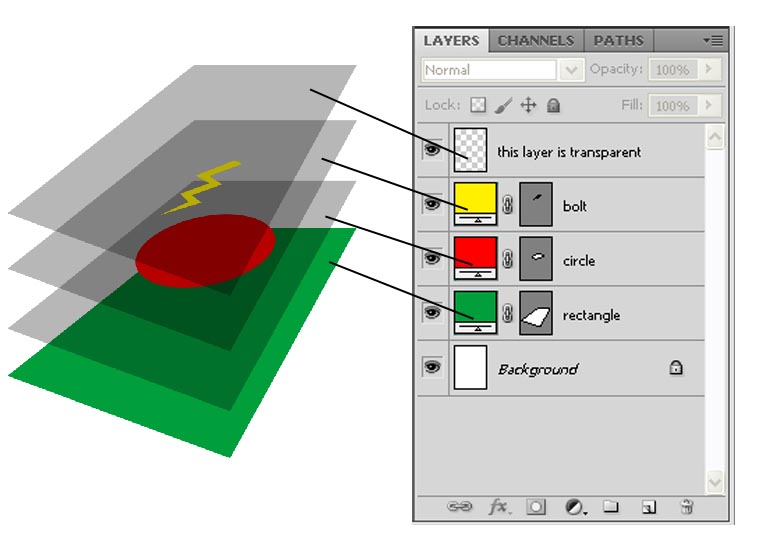
This graphic shows how layers can be stacked to create a composition. Layers contain both transparent and opaque components, so keep this in mind when stacking layers.
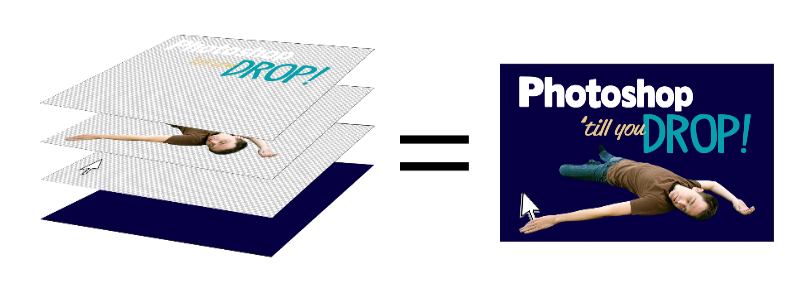
For example, in the graphic above, the image on the right consists of a total of 3 layers on the left. The top layer is the word “Photoshop till you DROP”, the middle layer is the same person who fell and the bottom layer is the same as the blue background image.
Organize and move layers Effects
Guide and organize layers
Organizing layers and being able to direct them is a very important factor when working on layers. This section shows you how to select, move, create folders, search and organize layers.
Select a layer
In order to do more work in Photoshop, you will need at least one selected layer.
- Just click on the Layers Palette to select the layer. The blue layer will be selected to be specified
- To select multiple layers, hold down the CMD or CTRL key on the keyboard and click on any of the layers you want to select. To select multiple consecutive layers, select the first layer, then hold down the Shift key and select the next layers.

Move the layers
As we all know, the layer where the layers are stacked changes the look of your image. It is very important that you know how to move the layers so that you can change their classification as needed.
- Select the layer you want to move.
- Click and hold the mouse and drag the layer to the desired location. A very thin line will appear between the layers to show where the layer is located. You move the layer where you want, release the mouse, the province will be moved to the new location.
Find the layers
Most Photoshop pages have multiple layers that can overlap quickly, making layers difficult to find. Fortunately, there are tools that can be used to find different types of layers.
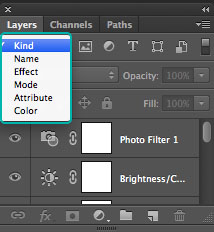
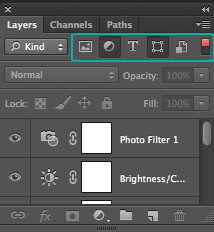
- Tap Search Dropdown
 Click to select whether you want to search by layer type, total, effect or color
 - After selecting the search type, select the application on the right side of Search Dropdown for more features of the search results.
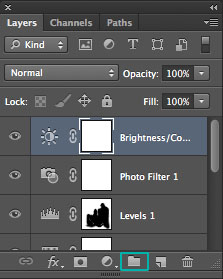
Create groups of layers
Another feature that helps you organize layers is the creation of folders, known as groups. You can add in groups and organize as you wish.
- Create a new folder by clicking Greate a new group on the Layers palette button
- Drag the layers into the group folder.
- Double click on the group name in the Layers palette button and change the group name.

Types of layers
There are different types of layers available. Some layers are parts of the final images that you draw into each other, some layers are shapes or text, and some layers are fillers or adjusters. Filling or adjusting layers let you play with colors and effects without changing the original image. If you change your mind, you can remove or change the filler and adjuster layers.
Background layer
When you first open an image in Fenoshop, the contract layer that contains that image is called the background image. The background image is a protective layer and many filters and effects are not applicable to the background layer.
The background layer is always called Back ground and will always be locked or protected.
![]()
Image layer
Image layers are layers that contain any image information. Whenever we create a new layer, it is conventionally called the Image layer.
![]()
Adjustment layer
Coordinate layer that contains images that only match the information and can be deleted at any time. Coordinate layers are recommended for your images because they do not cause any damage to the image.
![]()
Type layers
Typographic layers contain only live text. They can be created and edited through the Type tool.
![]()
Fill layer
Filling layers can include solid colors, ramps or patterns. You can go to Layer in the menu and select Fill layer and select pattern, solid color and. . . Create a layer of filler.
![]()
Shape layers
Shape layers include shapes that are drawn using the Shape layer. In order to edit the shape layer, select Layer and use the Shape tool for applications.
![]()
Layer components
Knowing the components of layers will help you better understand how layers work. Layers are more than just one object. Below is the shape of a layer and a description of all its main components and features.
Layer Thumbnail
This small layer indicates that the components of this layer are a coordinating layer.
Layer Mask
The layer mask is like a stencil for the layer. Layer masks allow certain components of the layer to be visible or hidden. The white parts are displayed in the mask while the black parts are hidden.
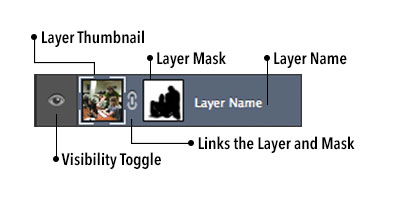
Layer Name
This displays the layer name.
Rename the layer
Double-click on the layer name and type the new name and press the Enter button to change the layer name.
Visibility control button – Visibility Toggle
This is a manual layer feature that allows you to hide or show a specific part of the layer without removing it, and by removing the eye mark, the layer is hidden in your image.
![]()
Layer and Mask Link
This link appears when you add a layer mask to the layers. This link![]() Helps ensure that all changes have been made to the mask layer.
Helps ensure that all changes have been made to the mask layer.
Layer features
Layers are very powerful because they have many features and effects that can be applied to layers. Learning layer properties helps you create creative and unique effects for your images and combinations.
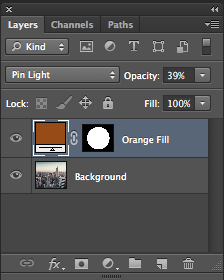
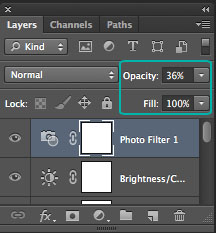
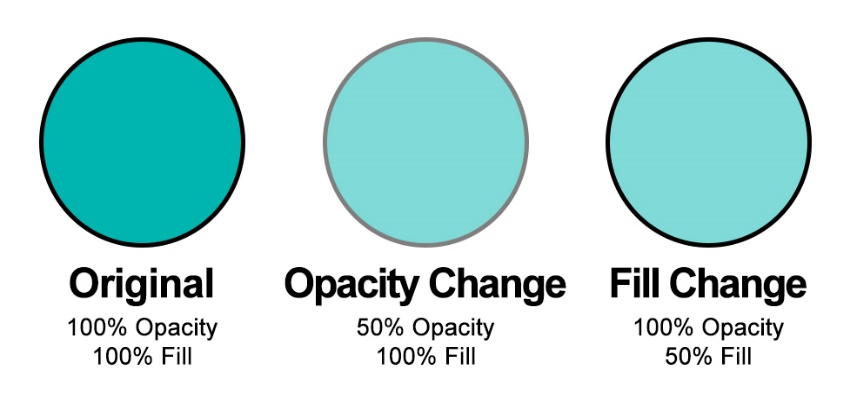
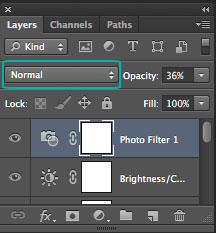
Opacity and Fill
Dimming and filling allow you to change the opacity (or brightness) of the layer.
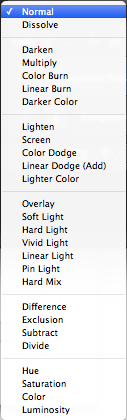
Blending Modes
Combination models affect the appearance of the layer and how it is displayed. Hybrid models are divided into five groups that affect the differences in layers. The best way to use hybrid models is to combine and synchronize them and try them out with different types.
Locking Layers
Locking layers can be a handy tool when working with Photoshop. There is such a way to lock the layer or layer components.
![]()
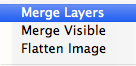
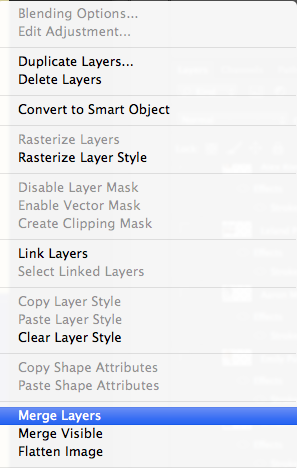
Merging and Flattening
If you need to combine multiple layers or spread the final image, you can use the Merge and Spread Layers command.
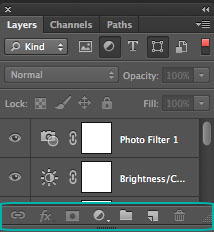
Combine or merge multiple layers by selecting a layer, then right-click on the layer name of one of the selected Merge Selected layers from the menu, then all selected layers will be in one of the combinations.
Layer Buttons

In order from left to right:
If you have a question in this regard, ask it in the comments section so that we can answer it very quickly and easily .