


Complete Layer style tutorial for better layer management in Photoshop
In the continuation of a series of attractive Photoshop tutorials , we will teach you how to work with a layer style in Photoshop, in a complete and visual way.
layer style that we will explain in this post.
What are layer styles?
One of the benefits of layer styles is that they relate to the contents of the layer. Since style is actually a separate entity that is only layer-related, it constantly edits or moves itself as a layer content.
In addition, after applying the changes, they can be easily adjusted or made incompatible. Photoshop comes with a number of styles by default and is available.
To create a layer style, select the layer you want to work with in your document, then select the layer style you want to apply.
After applying a light layer, the effects on the layer can be viewed, adjusted, disabled or enabled. Layers with effects applied to them can be viewed as a small round icon called Latin.
Click the arrow to the right of the icon to expand or drop the effects. Once the layer effects are expanded, you can easily disable certain effects in the layer style by clicking on the eye icon next to the effect.
Just like a layer, when an effect is disabled; These effects can be re-seen by clicking on the empty area where the eye resides.
Make quick changes
You can make quick changes to the layer style by double-clicking on the F icon to see the layer style options. From here you can customize the style of your layers.
![]()
Create your own effects and styles
To add your layer effects and create personalized styles, follow the path below:
Layer – layer style – blending option. Or right-click on your layer and select the blending option.
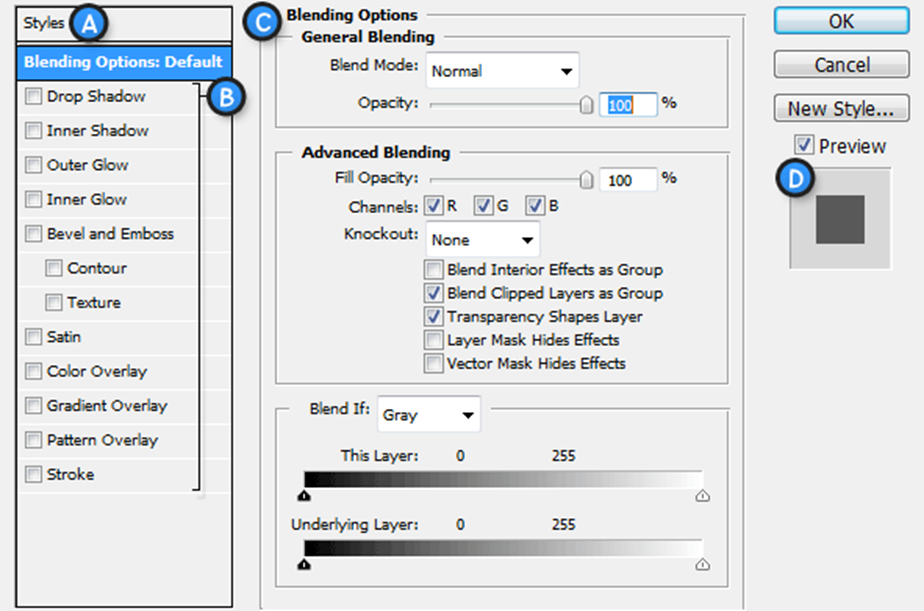
A. Style defaults. List of style defaults
B. Effects. A variety of effects that can be applied in one layer style. It is important to note that clicking on any of the effects will enable this effect and you will see options for a personal effect.
C. Options / Settings. When a name is checked for a work, its options are shown here.
D. Layer style preview. A preview of your layer style.
B effects can be activated by checking them and also deactivated by deleting them. To edit a work, you must click on its name. Effects settings are displayed in the C options section where they can be easily adjusted. You must click OK to apply a set of effects and options.
Layer benefits
Styles can be created with the following effects:
- Drop shadow: Create a shadow behind the contents of the layers.
- Inner shadow: Create a shadow above the contents of the layers.
- Outer glow: Creates an outer glow in the layers and does not fall like shadows.
- Inner glow: Creates shine above the layers and becomes like an inner shadow.
- Bevel and emboss: Used to create unique highlights and shadows in the contents of layers.
- Satin: Shows the contents of the layer a satin-like, glossy appearance.
- Overlay color: Fills the contents of the layer with a matte color.
- Gradient overlay: fills the content of the layer with a slope.
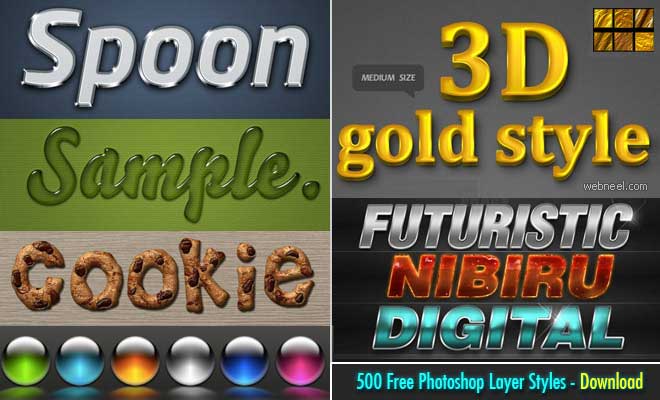
- Pattern overlay: fills the content of the layer with a pattern (for example, if you want to create a cookie text, just apply a cookie texture to this option)
- Stroke: Creates an outline of the contents of the layer using a matte color, gradient, or pattern.
Must try!
Let’s try what we’ve learned to make sure we understand all of this. We intend to test our capabilities by creating a base layer style for some text. Go ahead and create a new document in Photoshop and use the typing tool to add some large black and white text. Right-click on the text layer and select the blending option. First we intend to add a black drop. Check the Drop shadow effect and right-click on it to see its options. Make the settings as shown in the diagram below.
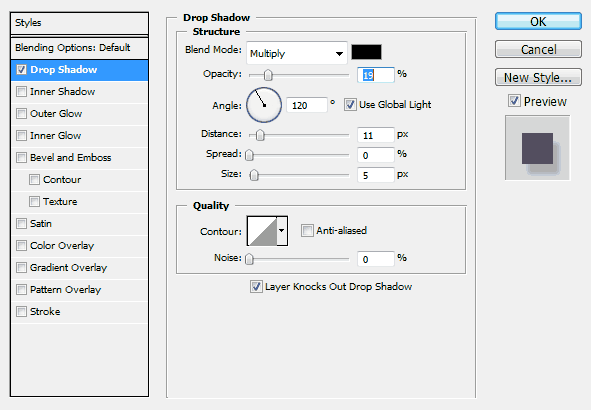
As you make the settings you can see that changes have been made to your actual document. Keeping in your document while adding effects allows you to better determine how the settings are. You should be familiar with many of these sliders and a variety of training pallet settings. Adjusting the angle may be new to you, but it’s very simple. You can enter a numeric value or adjust the angle with your mouse and click on the wheel. Doing so will also change the angle of your shadow.
Now we add a Bevel and emboss . We’re going to make a subtle cable so it doesn’t get too much attention, but it also diminishes our text.
Again the simulation of the settings is shown in the diagram below.
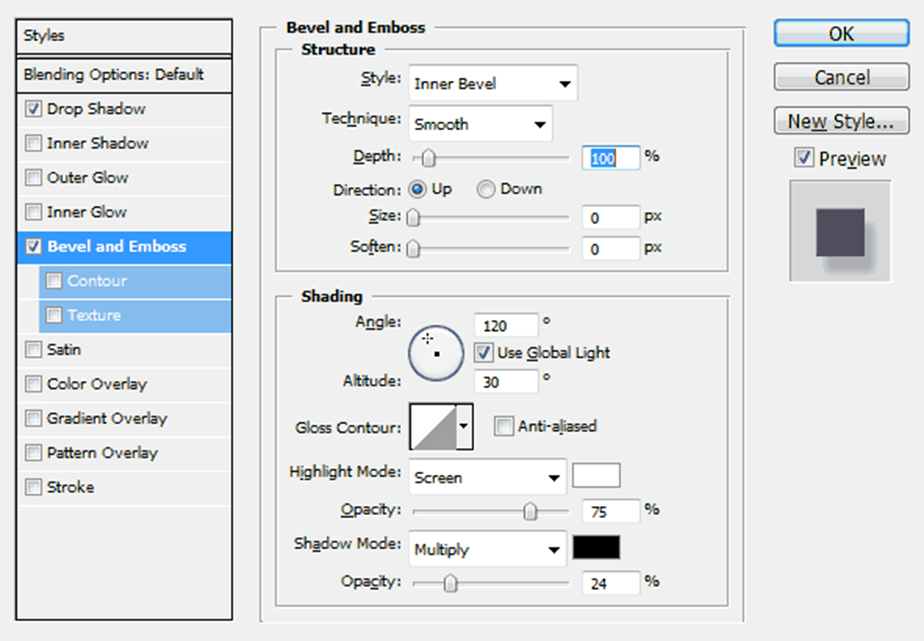
You do not see anything new here and you may want it and you may want to try it. As I suggested before, in order to have a better understanding of the different settings here. Now let’s add a gradient overlay.
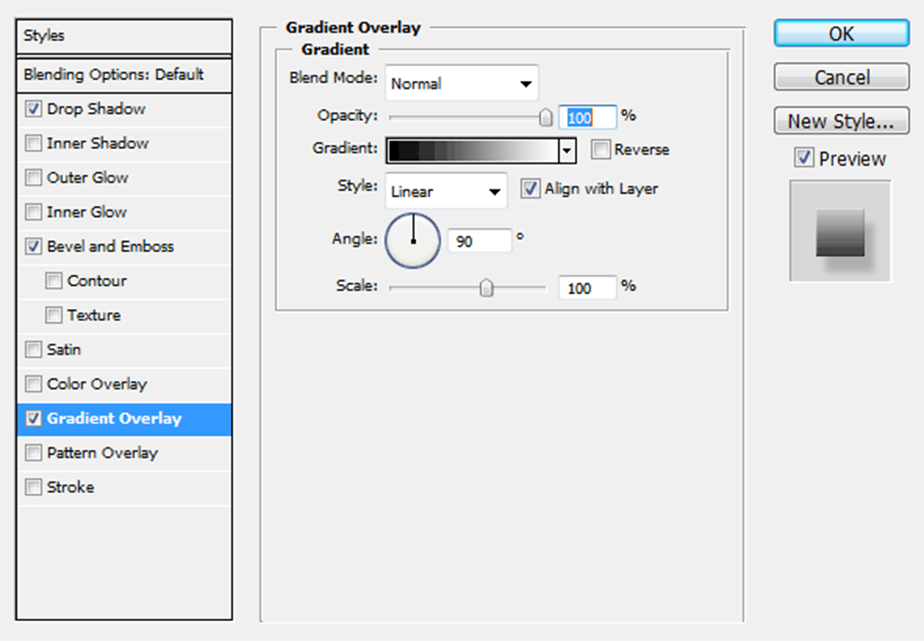
By default gradient overlay will probably use the background for the slope, which is not exactly what we are looking for. However it is good because we can easily adjust the slope from here.
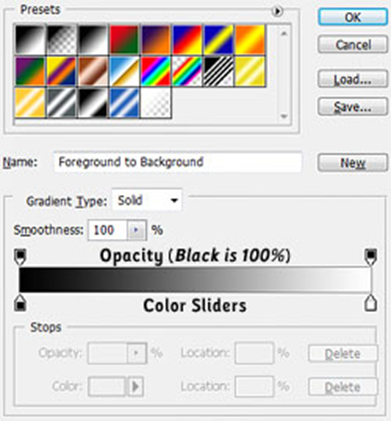
Click on the gradient shown in gradient picker. You will see the gradient editor. From the gradient edit you can choose the default slope or create a new custom slope yourself. At the bottom is the current slope editor with opacity stops and stops color. We can stop, add, delete and change by clicking anywhere from the top or bottom of the slope or by clicking.
We just want to stop the color change in the current state. Double click on the first color and apply 50a2e7 color and then stop the 75cefc color to the right. Click OK to apply the gradient to apply the created layer style. You already have enough skills in the effects and style of layers!