


Step-by-step tutorial for making animation (animation) in Photoshop new version
Here is an example of making an animated GIF. Gif is actually a type of animation that is much simpler but fully functional.
Note that making 2D and 3D animations is not an easy way and will require the skill of working with complex software.
Method one: The following video:
If you did not learn with the help of the video above, follow the step-by-step tutorial below.
Step 1: Upload your photos to Photoshop.
Put the photos you want in a separate folder (it is better to number them in the order you want from 1 to)). To upload them in Photoshop, do the following:
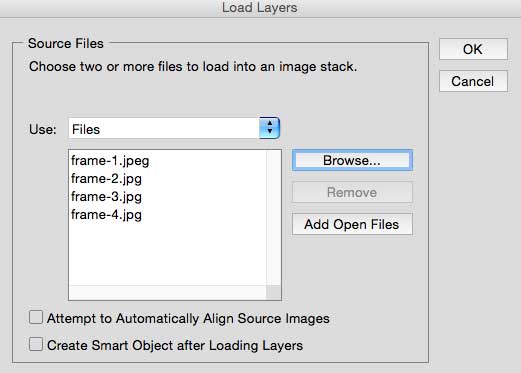
File> Scripts> Load Files Into Stack
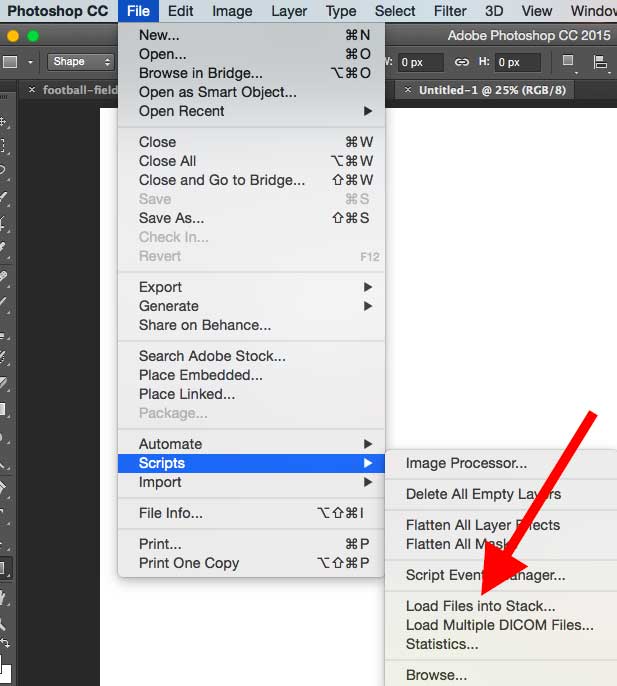
Then select the Browse option and the photos you want to put in the GIF, then click OK.
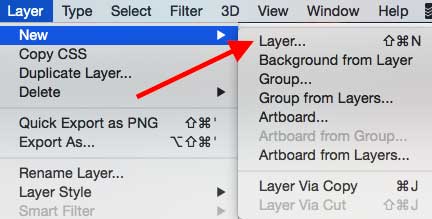
Photoshop then automatically creates a separate layer for each image you select (bottom right). If you want to add a new layer, you can go to Layer> New> Layer:
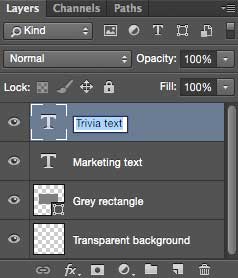
Name your files. To name the layers, go to the Layer panel at the bottom right of the page, double-click on its default name and rename it to the name you want. When you have finished typing the desired name, press Enter.
When the layers are ready and you have named them all, we move on to the second step.
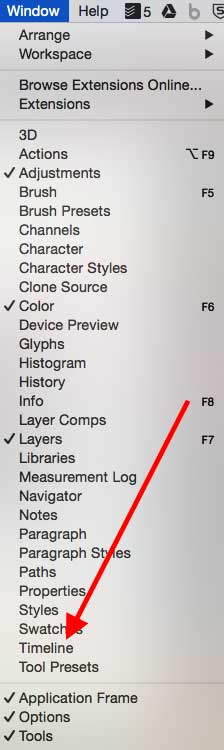
Step 2: Open the Timeline window
To open the timeline, go up and select the timeline option from the window. The timeline allows you to open and close different layers at different intervals. This will convert your still images to GIF.
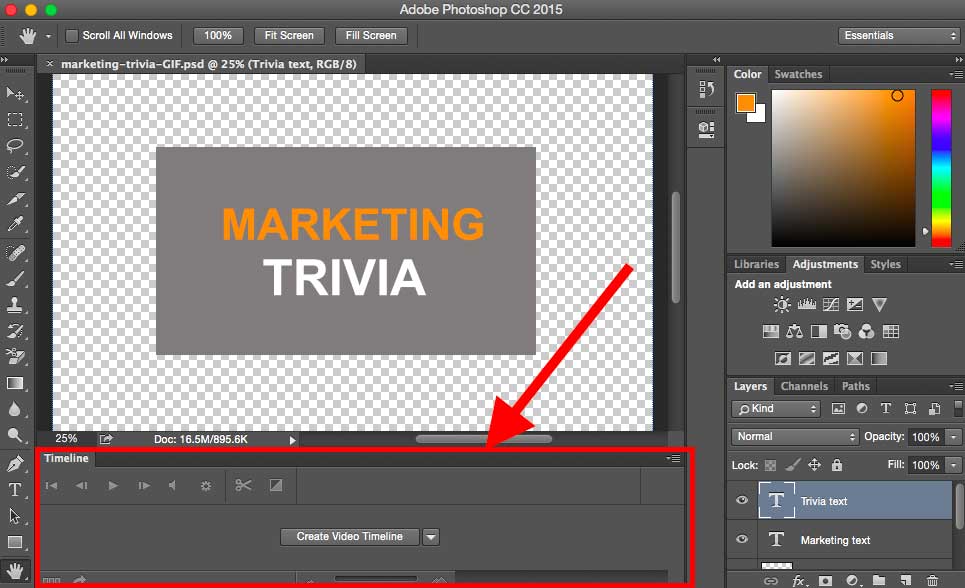
The timeline window appears at the bottom of the page and looks like the image below:
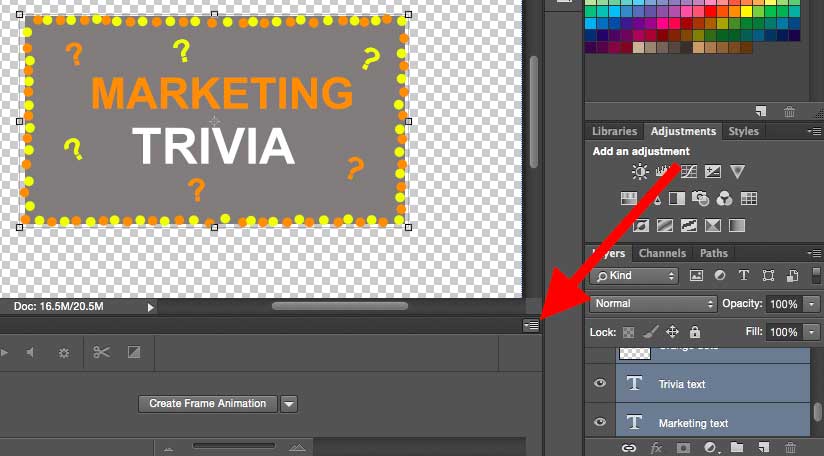
Step 3: In the Timeline window, click Create Frame Animation.
To create a gif, click on the arrow in the middle of the timeline window and select the Create Frame Animation option:

Your timeline should now look like the one below (or show the frames below):

Step 4: Create a new layer for each new frame.
If you just want to put the photos together and create a gif, skip this step. But if, for example, you want to display the end of a text gif, you have to create a text layer with what you want to be written in the Layers panel and place it on top of the other layers.
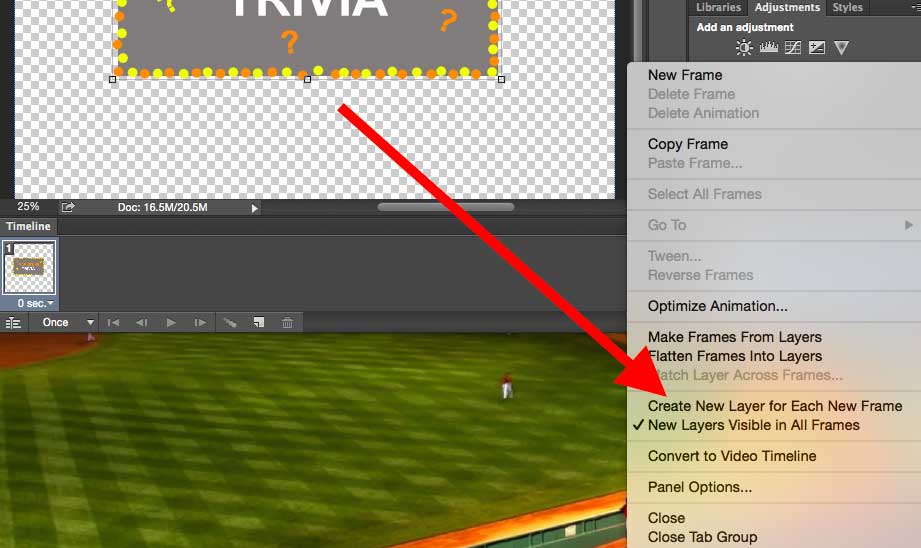
To do this, first go to the top menu and select Select> All Layers to select all layers. Then click on the menu icon on the right side of the timeline page.
From the menu that appears, select Create new layer for each new frame.
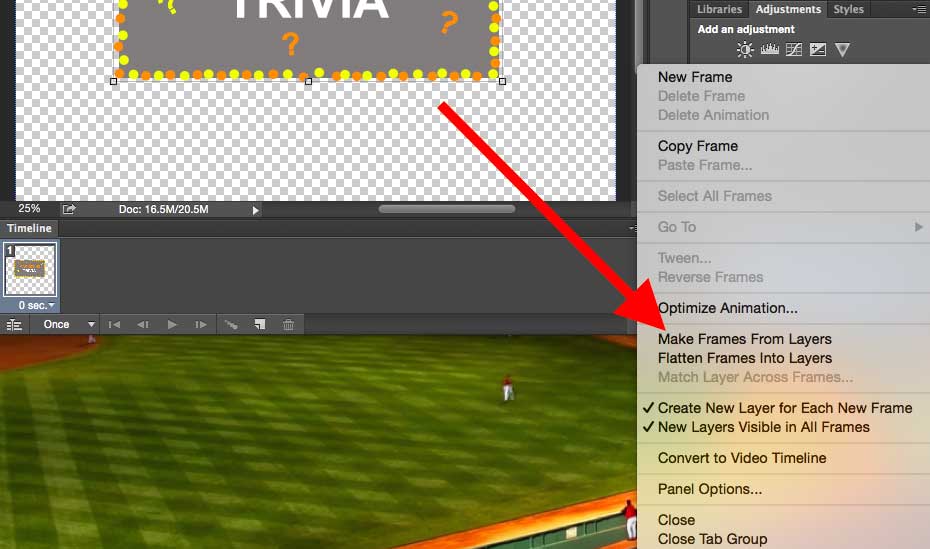
Step 5: Open the same menu on the right and select Make Frames From Layers.
This will create each frame of your GIF layer. This means that each layer you see is a frame of your gif.
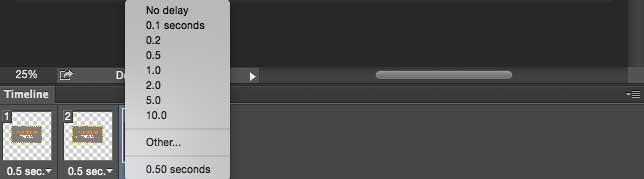
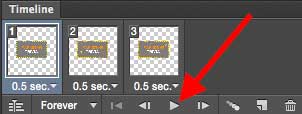
Step 6: Below each frame, specify how long it will appear before switching to another frame.
To do this, click on the time below each frame and specify how much you want it to be. In this example we select a time of 0.5 seconds for each frame.
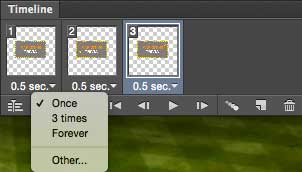
Step 7: At the bottom of the toolbar, select how many times you want your GIF to rotate.
The best option for this can be chosen forever (ie your gif, like the normal gifs you see on the internet, is constantly repeated and does not stop). If you want a specific iteration, click the other option:
Step 8: Click the play icon to see the GIF.
Step 9: Save your GIF and export it.
Are you satisfied with what you made? To use it online, save it and follow the steps below:
File> Export> Save for Web Legacy or press the combination keys Control, Shift and Pen:

Next, select the GIF file type from the default menu. For example, if you have a mild GIF, select Dithered GIFs. The number after the GIF file indicates the size and accuracy of the GIF colors compared to JPEGs or PNGs. In Adobe, a higher percentage of dithering leads to more color appearance and detail, but this increases the file size.
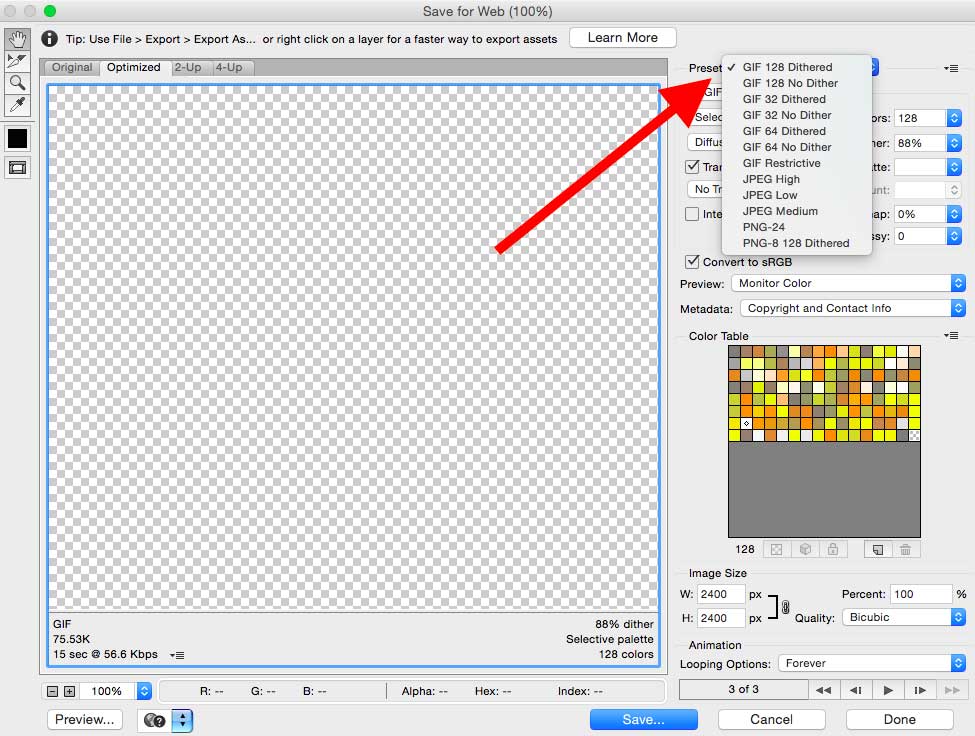
Click Save at the bottom to save the file to your computer.
How can we use the GIFs we create for animation?
1. On social media: Pinterest has pioneered the use of animated GIFs following Twitter. Later, Facebook and Instagram also used it. This can be a marketing method. See, for example, how products use GIF to market their websites.
2- In email: To have creativity and initiative and attract more attention, you can use animated images instead of simple images in your emails.
3- In blog posts: In blogs, you can use animated posts for cooking recipes or contacting the blog or anything else.