


How to draw straight lines, curves and dashes in Photoshop
In this tutorial you will learn how to draw straight lines, curved lines and colored lines in Photoshop.
1- How to draw a straight line in Photoshop with a brush
Choose a brush or pencil tool. Take a small hard round brush and draw a straight line with it.
To draw a straight line, hold down the Shift key and draw a line. To draw a horizontal or vertical line, hold down the Shift key and then draw the line horizontally or vertically.
Use the Photoshop grid to make sure you draw straight lines .
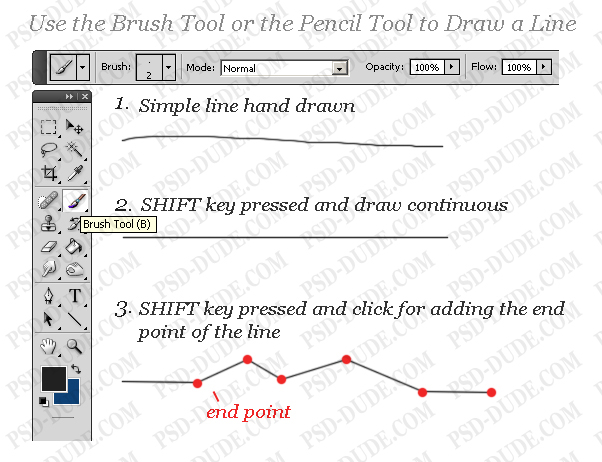
For angled or diagonal lines, hold down the Shift key and click to mark the end points of the line. Photoshop connects dots with a line.
1-1- How to draw a straight line with a brush without using other tools
Many graphic designers like to paint with a brush tool using a graphic cursor or a freehand mouse. When you practice a few times, you will find that drawing a straight horizontal line is easier than drawing a diagonal or vertical line. This is how our hands work.
How to rotate the canvas or background?
A simple trick you can do in Photoshop is to rotate the screen. Just like turning painting paper. Press the R key , then click and drag. If you hold down the Shift Mouse, the screen rotates 15 degrees, 15 degrees.
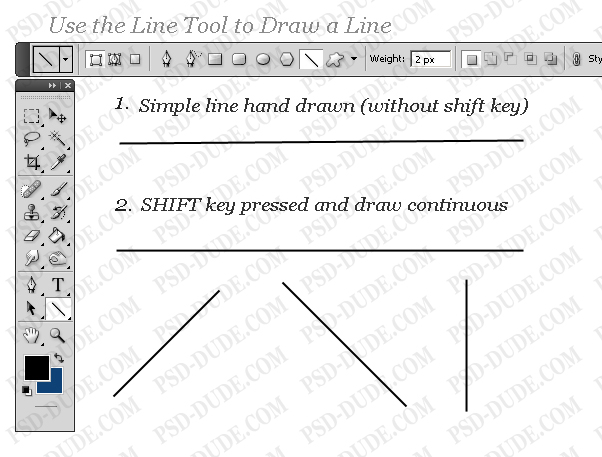
2. How to draw astraight lines with the line tool
Another way is to use the Line Tool located in the Photoshop toolbar. This line is a vector shape, so you can change and modify its shape, color and dimension without losing quality. You can also use the shift key to draw a straight lines.
If you need vector lines for your map, download Line Shapes for Photoshop .
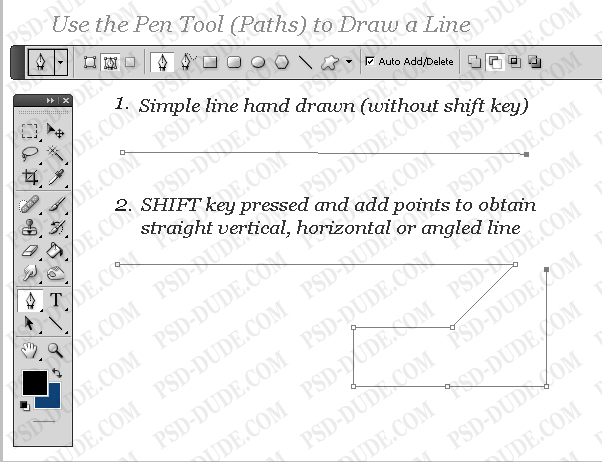
3- How to draw a line with an automatic tool
You must first check the Paths option. Then click to add the first point and then click again to add the second point and hold down the Shift key for the right line.
Then, take the Brush Tool and select the Hard Round brush , size 3px, black.
With the Pen Tool Options Paths to select and drag a line. This line is added as a Work Path .
To draw a line, right-click on the Work Path and select Stroke Path . Select the Brush Tool from the list .
You can now delete the Path or use it to draw other lines. You can move the Path , resize it, rotate it, and so on.
Tip: You must pre- select a layer before stroke , otherwise it may not work.
4- How to draw a curved line?
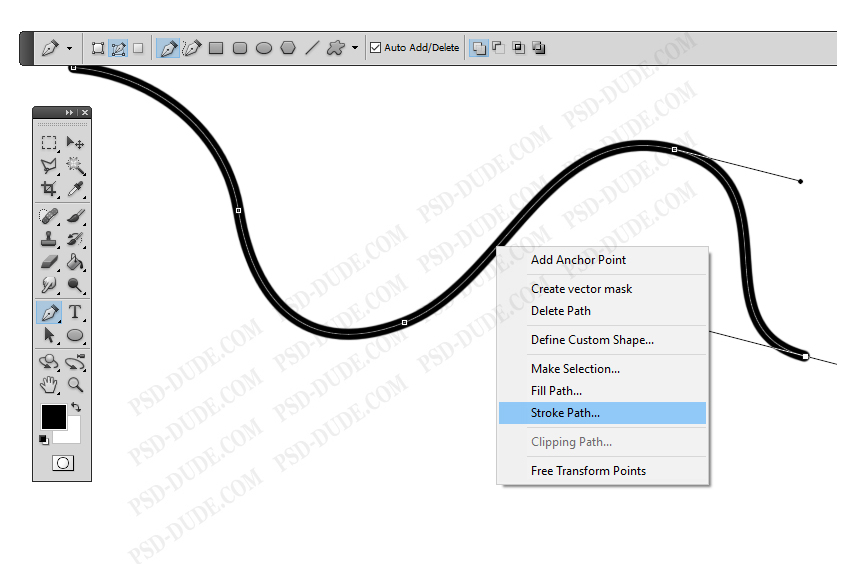
Select Paths and pick up the Pen Tool and draw a curved line. Using the Pen tool , drag the soft part of the curved line and shape it as you wish, and then release the mouse button.
To draw a curved line, right-click on the Work Path and select Stroke Path , then remove the Brush Tool from the list.
How to draw a curved line in Photoshop of newer version?
The new version of Photoshop offers new and useful tools and features. One of them is the new Curvature Pen Tool . If you click and hold the Pen Tool , you will see this option below its icon.
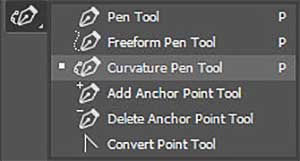
To use the new Curvature Pen Tool , click once to have Photoshop attach curved lines to the points you click. Double-clicking creates sharp corners. If you click on the line between two points, you can create an extra point and create a curved line.
After creating the curved line, you have to make a Stroke Path to draw the line.
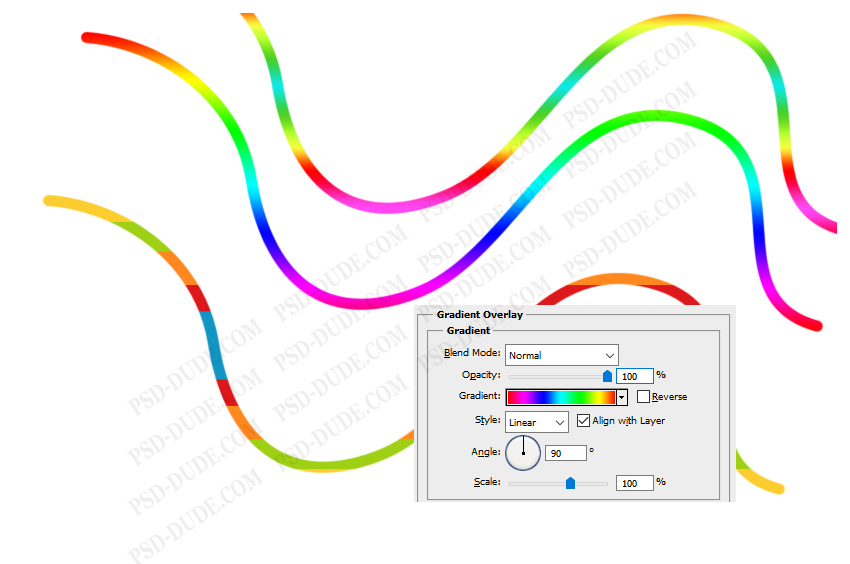
5. How to draw a colored line?
Add a layer to the layer where you drew the line. Use a Gradient Overlay layer to create colored lines.
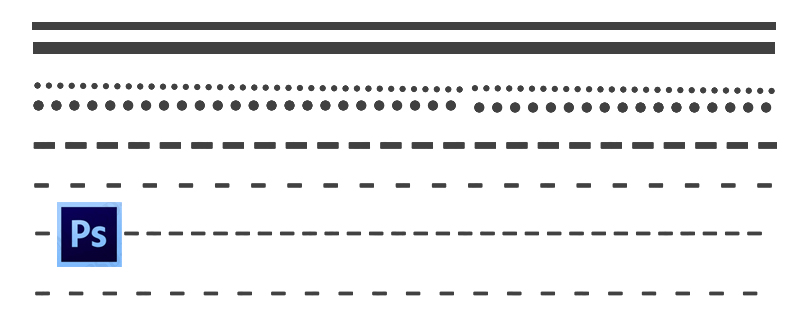
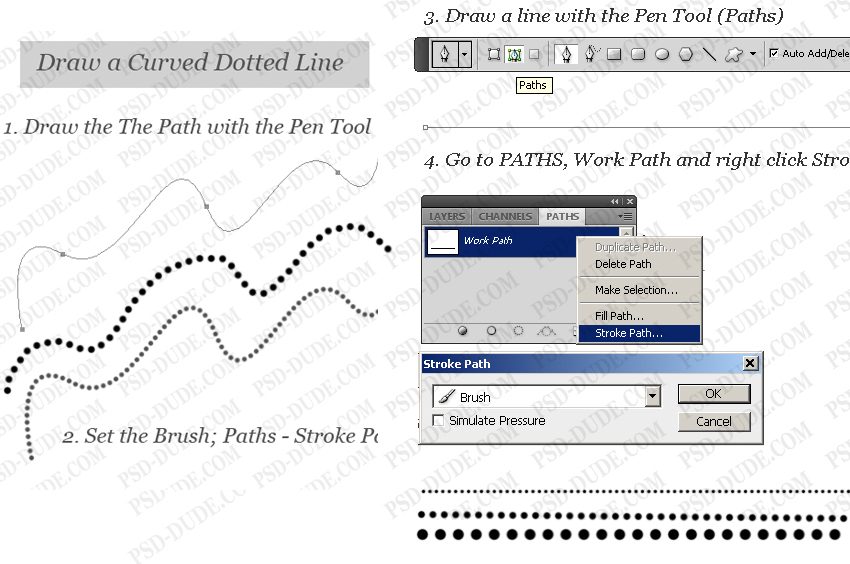
6. Draw a dotted line in Photoshop
Use a dotted line brush to draw the crease point.
7. Draw a dash in Photoshop
Use the dashed line brush to draw the dashed line.
8. Draw a continuous line in Photoshop
Press Control-T to extend the line. This resizing method only works for straight lines (horizontal and vertical lines).
9 – How to make a line thicker
If you are using the Line Tool , you must adjust the line thickness .
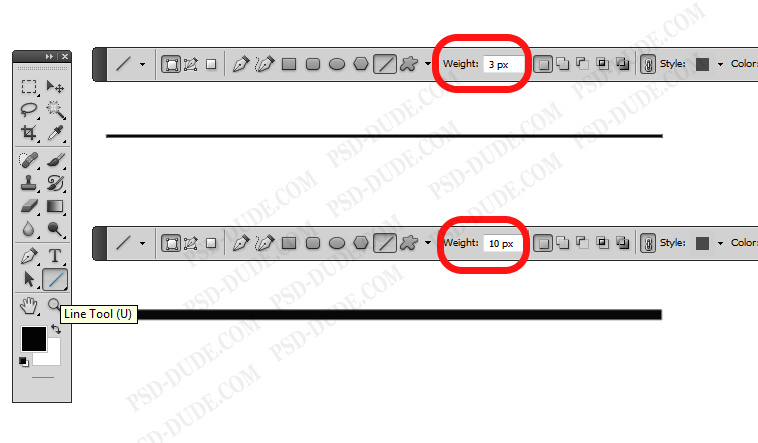
If you use the Brush Tool , you need to increase the size of the Brush Tool to make a line thicker .
How to thicken existing lines?
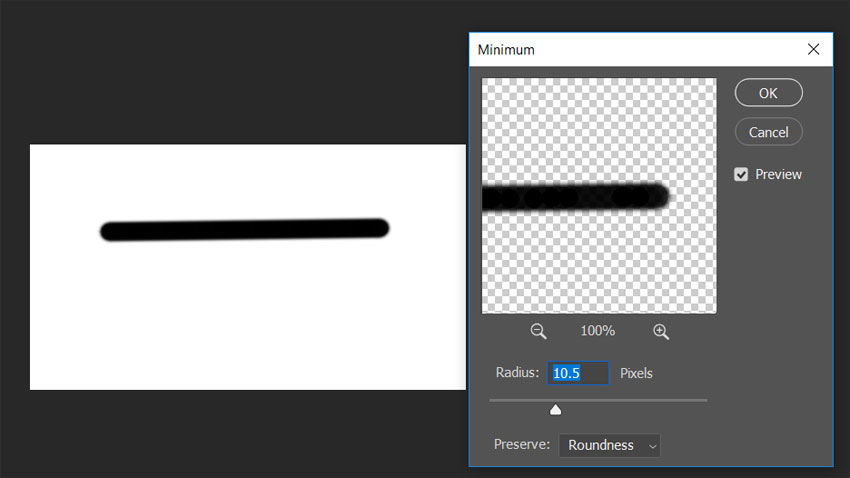
Go to the Filter section , then select the Other menu and then the Minimum filter . Using this filter, you can increase the size of the lines and make the existing lines thicker.
10 – Drawing parallel lines
Draw a straight line (horizontal or vertical) and press the Minimum filter to copy it in parallel.
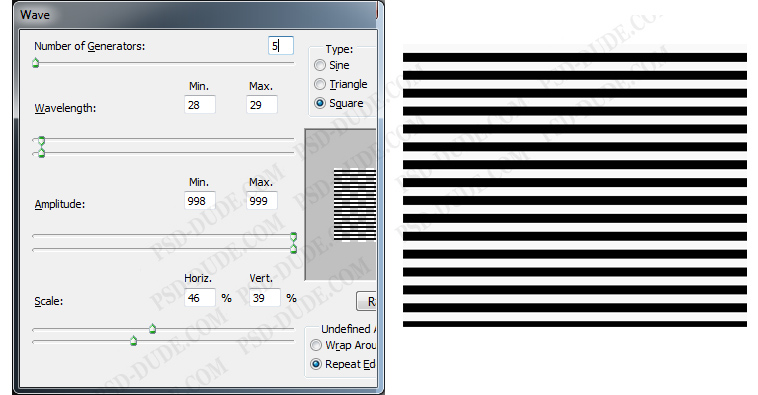
Short Tip: Create a new layer with a horizontal or vertical slope. Go to Filter> Distort> Wave and make these settings to draw parallel lines.
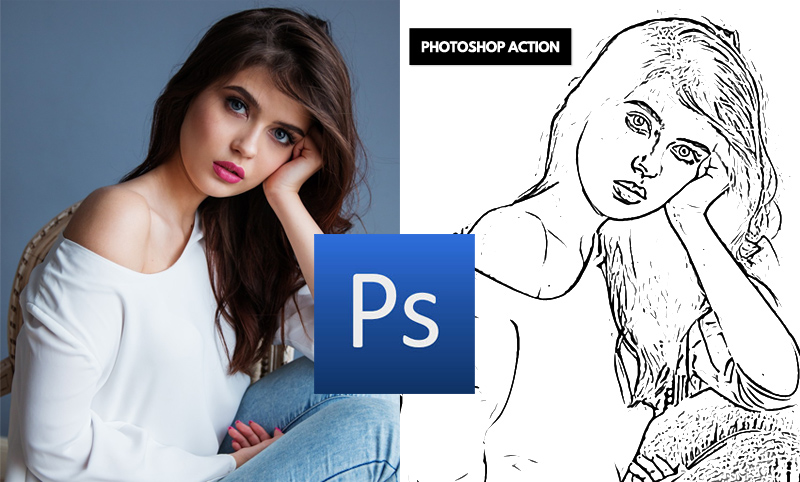
11- How to create smooth lines of finger art
If you want to turn the lines of a photo into drawing lines, you must use the Line Art Photoshop action .
You can use the Smoothing settings to smooth the brush lines .
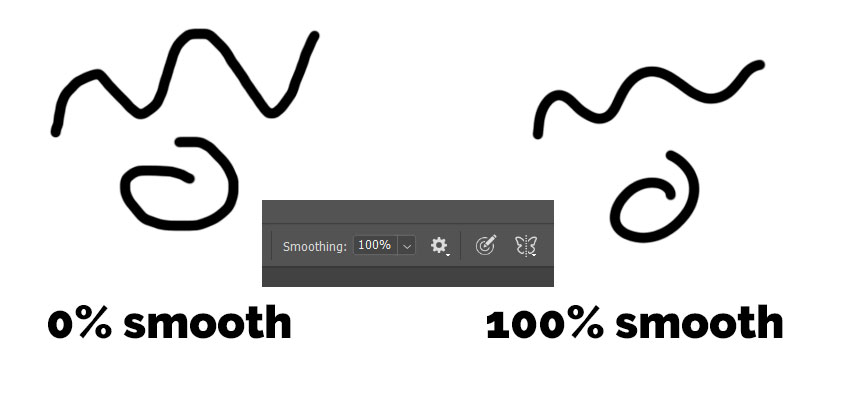
The first thing I noticed about using this feature is that there is a gap between where the cursor is and where the brush is painting.
This distance is part of Photoshop’s mechanism for calculating how smooth the curves and lines you draw should be. The way Photoshop draws a smooth curve is adjusted with options other than Smoothing . Click on the gear next to the Smoothing slider and you will see Smoothing Options :
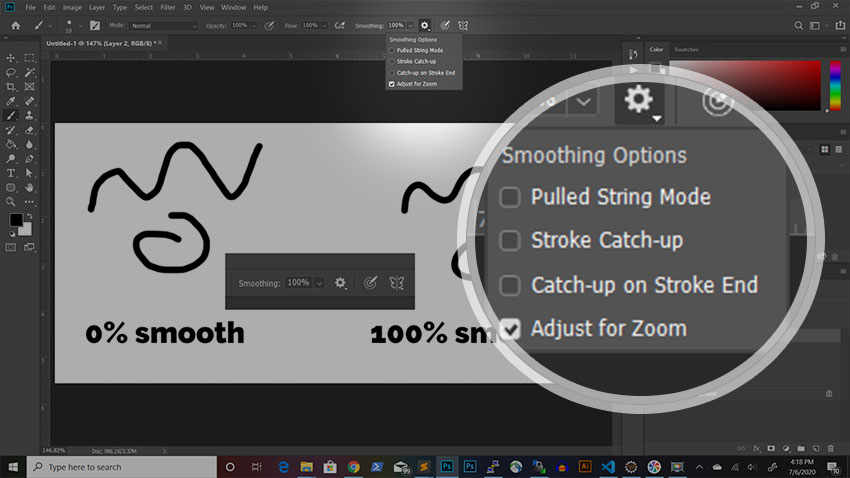
Pulled String Mode
To understand the function of this feature, imagine you attach a thread to a ball and dip the ball into the ink. You put the ball on the paper and pull the thread. The longer the thread, the smoother the lines you draw.
The Smoothing slider controls the length of the yarn and the resulting smoothness of the curves. Check this option and when drawing the length of the thread is shown in a circle around the starting point of the brush. The smoother the filter, the larger the circle.
Stroke Catch Up Photoshop
This option does not work at the same time as Pulled String Mode , so you must turn this option off first.
When you check the Stroke Catch-Up option and draw, you still notice the distance between the mouse cursor and the starting point, but this time the distance is shorter. So this mechanism causes the brush to reach the mouse.
So it’s like moving a brush like a rocket that tracks the mouse pointer and gets closer and closer to it. The more smoothing , the slower the rocket moves. Also, the closer the missile gets to the mouse pointer, the slower it gets.
This reduces the vibration of the brush movements and makes the curves smoother.
Catch-up on Stroke End
This option works the same as the Stroke Catch-Up option, except that when you release the click, the space between the mouse pointer and where the brush moves is filled.
Adjust for Zoom for straight lines
This option points to other Smoothing Options and, when enabled, adjusts the smoothing effect according to the magnification of the screen. This is very useful for large drawings where you change the brush strokes a lot and also for the brush strokes on the small details that you have magnified.