What Is Google Search Console and How to Use It — Complete Guide
Google Search Console is a free tool developed by Google that helps businesses optimize their sites for search.
This tool provides important information that is effective for SEO, such as your site’s ranking, keyword position, audience queries, number of clicks on links, and number of backlinks to your site’s content.
It also tells you about any problems with your site, things as crawl errors (i.e., Google can’t access a page on your site), and guides you (i.e., Google has banned your site for violating one of its guidelines). Fined). It even tells you if your site is mobile-friendly or not, and… For these reasons, Google Search Console is one of the essential items in your SEO toolbox.
How to set up Google Search Console on your site?
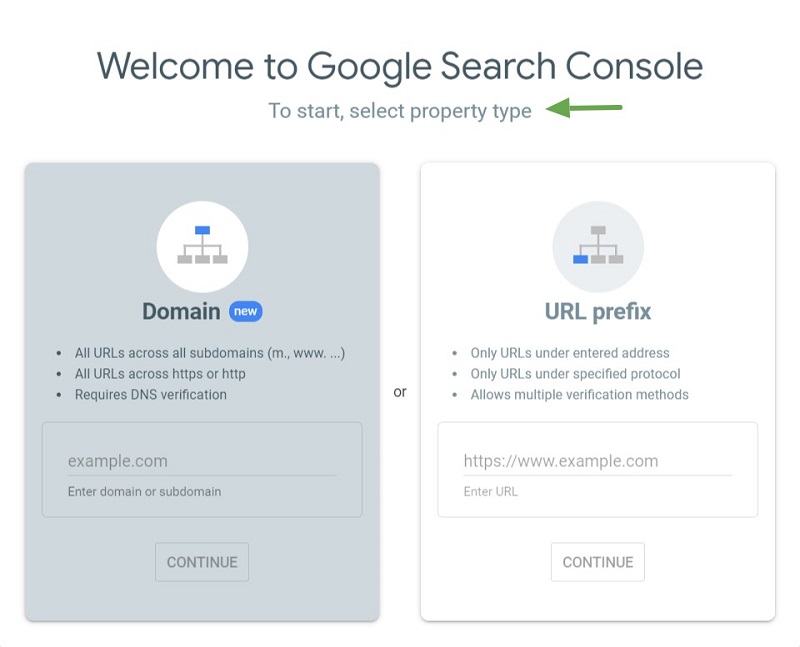
The first step is to create a Google Search Console account. You can log in using your Google Analytics account.
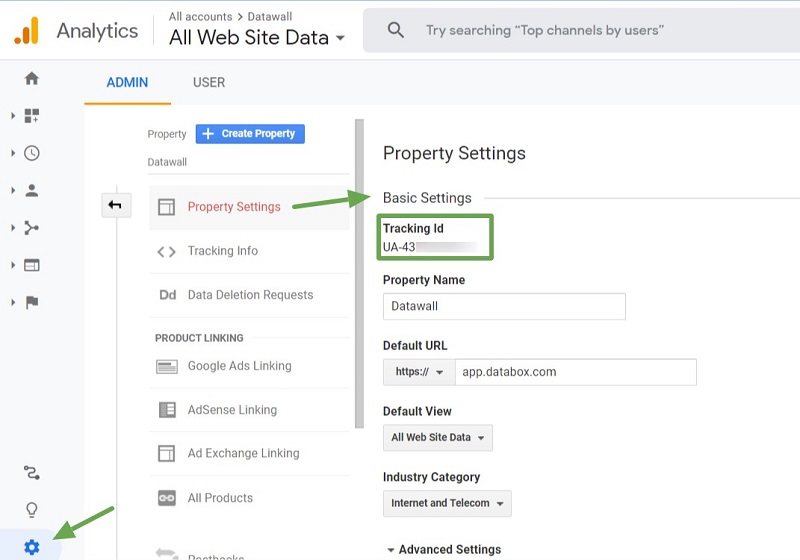
You must verify that you own the site. Preferably, verify ownership using your Google Analytics tracking ID. To find your Google Analytics tracking ID, sign in to your Google Analytics account and go to the “Feature Settings and Basic Settings” Tracking ID manager.
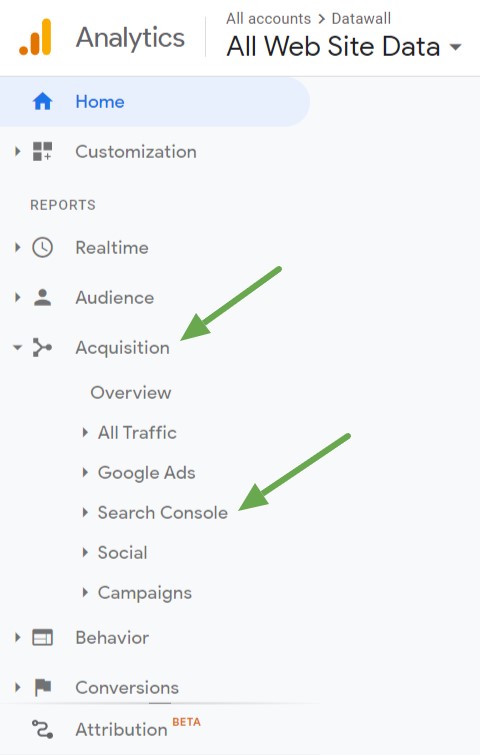
As simple as that, the next time you log into your Google Analytics account, you can also access the Google Search Console through the sidebar.
The principles of using Google Search Console for search engines
Now that you’ve set up Google Search Console, here are ten essential things you can do in Google Search Console to help you understand your website’s performance in organic search and help Google crawl and index your site. activate
1- You will find out what keywords your site is ranked for.
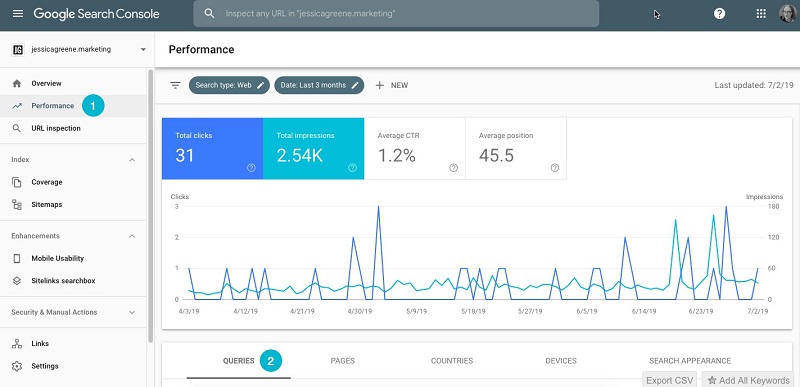
The Google Search Console “Performance” report contains much essential data you should rely on for SEO. One of these keywords is what your site and pages rank for, which you can see in the queries section.
To see your keywords in Google Search Console, log in to the tool, click “Performance,” and scroll to the bottom of the page.
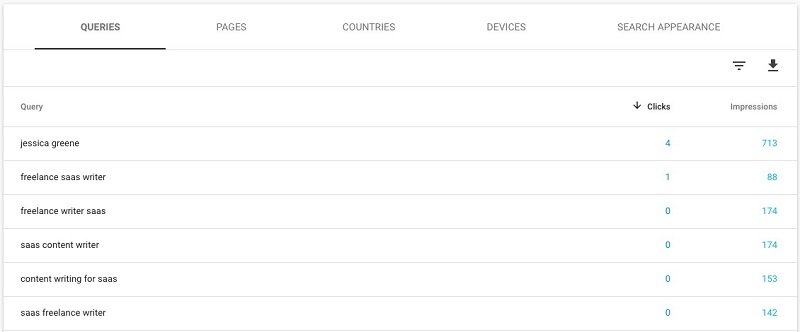
The “queries” tab will be selected by default. Below, you can scroll down the list and view the page to see each keyword in your website’s search results.
If you want pages specifically to rank for keywords, you need to take a few more steps. First, click on the “Pages” tab and then select the desired page to review.
Now, click on the “queries” tab again. Here you will see all the keywords for which the specific page you selected in the last step is ranking.
If you want to search for keywords on another page, go back to the “Pages” tab, deselect the currently selected page, select the next page you want to view, and click “queries” again.
2- How users interact
Above the chart in your performance report are four metrics: Total Clicks, Total Impressions, Average CTR (Click Through Rate), and Average Position.
Total Clicks shows the number of times users clicked on your search results during the selected time.
The total number of impressions is the number of times someone viewed your search results in the selected time. Average CTR is the number of clicks divided by the number of impressions.
When you first open the performance report, the data displayed in this section is data for your entire website. But if you click on the “Pages” tab and select a page, the report will refresh to show the data for that page.
You can select any of these criteria. When one is selected, the background is displayed in color. If not selected, it will be displayed as white.
When you select a metric, Google Search Console displays data for that metric in the performance and table graphs below.
If you’re on the “queries” tab, you can now see how many times people have viewed your results for specific search engine keywords, showing how many times they’ve clicked on your results and your overall click-through rate.
3- You will find out where your pages rank in specific keywords.
The last metric in the performance report is the average position. Position refers to where you rank in search results for specific keywords. If you are the top result, your position is 1. If you are at the top of page two, your position may be 11.
“Average Position” is the average (sum of positions divided by the total number of keywords) of your positions for each keyword your site ranks for.
If you filter by page, this is the average position for keywords for which a particular page ranks. For this reason, the average position is usually not the most useful data. However, if you go to the table below the chart, it will show you where you rank for each keyword. And this data is incredibly useful.
Using this data, you can see where each page of your site ranks for specific keywords, monitor ranking changes, make adjustments, and optimize your site.
4- See how many pages of your site are indexed in Google.
Using the “Coverage” report of Google Search Console, you can see exactly how many pages of your site Google has indexed. Click on “Coverage” and then select the “Valid” section.
The number of pages you submitted via XML sitemap is comparable to the number of pages indexed by Google, especially for large sites. This is one of the most important steps to determine if your site is crawling, indexing, or publishing content.
5- Submit a page to be indexed.
If you find that Google does not index a certain page of your site, you can submit it for indexing using the “URL Inspection” tool:
- Click on “Inspect URL.”
- Paste the URL you want to submit into the search bar and wait for Google’s test to complete.
- If Google doesn’t find an error, click “Request to be indexed.”
It may take a few hours or days for Google to re-index that page.
In conclusion
Google Search Console is an indispensable tool for optimizing your website’s SEO performance. By providing insights into keyword rankings, audience interactions, indexing status, and technical issues, it empowers you to enhance your site’s visibility on search engines. Proper setup and regular use of its features, such as performance tracking, keyword analysis, and URL inspection, can help ensure your site ranks higher in search results and delivers a better user experience. Start leveraging Google Search Console today to stay ahead in the competitive online landscape!
FAQ
What is Google Search Console?
Google Search Console is a free Google service that lets webmasters check indexing status, search visibility, and technical issues for their website in Google Search.
How do I start using Google Search Console?
Sign in with your Google account, add your site as a property, and verify ownership (via DNS, HTML file, meta tag, or linking Google Analytics) to access reports.
What key reports does Search Console provide?
It offers Performance (clicks, impressions, CTR), Index Coverage (indexed pages and errors), Enhancements (mobile usability and Core Web Vitals), Sitemaps, and Security/Manual Actions to help diagnose and optimize your site.