
How to Reset Network Settings in Windows 10
In this tutorial, you will learn how to reset network settings on Windows 10. Resetting the network is the last resort people use to fix their network connection problems.
The steps are straightforward. To do this, follow the steps below and apply them accordingly.
Reset Network Settings In Windows 10
- Select Settings in the Windows Start menu, then click Network and Internet.

- To make sure you are in the Network Status section of Windows, select Status in the left-hand list, then scroll down to Network Reset.
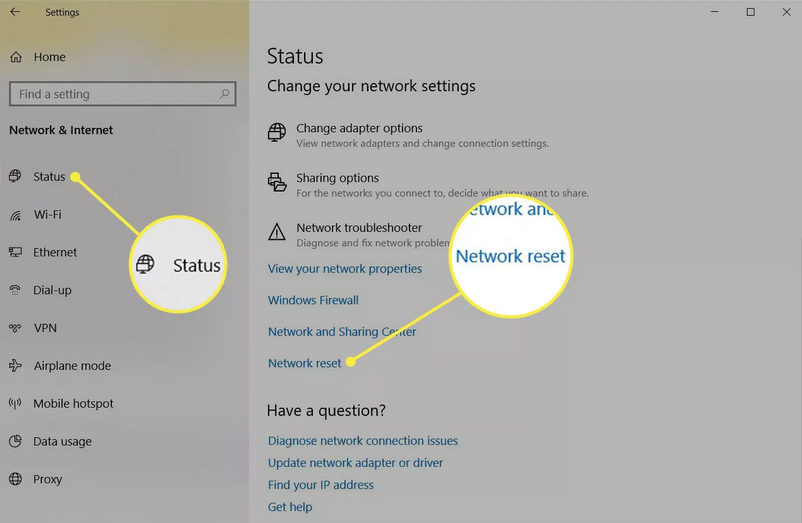
- Click Network reset. In this section, you will see the Windows reset information. Read it and click Reset now if you are sure that the operation will continue.
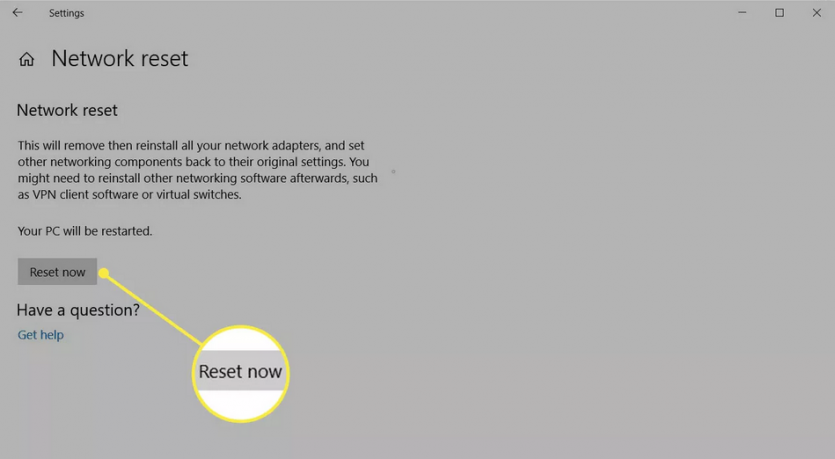
- In the window that opens, select Yes. It will start the reset process, and your computer will restart.

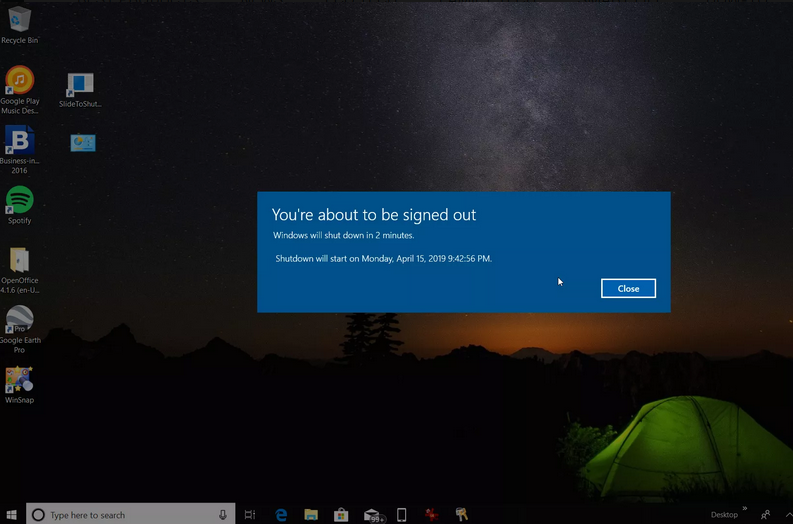
- You will receive a warning message when the computer tries to boot again.
- After the computer restarts, you will notice that your internet connection is not active. Your network card has been reset, and its previous connection can no longer be maintained. Select the Network icon, find the network you want to reconnect to, and click Connect.
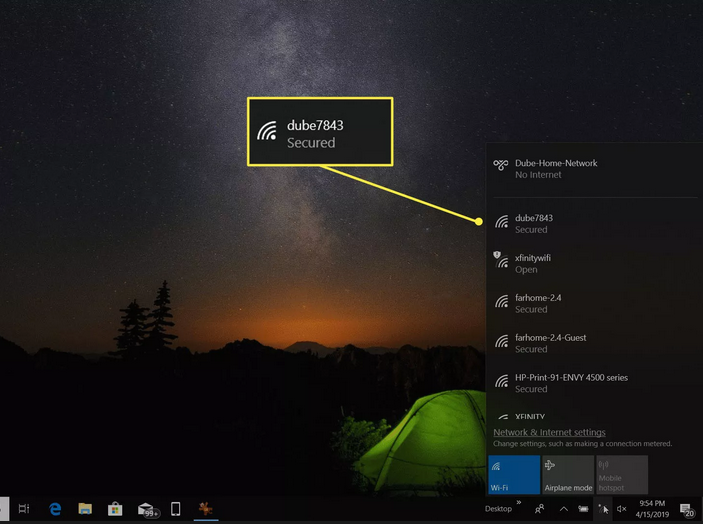
- If your TCP / IP settings are set to automatic detection, the network connection should detect the appropriate network settings and connect to the Internet without any problems.
What does a network reset do in Windows 10?
Resetting network settings in Windows 10 should be your last resort. When you start resetting your network, all network adapters installed on your system will be removed and reinstalled.
Microsoft initially introduced the ability to reset the network after the Windows 10 Anniversary Update (version 1607) was released, so people could quickly fix network problems that arose after the update. This solution still helps people solve network connection problems.
Network reset also resets the network component settings on your system to factory defaults.
These components are as follows:
- Winsock: An interface for applications that manage incoming and outgoing requests to the Internet.
- TCP / IP stands for Transmission Control Protocol / Internet Protocol and allows all network devices on your computer to communicate over the Internet.
Remember to write them down if you have already customized settings, as resetting the network will remove them.
However, most people set these components to identify their settings, so resetting the network automatically is usually no problem.
FAQ
When should you reset network settings?
If you face persistent issues such as no internet connection, misconfigured adapters, or network-related errors despite troubleshooting.
How do you reset network settings in Windows 10?
Go to Settings → Network & Internet → Status → Network reset; confirm the reset and restart your PC.