


Top Photoshop Special Effects that all Professionals Should Know!
With the help of this command, you can apply very beautiful effects such as shadow, border, gloss, satin and… effects in the layers in each layer panel and have amazing and beautiful images.
In this post, we want to introduce you to 10 very interesting and artistic effects of Photoshop. Of course, all of these effects are in the Layer Style category in Photoshop.
Learn how to make images look better in Photoshop
1- Drop Shadow :
With this effect, we can apply a shadow to the desired layer. In this painting portions of the Angle of the shadow created and customizable with the option Distance from the shadow of the layer set and the option Size can also be applied fading shadow set.
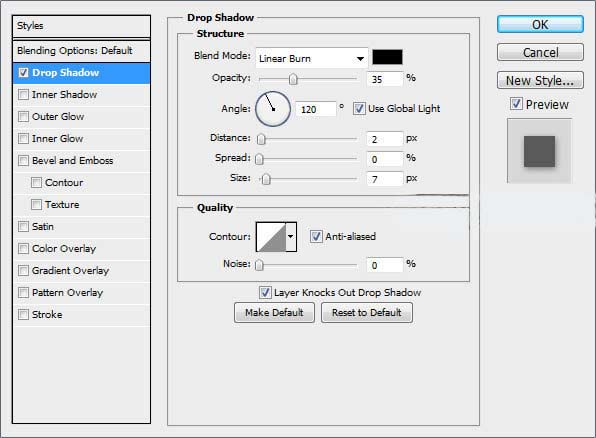
1. First, open the Drop Shadows settings window .
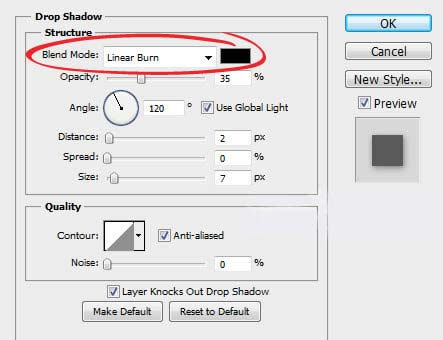
2. At the top of the window to Drop Shadows , dropdown menu Blend Mode to view Myknyd.dr the Blend Mode a box of color that specifies the color shade. Black is by default, but by clicking on it, you can choose the color you want.
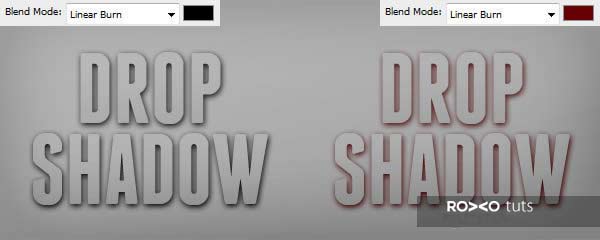
3- In the image below, you can see a text that we have given a black shade once and a crimson shade again. You can see the difference between the two texts and their shadow. So a small change in the color of the shadow can have a significant effect.
2- Inner Shadow effect:
The effect inside the shadow is used like the shadow effect to create a shadow, the only difference is that in this case the created shadow will be inside the desired layer, which has settings similar to the previous effect.

3- Outer Glow effect:
This effect can create radiance around the desired layer. The effect created in this state is similar to the state in which an object is placed in front of a light source and light reaches our eyes from around it. By clicking on the colored square in the Structure section, we can adjust the color of the created brightness and even change it from monochrome to gradient. Other customizable options for this effect include Spread to adjust the created luminosity and Size option to adjust the luminosity. In this effect, by adjusting the Technique section in Softer mode, softer edges will be created and in Precise mode, sharper edges will be created. The settings for this effect are as follows.
4- Inner Glow effect or inner glow:
This effect will act almost like the Outer Glow effect, and the difference will be in the application of radiance to the selected layer. Create a new layer and double click on it. Select the Inner Glow option. As you can see, this page consists of three parts.
- The first part is related to Blend mode settings .
- The second option is Opacity, which increases or decreases the transparency.
- By clicking on the colored square (blue) or the color spectrum, you can change the color of the overall structure of the drawn box.
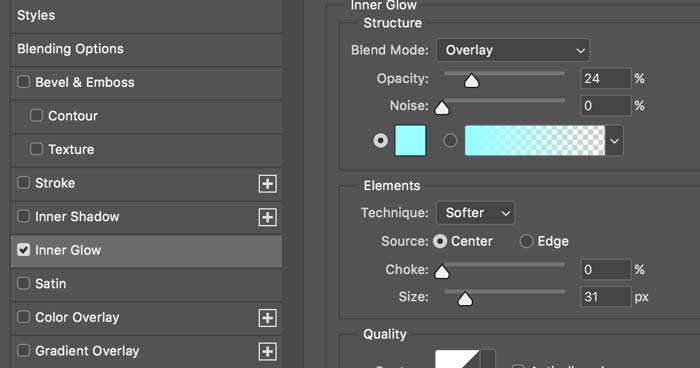
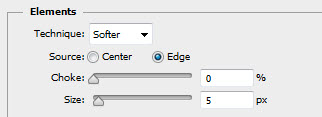
The next part is Element .
The first option is technique , which has 2 subsets. In this effect, by adjusting the Technique section in Softer mode, softer edges will be created and in Precise mode, sharper edges will be created. The Choke option also leads to the development or blockage of the blurred border of the shadow and the layer, so that if this percentage is low, the border between the shadow and the layer is more uniform and with a lower slope, and if this percentage increases, The slope of the changes will be large and the border between the shadow and the layer will be bolder.
Size: The size is related to the size of the created shadow, which can fade or increase or decrease the shadow evenly compared to the above 2 options.
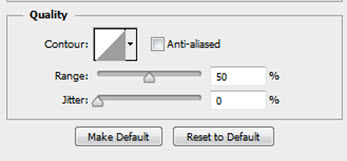
The next part is Quality. Quality section: Contour option has a special task in each effect. In the Outer Glow effect , the choice of alignment affects the style and type of light. For example, for Linear Contour mode, which is also the default mode of Photoshop, the light is produced uniformly and linearly, it is recommended to look at other levels and try these curves.
By activating the Anti-Alias option check box, the shadow corners of the box will automatically look a little smoother.
Among these options, you will often come across the term Jitter . This setting causes the entire brush to change.
5- Bevel And Emboss effect or external and prominent effect:
It can be said that the most interesting effect among the Photoshop effects is Bevel And Emboss ,
which applies volume to the selected layer and shows it raised or sunken.
In the Structure section, this effect is determined by the Style option, how to apply the volume,
which is in 5 modes: Outer Bevel (volume to the outside layer), Inner Bevel (volume to the inside layer),
Emboss (volume inside and outside layer), Pillow Emboss
(Volume on both sides can be adjusted by creating a depression in the middle) and finally Stroke Emboss (creating volume on the edge of the selected layer).
In this section, with the Depth option, the intensity of creating a volumetric effect,
and with the Size optionThe size of the created volume is adjusted softly with the Softer option .
If we want to have more settings on the created volume, this can be done from the Shading section .
Along with this effect, there are 2 options, the Contour option is used to adjust the volume edges and the Texture option is used to create texture on the created volume.
6- Satin effect or satin effect:
This effect, as its name suggests, mimics the reflection and electricity effects of satin fabric. Important settings for this effect are Distance to adjust the distance and Size to adjust the size of the effect. From the Angle section , the effect angle can be adjusted.
Add a satin effect to a layer
To add satin one layer is sufficient in the panel layers, layers that would effect applied on it to select it. Then at the bottom of the panel, click on the fx icon and select satin . To open the layer style window as follows.
Click on the satin option to activate and apply.
Note: For each layer, we can apply more than one effect at a time.
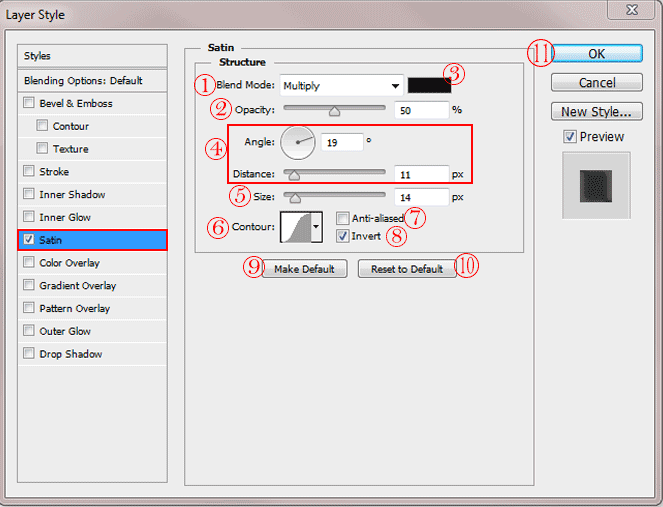
To add satin, we set the following properties:
- Blend mode feature : In this section, we set the blend mode .
- Opacity property : Slightly lower, we can set the opacity, which is the amount of color overlay .
- Color selection: In addition to the blend mode feature , we can also specify the satin color applied.
- Angle and distance properties : In the next section, we can change the angle and distance of the atlas, which is the same angle and distance. We can also do this outside the layer styles window by dragging and dropping on the main image.
- Size property : Specifies the effect size . The larger it is, the larger the satin size .
- Contour property : We can change the contour to determine the type of satin applied.
- Anti-aliased feature : If this feature is enabled, Photoshop will automatically gently color the edges of the area to make it even.
- Invert feature : By applying a satin effect , some parts of the image of this effect have been applied on them and some other parts have been protected. If we tick the option, instead of two changes: the parts that effect on them were not applied to them applied and vice versa.
- Make default button : If we have made the settings the way we want to apply this effect in the future, whenever we see the same settings for the first time, we click the make default button .
- Reset to default button : If we have changed the settings and now we want to return to the first state, click the reset to default button.
- Now we can do ok .
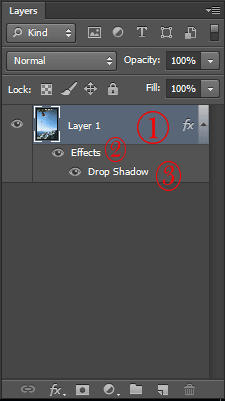
Divide the image layer into 3 parts, after adding satin:
The first part is the layer itself, which contains the original image, which appears next to it with an fx symbol , and by double-clicking on it, the layer styles window opens again, and we can see and change all the styles we have applied. Let’s. There is also a small arrow that we can use to show or hide the list of applied effects .
The second part contains the word effects and an eye mark next to it. Clicking on it will show / hide all the effects we have applied .
The third part contains a list of all the effects we have applied to the layer. We can show / hide any we want.
7- Color Overlay effect
With the help of this effect, the desired color can be applied to the entire desired layer. This effect does not have many adjustments and the most important adjustment is the same color selection and change that is done by clicking on the red square.
8- Gradient Overlay effect (gradient):
This effect, like the previous effect, is used to apply color to the entire layer, with the difference that in this effect, instead of applying a specific color, a slope of the desired colors can be applied in different modes. From the settings of this effect, we can select the desired colors that can be changed by clicking on the rectangle in front of the Gradient option , and select how to apply the selected colors in linear, round, angled, reflective and diamond modes. From the Angle section, the angle of color gradient and from the Scale section, its size will be adjustable.
9- Pattern Overlay effect or coating pattern:
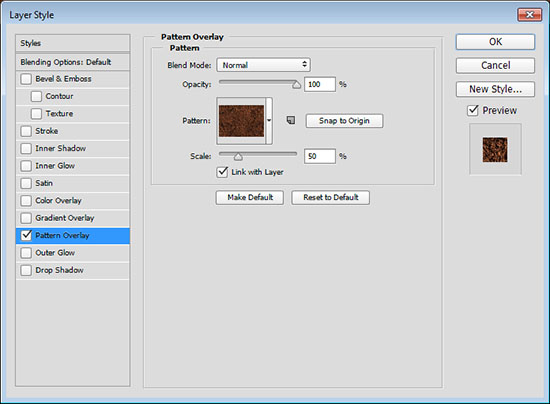
The function of this effect works the same as the previous two effects, with the difference that in this effect, instead of applying color, texture and design are applied on the entire selected layer. In this effect, the texture to be applied to the layer is selected from the Pattern section , and its size can be adjusted from the Scale section . In the Pattern section, in addition to being able to select existing textures, by clicking on the triangle on the right, you can call and use different types of Photoshop-defined textures. The way to create this effect is as follows: Open a page and customize a text in the middle of the type box do . Then double click on the layer and select the Pattern Overlay option.
Blend Mode : Blend modes are listed in the Blend Mode , each of which directly affects your image and design.
Set to Normal or Multiply by default , you can select other options as well.
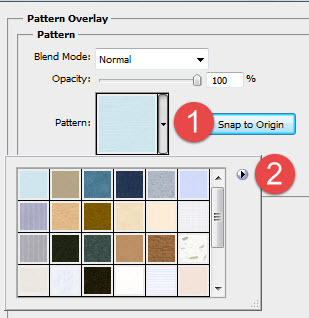
The second option is Opacity, which increases or decreases the transparency. From the pattern section, you can apply your desired pattern to text or a page. Click on the small triangle marked 1 on the right and select a pattern. You can also access other patterns through Triangle 2 . You can create a template yourself and add it to the default list via the following method.
1. Open the image you want to use as a template and select part of it with the Rectangle Marque tool in the toolbar.
2. From the main menu (Menu Bar) and in the Edit tab, select the Define Pattern option.
3- In the opened window, save the template with the desired name.
This template is added to the other templates in the Pattern Overlay effect box . You can increase or decrease the size of the texture
via the Scale option .
10- Stroke effect or round line effect:
With the help of this effect, which is also widely used, a margin of the desired thickness can be created around the desired layer. This margin may be monochrome ( color ), Shybrng ( Gradient ) or tissue ( Pattern ) applied from the Fill Type is adjustable.
From the Size section, the size and from the position section,
the place of application of the border (outwards, inwards or in the middle) can be adjusted. The steps to apply this effect are as follows.
Step 1: Add a round line effect to the text
For example, we write the phrase style on a black background with a bold font :
In the Layers panel you will see a background and a text layer Click on the text layer to select:
To add a round line, click on the layer effect icon in the Layers panel:
Now select Stroke from the menu that appears :
In the window that opens, select the color of the round line in the color swatch section:
Then select a light blue color for the round line from the color selection window:
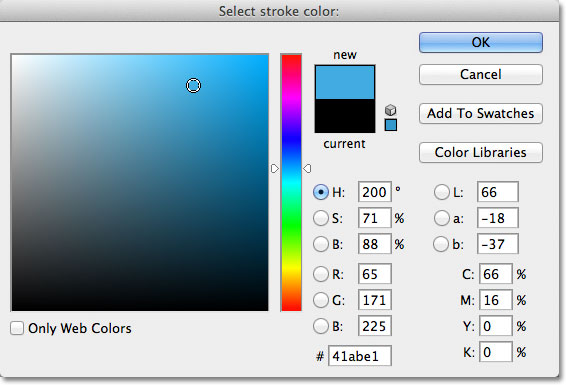
You can set the size of the round line Size = 12 px :
And finally, after applying the effect, our writing is as follows.
All these effects can be seen after applying the fx symbol in the continuation of the layer name in the Layers panel,
which can be viewed by clicking on the triangle next to it, and by clicking again in the aggregated form,
and if necessary, you can click on the eye icon. On the left side of them enabled or disabled them.
We hope we have shared the necessary information to resolve your ambiguities in this regard. Please share your suggestions or questions with us.