Sharpen or sharpen blurry images with the help of Photoshop Unsharp mask command
Today you will easily learn how to easily clarify images with the Unsharp mask command in Photoshop. Unsharp Mask takes its name from the black room technique in photography.
There, a copy of the original photo that is “unsharpened” is applied as a mask to the original photo. This blurring method actually creates a clearer image.
Photoshop Unsharp Mask filter works the same way. The only difference is that the whole process is now digital, and Photoshop handles all the confusing behind-the-scenes issues.
In fact, to use the Unsharp Mask filter, you do not need to know anything about Unsharp Mask. All you need to know is how to drag multiple sliders on the image to get great results.
In this tutorial, you will learn how each of the three Unsharp Mask sliders works and what settings are best for your image. And finally, we will make a final point to avoid color problems and make the image look great!
In this tutorial, we will use Photoshop CC, but you can also use Photoshop CS6.
How to sharpen images with Mask Unsharp
Before we learn how to sharpen a photo with Unsharp Mask, it is important to know that sharpening an image is not the same as setting the focus. Photoshop can’t go back and change the focus of the camera lens or remind you to use a tripod. The image will always be blurry, and no matter how much you use sharpening, it will not improve the blur.
Sharpening means sharpening the focus of the image, and this is what you will learn in this tutorial.
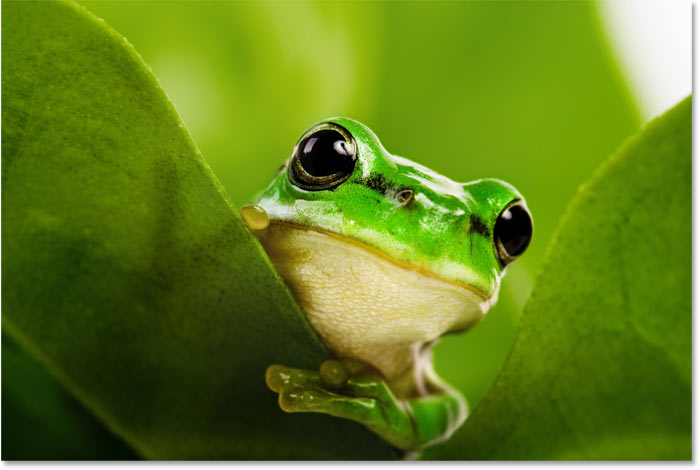
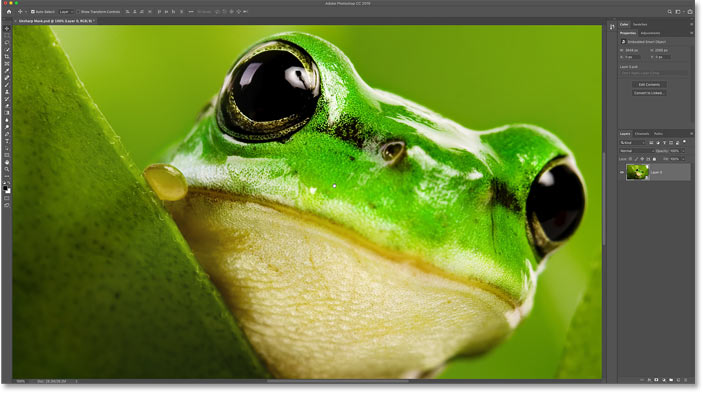
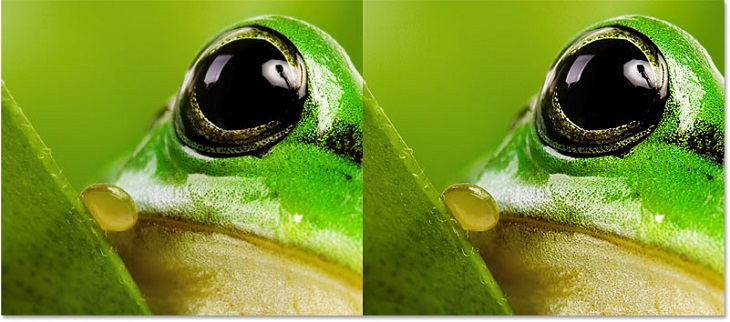
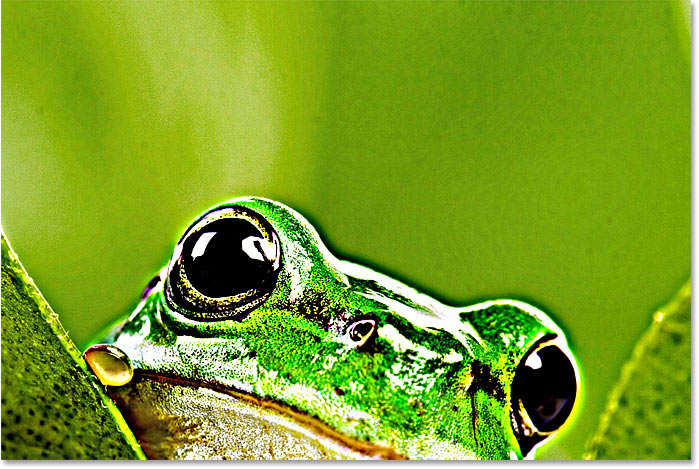
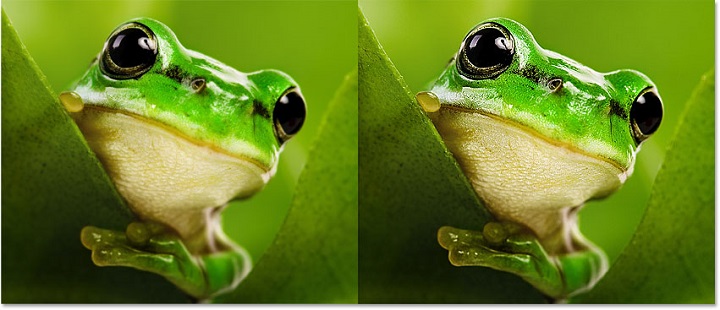
We use the following image for training. Because the macro image and depth of field are shallow, parts of it are blurry, but there are many details in the focus areas that can be sharpened, including areas around the frog’s eyes, skin texture, and leaf edges:
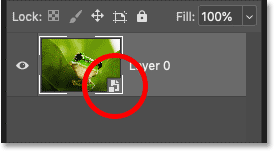
Step 1: Turn the image layer into a smart object
Start by converting the image layer to a smart object. By doing this, you can apply the Unsharp Mask as a smart filter, which has two important advantages. First, it will maintain the sharpening effect if you need to make changes. And second, it makes it easy to change the composition of the sharpening effect, which we will do in the final step.
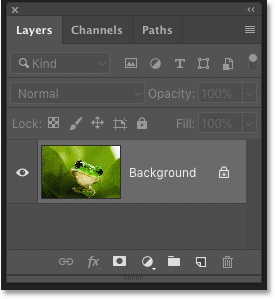
In the Layers panel, we see the image in the Background layer. Photoshop can only apply sharpening to one layer at a time, so if your document contains multiple layers, you should merge them into a single layer before sharpening:
To convert a layer to a smart object, click the menu icon at the top right of the Layers panel:
![]()
Then select from the Convert to Smart Object menu:

A smart object icon appears at the bottom right of the thumbnail, telling us that the image is now inside a smart object:
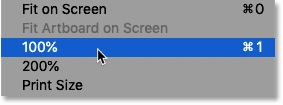
Step 2: Magnify up to 100%
The best way to judge a sharp image is to view it at 100% zoom. In this way, each pixel in the image occupies exactly one pixel on the screen, allowing for a more accurate display.
To zoom in, go to the View menu in the menu bar and select 100%.
You can also zoom in by pressing Ctrl + 1 on Windows and Command + 1 on Mac:
Then while zooming in, press and hold the space bar to temporarily access Photoshop’s Hand tool, move the image, and place the Sharp area in the center of the frame. When you have done this, release the spacebar:
Step 3: Select the Unsharp Mask filter
Go to the Filter menu in the menu bar, first select Sharpen and then Unsharp Mask:

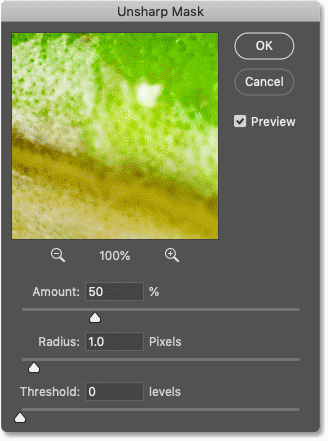
Unsharp Mask dialog box
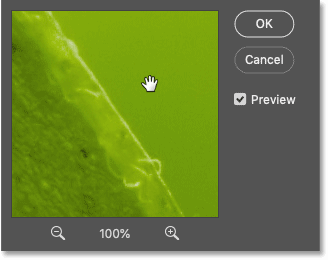
After performing the above steps, the Unsharp Mask dialog box will open with a photo preview window at the top of the screen and three sliders (magnitude, radius and threshold) below it. We’ll look at three sliders, but first let’s look at how to use the preview:
How to change the view in the Preview window?
If you view the image with a zoom other than 100%, the Preview window provides an easy way to check the sharpening of different parts of the image at 100%.
To move the preview to different parts of the image, click inside the preview window and drag.
You can also click directly on the image to instantly place that point in the center of the preview window:
How to enable and disable the Unsharp Mask preview?
While the Unsharp Mask dialog box is open, Photoshop shows you a live preview of the image using the Current, Radius and Threshold settings. You can enable or disable the preview to compare your settings with the original non-sharpened image.
To enable Preview, check the box next to it. With a signless preview, you will see the original image and by checking, you will see the Sharp effect.
You can also turn the preview on and off by pressing the letter P on the keyboard:
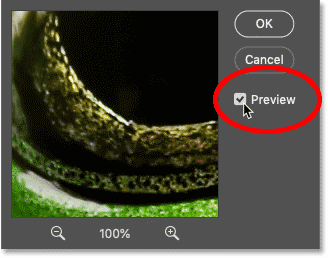
Also, to preview, click inside the window and hold down your mouse button to hide the Sharp effect and see the original image. Then release the mouse button to see the sharpened version:
Step 4: Increase the Amount slider to increase the edge contrast
Now that we know how to preview the Sharp effect, let’s take a look at each of the three sliders used to sharpen the image, starting with the Amount slider.
Sharpening the image means increasing the contrast along the edges, which makes the light edges lighter and the dark edges darker. The more we increase the contrast of the edge, the clearer the image. Edge contrast is controlled by the Amount slider:
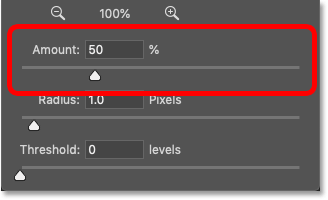
Default Amount
The default value is 50%, increasing the edge contrast by more than 50% makes the image clearer. But depending on the size of the photo and the amount of detail, there may not be much difference.
Here a comparison is shown with the original non-sharpened image on the left and the sharpened image with a default value of 50% on the right.
Because the image has a high resolution, the default value only sharpens the image slightly. You can see an increase in contrast around the frog’s eyes, skin texture and along the edge of the leaf:
Increase Amount
Pulling the slider to the right makes the edge contrast much stronger.
Increase the amount to a maximum of 500%:
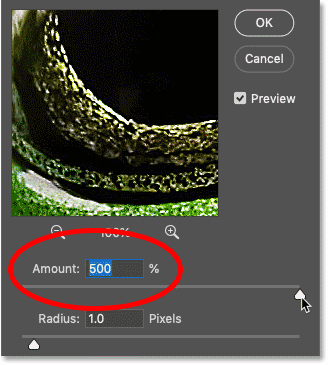
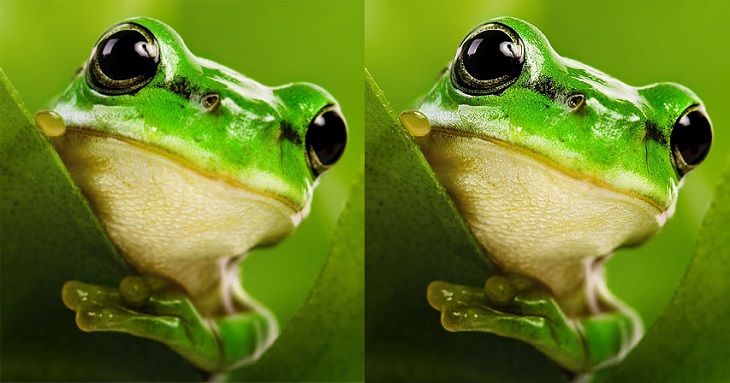
In high contrast settings, the bright parts of the edges become too bright and many pixels become pure white. The dark parts of the edges become too dark and even pure black. These results not only show a very sharp image, but also mean that we lose detail in highlights and shadows.
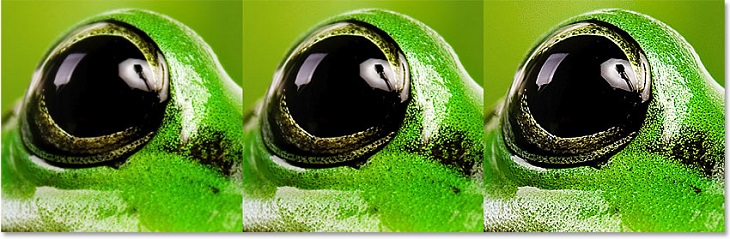
Look closely at the frog and the surrounding skin tissue. The main image is on the left. In the middle image the result is a little clearer using the default value of 50%. On the right, the sharpened version using the value is 500%:
How to set the correct amount (Amount) for sharpening
If the default value is 50% too fine and the maximum value is 500% too strong, what is the correct value to use?
Setting the correct value depends on the size of the image, the amount of image detail and the output of the target (print or web). But you can use the following instructions to help you choose the right amount:
- Printing: For large, high-resolution images, the Amount value of 150 to 200% is recommended for printing.
- Email / Web: For smaller, lower resolution images that are shared online, the Amount is 50% to 70%.
Keep in mind that the print version of the image will always require more sharpness than the image viewed online. This is because the pixels are much smaller in print than on a computer screen, so they need more sharpness to achieve the desired overall result.
Of course, to see the effect of Amount, we have to combine it with the other two settings of Radiation and Threshold Unsharp Mask filter. And to better see the result of these two settings, we set the Amount value to 500%.
Step 5: Increase the Radius slider to adjust the edge width
So far we have learned that the Amount value controls the contrast of the edge. The Radius value in the Unsharp Mask dialog box controls the thickness of the edges. Radius specifies how many pixels are drawn outside the edge that should be affected as part of the edge and the amount of Amount.

With a default radius of 1 pixel, only one pixel on each side of the edge (one pixel on the light side and one on the dark side) is affected. But increasing the Radius to 10 pixels increases the edge thickness to 10 pixels on both sides.
Thinner edges reveal higher contrast than lower Amount values, while thicker edges make it clearer. But if you increase the Radius too much, an aura appears along the edges, which are significant signs of sharpness and something you want to avoid.
Compare different values of Radius
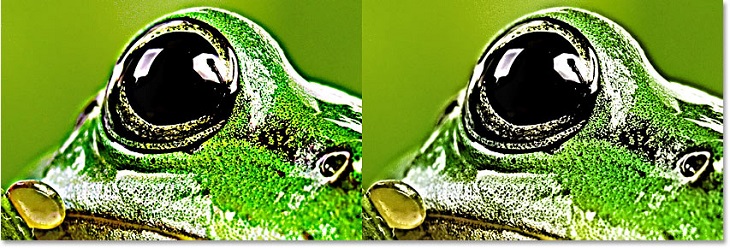
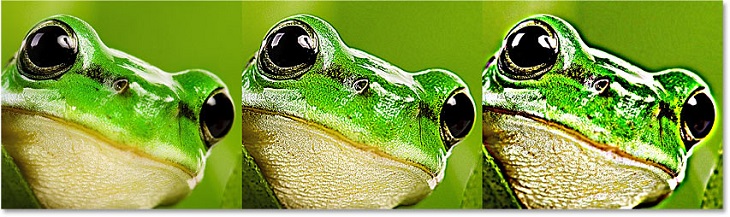
Here is a comparison with three different Radius values. The first image (left) starts with a default value of 1 pixel. Note that while we can see the increase in contrast with the Amount setting (currently at 500%), the image still looks fairly clear.
In the second image (center), we increased the radius to 5 pixels. Not only does the texture of the frog’s skin become more brittle and sharp, but lines or halos begin to appear. There is a dark green design above his head and light lines around his eyes. This can sometimes create the illusion of extra detail, but all we really do is distort the image.
In the third example (right), we increased the value of Radius to 20 pixels. This means that the edge thickness now expands to 20 pixels on each side, and the halos are now clearly visible:
How to select the correct Radius value to sharpen
Like the Amount value, setting the Radius value depends on the size of the image, the subject, and whether the image is printable or web-sharp. Ideally, set the Radius value below the value where the halo begins to appear.
Keep in mind that in print, the pixels are smaller than on a computer screen, so the same amount of Radius creates edges that are thicker on the screen than in print. Use the following instructions to find the best settings:
- Print: When sharpening to print, try a Radius of 1 to 2 pixels. For very large images, use 3 pixels. But more than that will probably create a distinct halo effect.
- Email / Web: A radius of less than 1 pixel is appropriate when doing this for email or Web Sharp. The ideal range is usually between 0.5 and 0.7 pixels.
Now we want to set the Amount value to 500% and increase the Radius value to 20 pixels, so we can better see the effect of the third slider (Threshold) in the Unsharp Mask dialog box.
Step 6: Pull the Threshold slider to sharpen only the edges
Before we look at the Threshold slider, let’s take a quick look at what we’ve learned so far:
- Sharpening the image means increasing the contrast along the edges, making the brighter side lighter and the darker side darker. The higher the contrast, the clearer the image.
- Amount value controls the contrast of the edges. Higher values mean stronger contrast and show more appearance.
- The Radius value adjusts the thickness of the edges. Thicker edges reveal more contrast, while thinner edges produce better sharpness.
Problem with Mask Unsharp
If Sharp is all about increasing edge contrast, expect the Unsharp Mask to have a way of recognizing edges.
Unlike Photoshop Smart Sharpen or High Pass filters, both of which are more advanced, the Unsharp Mask does not recognize edges. Instead, it sharpens all the pixels evenly.
Note that after increasing the Amount and Radius, the background of the image looks very stunning. This is because the Unsharp Mask sharpens every pixel, including background pixels that should not be sharpened. . We now use very high Amount and Radius values to illustrate this problem:
How Threshold works
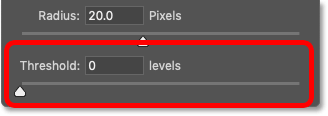
Fortunately, we can prevent the whole image from being sharpened by using the Threshold slider. By setting the Threshold greater than the default value of 0, we limit sharpening to pixels that differ in brightness from their neighbors.
Brightness is measured at levels between 0 and 255. So, for example, a Threshold value of 20 means that only pixels that are at least 20 levels lighter or darker than the surrounding pixels will be sharpened. Each pixel remains less than 20 levels of light or dark unsharpened.
Increase the Threshold value from 0 to 10. The easiest way to set the Threshold value is by clicking inside the box and then using the Up or Down scroll keys on the keyboard:
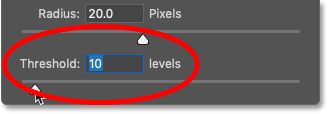
Since most background pixels differ from their neighbors by less than 10 light levels, they are no longer sharp and the environment looks smooth. The frog and the leaf remain sharp because the pixels differ in brightness by at least 10 levels:

How to set the correct threshold
Selecting the best threshold value for the image is a balanced action. The goal is to keep sharpening in areas that need it while removing it from areas (such as the background).
- Photoshop recommends a Threshold value between 2 and 20 levels. Setting the Threshold too high will sharpen some pixels in one area, while not resting other pixels in the same area, because some pixels are just above the threshold and some below.
- To prevent accidental intensification, we suggest limiting the Threshold value to 10 levels or less.
The best way to set the Amount, Radius and Threshold in Unsharp Mask
Now that we know how Unsharp Mask options work, what is the best way to use them to sharpen your image? Since the settings of these 3 items all work together, we recommend the following workflow:
- First, increase the Amount to 500%. This will have a lot of contrast, but it will be easier to find the best Radius value.
- Then, increase the Radius value only to the point where the halos are most apparent. Then reduce the amount until the halos disappear. For large images to print, a radius of 1 to 3 pixels should work. For smaller images displayed on the screen, use a radius of less than 0.5 to 0.7 pixels.
- Once you have set the Radius, go back and reduce the Amount to the appropriate value. 150 to 200 percent usually works for printing, while 50 to 70 percent is better for email and web images.
- Finally, increase the Threshold value to limit the Sharp effect to the areas that need it.
For the image below, we set the Amount to 170 ٪, the Radius to 2.5 pixels, and a Threshold to 5 levels:

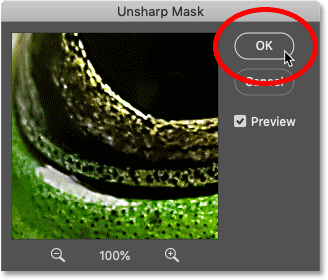
Step 7: Click Ok to close the Unsharp Mask
When you are satisfied with the settings, click OK to add changes to the image and close the Unsharp Mask dialog box:
On the left is the original image and on the right is the sharpened version. So far so good, but before doing so, there is another problem:
Step 8: Change the Unsharp Mask mode to Luminosity
By default, the Unsharp Mask affects not only the brightness of the pixels but also their color, causing problems. Some colors appear after sharpening and some pixels even change to other colors.
An example of a color change after sharpening
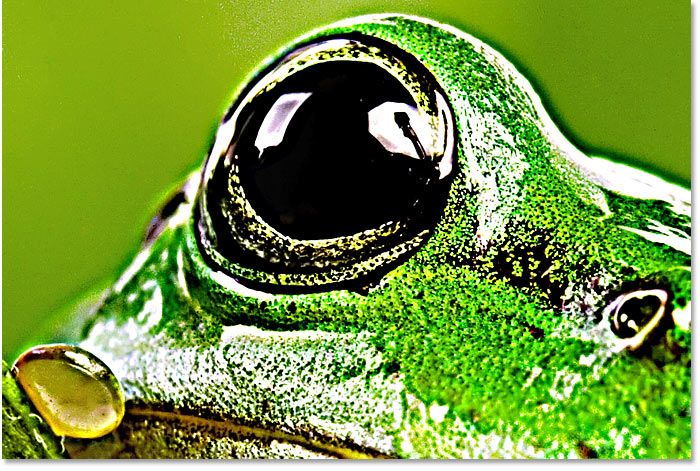
To show what the color change looks like, temporarily increase the Amount and Radius values, and then zoom in on the area around the frog’s eye.
Notice how much purple there is around the eyes and in the skin tissue around the frog’s nose. Purple is not in the original image. Instead, this is the result of the color change caused by the Unsharp Mask:
How to prevent discoloration?
To prevent discoloration, we need a way to limit sharpness to brightness. We can do this by changing the Unsharp Mask combination mode.
In the Layers panel, the Unsharp Mask appears as a smart filter below the image. To change the filter combination mode, double-click on the Blending Options icon to the right of the filter name:
![]()
In the window that opens, change the mode from Normal to Luminosity. Click OK to close the dialog box:
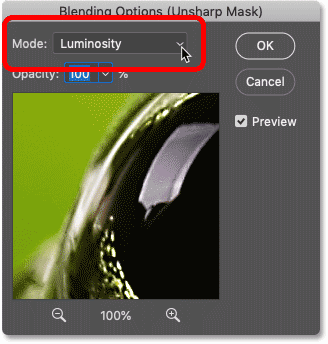
With the combination mode set to Luminosity, sharpening is currently limited to brightness and the color artifacts disappear.
The left shows an image that changes color to purple. And to the right is the result after changing the composition mode. Even if you do not notice any color problems after sharpening the image, you should always change the blending mode to Luminosity as a final step: