How to Take a Screenshot in Firefox Browser
If you use Firefox, you can take screenshots of web pages or selected areas. You can do this using the tools available on Windows, Linux, and macOS without installing the plugin.
Access the Firefox screenshot tool.
The screenshot tool in Firefox is called Firefox Screenshots, which is very easy to use. To access this tool, first open Firefox and log in to the website you want to capture a screenshot of. Right-click the screen, then select Take Screenshot from the menu that appears.
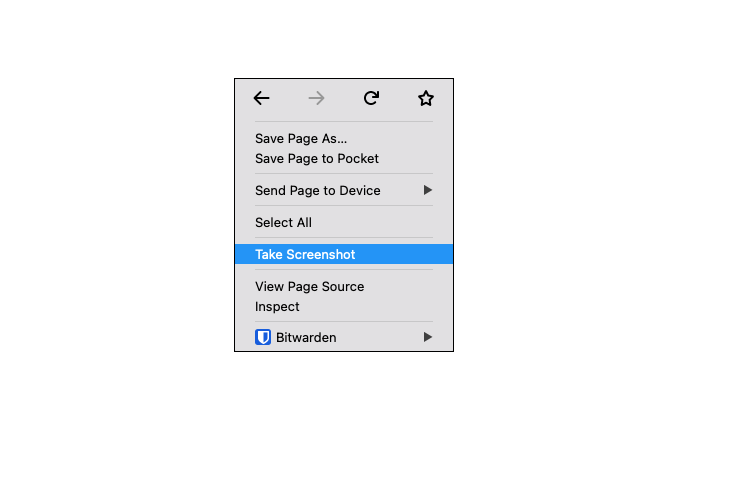
The Firefox browser switches to photo capture mode, allowing you to choose from four different ways to take a screenshot. These four methods are:
- Take a photo of a part of the page that is automatically detected
- Screenshots of the entire web page
- Screenshots from a visible part of the website
- Screenshots of the selected area on the page
In the following, we will examine each of these four methods.
Screenshots of a part of the page that is automatically detected
After selecting the Take a Screenshot option, which we described earlier, you will enter the automatic detection mode. By moving the mouse pointer on the screen, you will see parts of the website being highlighted. These sections can include the title, image, advertisement, paragraph of text, and so on.
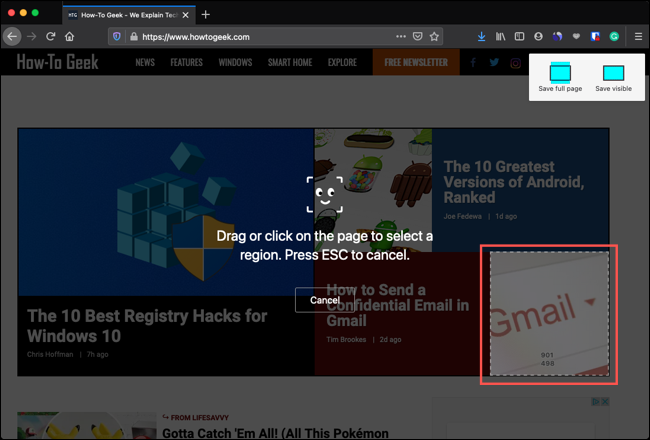
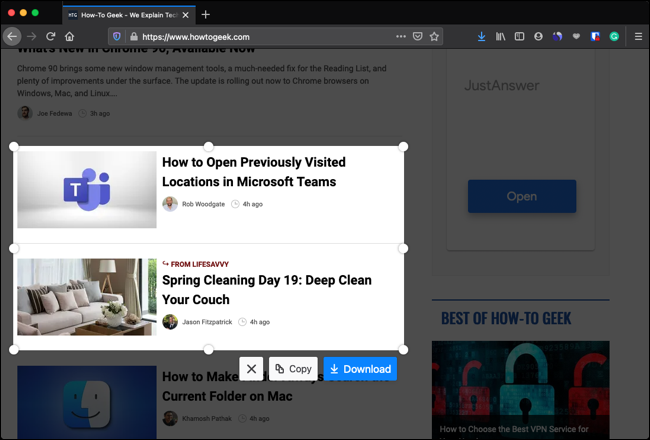
After selecting the area to capture, select Copy if you want to paste the image elsewhere; otherwise, choose the Download option to save the image to your computer.

Click the X icon to exit this mode and return to the standard website page.
Full-screen screenshots
Click the ” Save Full Page ” option in the upper right corner of the window to take a photo of the entire webpage in the Firefox browser. In this mode, you can take a full-screen screenshot by scrolling across the page.
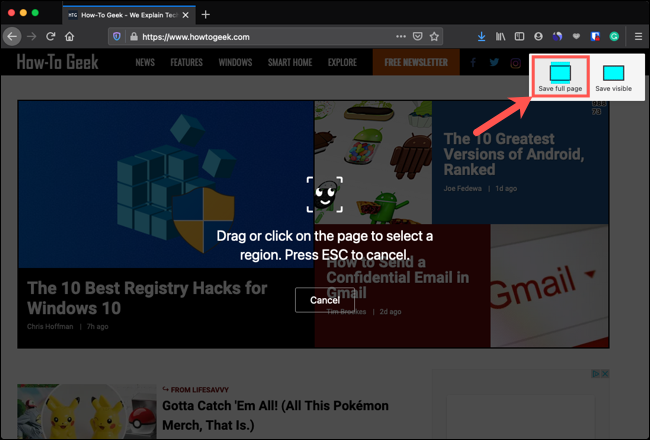
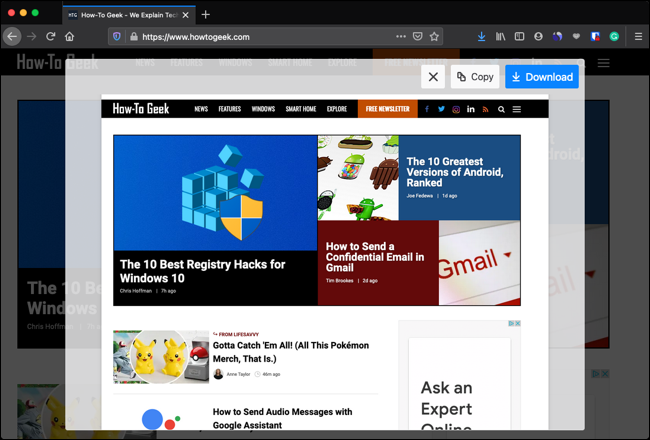
After clicking, you will see a preview of the Screenshot. Then, as in the previous method, you can select one of these options: If you want to paste the image elsewhere, select Copy; Otherwise, to save the photo to the computer, you must choose the Download option. Click the X icon to exit the screenshot mode and return to the standard web page.
Screenshots from the visible part of the website
If you do not want to take a screenshot of the entire website page, you can record only the visible portion. To do this, click on the “Save Visible” option in the upper right corner.
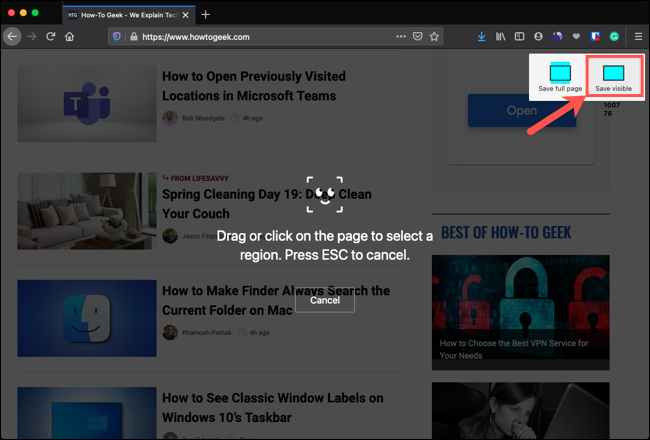
Then, like the two options above, select one of the Copy, Download, or Exit options as needed.
Screenshots of the selected area on the page
The last way to take screenshots in Firefox is to select the area manually. To do this, you must specify the part of the page that you want to take a picture of. After determining the location, drag your two fingers on the screen and lift your fingers from the screen to see the selected location.
If you want to adjust the screenshot size, drag the corner or edge. When you pull, you will see its width and height in pixels. This option is handy if you need an image of a specific size.
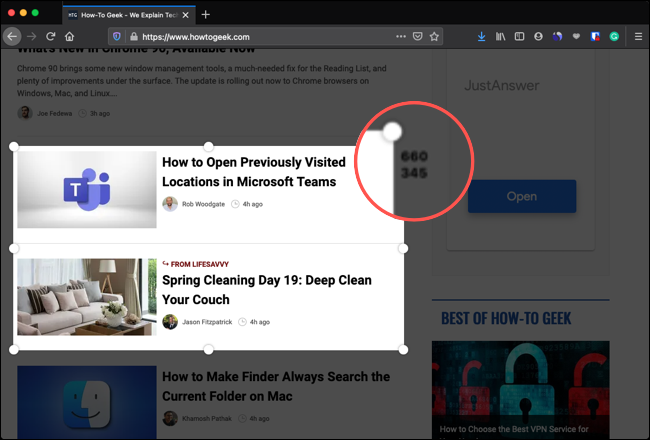
Now, as in the previous options, select one of the Copy Download or Exit options as needed.
After taking the Screenshot, you will return to the website’s regular page, where you can continue reading.
FAQ
How do you take a screenshot in Firefox?
Use Firefox’s built-in screenshot tool from the address bar or context menu to capture the visible page or a selected area.
Can you capture the entire webpage?
Yes, Firefox allows full-page screenshots beyond what’s visible on the screen.
Why use the built-in Firefox screenshot feature?
It provides a quick, no-install solution for capturing and saving web content.
