Pattern making tutorial in Photoshop (and changing color and scale)
The pattern in Photoshop is essentially an image that can be repeated over and over again. Using templates can speed up your workflow without having to create complex objects.
Pattern in Photoshop not only save you time but can also be combined with attractive design elements in your work.
You can create your own templates, use Photoshop templates, or download and install template libraries from sites like deviantART. In this tutorial, we will state the following:
- Check ready templates with Preset Manager
- Use Photoshop templates using three different methods
- How to create a custom Photoshop template
- Create and use a diagonal line pattern (for practice)
- Install a Photoshop template library
- Create a template library
- Exemplary tutorials that use patterns
Check ready templates with Preset Manager
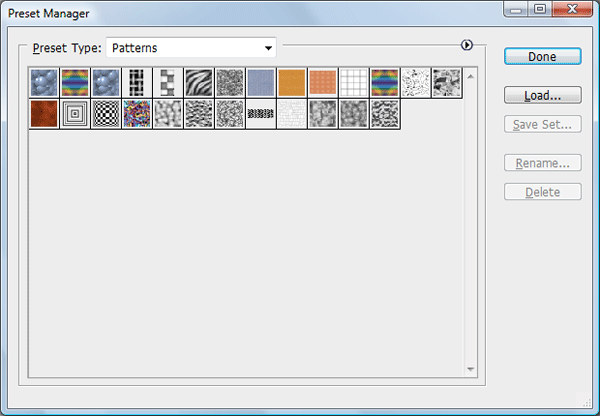
You can specify templates in Photoshop (as well as any of the previously saved templates) with Preset Manager. To access Preset Manager, go to Edit> Preset Manager. By default, Preset Manager displays preset fonts.
In the Preset Manager window, in the Preset Type drop-down menu, select Patterns to easily filter your Photoshop defaults.

You may not see many patterns at first. In this case, you need to download pattern libraries that are compatible with Photoshop. The pattern library is a collection of 1 or more patterns. It has a file with a .PAT extension. You can find pattern libraries on Photoshop Exchange Adobe, Brusheezy, and other sites.
To download Photoshop-compatible pattern libraries, click on the triangle on the right, which shows you a menu of preset patterns.
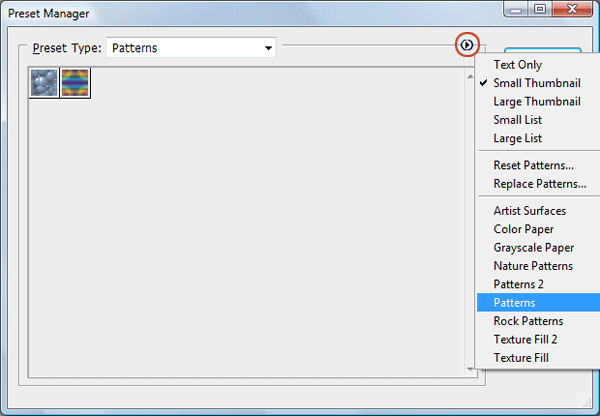
Select one of the download options (such as Patterns, Patterns 2, Rock Patterns).
When you select a template to download, you will be asked if you want to replace the current templates.
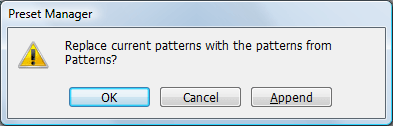
Just select the Append option, which will add new patterns to your current list instead of replacing them.
Apply Photoshop templates
By downloading the preset pattern libraries, it’s time to see how to use them. There are several methods you can use to apply a pattern. We will review each of them below.
Fill command: Fill the selections with patterns
The easiest way to fill in the part you choose to fill with the pattern is to use the Fill command. For example, you can use the Rectangular Marquee (M) tool to select an area on your canvas, go to Edit> Fill (Shift + F5) to access the Fill dialog box, and then select the pattern in the Use option. .
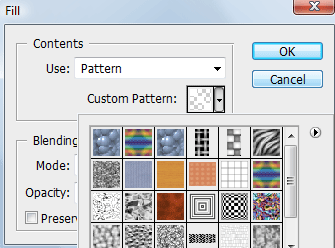
Selecting the Pattern option from the Use drop-down list activates a new option in the Fill dialog box called Custom Pattern. Set the Custom Pattern option on your desired pattern and then press OK to fill your selection with that pattern.
The Fill command is an easy way to apply the pattern to the entire canvas or parts of it. Another advantage of the Fill command is that you can place your pattern on a separate layer, meaning you can make changes to that layer without affecting other layers.
Pattern Overlay: Design a layer with a pattern
If you have a layer that you want to apply a pattern to, you can use the Pattern Overlay layer effect to lighten that layer. Double-click the layer to open the Layer Styles dialog box. Click Pattern Overlay on the right. Under Pattern, find the pattern you want to apply.
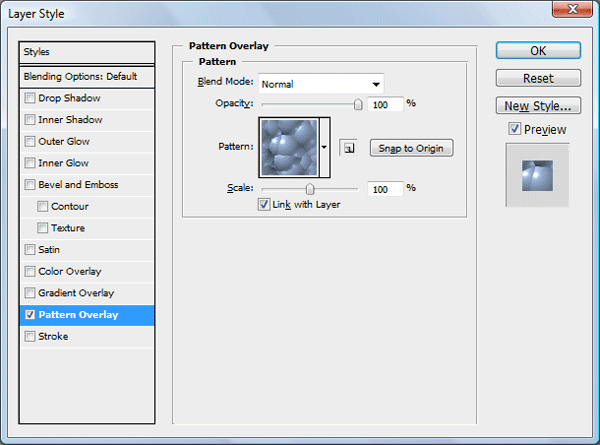
This method is for when you need more flexibility: you can easily hide, show, delete and eliminate the layer effect without affecting the content of that layer.
Tip: To set the Pattern Overlay position, check the Preview option, and then on your canvas, click and hold the desired area, and then drag the mouse over that area.
Painting tool: painting with patterns
If you want to draw the pattern on the canvas, there are several painting tools such as Paint Bucket Tool and Pattern Stamp Tool that can be adjusted to use the patterns.
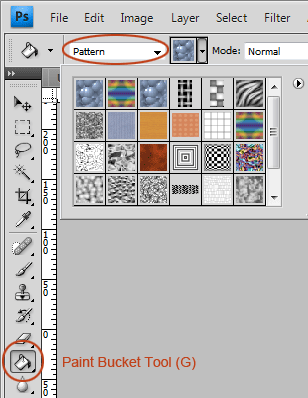
Using a drawing tool is useful when you want to apply a pattern irregularly. Painting tools also give you more control, especially when you have a graphics tablet.
However, using a pattern using drawing tools will take longer than using the Pattern Overlay layer effect or the Fill command because they automatically decide how to use the pattern. In addition, the results can be erratic and unpredictable when using the Pattern Stamp tool.
Summary table: Apply Photoshop templates
| Applied method | Advantages | Disadvantages |
| Fill command | Ease of useIt can be in a separate layer that you can manipulate independently of other layers
Great for filling large areas of the canvas with a pattern |
This method is more difficult to use on objects that you have to select manually |
| Pattern Overlay layer effect | Easy to use on complex objects and shapesThere are many options to choose from such as Opacity, Scale and Blend Mode | It is on the same layer and any changes you want to make to the template will affect the layer |
| Painting tool | Gives you more controlIt can be in a separate layer that you can manipulate independently of other layers
Great for irregular use of patterns The results can look natural |
It takes longer and more skillThe results may seem contradictory and unpredictable |
Create a custom Photoshop template
Creating a template is easy. Keep in mind that the patterns must be rectangular. They can not be strange shapes. If they have a shape that does not have a rectangular side (like a circle), the pattern is treated like a rectangle.

To create a pattern, use the Rectangular Marquee (M) tool to make a selection around your desired area. Then go to Edit> Define Pattern to define the selected area as a template.

Tip: Many find it easier to create templates outside of their work document that are in another Photoshop document. If you want to create a template that is not in any part of your document, this is a good option because it allows you to focus only on designing your own template.
In practice: Create and use a diagonal line pattern
Let’s practice how to create and use Photoshop templates. Here we will create one of our favorite patterns: a diagonal line pattern, which you can use during the design tutorial.
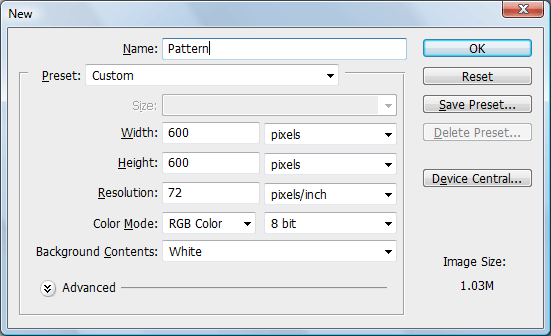
Create a work document
First create a new document (Ctrl / Cmd + N) in Photoshop. This will be our main document.
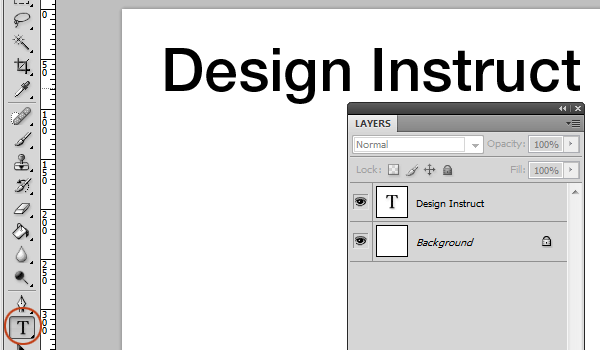
Use the Horizontal Text (T) tool to write text in your new document. Since the pattern we are creating is white, choose a dark (black) text so that we can see our patterns clearly. In this example, Helvetica Neue Medium was used in 30pt (Arial – or any other font).
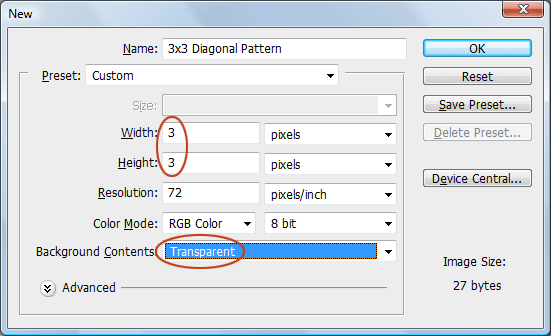
Create a Diagonal Line pattern
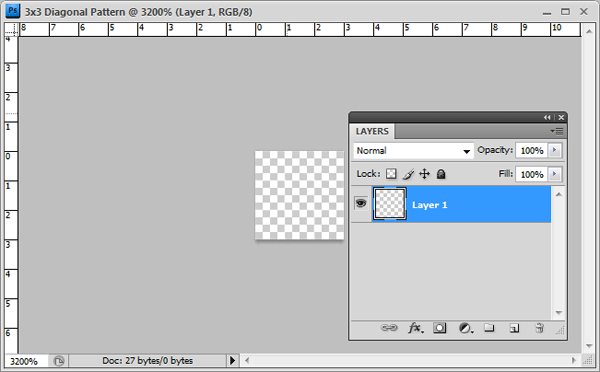
We will create this template in another document. Create another document that is 3x3px in size. In the Background Contents option, select Transparent so that if it is off, we do not have the default white Background layer.
The canvas will be very small – only 3 by 3 pixels – so we need to zoom in actually close. Use the Zoom (Z) tool to zoom in so you can easily view your work. Magnification 3200 کردیم We selected the original size (which is the maximum magnification).
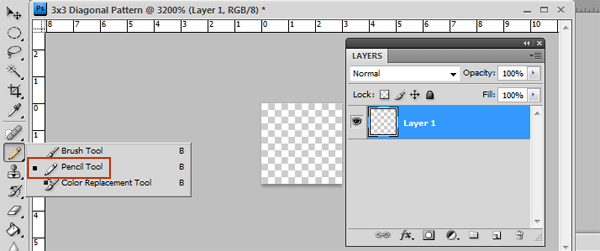
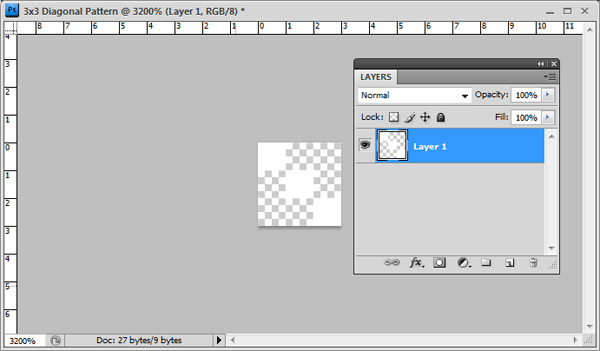
Draw a white diagonal line from the top left corner to the bottom right corner of the canvas. There are several ways to do this. Our method is to use the Pencil (B) tool.
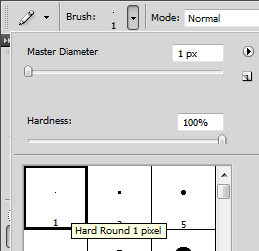
Set the Foreground color to white (#ffffff) and then set the Pencil Tool with the Option Bar by selecting the Hard Round 1 pixel. Check that Flow and Opacity are 100% (by default).
We chose a different color just so you can clearly see the trend below. Hold Shift (to make sure the line is straight) Click once in the upper left corner of the screen and then click again in the lower right corner of the canvas.
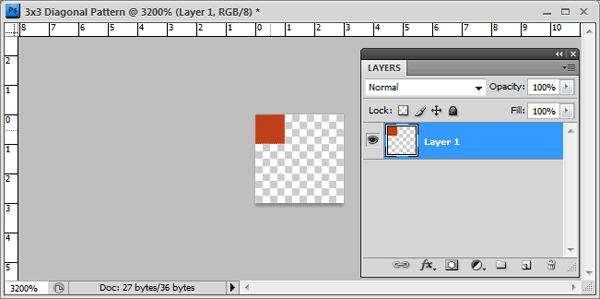
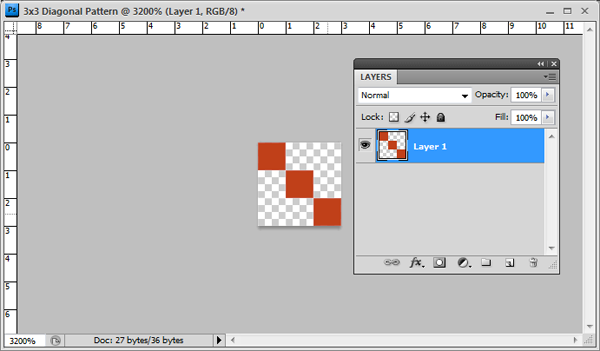
Our white diagonal pattern so far (back to the original white):
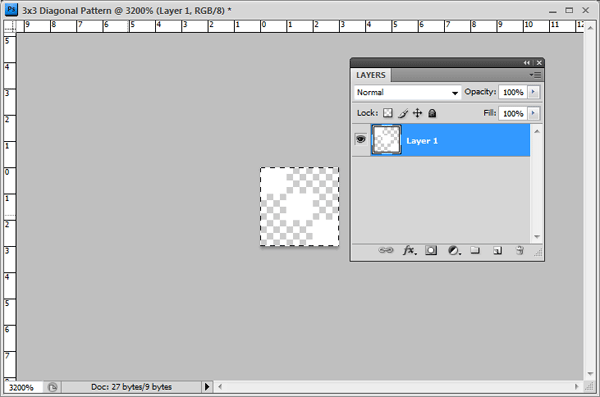
Once the diagonal line is drawn, select (Select> All (Ctrl + A) to place the selection around the canvas.
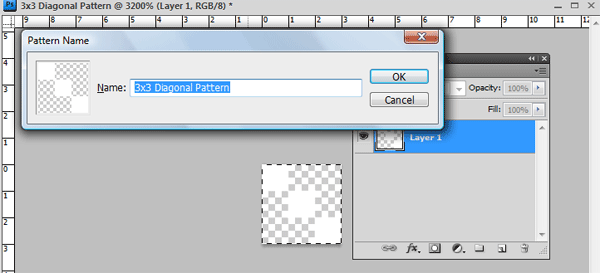
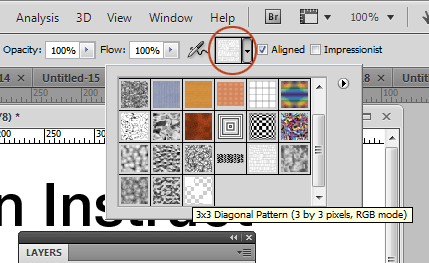
Go to Edit> Define Pattern by selecting the entire 3 by 3 pixel canvas. What you will see below is the Pattern Name dialog box. Just name your pattern something you will remember. We named our pattern my pattern as 3.3.
You can now close this document (you do not need to save it). Return to the original Photoshop document.
In the next step, we will apply our custom template using the 3 different methods we have discussed.
Apply the pattern using the Fill command
First create a new layer on top of the text layer. Then hold down Ctrl / Cmd and then click on its layer to make a selection around the text.
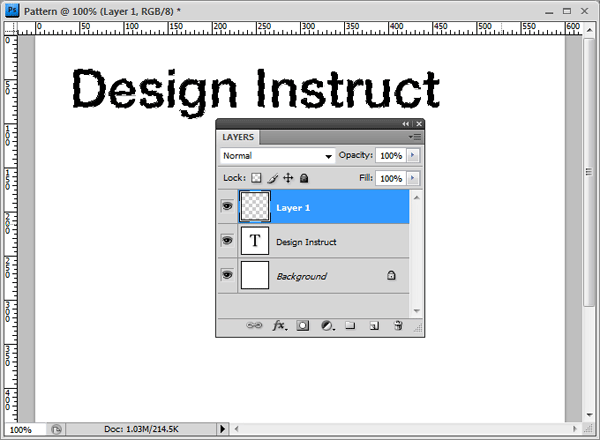
Press Shift + F5 (or select Edit> Fill). Under Use, select Pattern, and under Custom Pattern, find the diagonal line pattern we just created.

Press OK to apply the pattern using the Fill command.
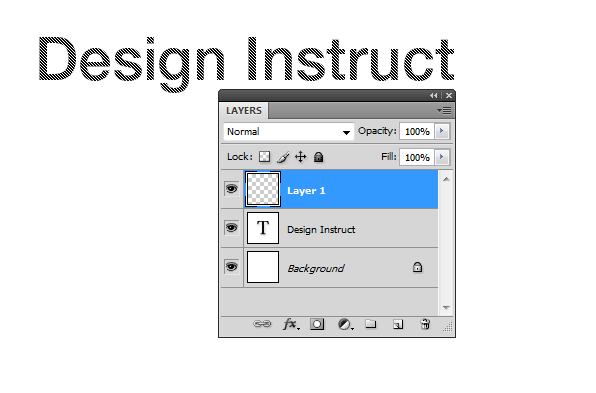
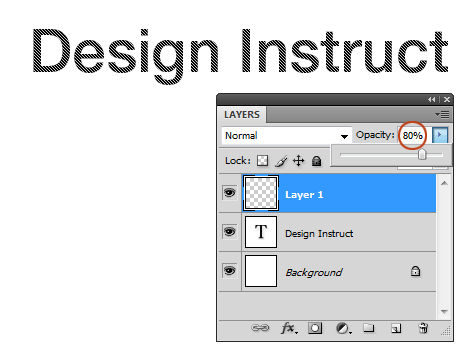
The interesting thing about this technique is that you can adjust the blend mode of the template layer without affecting the text layer below it. Let’s do the same. Let’s reduce the layer Opacity to about 80% so that it is not too strong.
Tip: One good thing to keep in mind when using patterns on a separate layer is to link the two layers together. That way, if you want to move the text layer, the template layer moves with it (and vice versa). Do this by selecting both layers in the Layers Panel, right-clicking on one of them, and then selecting Link Layers.
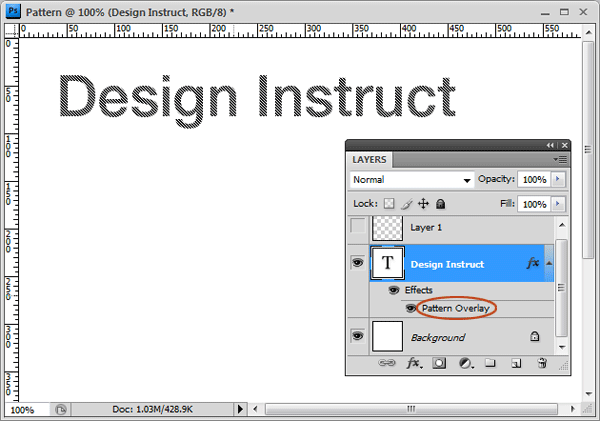
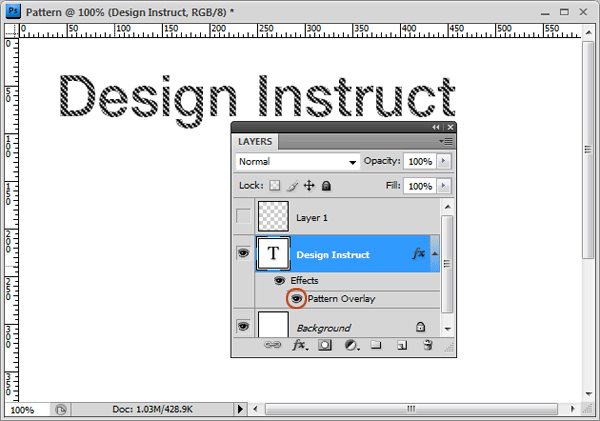
Apply a custom pattern as a Pattern Overlay
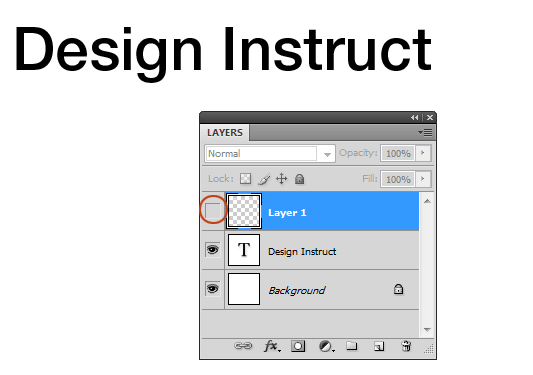
Let’s use the same pattern again, but this time using a layered style. Hide or delete the pattern layer created by the Fill command.
Double-click on the text layer to see the Layer Style dialog box. To apply the layer effect and see the Pattern Overlay options, click on Pattern Overlay on the left.
In the Pattern option, find the 3-by-3 diagonal line pattern we created. Make sure the Preview option is checked on the right side of the dialog so you can see how the text layer is designed as a style.
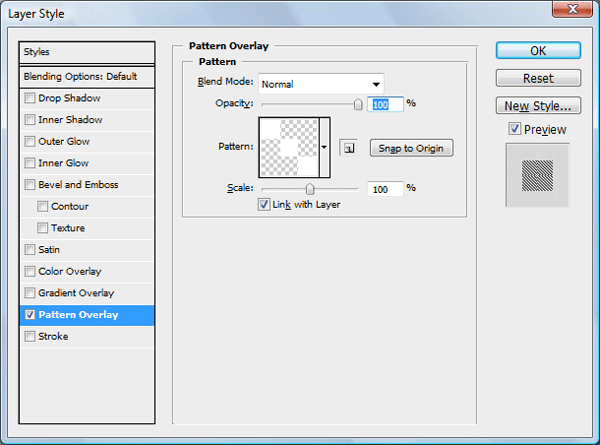
Some Pattern Overlay style options:
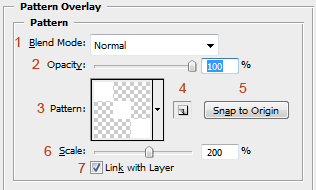
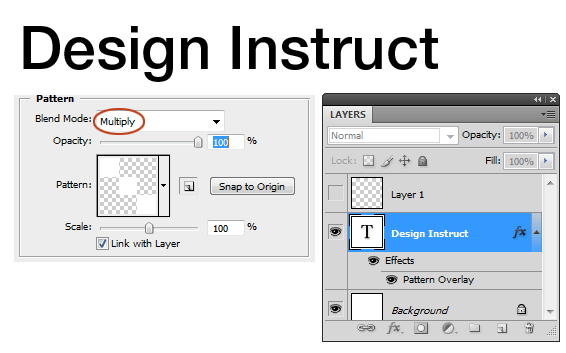
1- Blend Mode: (for example, Darken, Multiply, Color Burn) changes the pattern.
2- Opacity: controls the transparency of the pattern. Decrease the value until the pattern is translucent.
3. Pattern: The pattern to be applied.

4. Create a new preset of the template: If you want to save the template you applied as another template, click on this icon (this method also saves all the other options you have created).
5. Snap to Origin: If you rotate the pattern while applying the layer effect, press this option to adjust its position.
6- Scale: Adjusts the size and resolution of the pattern.
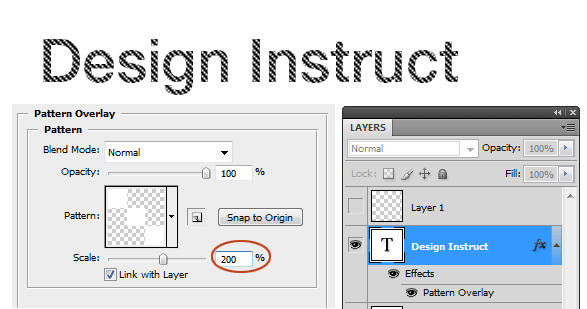
7- Link with Layer: If this option is selected, when you move it, the pattern will move along with the layer. This option is selected by default. If you do not want the template to move, uncheck it.
Apply a custom template using the Pattern Stamp tool
Next, we are going to apply our custom diagonal line pattern using the Pattern Stamp (S) tool. There are other drawing tools you can use, but this one is specifically for using patterns. Think of this painting tool as a brush tool (B), but instead of a brush, you draw with a pattern.
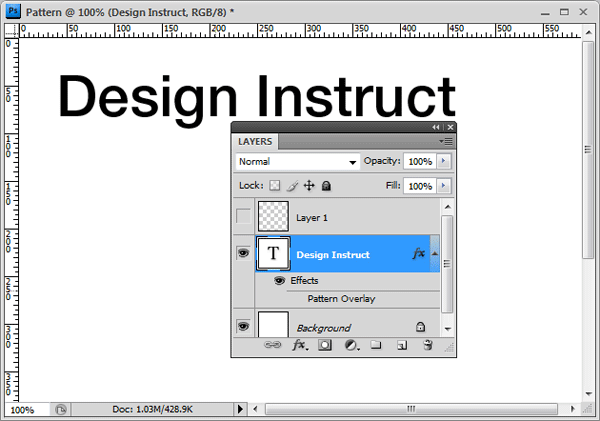
First, hide (or delete) the Pattern Overlay layer effect so that we can see our desired pattern using the Pattern Stamp tool. Hide Pattern Overlay by clicking on the eye icon in the Layers panel next to Pattern Overlay.
Now select Pattern Stamp Tool (S) from the Tools panel.
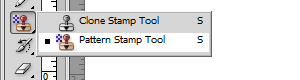
In the Options bar, click the Pattern picker drop-down menu and search for the 3 by 3 pixel diagonal line pattern. Click on the diagonal pattern to place it as the tip of the Pattern Tool Stamp Tool.
To apply the pattern, create a new layer and draw on the text. Below you can see that we just clicked on a few places and played with the Pattern Stamp Tool’s Opacity and Flow options to get natural and unique effects.

Install Pattern Library in Photoshop
If you have downloaded Photoshop Pattern Library, it is quick to install. Go to Edit> Preset Manager. Press the Load button on the right. Find the file on your computer (the file must have a .PAT extension).

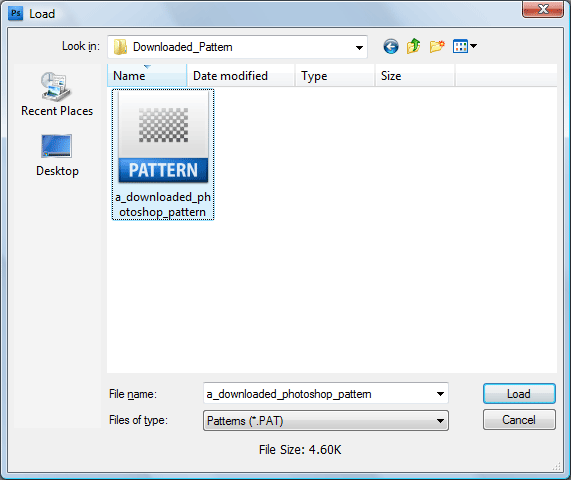
For Photoshop CS versions, you can use the default pattern library in the folder location: Adobe Photoshop [Photoshop Version]> Presets> Patterns.
To download Photoshop Pattern libraries
You may be wondering where you can download Photoshop template libraries.
Adobe – Photoshop Exchange Patterns: The official Adobe Marketplace has a section on pattern libraries. There are currently over 75 libraries on the site, many of which are free to download.
deviantART is one of the largest sites for digital designers and artists, deviantART has some Photoshop pattern libraries that you can see under the Photoshop template category.
Brusheezy is a site with top- notch Photoshop resources that has a section that provides Photoshop templates that you can sort and filter.
The Ultimate Collection Of Free Photoshop Patterns: This post was uploaded to Smashing Magazine by links to free Photoshop templates across the web.
Create a template library
As mentioned earlier, a template library is a collection of Photoshop templates. It is a good idea to create Photoshop template libraries for when you want to create your own custom templates in an organized way or when you want to share your templates with others.
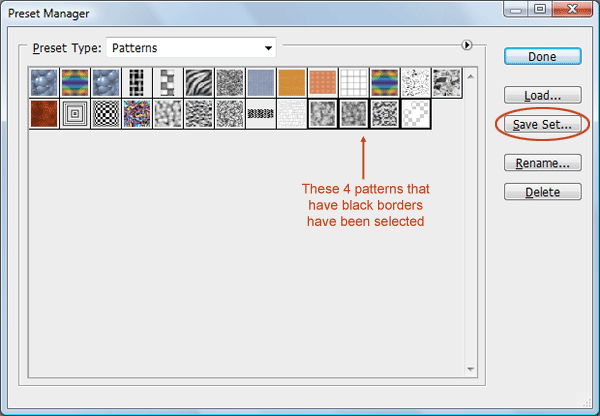
To create a template library, go to (Edit> Preset Manager). Filter presets to show only patterns. Select the template you want in the template library by holding down Ctrl / Cmd and clicking on any of them.
After selecting all the patterns you want, click the Save Set button. Save the template file anywhere on your computer.