How to Build a Linux Web Server: Step-by-Step Guide
Linux is one of the most flexible operating systems in the software world. It can be installed on an old computer and used without problems.
If you have an old Desktop or laptop computer, you can create a web server using Linux and your old computer to host different web platforms.
In other words, you can turn your old computer into a money-making tool. Are you interested in building a Linux home web server?
The easiest way to do this is to install Linux on a relatively old computer, as the Linux server does not require powerful hardware. So, the above solution is a cost-effective way to host a website or blog.
How do you create a web server with Linux?
You must first have the requirements to access and benefit from a home web server. To build a Linux home server, you must first prepare the hardware and software requirements as follows:
- Preparing an old computer that you no longer use.
- Download the distribution suitable for installation on an old computer
- Install one of the web server software, such as Apache
- An Internet connection to access the server over the Internet
The first step is to prepare the computer
The computer you intend to use for this purpose must have the specifications to install Linux. You should use two versions of Ubuntu and Lubuntu to build a home server.
While Ubuntu is a more widespread distribution, we recommend using Lubuntu because Lubuntu 19.04 runs more smoothly than Ubuntu and uses the same source code.
The minimum hardware requirements to install Lubunto are as follows:
- 512MHz dual-core processor (Of course, it is recommended to use a 1GHz processor for Lubuntu and a 2GHz processor if you plan to use Ubuntu).
- 4 GB of main memory
- 25 GB of external memory
- 32-bit or 64-bit distribution
As you can see, Linux does not require powerful hardware to run, and you can install it on an older computer without problems.
Additionally, if you have an older MacBook with a PowerPC processor, installing these distributions on an older Mac computer is still possible.
Like Ubuntu, the Lubuntu version supports various graphics cards, hard drives, and other hardware.
Because the hardware requirements of professional servers are designed to be capable of long-term operation, personal computers have different limitations, so it is better to pay attention to the ambient temperature in which this computer is to be located, especially in hot seasons.
For example, personal computers use regular hard drives, while servers use hard drives designed for long-term work without shutting down the System.
The second step is to install the Linux distribution
As mentioned, Lubunto is a lighter and smoother version of Ubuntu. Because it is based on fast and smooth execution and minimal use of System resources, it works well on older hardware.
To download the image related to the above distribution, go to https://lubuntu.net/downloads/See. After downloading the image, burn it to a DVD or transfer it to flash memory.
If your computer’s CPU supports 64-bit architecture, we suggest you download the 64-bit version. To start the installation, start the computer after connecting the flash drive or inserting a DVD into the device. If nothing extraordinary happens after booting the System, it indicates that you need to edit the System boot settings.
To do this, go to the System BIOS menu and select the boot option from flash memory so the System can boot from flash memory or DVD.
After booting the computer and booting through the Linux image, select the Install Lubuntu option, then the Download Updates while Installing option, the Install 3rd Party Software option, and finally the Erase and Use the Entire Disk option.
Note that after selecting the Erase and Use the Entire Disk option, all current data and the operating System will be removed from the System (of course, if the operating System is to be installed on a drive that already has the operating System installed on it).
After selecting the third option, select the other options according to the desired settings.
Note that encrypting the home folder in the server build process is not fun, as this computer is not to be used to serve other users. After installing Linux, boot the computer to complete the installation process.
After installation, go to System> Administration> Update Manager> Install Updates to receive new operating System updates. After installing the updates, reboot the System to apply the changes.
Step 3. Install the software and server
There are many web server software, but most websites run on a combination of Apache, MySQL, and Patch software, known as LAMP. All three tools can be installed using System Center software.
After installing these tools, you must go to System> Administration> Synaptic Package Manager to run them.
Typically, the above software is installed in the Synaptic Package Manager. After installing the above tools, we must install other components and peripherals.
To do this, search for the names of other required packages, including apache2, php5, php5-MySQL, and MySQL-server, and install them.
After receiving the files, please make the necessary changes to install them. When installing the software, the installer displays a message for the MySQL root password (the root account belongs to the user who has access to all the files and operating System commands).
It is also possible to install these files via the command line.
To do this, open a Linux command line window and enter the following command:
Sudo apt install lamp-server ^ -y
The above command installs the requirements we mentioned (Figure 1).
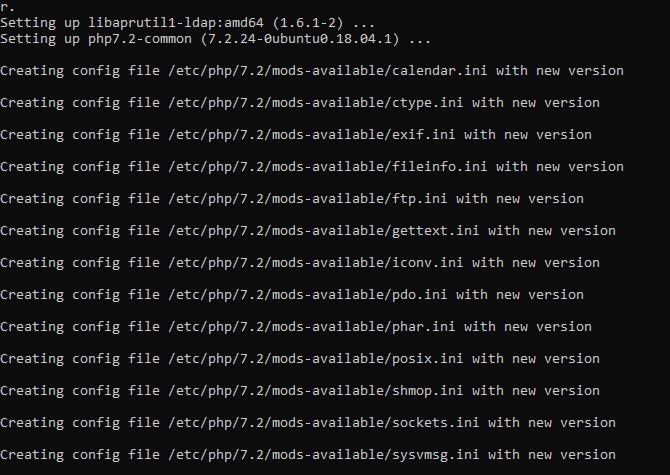
Figure 1
Web server testing
Once the requirements have been installed, the server must be tested in the next step. Enter http://127.0.0.1 or HTTP: // localhost to test the web server in the browser’s address bar.
If you see the message “It works,” it indicates that the server is working correctly. If the web server works correctly, Apache and MySQL software will start running in the operating System’s background after the computer is turned on.
After running the server, you can edit your files to / var/www. You must update the URL entered in the browser to see when the changes affect the website.
Find the local IP address.
Indeed, the server works well, but it must be connected to the World Wide Web because it is essential to keep the server up to date by installing Security patches.
First, find the server’s local IP address and set it to another IP address that can be referenced in the future. The current IP address assigned by the router can be found in the Network Information section.
To find the current IP address, click on Network Connection, select Connection Information, and then view and record it.
This section displays information related to the network card, broadcast address, gateway, server domain name System, and IP address.
Next, you need to edit the Connection information to create a static IP address on the local network.
To do this, right-click and select Edit Connections.
Then, select the network card (for example, eth1) and edit the following settings.
Select the IPv4 tab and change the Method option to Manual. Select the Add option and enter the network connection information. Although IP addresses in each System are different, the numeric value of the last part of the address should be set to 254.
For example, if the address is 192.168.20.123, change it to 192.168.20.254. The new manual IP address you specify must be new and not used on the local network to create a static IP address.
Sharing web folders
There are several ways to upload files to the server and access them. However, the vital thing to note is the importance of folder permissions and how to access them.
This mechanism should only be enabled when your server is on a personal network and you are sure no user can connect to the network or access the shared folders. To edit permissions, press Ctrl + Alt + T simultaneously to open the terminal.
After opening the terminal, enter the following command:
Sudo chmod 777 / var / www
After entering the phrase, you must enter a password to update the permissions. Now go to the file browser and find / var /. Right-click on the www folder and turn off the Sharing options.
You can set a password for shared folders to increase their Security. If you want other users to access shared folders without entering a username and password, select the Guest Access option, although we suggest setting passwords for shared folders.
Selecting the Allow others to create and delete files option in this folder allows you to create and delete files in the shared folder. To view the files, go to //localhost/www.
Online server through port forwarding
. You must go online now that you have identified your IP address. To do this, you must be familiar with Port Forwarding. Every user who connects to the Internet has an IP address.
In most home and business network-based connections, the computer IP does not connect directly to the Internet, so how should site visitors connect to the server?
This is done through a technique called port forwarding. Server ports are similar to house doors and windows, so they should be very secure. In the business world, each of an organization’s servers allows access to various services running on the server. Web servers use port 80 by default.
To take advantage of the above feature, you must enter the IP address of your modem (sometimes this address is engraved on it). Then, go to the admin page, find the Port Forwarding or Applications section, and forward the ports correctly.
Forward the TCP 80 port to the static IP address of your local network
Some home modems connect to an Internet service provider with a dynamic IP address. This means the public IP address changes after a specified period or when the router turns on and off.
To solve this problem, we must use the Dynamic Domain Name System, which allows the use of the Internet address (URL) with the Dynamic Domain Name System.
Using a client application (software that allows you to use server services), the Internet address will still be connected to the server when the public IP address changes.
In this case, visitors can refer to an address, such as forwarding the TCP 80 port to the static IP address of your local network. Some home modems connect to an Internet service provider with a dynamic IP address.
This means the public IP address changes after a specified period or when the router turns on and off.
To solve this problem, we must use the Dynamic Domain Name System, which allows the use of the Internet address (URL) with the Dynamic Domain Name System.
Using a client application (software that allows you to use server services), the Internet address will still be connected to the server when the public IP address changes.
In this case, visitors can refer to an address such as. This means the public IP address changes after a specified period or when the router turns on and off.
To solve this problem, we must use the Dynamic Domain Name System, which allows the use of the Internet address (URL) with the Dynamic Domain Name System.
Using a client application (software that allows you to use server services), the Internet address will still be connected to the server when the public IP address changes.
In this case, visitors can refer to an address such as Using a client application (software that allows you to use server services) the Internet address will still be connected to the server when the public IP address changes.
Visitors can refer to an address, such as using a client application (software that allows you to use server services), and the Internet address will still be connected to the server when the public IP address changes.
In this case, visitors can refer to an address such as visit your website http://yourhostname.dyndns.org.
Note that at the above address, your hostname should be replaced with the name of the dedicated host you are considering. Some ISPs block the 80 router port. In such cases, you must forward a port, such as port 8080, to port 80.
After doing this, you can open your site by entering the value 8080 at the end of the address.
In this case, the site address is http://yourhostname.dyndns.org:8080.
Complete Linux web server.
After performing the above steps to use the server, you should focus on programming or installing the software you want. You may want to start a blog, have several forums or sites, or plan to host some social networks.
In general, hosting any domain on the site is available, even on a computer you could not imagine.
FAQ
Can I use an older computer as a Linux web server?
Yes — the guide shows you can install a lightweight distribution (e.g. Lubuntu) that runs on minimal specs (e.g. 512 MHz dual-core, 4 GB memory, 25 GB storage).
What software do I need to host a website on Linux?
You’ll install the LAMP stack: Apache HTTP Server (web server) + MySQL (database) + PHP (server-side scripting) or similar.
How do I make my home-server web-accessible on the Internet?
You’ll need to set a static local IP, configure port-forwarding in your router (e.g., forward port 80 to your server’s IP), and optionally use a Dynamic DNS service if your public IP is dynamic.