
How to Take a Screenshot on Windows 10: Simple Steps for Full Screen, Windows & Snips
We Are At Your Service With Another Article Dedicated To Computer Training. This article will teach you how to take a screenshot of Windows 10.
Take a Screenshot: Microsoft’s Windows Update on October 10 introduced a new way to take screenshots in Windows 10:
Windows uses the Snip & Sketch tool to capture screenshots.
However, Snip & Sketch is easy to use. To learn how to take screenshots with the tools and shortcuts in Windows 10.
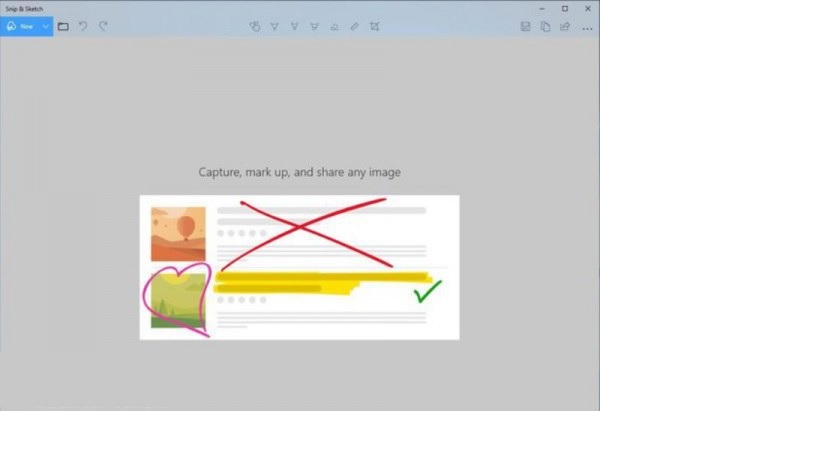
Snip & Sketch
The new Windows tool, Snip & Sketch, is much easier to access, and we’ll be able to share screenshots easily. However, the new tool lacks a key feature that keeps us relying on the Snipping Tool to take screenshots in Windows 10. On the Snip & Sketch page, click the new button to start taking pictures of the page.
The Snip & Sketch screen disappears, and you will see a minimal menu at the top of the screen that lets you choose the type of screenshot you want: Rectangular, Free Mode, or Full-Screen. Types of screenshots are tools.
Surprisingly, this software does not allow you to take a screenshot of a window in Windows 10, which is why we still rely on the Windows Snipping Tool.
But in Snip & Sketch, you can click the key with a down arrow (next to the New key) to delay the screenshot for 3 to 10 seconds.
After taking a screenshot, the photo will be uploaded to the Snip & Sketch page. You can edit your photo after taking a picture of the monitor screen using tools embedded in the top of the window.
Of course, the screenshot in your Windows 10 will be copied to the clipboard, and all the changes you make will be in the clipboard.
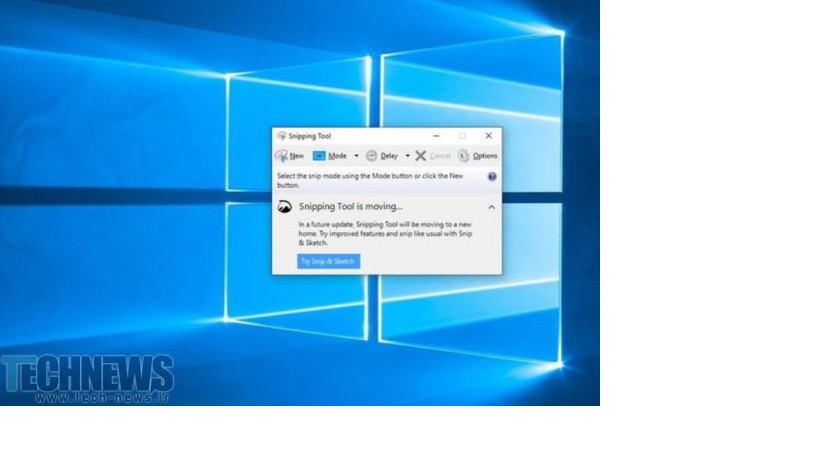
Snipping Tool
This tool has been available in various versions of Windows since Windows Vista. Click the New button to begin taking a screenshot in Windows 10.
This software’s default screenshot mode is rectangular, but you can also take screenshots in other modes, such as free-form, full-screen, and window.
The Snipping Tool does not automatically save your screenshots, so you must save them in another tool before exiting the app. Of course, it will automatically copy the captured photo to the clipboard.
Print Screen
To take a screenshot of the monitor in Windows 10, press the Print Screen key on your Keyboard (sometimes labeled PrtScn). Your screenshot will not be saved as a file; it will be copied to the clipboard.
You will need to open a photo editing tool such as Microsoft Paint, paste the screenshot, and save the file from there.
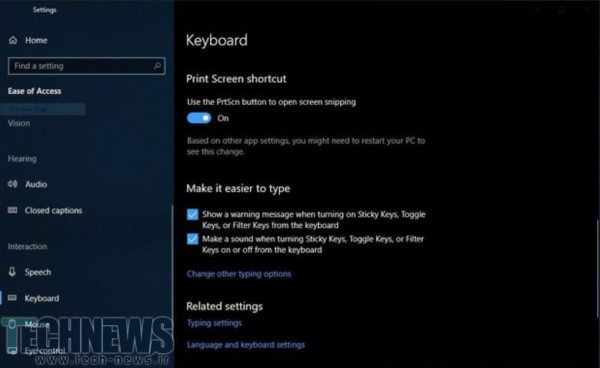
You can also set the PrtScn button on your Keyboard to press Snip & Sketch, enter the settings, select Ease of Access, and then Keyboard, and then, under the Print Screen Shortcut tab, select Use the PrtScn button to switch the open screen snipping to On.
Windows key + Print Screen
You can press the Windows key and the Print Screen key simultaneously to capture a screenshot of your monitor and save it automatically. Your screen will dim for a moment to show that you have taken a screenshot. The screenshots will be saved in the Image screenshots folder.
Windows key + shift-S
You can also use your keyboard shortcut, the Windows key, and shift-S (or the new shortcut in the Windows Action Center) to take a screenshot with Snip & Sketch. Your screen will dim for a moment, and you will see a small Snip & Sketch menu at the top of your screen that lets you specify your screenshot type.
Alt + Print Screen
You can use the Alt+PrtScn key combination to take a screenshot of the active window in Windows. These combination keys capture a screenshot of your active Windows window and place it on the clipboard. To save the photo file, you must open photo editing software and save it.
Windows Logo + Volume Down
If you use a Microsoft Surface device, you can use special physical keys (if you can call them physical) to take a picture of your entire screen, just like taking screenshots on existing phones and tablets.
Hold the Windows key on the Surface Touchscreen and press the physical Volume down key next to the tablet.
The screen will dim for a moment, and the screenshot will be saved in your Windows 10 Screenshots folder. To access other specialized articles, refer to the Windows 10 training page.
Also, ask us your questions and problems regarding how to take a screenshot of the screenshot screen to help you do it faster and easier.
FAQ
How do I capture the entire screen in Windows 10?
Press Windows key + Print Screen — the screen will dim briefly and the screenshot will be saved automatically to the “Pictures → Screenshots” folder.
How can I screenshot just a portion or a single window?
Use Windows key + Shift + S to open Snip & Sketch — then choose Rectangular, Freeform, Window, or Full-screen snip for flexible capture.
Is there a way to screenshot using a built-in Windows tool without keyboard shortcuts?
Yes — you can open Snip & Sketch or Snipping Tool from the Start menu to manually select and capture screen areas, annotate them, and save them as image files.