How to Install Joomla on cPanel — Step-by-Step Instructions
In this article, we want to teach you how to install Joomla on cPanel. After launching the site, you should look for a suitable content management system. By learning how to install Joomla in cPanel, you can have free content management software for any site, from simple to complex.
Paid options like Softaculous can simplify the installation process and allow you to do what you want with one click from the cPanel. But we assume here that you do not want to pay extra, or you want to have more software. For this reason, here is the video tutorial on installing Joomla in cPanel. We will teach you how to install Joomla using the options available in cPanel.
If you want to use CMS (Content Management System) platforms, you should know that setting up a website has never been so easy. The two most prominent content management platforms in the e-commerce market are Joomla and WordPress. Both platforms are known for their ease of use, extensive customization opportunities, and active communities. So, while Joomla! It has its advantages and disadvantages over WordPress; both can be very helpful in building modern sites with great features.
What is WordPress?
WordPress was launched in 2003. However, WordPress has grown far beyond that point. This platform is very easy to use; you can create any site in the shortest possible time and customize your site using the huge ecosystem of WordPress plugins and themes.
What is Joomla?
It was launched in 2005, Joomla! It is also a premium open-source content management system platform written in PHP and stored in the MySQL database. Joomla! It is an open-source content management system that is free and available to everyone. The program was launched to provide a scalable tool for users to build their websites and applications without coding knowledge.
This article will explain the step-by-step instructions for the Joomla installation tutorial in cPanel.
How to install Joomla in the cPanel step-by-step
Download Joomla from the official Joomla page https://downloads.joomla.org and save the zip file to your computer.
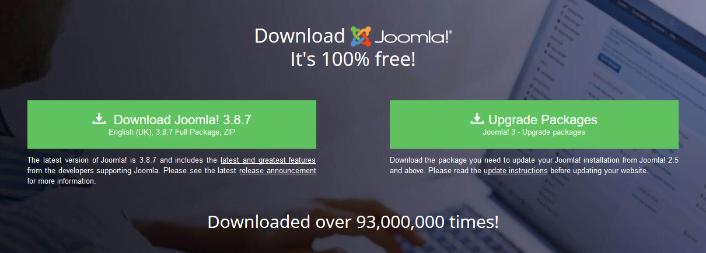 Download from the Joomla site
Go to cPanel and click on File Manager below.


- The new page will show you an overview of files and folders. Click on public_html.
Click on public HTML
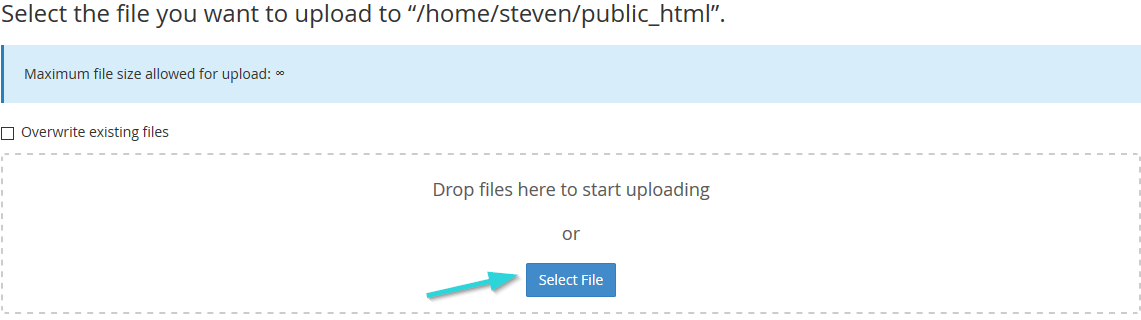
- Click Upload at the top of the page. An overview of the page is shown below.
- Click Select File and select the zip file you downloaded in step 1. Then select Open to start loading the file.
Click Go Back when the confirmation screen appears.

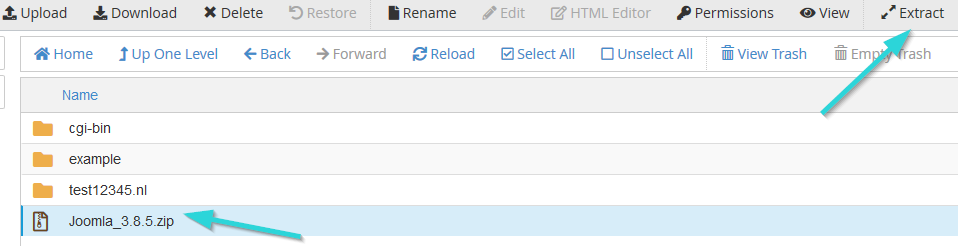
You will now be returned to the public_html folder and see the Joomla! Zip file on the page. Select the desired file and click on the Extract option at the top of the page.
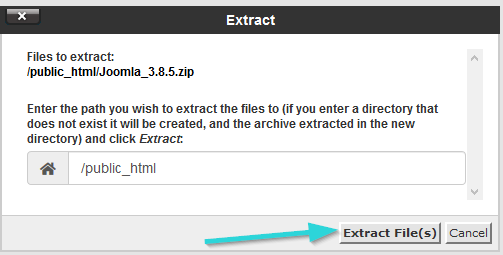
A window like the one below will be displayed, and you can select the location to extract the file from the compression or the zipper. After selecting the desired location, click on the Extract File (s) option to start extracting the file from the compressed state.
Note: To fully install Joomla in the cPanel, you must create a new database. We suggest that you refer to the article “Learning to build a database in PHPMyAdmin” to learn how to build a database in cPanel.
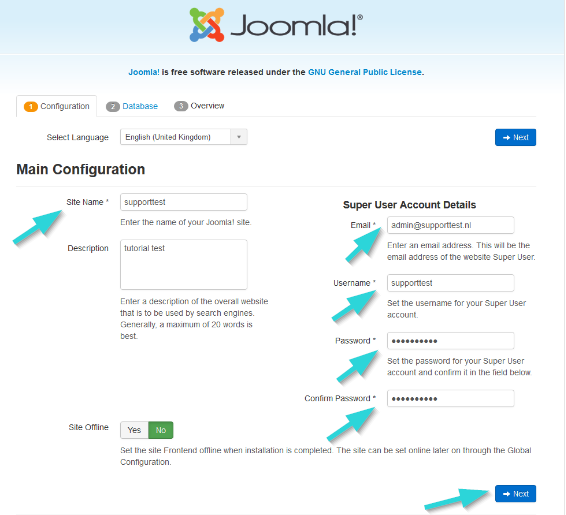
Joomla! It is now installed for your domain. Open a browser and enter your domain address as yoursite.com. Enter your domain name instead of your site. By entering the site, you will encounter Joomla’s settings menu. Enter basic information about your site. Filling out starred items is required. Click Next.
In the second tab, there is the Database. As we mentioned before, you must have created a database for Joomla in cPanel before this step! Enter information about the new Database you created here. Except for the Username (Password) and Password (Database Name), keep the other settings in the default mode and do not change them!
Click Next.
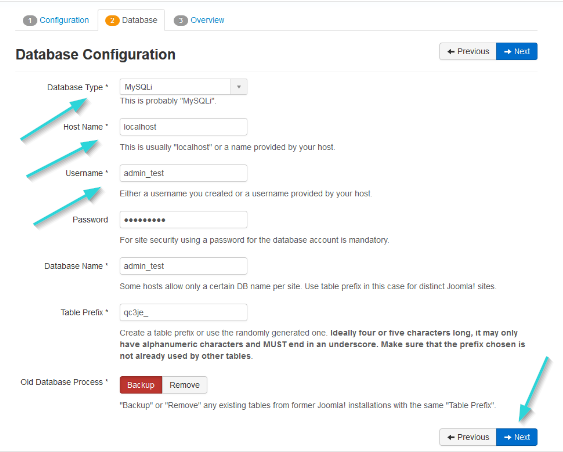
Enter the database information you created.
On the Overview tab, the confirmation screen appears. An overview of the settings you have applied so far is shown. If the information is correct, click Installation.
You can send a copy of the configuration information to your email by changing the Email Configuration settings to Yes.
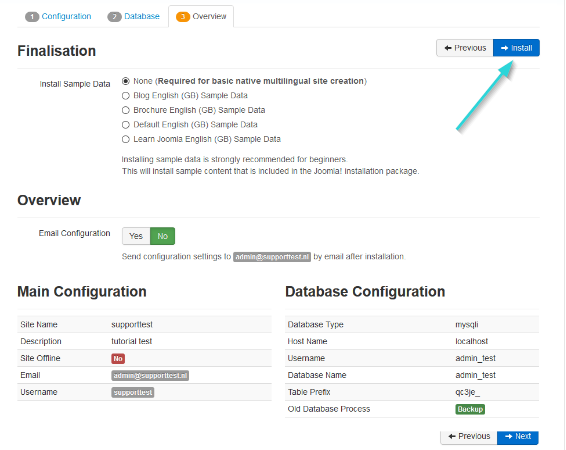
Review and install all settings.
Joomla installation in cPanel is complete! If you have correctly followed the steps to install Joomla in cPanel, Joomla will immediately suggest that you prepare your site in several languages. If you want to present your site in several languages, we suggest selecting this option.
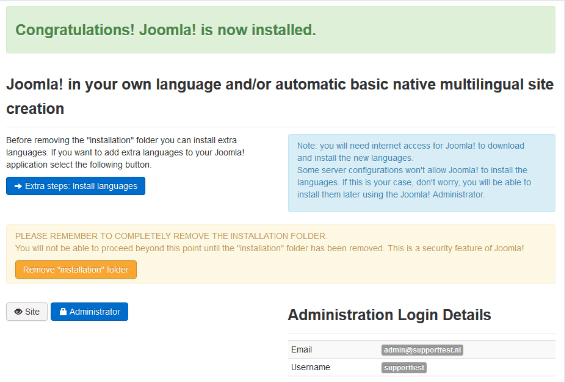
Joomla! It was successfully installed.
After installing Joomla in the cPanel, click on the Delete the Folder option to delete the installation folder and complete the installation process.
After completing all the steps for installing Joomla in cPanel, you must use yoursite.com/administrator to log in to Joomla! Enter your domain name instead of your site.
FAQ
How do I install Joomla via Softaculous in cPanel?
Go to cPanel → Softaculous Apps Installer → search for “Joomla” → click Install, then pick domain, version, and settings → enter admin info → install.
Can I install Joomla manually without Softaculous?
Yes — upload Joomla files via File Manager or FTP, create a MySQL database and user in cPanel → run the Joomla installer in your browser and fill in the database credentials.
How can I secure my Joomla installation after setup?
Delete the “installation” folder, set correct folder/file permissions, and update Joomla and its extensions regularly.