How to Install Android Applications in Windows 11
Finally, it is possible to experience Android applications on Windows 11. In This Tutorial, We Will Discuss How To Install And Run Android Applications.
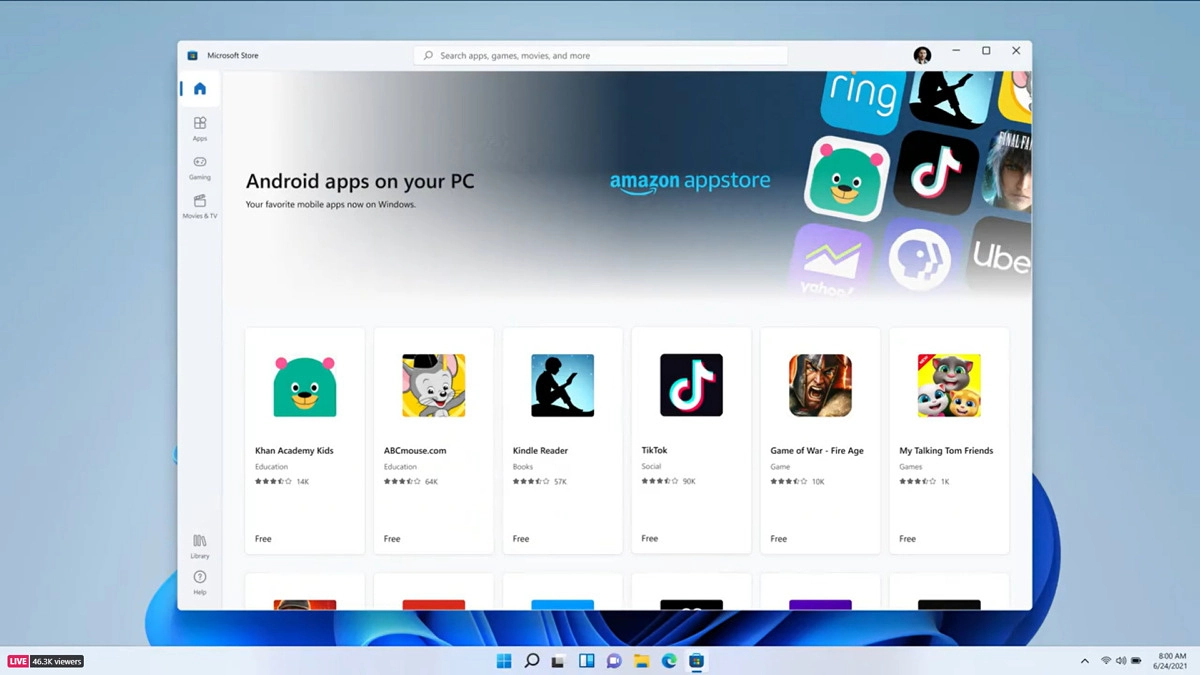
In the first major update for Windows 11, released a few weeks ago, the ability to run Android applications was finally removed from beta and made available to all users.
Microsoft engineers have developed a Windows Subsystem for Android, or “Windows Subsystem for Android,” to run Android applications in Windows 11. This program is a virtual machine with a full version of the Android operating system.
Microsoft has partnered with Amazon to download and run Android apps. By installing this app, the Amazon software store will also be established so that users can download the apps they need from the store.
However, because the number of apps in this store is minimal compared to Google Play and not all of them are optimized for Windows, many apps are not found. Is there another way to install Android apps on Windows? The answer is “yes.”
Download and install Windows Subsystem for Android.
Before doing anything, you must download the Windows Subsystem for Android or the Amazon App Store from the Microsoft Store. Note that you will need a system with the following minimums to do this:
- Support for Virtualization Technology and BIOS / UEFI-enabled
- At least eight gigabytes of RAM
- Windows is installed on SSD memory (it is not possible to run Android applications on Windows installed on the hard disk or HDD)
After installing one of the programs mentioned, it is time to install the applications. The official way to install Android apps is through the Amazon Store, but in this tutorial, we will install each app in APK format. Additionally, the Windows area must be set to the United States.
Fortunately, Microsoft has provided several features, including access to Android developer settings and debugging. Android debugging commands (ADB) allow various tasks on an Android-based device. One of the multiple commands can be used to install applications. Therefore, side-by-side download of applications outside the Amazon Store in the Windows Subsystem for Android is easily possible through ADB commands. So, follow the continuation of the training.
Steps to install Android applications in Windows 11
To install Android applications in Windows, you must follow three steps. In the first step, you must download and launch the Android debugging tool, which uses Windows command-line commands. In the second step, prepare the APK file of the desired application, and in the last step, send and install the APK file to the host using ADB commands.
Launch Android Debugging Bridge (ADB)
First, you need to launch the ADB tool in Windows to do this:
1. Download the latest version of the SDK Platform Tools here.
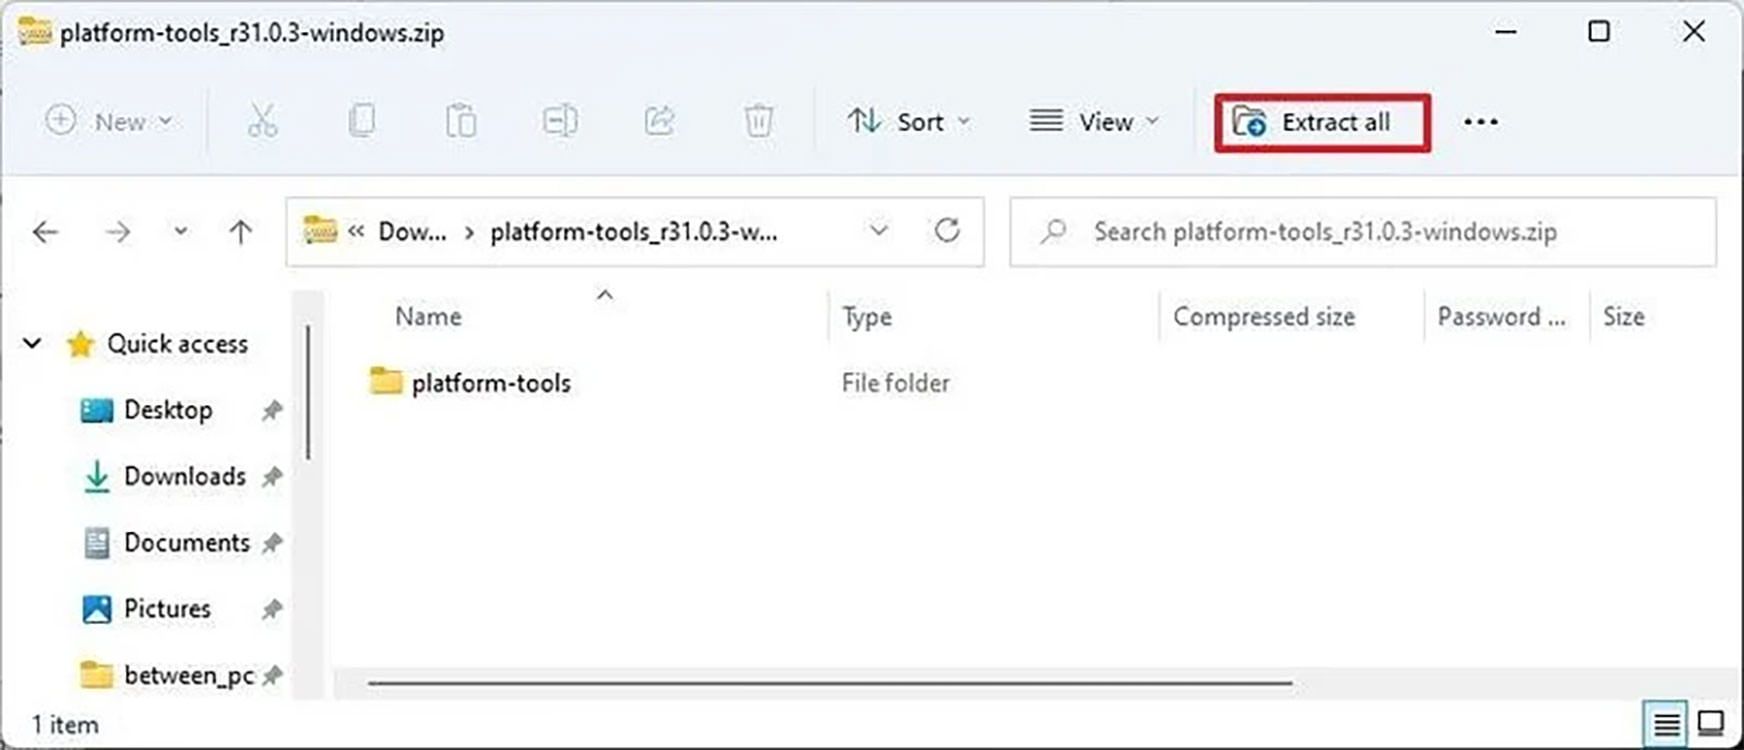
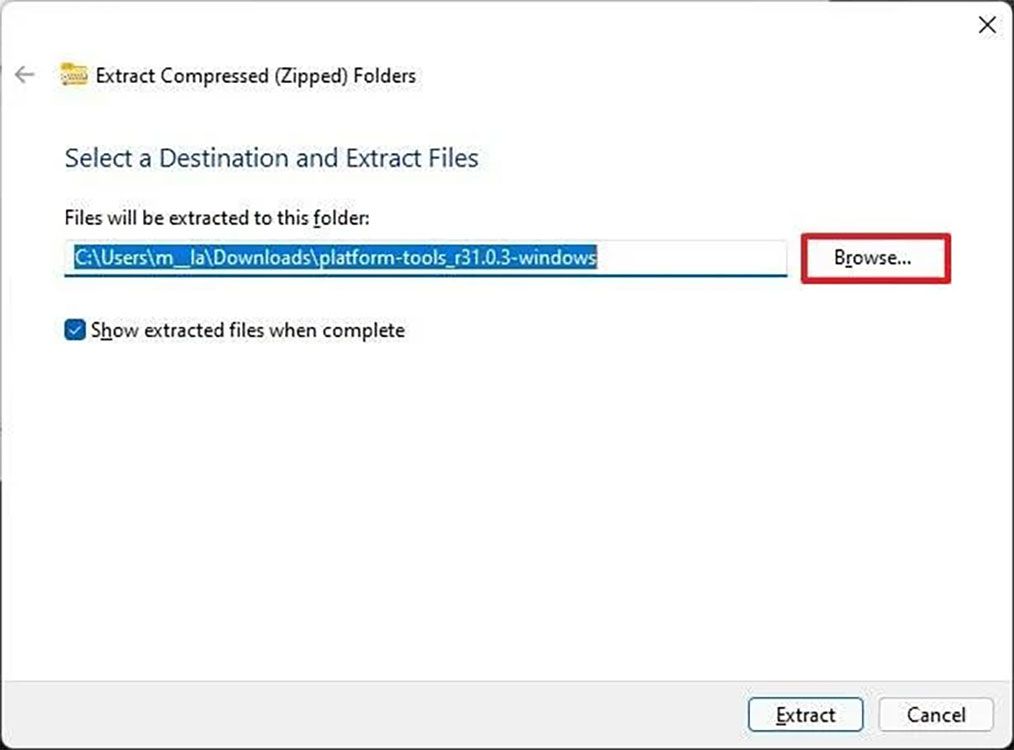
2. Open the downloaded zip file and unzip it in the appropriate place. Click on the Extract All option, specify the desired path by selecting the Browse option, and click on the Extract option.
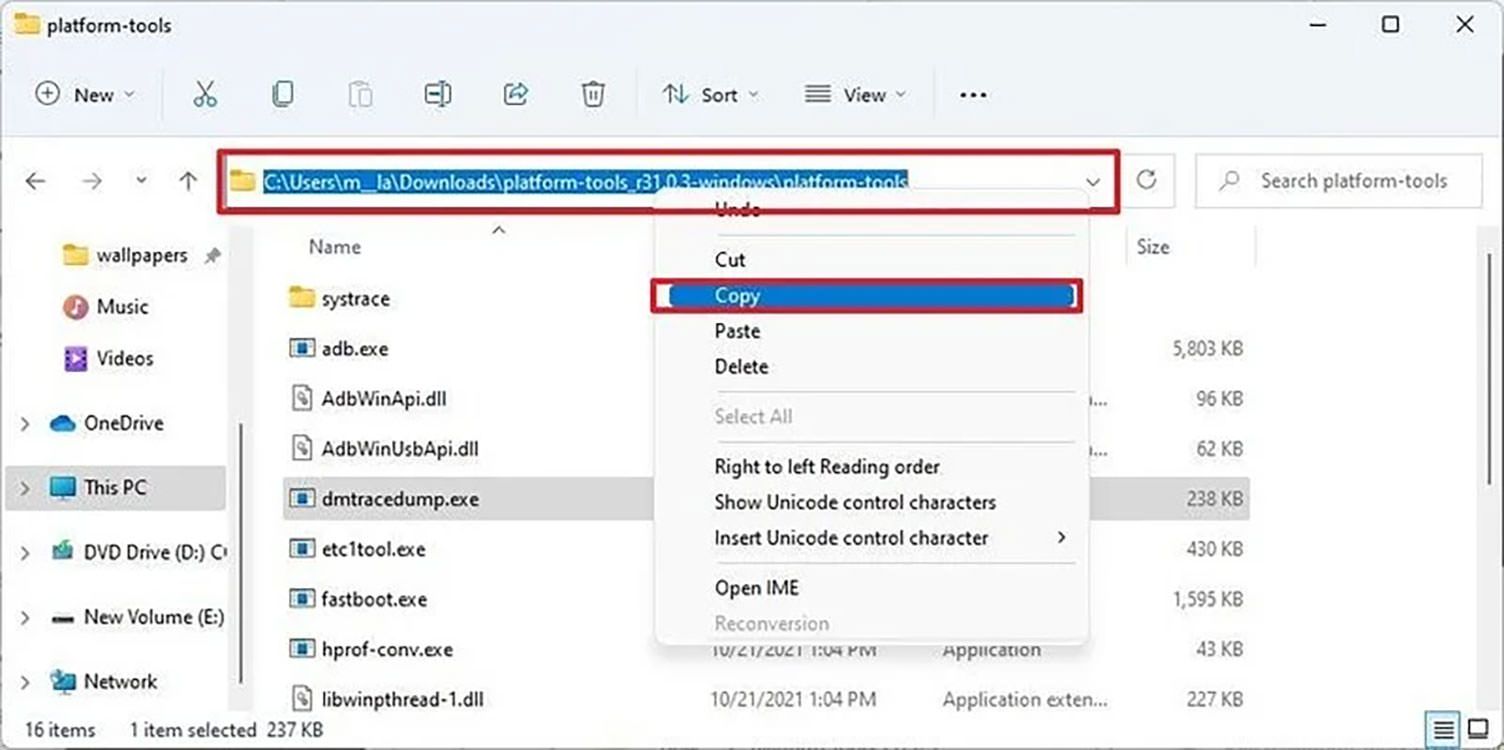
3. Open the extracted folder and copy its path from the address bar.
Download the Android application.
In this step, you need the application’s installation file, which is known as the app extension. You can use any repository to download the desired program’s app. After downloading the app, move it to the same platform-tools folder that you unzipped in the previous step.
Side download Android application
Now, to install the APK manually and outside the Amazon store, do the following:
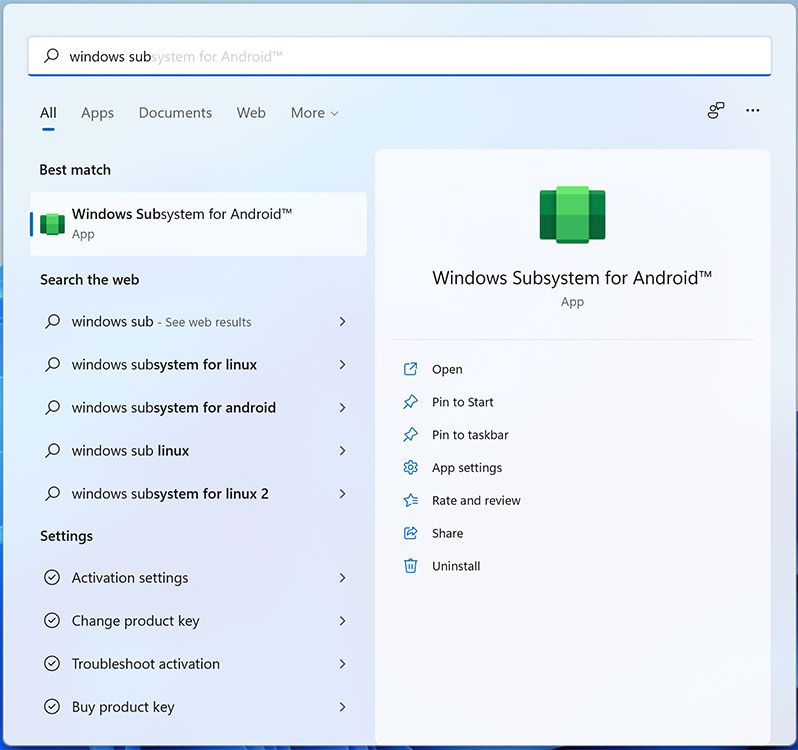
1. Open the Start menu, search for Windows Subsystem for Android, and click on the first result to open its settings window.
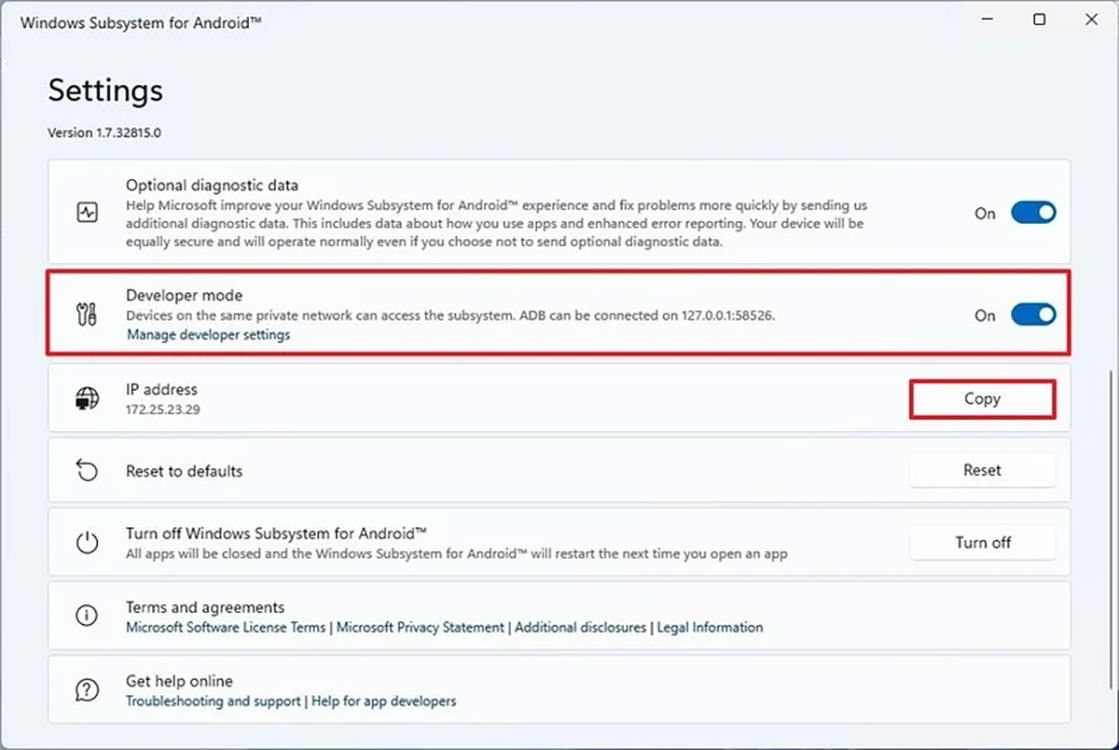
2. In the open window, find the Developer mode section and change its status icon to ON to activate the developer options in the Android environment.
3- Find the IP Address section, see the address provided for wireless troubleshooting, and copy it by clicking Copy. Because this feature uses Windows’s network, it uses the local IP address, i.e., 127.0.0.1, to connect to the network.
However, the Android system changes it to random addresses from 172.30.0.0/24. If the address is not displayed, launch the virtual machine once by clicking on Files or Manage developer settings, then click Refresh in the IP Address section and copy the address below.
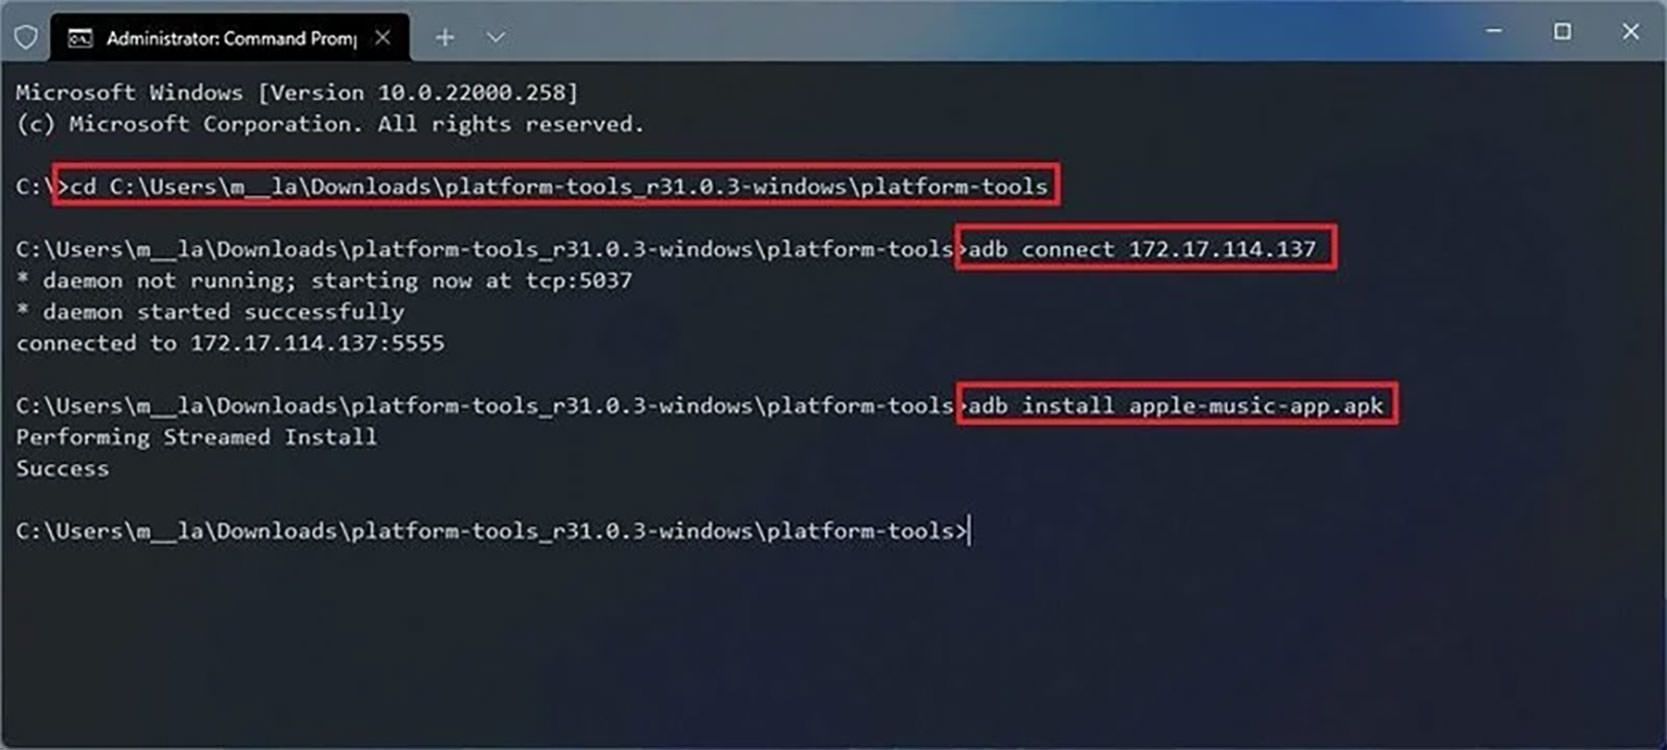
4. Now that the Android virtual machine is running in the background, open the Start menu and search for cmd. The first result is to open the Windows command line and paste the phrase cd and then the same path that you copied from the clipboard, as follows:
cd C: \ PATH \ TO \ platform-tools
“C: \ PATH \ TO \ platform-tools” is the same path as the folder. It would help if you replaced this phrase with the same copied way.
5. Now, using the following command, the Android debugging tool is called, and the connection to the virtual machine debugging interface is made:
ADB connect WSA-IP-ADDRESS
Replace “WSA-IP-ADDRESS” with the host’s IP address here. There are two ways you can do this:
- Enter the IP address of the localhost and port 58526 as follows:
ADB connect 127.0.0.1:58526
- You should replace the IP address provided in the Windows subsystem settings for Android that you copied in section 3 with “WSA-IP-ADDRESS.”
6. Install the desired program with the help of the following command:
adb install ANDROID-APK-APPNAME
You must replace the phrase “ANDROID-APK-APPNAME” with the name assigned to the APK file. For example, for installing the “Apple Music” application from the APK file named apple-music-app.apk, the following command is executed:
ADB install apple-music-app.apk
You have already placed the downloaded APK file in the platform tools folder.
After following all the above steps, the application or game you want will install, and its shortcut will be in the Start menu like other Windows applications. Also, by right-clicking on the shortcut and selecting the App settings option, you can access that application’s settings in the Android environment and delete it with the Uninstall option. If the icon does not appear at startup, you can call the applications with the following two commands on the command line:
%LOCALAPPDATA%\Microsoft\WindowsApps\MicrosoftCorporationII.WindowsSubsystemForAndroid_8wekyb3d8bbwe\WsaClient.exe /launch wsa://<PACKAGENAME>
adb shell monkey -p <PACKAGENAME> 1
Here, < PACKAGENAME> is the application ID.
With this method, you can also install third-party software stores and a wide range of Android applications from within the same stores without the need to execute ADB commands. This is also possible by installing a browser in the subsystem and downloading the APK file through the same browser.
It should be noted that the implementation of applications dependent on Google services may have problems, or you may suddenly leave the program. This article explains how to install the Windows Subsystem for Android and Google services.
Have you installed the official Microsoft emulator for Android in Windows 11? What do you think about the company’s decision to run Android applications in the Windows environment?
FAQ
How can I run Android apps on Windows 11?
Enable Windows Subsystem for Android (or equivalent), then sideload or install compatible Android apps.
Do all Android apps work on Windows 11?
No — only apps compatible with the Android subsystem on Windows will run properly.
Is installing Android apps on Windows 11 safe?
It’s generally safe if you use trusted sources or official stores; avoid installing unknown or unverified APKs to reduce security risks.