


How To Increase Photo Resolution With Super Resolution Photoshop
In this article, you will learn how to use the Adobe Photoshop Super Resolution AI-based feature to increase the resolution and size of image files.
Adobe Photoshop Super Resolution is a remarkable technology that uses artificial intelligence to quadruple the size of photos. The end result is not extraordinary; But it’s a great way to breathe new life into old photos and print photos bigger with twice the pixels in width and height. This report teaches you how to use Super Resolution.
According to an article of Cnet , Adobe to create such a capability, with millions of photo-realistic artificial intelligence technology Senseio trained. In the process, the original versions were placed in front of the system alongside one-fourth of the options so that it could learn the best way to restore them. The Super Resolution feature does the same thing to your photos and is fully aware of how to increase their sharpness.
If you think about the performance of this system, you will notice that Adobe’s new feature is supposed to create pixels that did not exist at all in the first place; But this is not going to be done as magically as science fiction movies.
It is better to put these issues aside and pay attention to the results that have been achieved so far with this feature.
The Super Resolution feature has been able to work with many images and deliver acceptable results, especially when it comes to extending the edges of a photo; In this case, the system can handle the operation well without adding artifacts such as toothed pixels. Based on the experience gained in using it, the new feature of Photoshop can even process the face, which is one of the most important parts of a photo, well.
In this section, you will first learn how to use Super Resolution alone, then how to apply it to JPEG images, and finally how to work with this tool in Adobe Lightroom software to edit and index photos. Adobe is said to be finally planning to add this feature to Lightroom.
Use Super Resolution in Adobe Camera Raw
Start the Super Resolution process by opening a raw file. Photoshop opens raw files directly in Adobe Camera Raw. Right-click on the image and select Enhance. You can also use the Command-Shift-D keyboard shortcut in Mac OS X and Control-Shift-D in Windows.
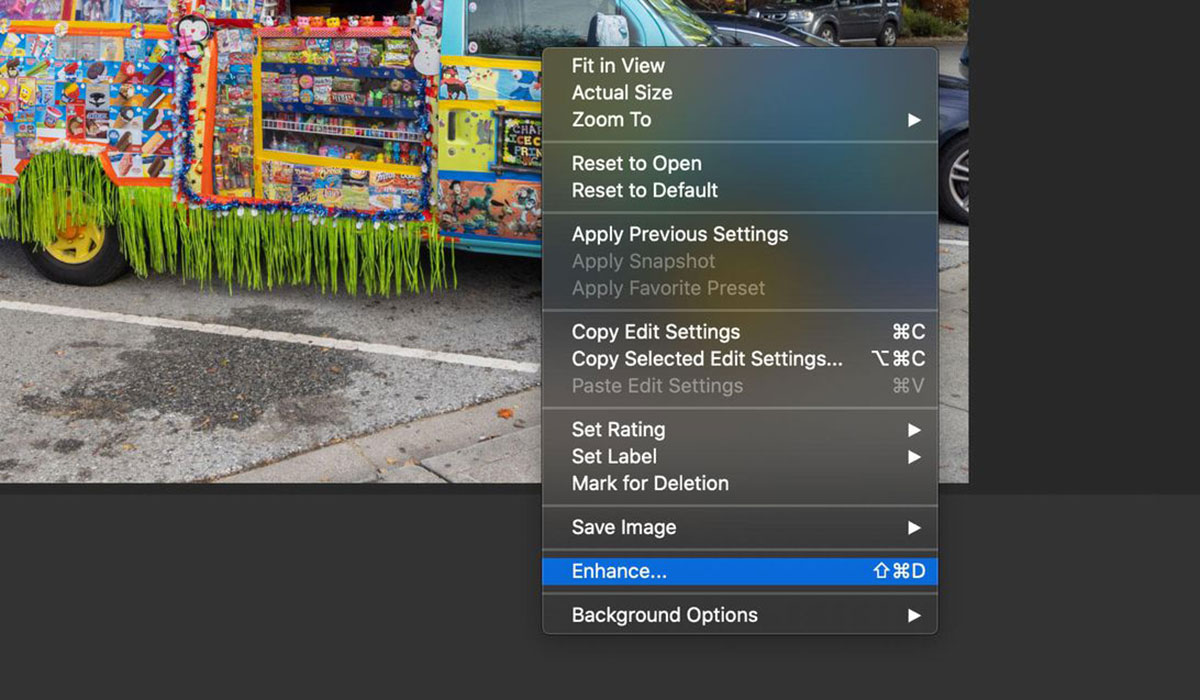
In this step, you will see the Enhanced Preview box with several options to control the process ahead. First, you will see the Raw Details option that Adobe added to its software in 2019, which improves the rendering of raw files. Below that is a box to confirm Super Resolution , be sure to check it.
To view the expected results, click and drag to activate the preview.
Click on the magnifying glass icon to zoom in and select the location you want to scrutinize exactly.
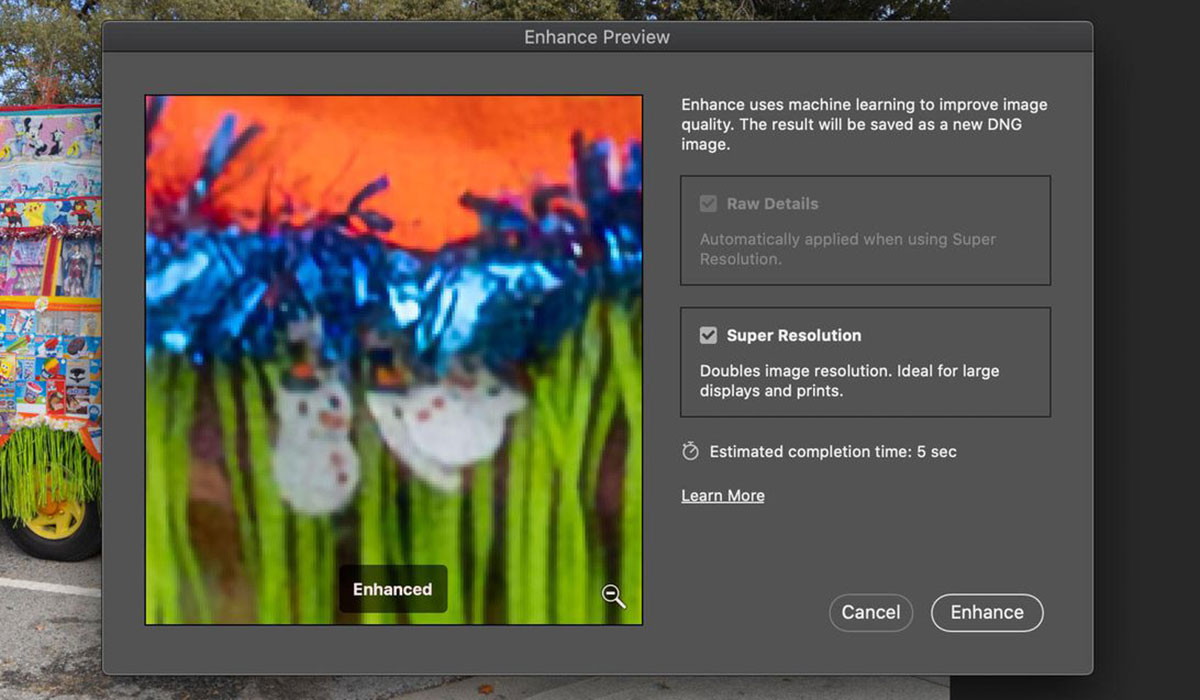
Click the Enhance button and wait. Photoshop shows its estimate for the duration of the process. This process may take up to a few minutes in some cases; But it often does not take much time. Experience has shown that sometimes it only takes a few seconds to convert 12 megapixel photos to 48 megapixels. If you want to skip the Enhanced Preview step, hold down the Option button in Mac OS X or Alt in Windows and click Enhance.
The next step in this process is fine-tuning. It is recommended that you use close-up magnification at this stage to edit details such as sharpness, texture, and noise reduction using existing tools.
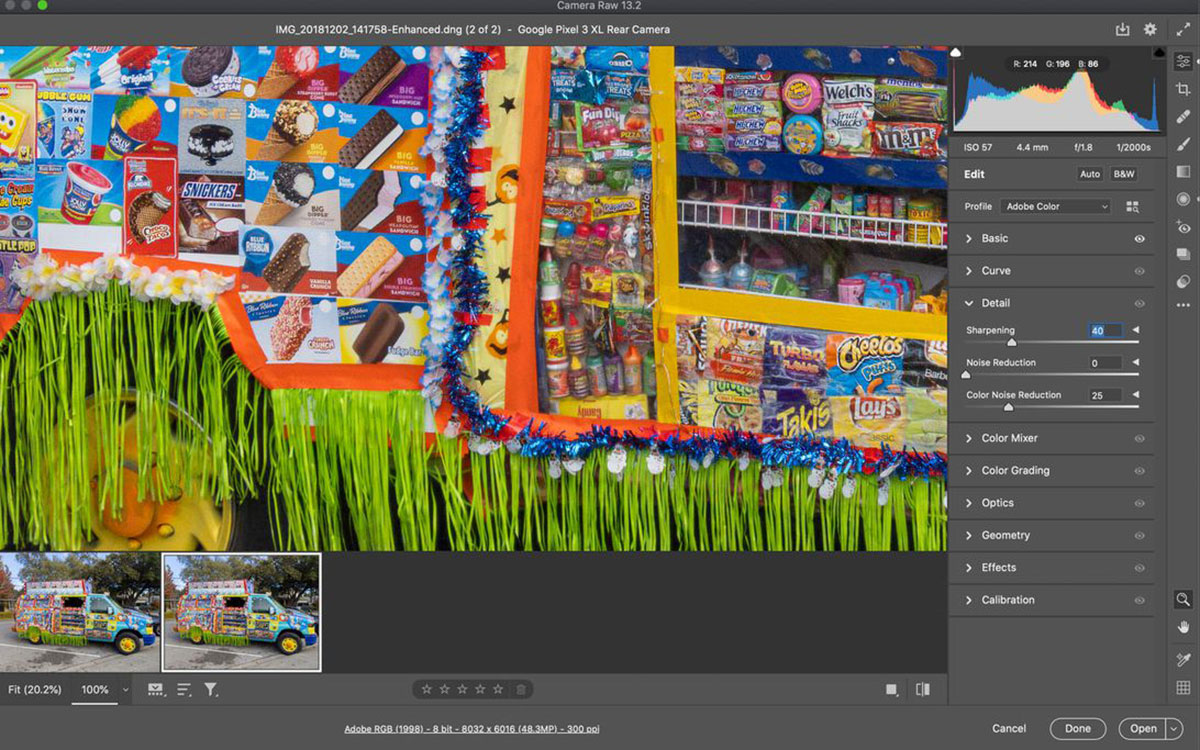
In the last step, you have two options: you can click the Done button and see the new version next to the original file (then the file name is added – Enhanced) or click Open to open the final image in Photoshop.
Use Super Resolution feature for JPEG format
The process for applying the formats JPEG, or HEIC or TIFF, you must first change the default settings for Photoshop files in Adobe Camera Raw opened with that format. Unfortunately, you can not use the Camera Raw Filter command in the Filter menu to do this.
First open the Photoshop settings section, go to the File Handling section, then click on Camera Raw Preferences. In the next box that appears, click on File Manager. Simply change the JPEG / HEIC option to “Automatically open all supported images” and do the same for TIFF images.
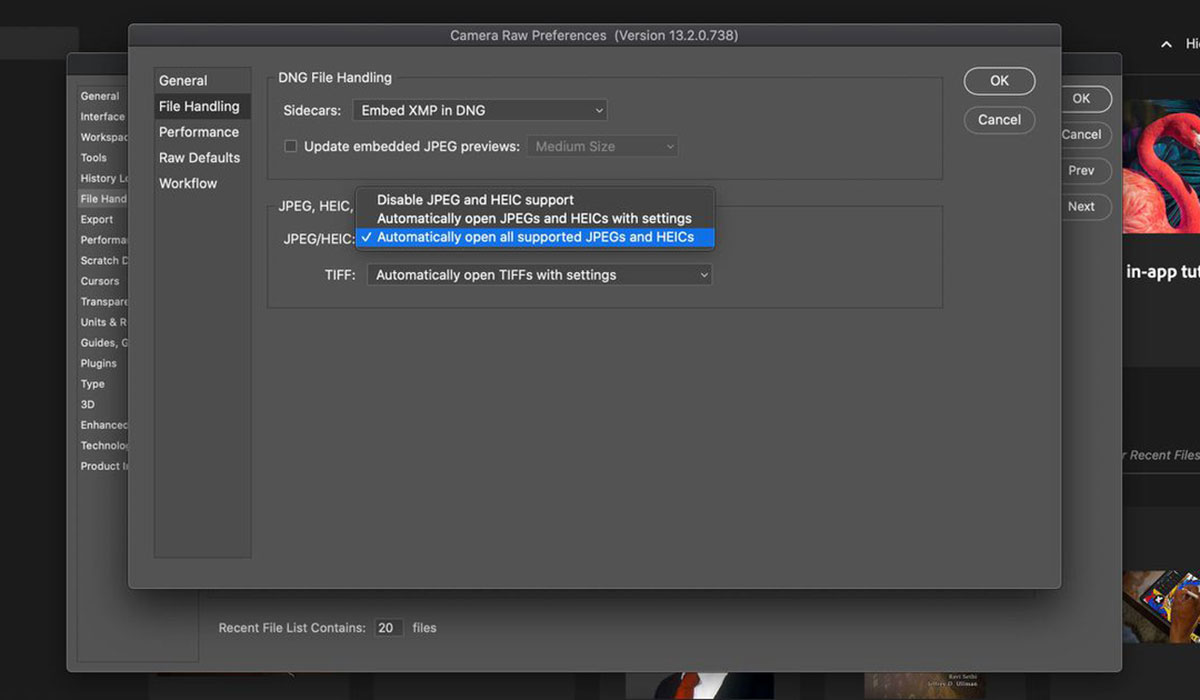
Note that applying these settings means that these images open in Adobe Camera Raw; Even if you do not intend to use Super Resolution and other Adobe Camera Raw editing options. Since some users use different features of this section, they do not have a problem; But if you are one of those groups that need other editing options, it is best to reset the settings after this process.
Mirrorless DSLR cameras from Sony, Nikon, Canon and other companies are capable of shooting in RAW format. Smartphones are also getting better, despite Apple’s ProRaw format and Google’s computing technology .
Use the Super Resolution feature in Adobe Lightroom
As long as Adobe adds Super Resolution directly to Lightroom, it will take a bit of effort to use it in this software. Here’s how to use Lightroom Classic to save files to your computer’s local storage systems.
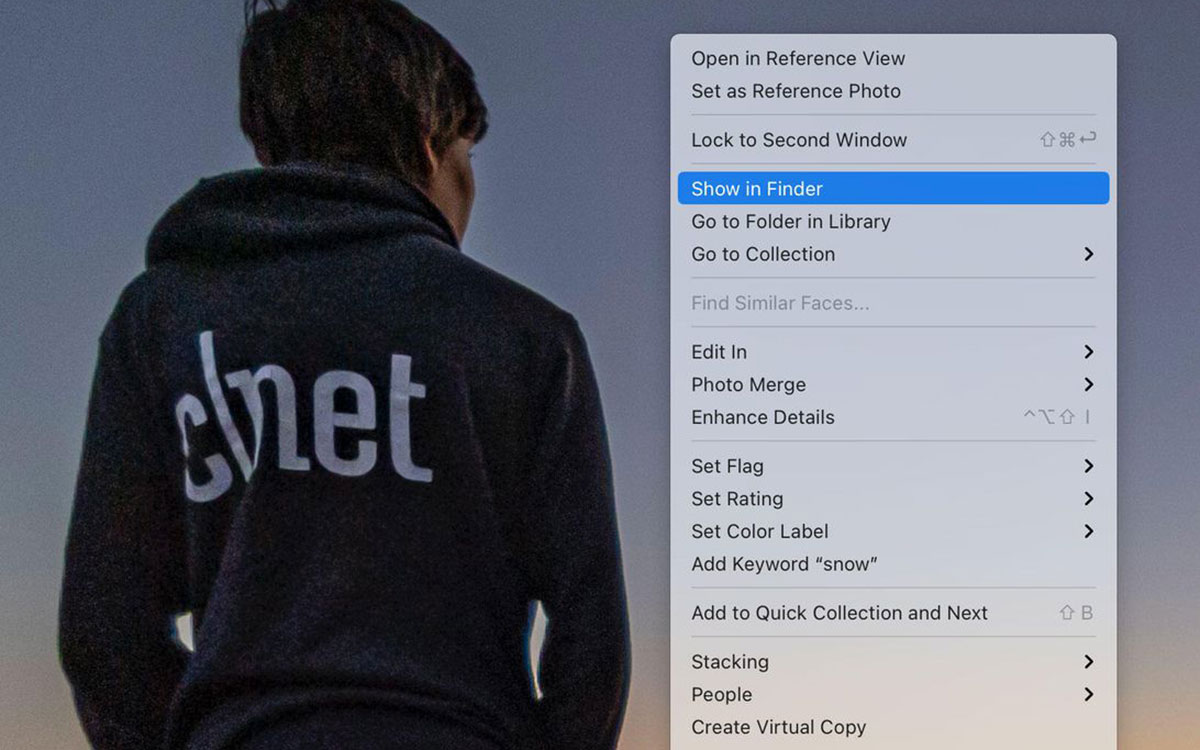
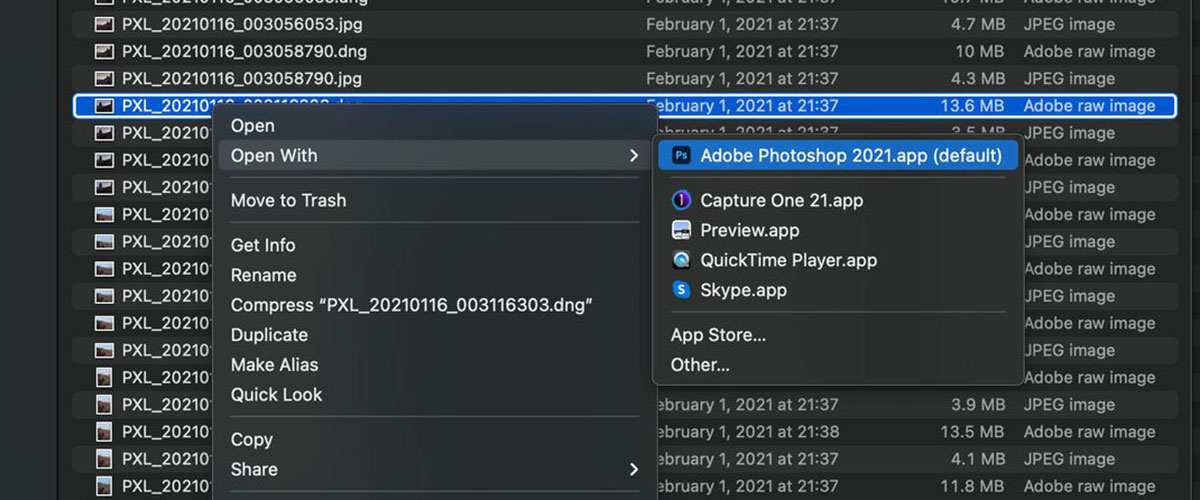
If you are a regular user of Lightroom, you are probably used to the Edit in Photoshop command; Unfortunately, you can not use it for Super Resolution. Instead, right-click on the image and select Show in Finder in Macau or Show in Explorer in Windows. This will take you to a file, then you can open it in Photoshop.
Follow the steps above to apply Super Resolution. You can edit the image further in Adobe Camera Raw; But if you prefer Lightroom environment, just click Done.
You should now enter the advanced version of Lightroom.
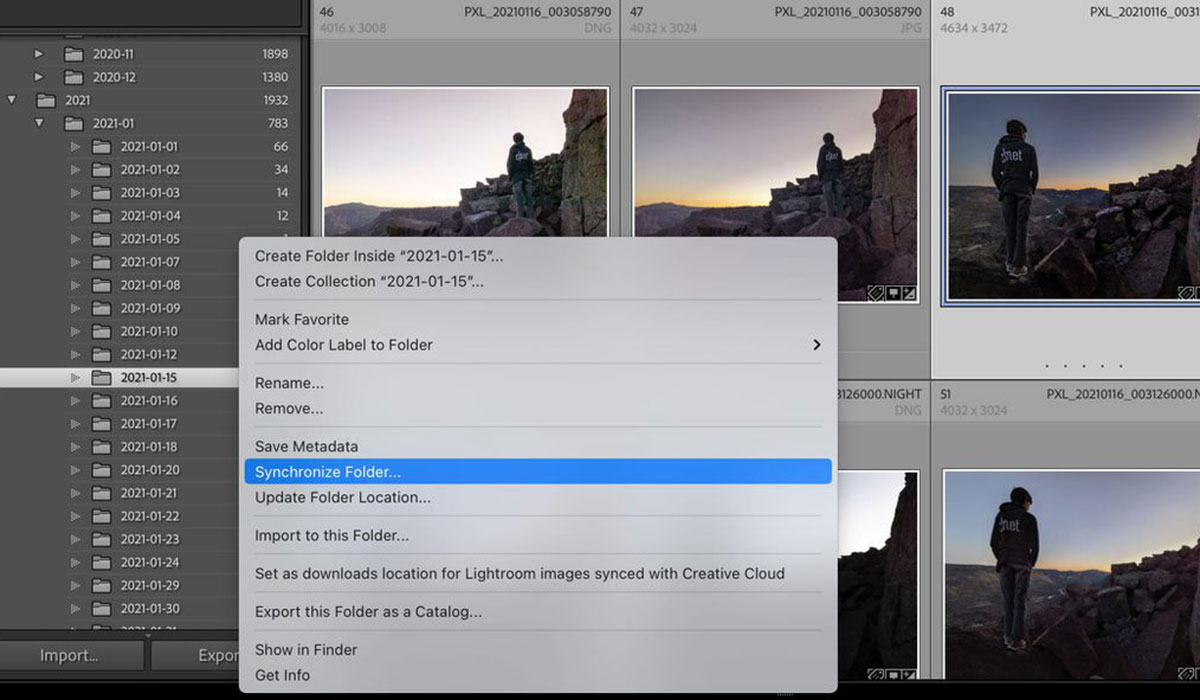
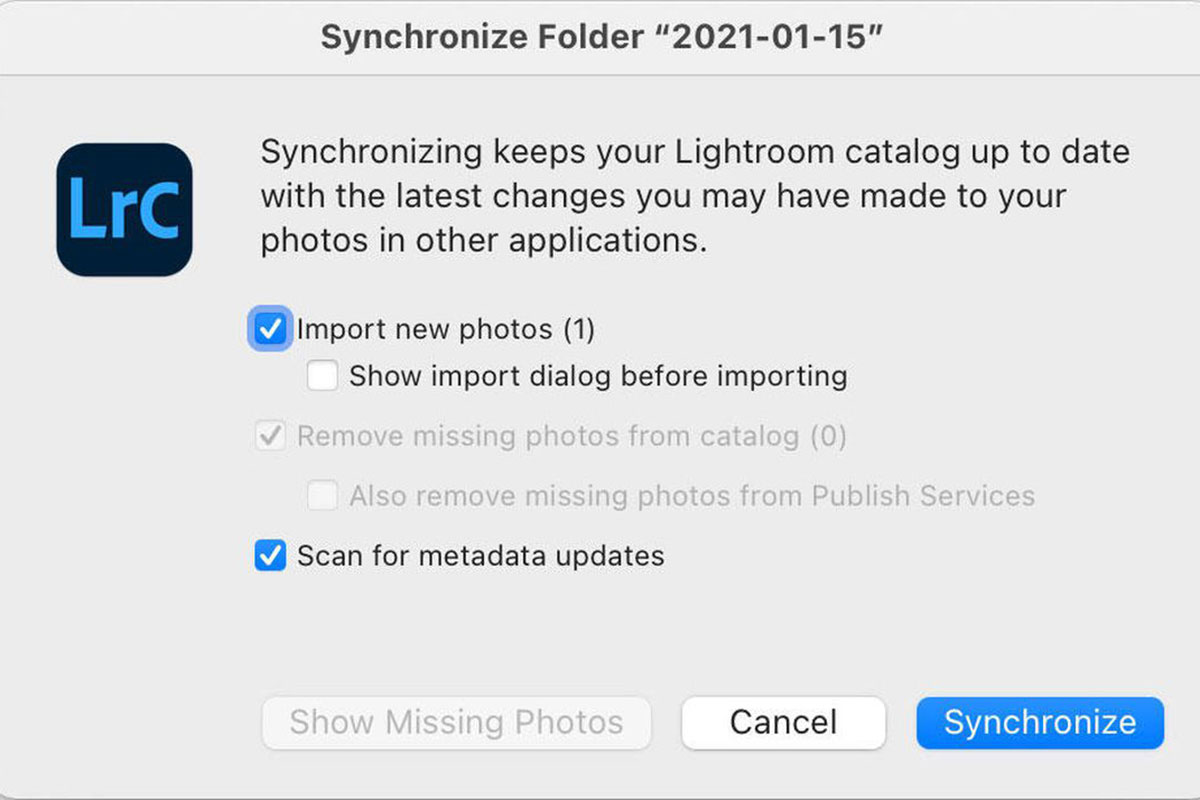
In the Lightroom folders section, right-click on the folder where the original version is stored.
Then click on Synchronize Folder; Lightroom should identify the new version. Finally, click the Sync button to display the file in the software directory.
If you want to be aware of the latest changes to the Super Resolution feature, be sure to check out new versions. Experience has shown that to get better results in certain areas of the image where artificial intelligence may be mistaken (such as hair), it is better to reduce the sharpness of the images (Sharpness). There are other tricks to improve the end result that you can find by searching the internet.
After learning how to work with Super Resolution in different situations, it is better to pay a little attention to the power of this feature and its effects on images. This feature goes beyond the clarification and detail enhancement algorithms previously used. Using it, you can see a doubling of the linear resolution, resulting in a fourfold increase in the number of pixels.
This is not the first time we have seen an increase in the performance of software features; But Super Resolution has been able to have a significant impact in this regard.
To test the power of this technology, an experiment has been conducted, the results of which you can see below.
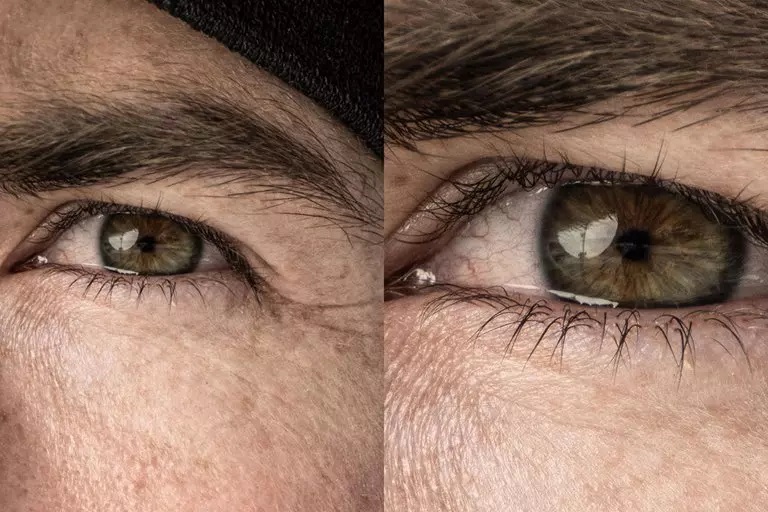
Low resolution cameras like the Sony a7S III have long been admired for their low light capability. In short, low-resolution sensors have larger pixels, which often means more light; As a result, they provide better results with high ISO. To test this, the same images with 25600 ISO were taken by Sony A7SIII and Sony A7RIV cameras, and exactly the same test was performed to compare the 20-megapixel Canon EOS R6 with the forty-five-megapixel R5. After using the Super Resolution feature in the recorded images, the results were amazing.
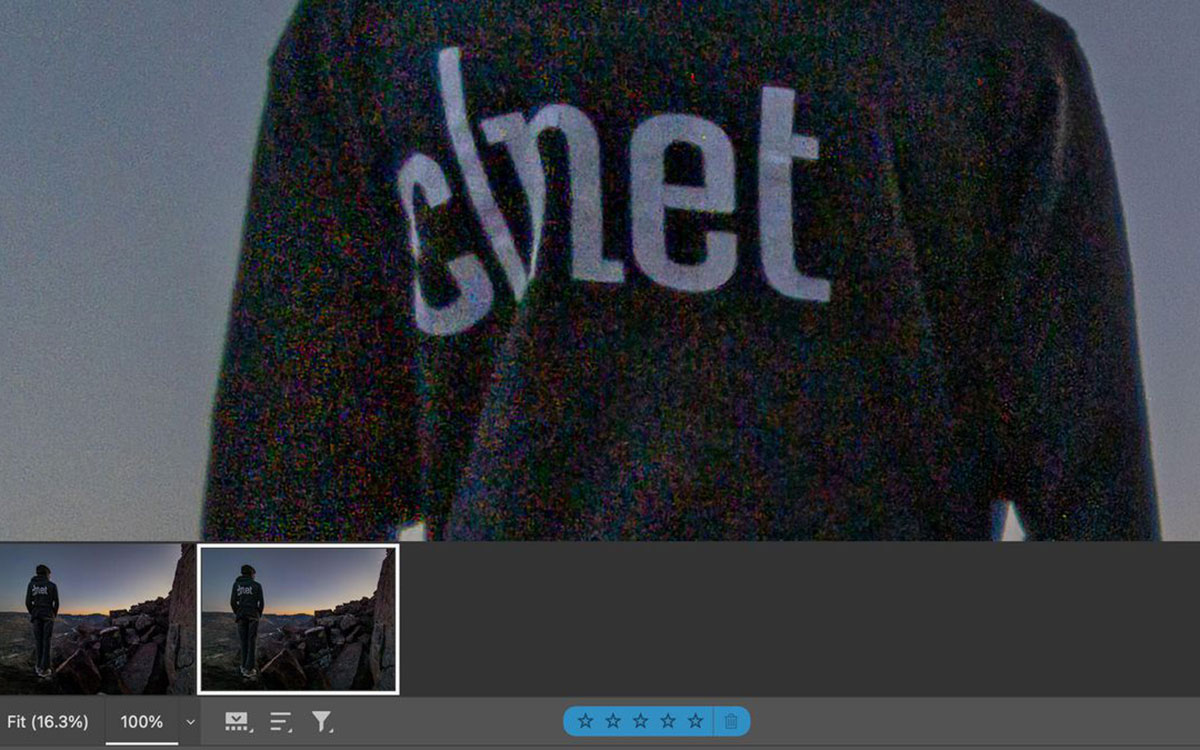
Next, the image on the left was captured by Alpha 7S III and then the Super Resolution process was performed on it.
The image on the right was taken by Alpha 7R IV.
Equipped with a 48-megapixel resolution, the Sony a7S III captures the details of the a7R IV shower, doing so with less noise and more color retention.
The experiment was repeated with Canon R6 and R5, which had similar results; Of course, the R6 managed to capture images with more detail, higher color information and less noise. Next, the image on the left is captured by the EOS R6 and then the Super Resolution process is performed on it.
The image on the right was taken by EOS R5.
Unprecedented results were obtained after performing this experiment. Files improved by Super Resolution technology had much more detail, which made editing much easier.
In general, the result of this test indicates the excellent performance of this feature. The artificial intelligence used in Adobe Photoshop’s new feature can make a big leap in photography and editing.