How to Fix 403 Forbidden Error on Google Chrome
How to Fix 403 Forbidden Error on Google Chrome
You may encounter a “403 forbidden” error when you access a page with no website content or a page you cannot access. The reason is that most websites have banned the browsing of files in directories to prevent hackers from accessing sensitive files.
You can fix the 403 error using the following methods. Check the .htaccess file. Reset file and folder access. Disable WordPress plugins. Upload the main command page. Edit the ownership of the file. Verify the A record and remove any malware. Clear your web browser’s history and cache.
However, if you or your visitors encounter this error, you must resolve the issue to avoid losing valuable visitors. Considering that the cause of this issue is different, several methods exist to improve the 403 error.
Here we explain the different types of 403 forbidden errors, the possible causes, as well as 11 methods to fix the 403 forbidden error, and we recommend that you do not miss this article; Because the occurrence of 403 errors can hurt your user experience and you will lose many of your customers, and if this matter is essential to you, you can increase the speed of your site by preparing a virtual server and have a good user experience for Provide your users. For this purpose, you can refer to our site’s virtual server purchase page. Be with us.
What is a 403 error?
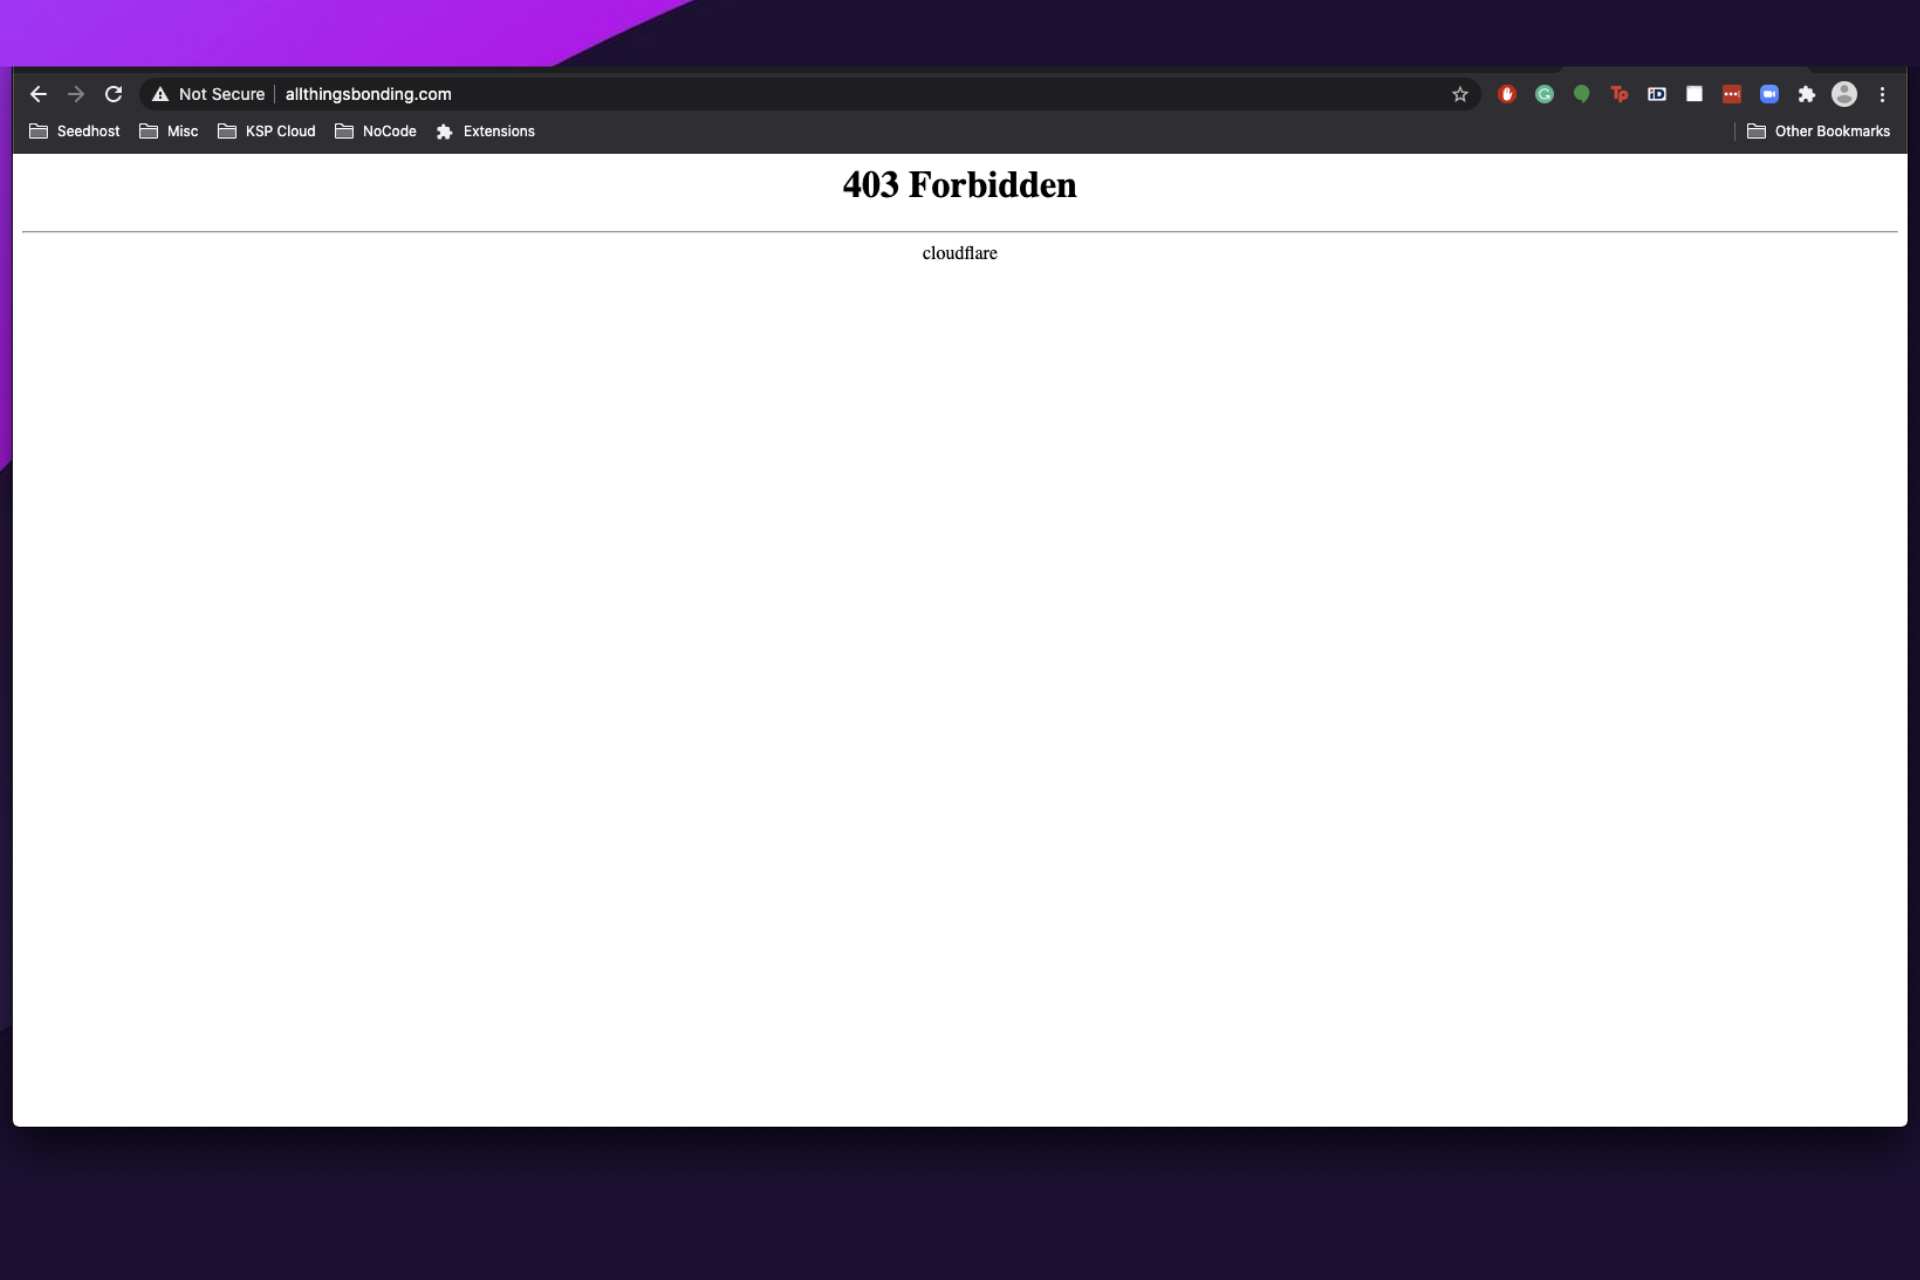
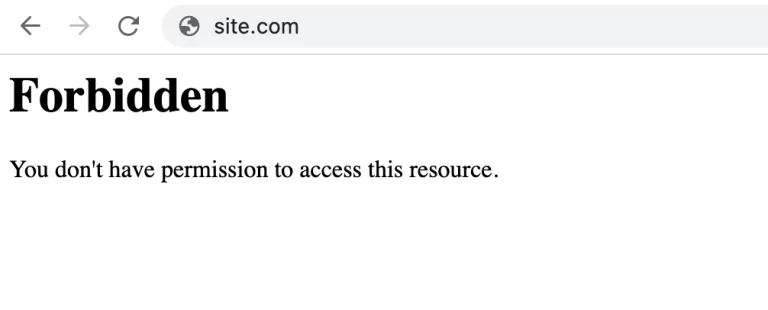
403 Forbidden error means you are not allowed to access this resource. This HTTP status code occurs when the web server understands the request but cannot provide additional access. In response to the question “What is error 403?”, we must say that it prevents you from accessing this page.
Cause of the Forbidden 403 error
Some of the causes of HTTP 403 Forbidden errors are due to some client-side access errors, which means you can usually fix the problem yourself.
One of the common causes of these errors is the file or folder permission settings that control who can read, write, and execute the file or folder.
There are two possibilities in this case: either the website owner has edited the settings so you cannot access the resources, or he has not set the correct permissions.
The second common cause is incorrect or corrupt settings in the .htaccess file. This may occur after making changes to the file. Fortunately, the problem is easily solved by creating a new server configuration file.
In addition to the two common reasons mentioned, there are other reasons for this error:
The website’s main page is missing (Missing index page): The website’s main page is not named index.html or index.php.
Faulty WordPress plugin – If a WordPress plugin is not configured correctly or compatible with another plugin, it may cause 403 errors.
Wrong IP Address – The domain name refers to an outdated or incorrect IP address currently hosting a website, which blocks your access to it.
Malware – Malware infection may cause persistent corruption of the .htaccess file. To restore the file, you need to remove this malware. New Page Link – The website owner may have updated the page link, which is now different from the cached version.
How to fix the 403 Forbidden error?
Since the HTTP 403 Forbidden error is directly related to file access permissions, our present methods will focus on resolving it.
However, alternative solutions exist to resolve this issue, such as clearing the browser’s cache or scanning for malware.
Look at the eight methods available to resolve the 403 HTTP error.
Please note that while the steps outlined here primarily focus on WordPress, they can also be applied to other websites.
1. htaccess file. Check out
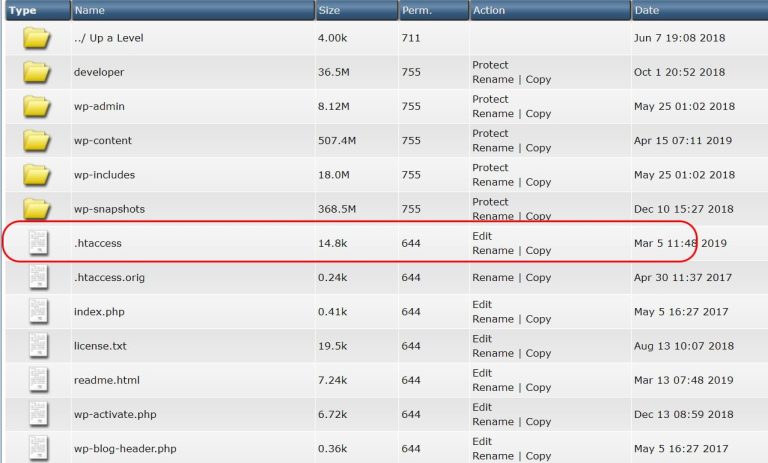
From where is the htaccess file? It remains hidden in the site directory, so you may not be familiar with this file. However, you can access this file by default through the public_html guide.
To find it, follow these steps:
Visit your server with root access (public_html) or use FTP management software (such as Filezilla).
When you enter your server space, you can see the following page.
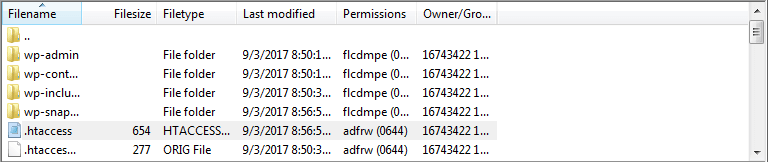
If you are using direct admin and want to connect with the help of FTP, you will encounter a scene similar to the image below.
Pay attention that if you cannot find this file, it indicates that it has not been created. In this case, go to the article on how to create an htaccess file in WordPress and create this file.
2. Reset file and directory permissions
This error (HTTP 403 errors) may cause your website to get a 403 error due to incorrect permissions on files or folders. When files are created, they have a specific default file permission that controls how you can read, write, and execute them.
Using FTP, you can edit files and folder access. To get started, you must:
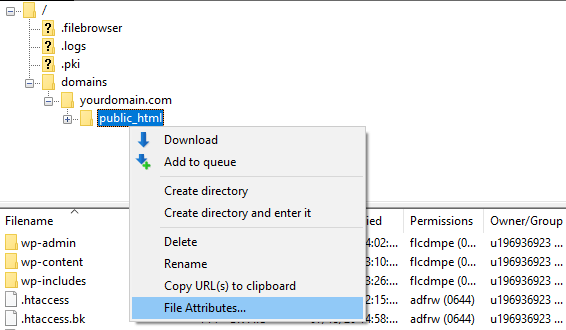
Configure an FTP client and connect to your website, then right-click on public_html and select File Attributes.
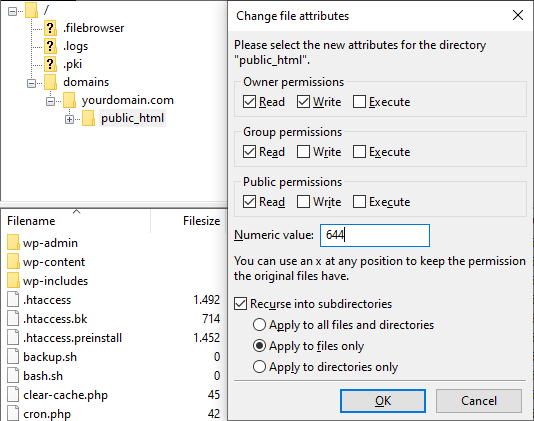
In the Numeric value field, enter license 755, select the “Apply to Directory only” option, and press the OK button. The general way to assign numerical values to file permissions is to use 755 for folders, 644 for static content, and 700 for dynamic content.

After changing the folder access, repeat steps 2 and 3, but this time enter the number 644 in the Numeric value field and select the Apply to files only option.
After completing these steps, try logging in to the site and check if the error is resolved.
3. Disable WordPress plugins
If you’ve made it this far and none of the previous methods worked, the 403 forbidden error may be due to an incompatible or broken plugin. We’ll try to turn off the plugins to see if that resolves the 403-banned issues.
We recommend you turn off all plugins and then check them individually. With this method, you should be able to identify the problem and move toward finding a solution. Here’s what you need to do:
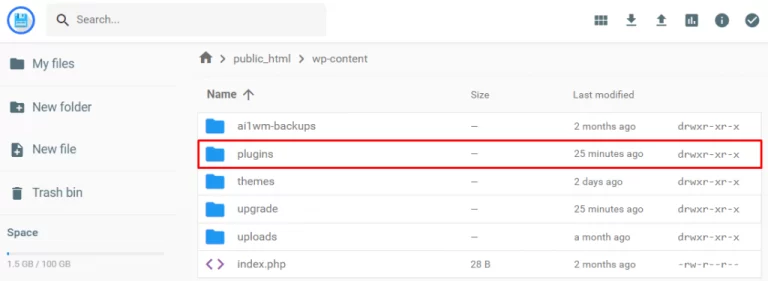
Access your server account via FTP and navigate to the public_html -> wp-content folder.
Find the plugins folder.
In the next step, change the folder’s name to another, such as disabled-plugins, so all plugins are disabled.
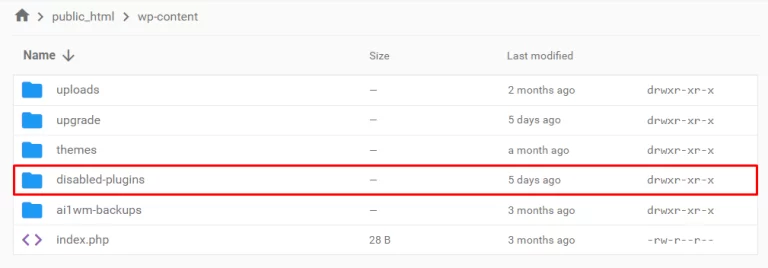
Try reaccessing the website. If the error no longer exists, a problematic plugin is the trustworthy source of the error. Rename the folder to Plugins to enable all plugins.
Now you need to disable the plugins from your WordPress dashboard and check whether the website works. This method allows you to identify the problematic plugin. Once you find it, update or remove the plugin if needed.
However, you may need to contact your hosting provider for assistance if the error still appears.
4. Upload a listing page
If you want to upload a homepage for your website, first check the homepage name of your website. It should be called index.html or index.php. If it does not have a suitable name, there are two solutions. The first and easiest way is to rename the homepage to index.html or index.php.
However, if you want to retain the current homepage name, upload an index page to your public_html directory and create a redirect to your existing homepage.
Here are the steps to follow:
1- Upload an index.html or index.php file to your public_html directory. To do this, use your hosting account’s file manager or FTP.
2- Open the .htaccess file.
3- Enter this code to return the index.php or index.html file to your main home page. Don’t forget to replace homepage.html with the actual name of the page.
Redirect /index.html /homepage.html
5. Edit file ownership
If you use a Linux server or VPS, incorrect file ownership can result in a 403 Forbidden error.
Files and folders can be assigned to an owner, a group, or both. Note that you need SSH access to change ownership in these environments. It would also be helpful to have an SSH terminal to connect to the VPS.
After connecting to your website server via SSH, verify ownership using the following SSH command:
ls -1 [file name]
The result you see will be like the example below:
-rwxrw-rw- 1 [owner][group] 20 Jul 20 12:00 filename.txt
See the Owner and Group section. The correct ownership should be the username of your hosting account. If you see a different license, use the Linux chown command to change the ownership of the file. Below is the primary writing method for the chosen order.
chown [owner][:group] [file name]
For example, if your username is ded9, use a command like the following:
chown ded9 filename.txt
6. Verify A Record
If your domain name points to the wrong IP address and you don’t have access to view the content, a 403 error will occur. You need to ensure that your domain name points to the correct IP address.
7. Check for a virus
A virus may be another reason for the 403 error. If your WordPress site is infected by malware, it may continuously inject unwanted code into your .htaccess file. Because of this, even if you repair the file using the primary method we provided, the error will remain.
Check your website for any viruses. For this, there are security plugins for WordPress, such as Sucuri or Wordfence.
8. Clear your web history/cache
We said that one of the reasons for the 403 error may be caused by files in your browser’s cache or cookies (small pieces of information stored on websites). The stock holds the necessary information to open a website in your browser, making it faster the second time it is opened. However, this may be due to a website update that causes the current address and the address stored in your browser cache to differ. Likewise, your browser cookies may also be the cause of this error. This can happen to the website you usually log in to and log in to your account.
Clearing the browser’s cache and cookies should resolve the issue. Clearing the cache may cause a delay on your next visit to the website, as your browser will request all the site files again. Also, deleting cookies will make you exit from all the websites you have entered.
To clear cache and cookies in Google Chrome, follow these steps:
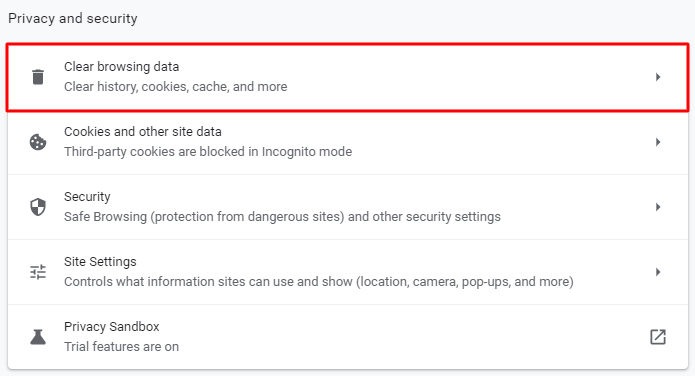
Select the settings option on the three dots icon in the upper right corner. Locate the Privacy and Security section and click on Clear browsing data.
Use the drop-down menu to select the duration for which you want to delete data. Then check the “Cookies and other site data” and “Cached images and files” options.
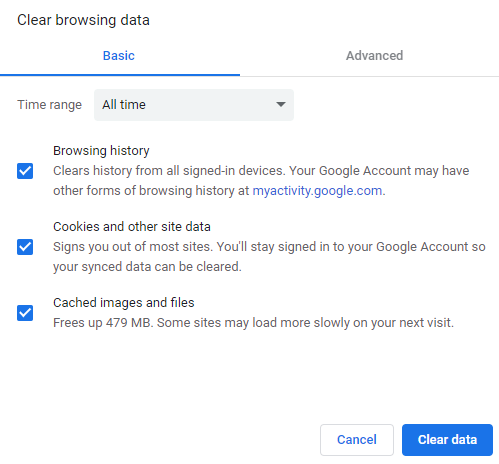
Click on the Clear Data option.
After completing all the steps, try visiting the website and logging in if necessary. We suggest contacting our support team to resolve the issue if this or any other solution fails.
9. Refresh the page
“Refresh the page” is a simple way to fix the problem. The 403 error is often temporary and can be fixed with a simple update. Most browsers use Ctrl + R on Windows or Cmd + R on Mac to refresh, and have a refresh button in the address bar.
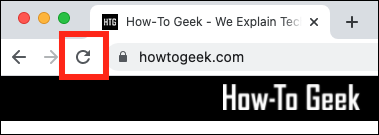
This method isn’t beneficial, but it’s worth a try.
10. Check that the URL you want to open is typed correctly.
We said that one of the reasons for the 403 error is that users enter the address incorrectly. To ensure that the URL you are trying to access is for a web page or file and not a folder, note that a typical URL ends with .com, .php, .org, or .html. Find or only has an extension, while a folder URL usually ends with a “/.”
Most servers are set to disallow the update folder for security reasons. When they are configured correctly, you will be redirected to another page. When they are not set correctly, you may see a 403 error.
11. Disable CDN temporarily
If you’re receiving a 403 error when accessing resources such as images, JavaScript, or CSS, the issue may be related to your CDN.
We suggest temporarily disabling your CDN and checking your site to see if the issue is resolved.
Conclusion
A 403 error may be the reason you are unable to access a page, which can cause frustration and dissatisfaction. The leading cause of these errors is usually due to incorrect file permissions. Still, several other factors exist, such as missing index files, invalid plugins, viruses, and malware.
Finding the real cause of these 403 errors can be complicated. However, by following the methods mentioned in this article, we are confident you can get your website up and running again.
The 403 forbidden error is just one of the HTTP error codes. As a website owner, you may encounter other 404 or server-side errors, such as 504 errors.
FAQ
What does the 403 Forbidden error mean in Google Chrome?
The 403 Forbidden error indicates that the server is refusing to give you access to a specific webpage, often due to permission issues or restrictions.
How can I fix the 403 Forbidden error in Chrome?
You can try clearing your browser cache and cookies, checking the website URL, disabling browser extensions, or contacting the site admin if the issue is server-related.
Can the 403 error be caused by my internet connection?
Yes, sometimes incorrect DNS settings, proxy configurations, or firewall restrictions can trigger a 403 error, so checking your network settings may help.