


How to combine multiple photos into one photo (collage) in Photoshop
This article is a step-by-step guide on how to make a collage in Photoshop. You will learn to put the photos together to look great. Most magazines use this technique.
This is because choosing photos can make the story or subject matter clearer to the viewer. If you want to learn how to make a collage, follow this Photoshop tutorial.
Do you need to use Adobe Photoshop?
No. There are many other programs that you can use. To show you more about how to make a photo collage, we chose Photoshop because it is commonly used.
Photoshop also gives you a lot of freedom to express creative photography ideas. Other programs offer limited flexibility.
But do not think that if you have other software that can do the steps of this article, you need to create a collage in Photoshop. You can also create a collage in Lightroom.
Choose your favorite magazine for inspiration. You will find interesting photo collage layouts in many good magazines.
Look at how the photos are positioned. What kind of photos often appear. Whether it contains text or margins. These are all questions that can help you define the style of Photoshop collage.

Make Photoshop Collage – Step by Step
Step 1: Select your photos
After selecting the subject of the photo collage, you must select the images in which you will be placed. Click the Photoshop icon on your desktop to open Photoshop first.
Most of the time, five to seven photos will suffice unless you want to create a very large collage. The goal is to tell a story with multiple images that you could not tell with a single image. Few images do not convey enough emotion.
Mixing too many photos in a collage will confuse it. Careful selection of the photos to be used is the key to creating a harmonious and expressive collage.
Insert wide, medium, and close-up images. This combination provides a viewer with different perspectives on the topic of your choice. Adding wide, medium and close-up photos to the collage gives you visual depth.
This is not a hard and fast rule. Some people work well in a photo collage with only close-up photos, such as a close-up flower collage.

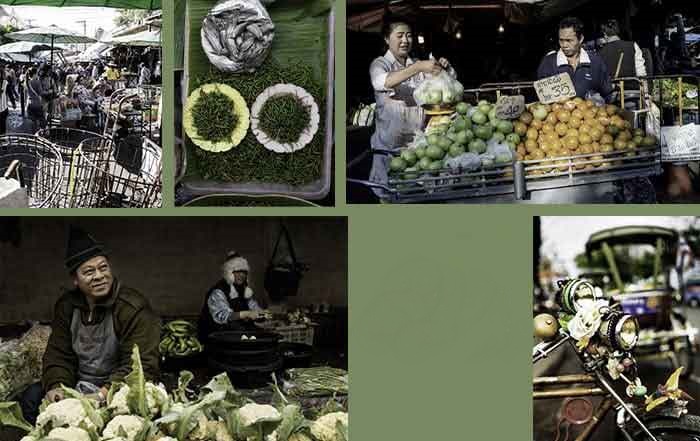
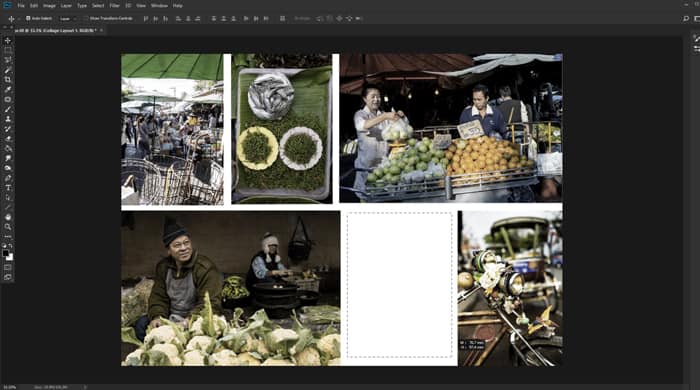
For the description of this article, we have selected a series of photos from Muang Mai market in Chiang Mai, Thailand.
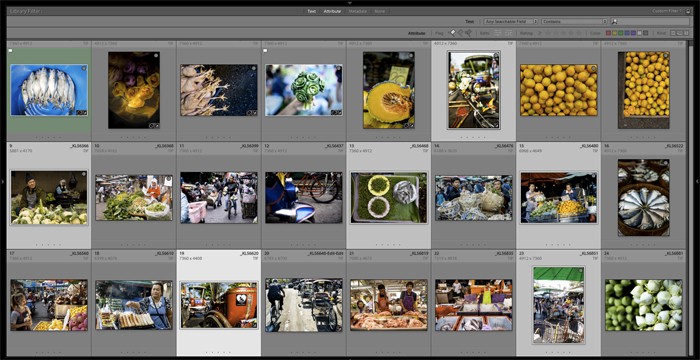
We had 24 photos in our folder and limited the selection to 13 and then 6 final selections. Includes wide, medium and close-up photos and some vertical and horizontal images.
When choosing your photos, look for photos with similar colors and shapes. These common elements help to make your photos more cohesive.
At this stage, there is no need to select your final images. It gives you flexibility when you start the project by choosing eight or ten or more. However, do not choose too many because it can slow down your progress.
Step 2: Resize your selected photos
Now you need to resize your photos. Using them in full resolution is not necessary and will probably slow down your system.
Think about how you will display your final photo collage. If you want to print it to hang on the wall or put in an album, your photos need large files.
If you just want to share the collage on social media, you can make your files smaller.
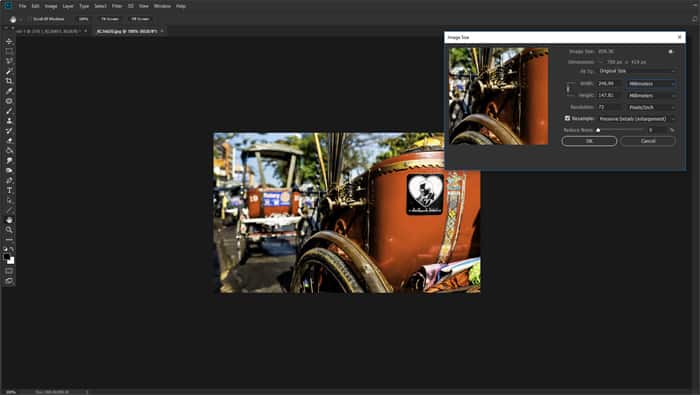
To print, set the image resolution to 300 ppi. To use on the monitor, set the image resolution to 72 ppi. Select the dimensions of the collage print and calculate the size of the photos. Then make them 30% larger.
Enlarging them gives you the flexibility to resize later if necessary. We resized the images to 700 pixels on the long side, which is 247 mm at 72 ppi.
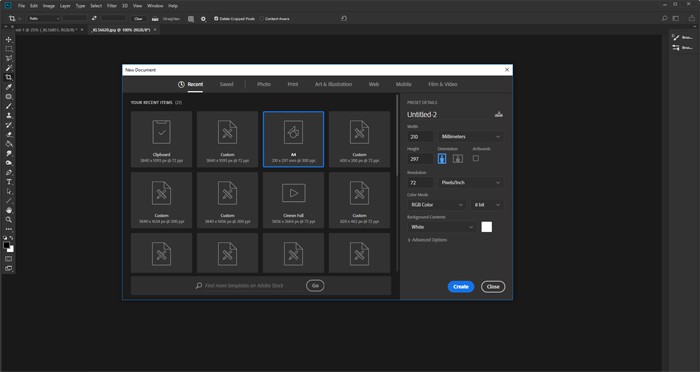
Step 3: Create a new file in Photoshop
Open the New Document panel in Photoshop and select preset or create a custom document. You do not need to be very precise because you can always cut it or increase the size of your canvas later.
The most important thing is to prepare your new document with the right resolution. The resolution of your new document should be the same as you used when resizing your photos in step 2.
We have decided to create our collage with horizontal A4 dimensions at 72 ppi. This will be suitable for use on the website.
Step 4: Add your photos to your new file
There are many ways you can add a photo to your document. We think the best way is to open the folder you are in and drag them to your document canvas.
In this way, they are added as Photoshop Smart Objects. Resizing a smart object is non-destructive, this is one of the benefits of using them in your collage. You can also tilt, rotate, orient, or apply any non-destructive conversion to a smart object.
This means that you use a lot of flexibility in positioning, scaling and distorting photos in your collage without losing quality.
Smart objects must be page or rasterized before any pixel editing can be performed on them. If you want to clone something with dodge, burn, brush or right-click on the layer in any way you want to manipulate the pixels, select Rasterize Layer.
It is best to edit the photos you are using before resizing and importing them. If you realize you need to, wait until you have all your photos in step 6, scaling and rotating.
To make it easier to see the photos you post, hide the ones you have not yet posted. Turn on each new layer as soon as it arrives to add it to your design.
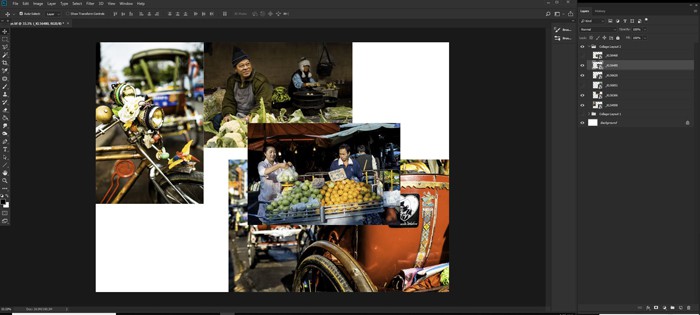
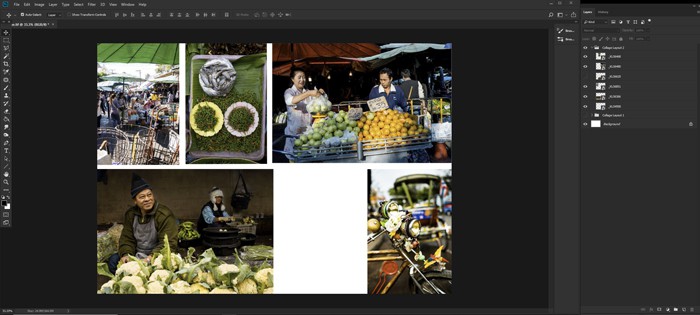
Step 5: Place your photos on the Photoshop collage canvas
Select the Move tool, click on the photos and drag in the position. You may need to try this to find the way you want.
Overlapping photos can be easily combined, so they fit in the way you want.
When you have a photo below another photo and you want to see it at the top, click on its layer in the Layers panel and drag the layer up. Place it above the overlapping photo.
Arranging and placing your photos can be very time consuming. To try out different layouts, create a new group with your photos in the Layers panel.
To do this, click on the Create New Group icon at the bottom of the Layers panel. Name your group. Select all the layers with your photos and drag them to the folder you created.
You can now copy the folder, which copies all the layers. Right-click on the group icon and select Duplicate Group. Shrink one of the groups (Collapsing) and hide it from view, then start using your photos again.
You can copy a group as many times as you want. Shrinking them from view will make the new group easier to work with. Change the position and size of each image until you are satisfied with the new image.
If you do not want the whole image to be your Photoshop collage, use the Photoshop lasso tool to crop parts of the images.
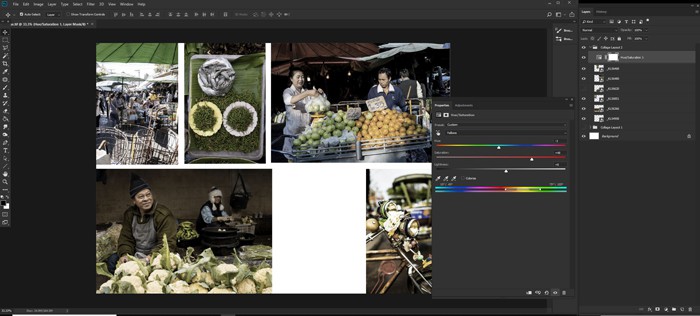
Step 6: Adjust each photo
You may want to individually resize each photo or color, tone or other features of your entire collage. Set separate photos using Image> Adjustments and then select the menu item. This allows you to adjust the color, contrast and… of each image.
You may want to emphasize a particular color in each photo or adjust the brightness level so that all photos are well balanced. This is where you can use your creative style.
Create a new adjustment layer to complete the settings of all your photos. Click on the New Fill and Adjustment Layer icons at the bottom of your Layers page and select what you want to manipulate.
You can change the whole look and feel of your collage here. Be careful, if you spend too much time on these changes, you will lose a lot of time.
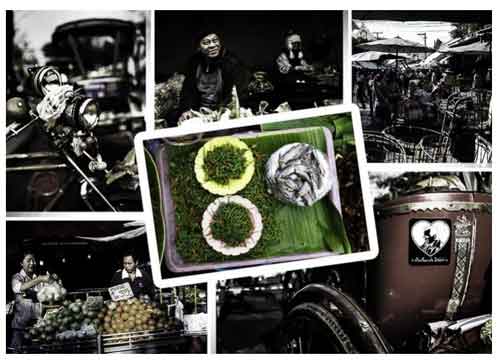
For one version of the collage, we decided to make almost 60% of the photos black and white. Then we made adjustments in the green, blue and yellow channels to restore their color.
Or in another version of Photoshop collage, we worked on each photo separately. First we made settings to saturate the photos around the edges.
Then we changed the brightness and contrast levels in each of them. In the middle photo, we increased the saturation in some color channels.

Step 7: Add text to the photo
Add a title or note to it, just like what you see in a magazine. Select the Text tool. Click and drag where you want the text to be.
Choose the desired font and size. You may not want to add text so that the photos are without text.
Step 8: Adjust the background color of the layer
This set is optional like step 7. You may be satisfied with the assembly method at this stage. However, you might also like to try and adjust your photo collage a bit more.
Click on the background image layer and try to change the color or add a gradient. The background should support your photos.
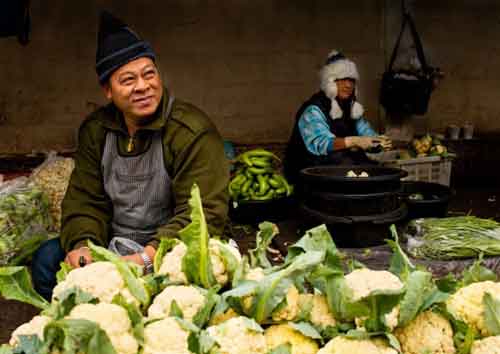
Choose a color that stands out in your photo collage and create your new background color. Before choosing the color of cauliflower leaves for our background, we experimented with several colors.
Then we changed the color of our text to the same yellow color in the photo of peppers and fish. You can also keep the background white or add a white border around your images.

Step 9: Add a border or border to the photos
An option you might want to try is to add borders to photos. This can cause old-fashioned print photos to be displayed on the screen.
Choose one of your photos. Select the Stroke option from the fx icon at the bottom of your Layers panel.
In the Layer Style window that opens, adjust the size, position, transparency and color.
For this version of Photoshop collage, we have made the borders white and 25 pixels with 100% transparency. They are located on the outside of the edge of the photo.
If you want to make them unique for each photo, you can add a border separately. If you want them all the same, right-click on the layer you added the stroke to and click Copy Layer Style.
Now select all the other photo layers, right click and select Paste Layer Style. The stroke you created on the first layer is added to each of your photos.

What else can you use to improve your collage?
You can try placing several photos on a blank canvas and arranging them.
Other things you might want to try are:
- Resize the canvas longer or longer
- Add more photos
- Add a layer of paint on the collage
- Copy the Layer group and try Blend Mods
- Add vignette effect
In this version of Photoshop collage, we copied the group twice. Set the middle layer blend mode to Overlay and the first mode to Screen.
For the bottom layer, we set the blend mode to normal. Then we slightly reduced the transparency of the page layer.
And finally, we added the vignette effect.
Now you know how to make a collage in Photoshop in 9 easy steps.