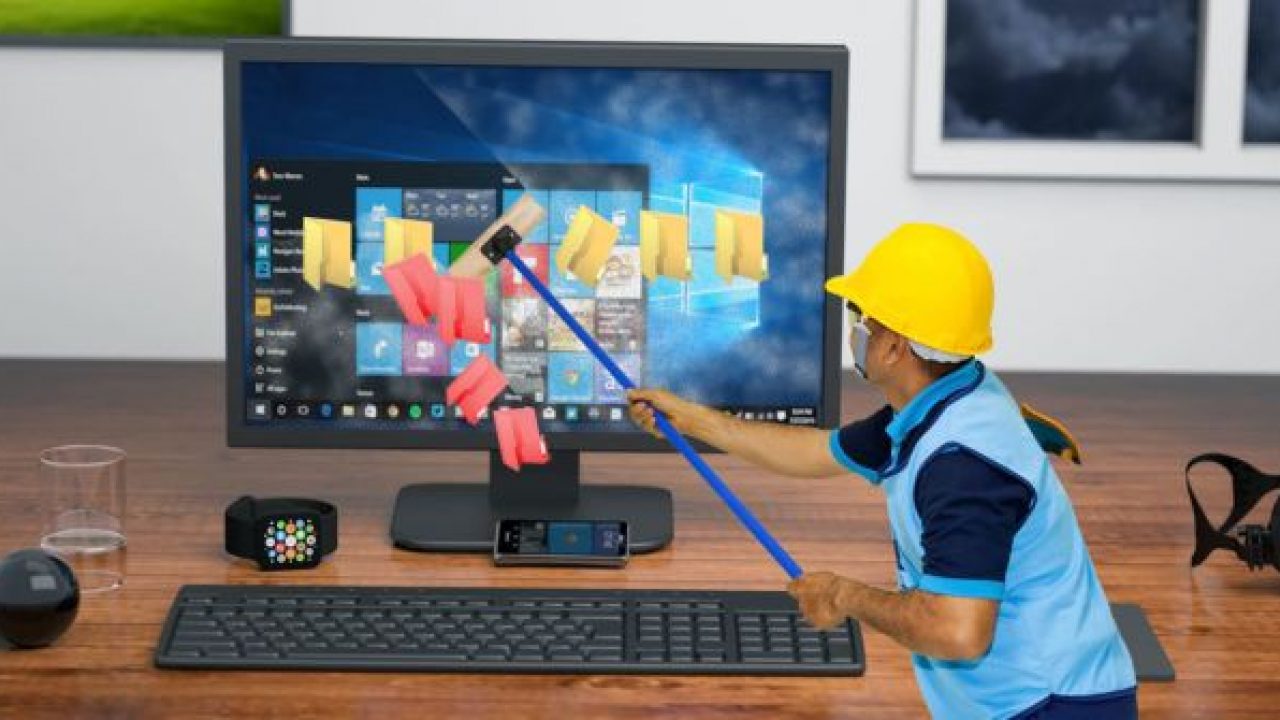
Free Up Your Computer’s Hard Drive By Deleting These Windows Files And Folders
Your Windows PC Contains Many Files And Folders You Do Not Need, From Hidden Caches To Old Files That Take Up Only Hard Disk Space.
Free up hard disk space and gain more space, so you can delete these files and folders.
Of course, you should be careful when deleting files and folders because your computer will have problems if you delete them incorrectly. In addition, some of these folders are located in protected areas, so be careful when removing them.
The best way to delete folders: Disk Cleanup
Before we get to the files and folders, you can delete them without worry. We need to tell you that deleting them manually is usually not the best way. In addition to being time-consuming, manually removing them is safer. This will not accidentally delete the files you need, nor will the wrong folders be deleted.
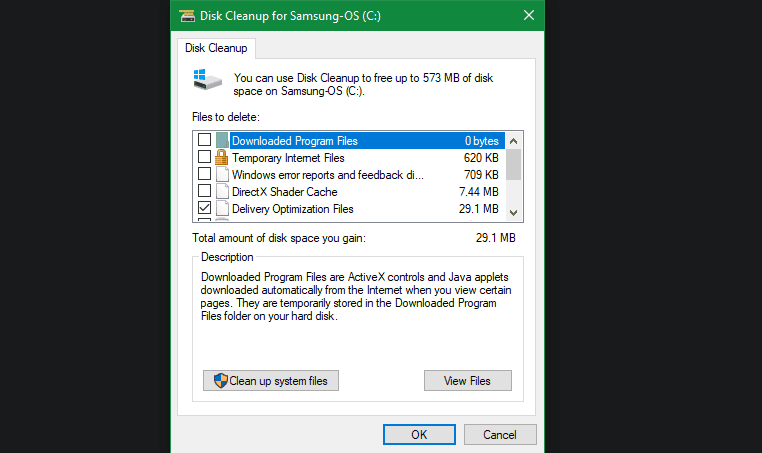
The Windows Disk Cleanup tool helps you free up storage space and is easy to use. To get started, type Disk Cleanup in the Start menu search bar and run it. Then select the desired drive and let it scan. You will see several categories of files in front of you, and for more, select the Cleanup system files option with admin permissions.
If this tool’s user interface seems a bit slow, you can go to settings, system, and storage, and try the newer Windows 10 tool. In this tool, click the Temporary files option to display a list similar to the one in Disk Cleanup.
What should we remove from Disk Cleanup?
This article is not a guide to using the Disk Cleanup tool; therefore, we will not review all its options and features. However, we introduce several practical options:
- Windows Update Cleanup: This option removes old copies of Windows update files. Deleting them is not a problem most of the time, but if you run into issues with Windows updates, you should keep them for future troubleshooting.
- Windows upgrade log files: This option is similar to the previous option and keeps the data files Windows uses to fix problems during updates or installations. If you do not encounter an error updating your system, you can delete it.
- Language resource files: If you have downloaded another language or keyboard in the past that you no longer use, you can quickly delete it using this option.
- Recycle Bin: You can quickly empty it from here using its window. Of course, before doing this, you must ensure the file or folder you need is not in it.
- Temporary files: As you can guess from the name of this option, we deal with temporary files that are not useful in the long run, so you can delete them without worry.
Free up the hard disk.
Now that you know this tool and its application options, let’s see what you can delete from Windows 10 without worrying about freeing up your system’s hard disk space.
1. Hibernation file
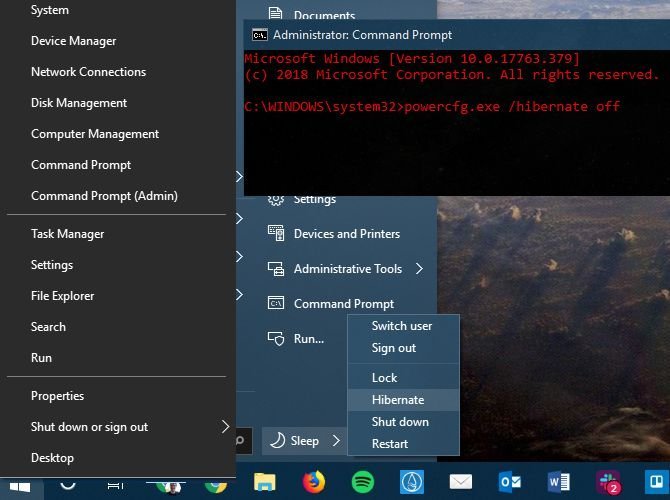
Location: C: \ hiberfil.sys
Hibernation mode on your system is similar to sleep mode, except it stores all your open tasks in memory and then powers down your system. You can disconnect the battery from your laptop, put it into hibernation mode for a week, and then restart.
Doing so consumes storage space, so we use a hibernation file. Depending on the hard drive, this file can reach several gigabytes. If you do not use this feature and want to turn it off, you can do so easily from the command prompt.
Right-click the Start button or press Win + X, then open Command Prompt or Windows PowerShell with admin access. Enter the following command to turn off Hibernation mode:
powercfg.exe / hibernate off
With this simple command, hibernation mode is disabled, and Windows then deletes the hiberfil.sys file, but if it does not, you can delete it yourself. You should note that you can no longer use the fast boot feature in Windows 10 by turning off Hibernate mode. However, you do not lose any special features.
2. Windows Temp folder

Location: C: \ Windows \ Temp
As the name implies, we deal with temporary files that are only important for initial use. Windows uses temporary files and folders only once and no longer needs them.
Instead of deleting them with Disk Cleanup, you can go to the corresponding folder and manually delete all its contents. Press Ctrl+A to select all items in this folder, then press Delete. You may encounter an error while deleting these files, but ignore it and delete all the files.
3. trash bin
Location: Shell: RecycleBinFolder
Trash is a special folder located on the \: C drive that Windows protects, so you do not need to access it this way. Whenever you delete a file from your system, Windows sends it to the Recycle Bin. Files remain in this location if you permanently delete or recover them.
While deleting trash files may be evident to you, we have this option for people who do not pay attention. For this reason, the same bin may take up several gigabytes of system hard disk space.
You can access the Recycle Bin from the desktop, but if you do not see it, type shell: RecycleBinFolder in the address bar of the File Explorer. Here, you can see all the files you have recently deleted.
Right-click on any of them and select Delete permanently to delete them. Click the Restore option to restore the file to its original location. At the top bar of the Recycle Bin Tools tab are the Empty Recycle Bin and Restore All Items buttons, which you can also use.
Click the Recycle Bin properties option to change how the trash works. In this menu, you can specify the maximum size of trash files, or select the second option to delete them from the beginning rather than moving them to this section.
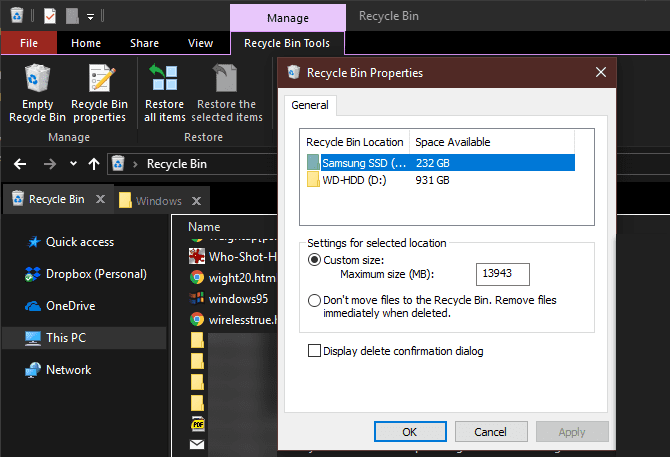
If you select Don’t move files to the Recycle Bin, Windows will permanently delete the files, and you will no longer be able to access them in the Recycle Bin. However, we suggest you do not enable this feature so you can recover the files if you accidentally delete them.
4. Windows. old folder
Location: C: \ Windows.old
Each time you upgrade to Windows, the system keeps a copy of your previous files called Windows. This folder contains everything created during the last installation, so you can access the files if they were not transferred correctly.
If needed, you can use this folder to return to the previous Windows version. Additionally, you can open his folder and access some of the required old files. Windows will automatically delete this folder shortly after the system upgrade, but you can also do so manually.
If you want to do this through File Explorer, this folder will not be deleted, so you should use the Disk Cleanup tool. Click on the Clean Up system files option at the bottom to scan the system using this tool. After the scan, look for the previous Windows installation and use this tool to remove it.
Of course, deleting these files can make it difficult to recover the data in the event of a problem. For this reason, we recommend that you do not uninstall Windows after upgrading it until you are sure that your system is functioning properly.
5. Downloaded Program Files
Location: C: \ Windows \ Downloaded Program Files
The name of this option is a bit confusing, but it contains files used by ActiveX IE controls and Java applets. With these features, when you use the same feature within a website, you will no longer need to re-download it.
This folder is no longer functional due to the low usage of Internet Explorer. ActiveX is an outdated technology with numerous security issues, and Java’s performance on the Web is limited. Internet Explorer is the only browser that supports ActiveX, and most users use it for older corporate sites. Microsoft has removed this browser from Windows 11.
Since most users no longer use Internet Explorer, the Downloaded Program Files folder may be empty, but it’s a good idea to check it manually.
6. LiveKernelReports
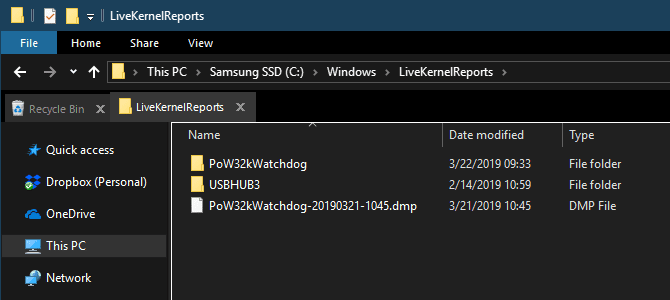
Location: C: \ Windows \ LiveKernelReports
LiveKernelReports is another directory you may encounter when scanning large files on your system. This folder stores logs in the stream that Windows maintains. If your system has a problem, you can analyze the contents of these files to begin troubleshooting it.
You can delete any large file in this folder with a DMP file extension. Instead of manually deleting these files, we suggest you use the Disk Cleanup tool again. Do not delete the files in this folder if your system or Windows crashes.
7. Folder Rempel
Location: C: \ Program Files \ reply
Although the Rempel folder is small, you might be surprised to find it on your system. This folder contains several small files, some of which may be linked to several task manager processes. It is connected to the Windows 10 update and contains “Reliability Improvements” files to help smooth the update.
Given this, can we delete the Rempl folder? Doing so will not harm your system, but since it is not large and helps make Windows updates faster and easier, it is better not to do anything with it.
Windows is full of unnecessary files and folders; you can delete them to free up your hard drive space. However, please do not remove the blank space until you need it.
Finally, you can run Disk Cleanup once or twice a month to make deleting extra files and freeing up your hard drive a routine.
FAQ
Which Windows files are safe to delete for more space?
Temporary files, caches, old update files, and leftover installer files — these don’t affect your system’s core operations.
When should I clean these files?
When your storage is nearly full, system sluggishness appears, or after major Windows updates.
Will deleting these files speed up my computer?
Yes — removing clutter can free disk space and may improve performance if storage was a bottleneck.