7 Steps to Migrate Your Website to a New Server With No Downtime
If you have decided to change hosting due to reasons such as traffic loss, low page loading speed, or the inappropriateness of your current host, but have no idea how to transfer the site to a new server, there is no need to worry. You have passed the most important stage, deciding on host changes, and now, to achieve this goal, you need reliable training to migrate to another host without losing any files or disrupting the site’s performance.
Transferring a website to a new server involves seven main steps: buying a new host, backing up the site files, transferring the files to the new server, testing the website’s performance on the new host, transferring emails, changing the server, and canceling the old hosting plan. This tutorial reviews all these steps in detail.
Although this work seems very difficult and risky in words, in practice, it is very clear and simple. In this training, we explain each step with the necessary tips and details so that there are no questions left, and after the successful transfer of the site, you can continue your activities safely.
Transferring the site to a new server requires a series of steps, and the most important of them is that you should not rush to cancel your current hosting plan and only act to cancel your previous plan when you are sure of the proper functioning of your site on the new server. be
Also, you should think about creating a complete backup of your website files and data so that in the worst possible case, if you lose your files, you can use the website backup file without any worries.
Of course, the above two items were only two important prerequisites for transferring the site to a new server. The steps we have considered for this training will provide you with all the necessary steps for a successful transfer. Of course, note that all these steps can provide the background for your success when choosing a hosting server. Choose a strong and suitable one for transferring your website. In this context, you can refer to our hosting virtual server purchase page and choose an ideal plan for your website.
When Should We Think About Moving the Site to a New Server?
Although continuing to operate in a host where you have stored all the important files and data of the site and reached your desired performance, the idea is completely logical and correct, but it is not always the case. There are many reasons that cause site host change alarms, and if you have noticed these alarms, it is time to think about transferring the site to a new server. Let’s get acquainted with three reasons for moving to a new host:
Loss of traffic
You may not notice the shortcomings of your current server or host at the beginning when the website traffic is light and controllable, but strong hosts show their strength when faced with heavy loads and traffic. Suppose you see visitor dissatisfaction and loss of traffic due to unexpected server failures during busy hours of the website. In that case, it’s time to think about migrating to a more powerful host.
Too much server downtime can also affect the ranking of website pages in search results, which is certainly not what you want. So you can be sure about traffic control and maintaining the satisfaction of your potential customers by transferring the site to a new server.
Slow loading website
If you have noticed that your website has slowed down over time with the increase in content or website traffic, and with all the solutions to increase the speed of the site, you have not yet reached your desired result, maybe it is time to transfer your website to another host. You need a website with high performance and speed to maintain user satisfaction and increase your SEO score, and what better idea than to move your website to a more powerful and efficient host?
Dissatisfaction with the performance of the current host
If the current host does not meet your needs and does not offer you the desired features, facilities and functionality, you do not have to be condemned to it forever. There are many hosting providers that can be the ideal host for your website and offer the features and performance that suit your website’s needs, along with affordability.
So, if the current site server is not able to meet your expectations from various aspects, such as security, performance, development capabilities, facilities, and new technologies, you should also think about maintaining the performance and ranking of your website and solutions, such as transferring the site to activate the new server.
But to do this, you need to plan carefully so as not to jeopardize the status of your website.
In general, there is one rule of thumb for migrating to another host that you should always remember:
“You should not rush to transfer to a new host in any way. First, choose a reliable host, then perform file backup and file transfer tasks, and after you are sure of the stable performance of your website, cancel your previous hosting plans.
It’s time to provide you with the steps to migrate to a new host with all the details and key points so that you can go through this sensitive and stressful process as quickly as possible.
Step 1: Choose the new hosting.
Most likely, the reason why they are thinking of moving the website to a new host is that they are dissatisfied with the performance of the current host. That’s why, in order not to be fooled, you should first do the necessary research and reviews about hosting providers and choose a suitable host.
When choosing a new hosting server, you should pay attention to some important points, which we mention below:
Website requirements
Before choosing a hosting plan, you should have a clear idea of your needs. If your goal is to learn web design or create a personal website, a shared hosting plan can meet your needs. If you are looking to implement a growing online store, you need a virtual or dedicated server with sufficient hardware resources (storage space, CPU, and bandwidth). It is important to know your purpose and then choose a host that covers all these requirements based on the requirements of this purpose.
Security
Security is one of the most important factors in choosing a hosting provider. No matter how much the hosting in question provides you with the necessary resources and facilities, the lack of security provides the basis for various attacks and site malfunctions, and this is not what you expect from a new host. So choose a hosting that has strict security measures to protect your website from hackers and other threats.
Server reliability and uptime
Surely, when you want to launch a website, you know that in order to have a clear path, users should see the content of the desired page and find answers to their questions instead of the message “This webpage is not available”. This is why the reliability and uptime of the server are one of the most important factors in choosing a new host for the website. So pay attention to the uptime percentage of the hosting plan because this factor shows the percentage of time that your website is accessible or visible online.
The higher this percentage is (preferably above 90%), the less likely your website will go offline unexpectedly.
Speed
High website speed is one of the most important criteria required by internet users. On the other hand, popular search engines like Google, which attach great importance to user experience, consider speed to be one of the most important ranking factors of sites in search results.
So if you care about your site’s SEO, consider hosting speed as a major factor.
Customer support
No matter how good the host or server you choose is in terms of performance, security, and reliability, there is still a possibility of disruption or encountering a problem on the server side, and this is where the support department comes into action to help you. You should be able to contact the support team whenever you need help and get help from them to solve the problem.
Price
Although the price is one of the most important criteria for buying a hosting plan, you should never sacrifice the above items for the price. After you have chosen the plans that meet the above criteria, it is time to check them in terms of price and, in addition to the purchase cost, also check the cost of upgrading the plan, renewal, etc., so that, as a result, you have a host that fits your needs. And become your budget.
Having said that, if you need a powerful server with 99.9% security and uptime to host your website but don’t know where to start, you can safely rely on AssamServer’sr hosting plans and start fresh. And make a powerful figure for your business.
Step 2) Back up all your website files and data.
Preparing a backup copy of the files and information available on the current host server and the databases connected to the website is one of the main steps of transferring the site to the new server. By doing this, you reduce the possibility of losing the information and data needed to launch the website to zero, provided that you keep this file in a place other than the website hosting.
In the article on backing up a website with cPanel, we have reviewed all the necessary steps to create a backup file and save it in the local system, which you can get help with if needed.
All you have to do is log in to your cPanel account, click on Backup Manager from the Files section, and select the Backup Wizard option.
Then, the steps related to full or partial backup begin, which is preferably better to use the full backup method so that all the details related to the site files are included in one integrated file.
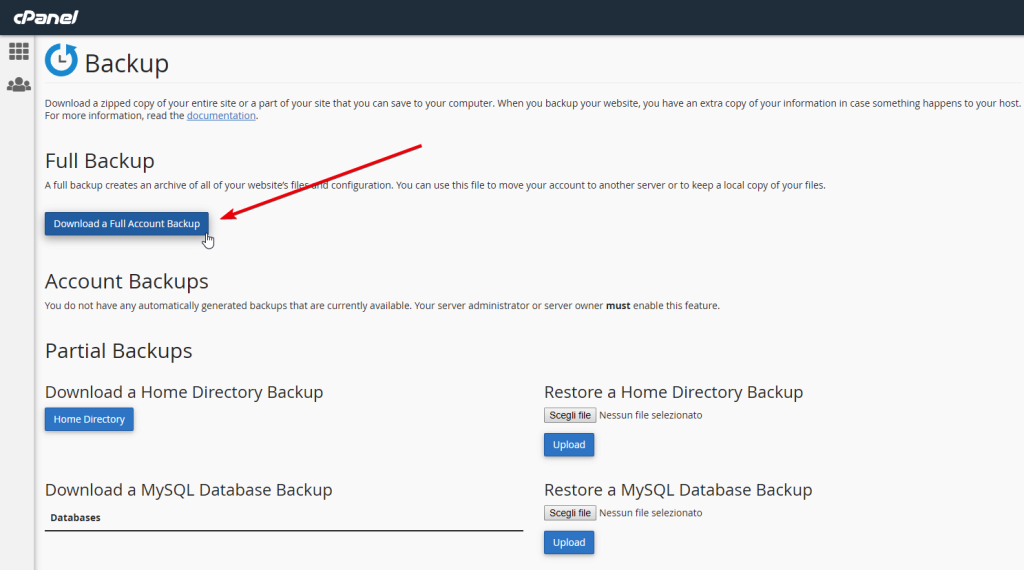
In general, try to back up all the main files of the site and all the files in the subdomains so that later on, on the new server, you can provide the necessary conditions for the proper functioning of the website.
After you have prepared the full backup file, you should also back up the database. To back up your website’s MySQL database, you can use the phpMyAdmin tool available in your host’s cPanel dashboard. Just open phpMyAdmin, select the desired database, and select the quick option from the export drop-down menu. Click on Go to the SQL file. related to the database and all its data to be created.
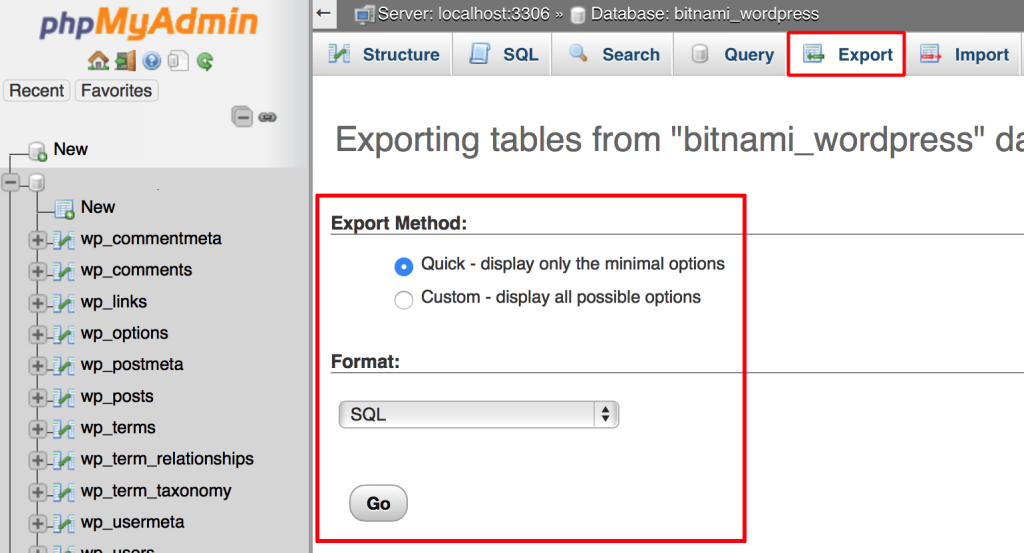
Then, put this file in the same place where you keep the rest of the website files.
Of course, you can also use ftp clients like FileZilla to back up your website files and data.
Do not decompress these backup files and let them remain as they are because when you upload these files to the new server, the extraction and parsing process will be completed by the server itself.
Step 3) Start transferring the site to the new server.
After you have backed up all the files and information stored on your previous server and stored them in a safe place, you can start migrating to the new host.
To do this, you must first log in to your new host. So, after you have made your purchase, check your email for the new host and find the login information for the hosting account, such as username, password, IP address, and the link to the desired cPanel plan.
If you don’t have access to the CPanel link, you can add the /cpanel extension or the port number: 2082 to the end of the address to enter the CPanel account as an admin. If needed, you can get the necessary instructions to enter cPanel, FTP account, or any desired control panel from the support department.
After you have successfully logged in to cPanel, you must go to the Backup Manager section and use the Restore section to upload the full backup file that you created from the previous host, and wait for the process of uploading and loading each file to the location. Be completed as appropriate.
Next, it’s time to upload the database. For this, it is enough to enter the recovery page again by clicking the back button and using the Restore a MySQL Database section, select the database file that you created, and then upload it.
The thing that you should pay a lot of attention to is the database users.
Databases contain important information such as usernames and passwords of users and their access permissions to the database, and the support file you prepared does not contain this information. You must enter this information manually in the MySQL database interface of CPanel.
Step 4) Test the performance of the website on the new host.
Now that you have transferred all the website files to the new server, you need to make sure that all the files, especially your database, are working properly.
Carefully check all data, images, links, and accounts to see if they appear in their correct place and function properly. If there are any defects or problems, it is better to do the necessary troubleshooting at this stage so that you don’t have complications later.
Step 5) Transfer your email accounts to the new server.
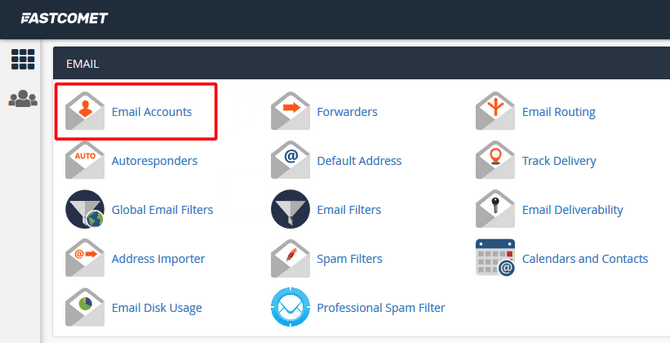
When transferring your website from one server to another, don’t forget to transfer your company’s email accounts. Currently, email accounts that each have a specific purpose are connected to your old server, and in order not to lose these emails, you must set up the desired emails on the new server before changing the DNS. You can use the server control panel for this. For example, to create an email in cPanel, you can add your new emails by visiting the Email accounts section.
Step 6) Change the name servers.
Although currently, your website files are located on another server and so to speak, live in a new place, the DNS system does not know about this. To solve this problem, just register the name servers provided by the hosting provider via email in the domain registration system.
So log in to your account in the domain registration system, and by clicking on domains, find the desired website domain and click on the three dots next to it. Then, select the Name servers management option.
Step 7) Cancel your previous hosting plan.
Now that you’ve successfully moved your website to a new server and are sure it’s working properly in its new home, you no longer need your old host and can safely cancel it.
Note that if you want to have a safe cancellation process so you don’t get in trouble later, it’s best to contact support and pay any cancellation fees.
Transferring a WordPress website to a new server with the Duplicator plugin
If you have started your website with WordPress, there are many plugins, such as All-In-One WP Migration and Duplicator, that can make the process of compressing the files and database of the website and uploading it to the new host much easier for you. Formation that we use Duplicator in this section.
To transfer the website to a new server with Duplicator, just follow the steps below:
Enter the WordPress dashboard of your old hosting and install the Duplicator plugin. You have two ways to do this:
1) Download the Duplicator zip file and click on Add New and then Upload Plugin from the Plugins section and upload the Duplicator file.
2) Go to the Plugins section and click on Add New and search for the Duplicator plugin, find the corresponding file, and click on Install Now.
Then, from the Installed Plugins section, click on the Activate option related to the Duplicator plugin to activate it.
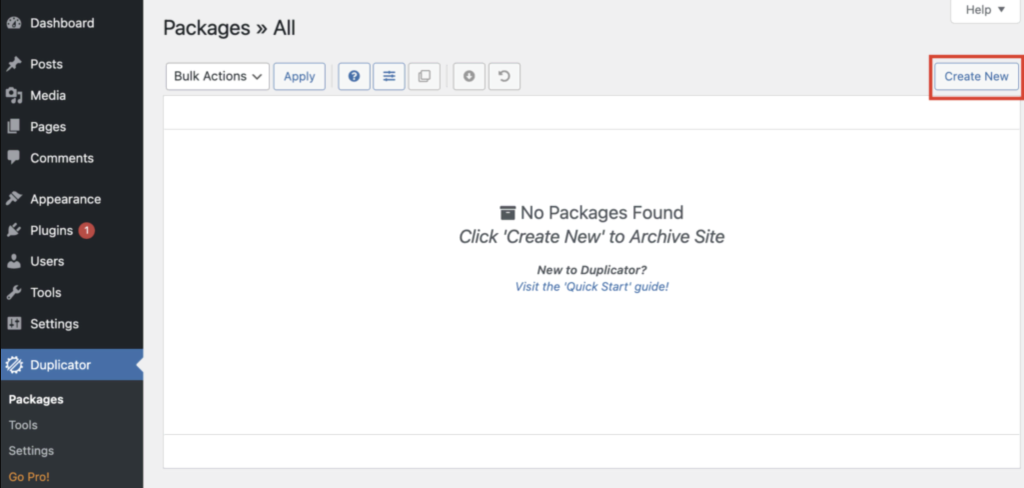
From the dashboard menu, select Duplicator and click the Create New button.
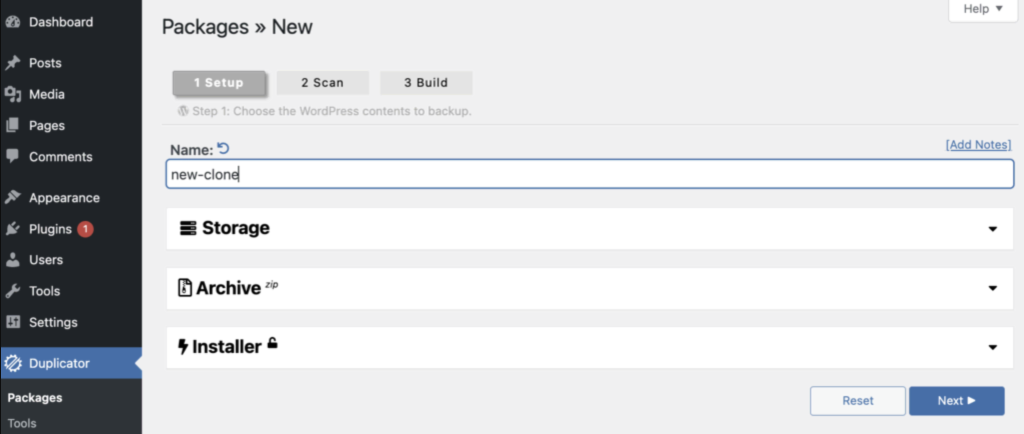
Then, enter a desired name for the backup package and click Next.
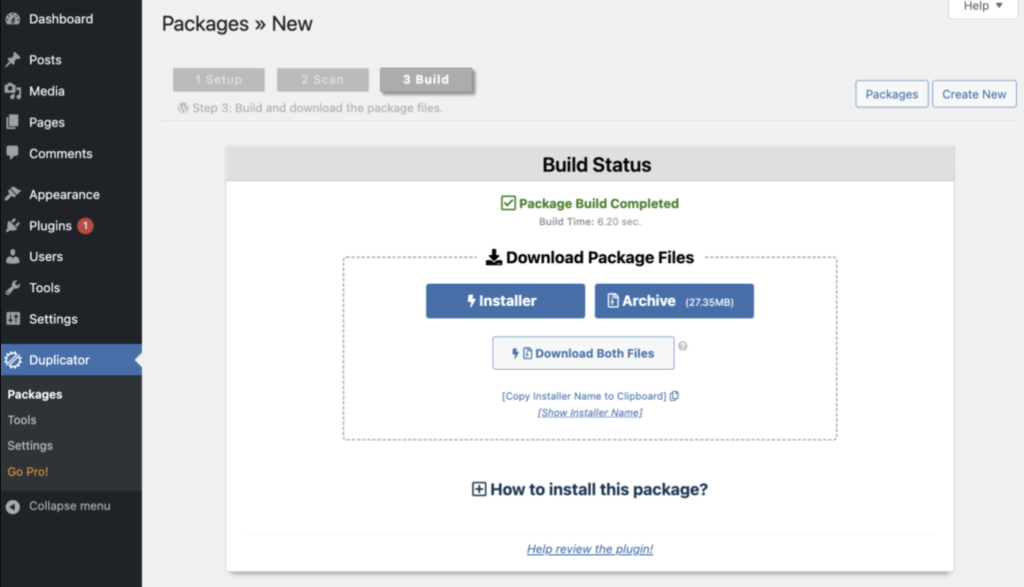
After the scanning process is finished, click Build to create your package.
After you see the two ready package files on the next page, click on Download Both Files to download the backup zip file and the installer.php file, and save them in the system.
Then, upload these two files to the root directory or public_html folder of the new host, for which you can use an FTP client such as FileZilla.
After this step, all website files will be extracted directly into the public_html folder, and you don’t need to worry about transferring them manually.
Conclusion
Although moving the site to a new server seems like a difficult and risky task, if you take care and follow all the important points for a safe migration, you no longer need to worry about the difficulty of this process. Just follow the steps that we reviewed in this article in order and carefully. If you encountered a problem during the transfer of the site, you can share your problem with us in the comments section so that we can overcome all the problems together.
FAQ
What should I do first when planning a server migration?
Start by creating a full backup of your website files, databases and any configuration settings. Then set up the new server environment and test it thoroughly before switching.
Why is lowering the DNS TTL important in a migration?
Reducing the Time‑To‑Live (TTL) value ahead of the switch ensures that DNS caches around the Internet update more quickly when you point your domain to the new server, minimizing the overlap where users might hit the old server.
How long should I keep my old hosting active after migration?
It’s best to keep the old hosting account active for at least a few days after the DNS switch to capture any traffic still routed there during propagation and to avoid unexpected downtime.