10 Ways to Make Your WHMCS Installation More Secure: Essential Protection Steps
Activists in the field of providing hosting and virtual server services have always been and are the most frequent users of the WHMCS service. You may ask why. When launching your website, which is equipped with a management system for customer orders and invoices, WHMCS plays an important role. In order to have a secure WHMCS system, you need to purchase a virtual server from a reliable and quality company as the first step.
The WHMCS service contains the most important information about your business, the most personal information about your customers. Strangers’ access to this information and disclosure will most likely destroy your business overnight. If you haven’t secured your WHMCS yet, keep in mind the valuable saying that ‘prevention is better than cure’ and the sentence above: It is better to secure it immediately.
If it is a program that can show all the information related to the services of all the customers in detail and provide the management of the services to the admin, it will probably be the first choice of many.
WHMCS can be considered the beating heart of business customer transactions and order management. This system stores customer service and purchase information, and it allows you to extend and support services.
Isn’t it better to protect the beating heart of our business with these explanations? Increasing the security of WHMCS should be done from the beginning of using this system because every second is important.
Join us as we explore 10 ways to increase WHMCS security.
Ways to increase WHMCS security
Purchasing the original version of WHMCS is the first step in increasing its security. Be sure to use the paid, original version of this system. Cracked versions are completely penetrable.
By applying the safety enhancement methods described below, you will actually prevent unauthorized access to the WHMCS system.
The WHMCS system itself has features to protect your information, but in this section, we explain other ways to improve its security:
1. Moving Downloads, Attachments and Templates_C directories
It is better to move all writable folders and directories to a safe and personal place so that the possibility of accessing them on the web becomes zero.
Note: If you are using suPHP or PHP suEXEC, directories are writeable at access level 755, which is the highest access level for files and folders.
If you are unable to transfer all the folders or do not intend to transfer all the directories at the moment, you can start with the three folders Downloads, Attachments, and Templates_C.
After migration, you need to update their location in the shell cache and installation file repository. How to move directories depends on the control panel you are using. Proceed as follows in cPanel:
- Go to Files >> File Manager in cPanel.
- Go to the installation directory of your WHMCS system.
- For each of the three folders:
a) Right click on the folder and select Move.
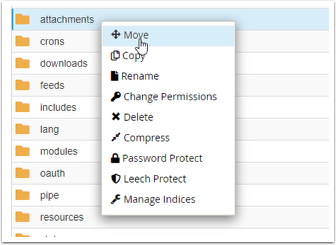
b) Enter the new location of the folders. The selected location must be in the public_html section. Then click Move File(s) to move the folders.
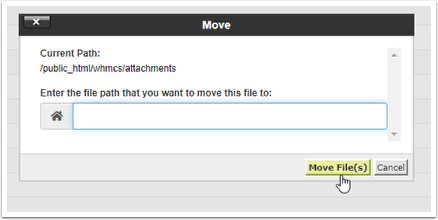
Note: Be sure to write down the new path of the folders because we will need them later.
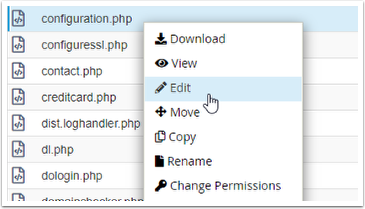
c) Navigate to the WHMCS installation path.
Right-click on the configuration.php file and select Edit.
Update templates_compiledir$ settings to use the new templates_c location. for example:
$templates_compiledir = "/home/username/templates_c/";
username is the username of your host.
- Save the changes by clicking Save Changes.
- Go to the opposite address in the WHMCS admin area: Configuration > System Settings > Storage Settings
- In the Configurations tab, select Local Storage and then Add New Configuration and click +.
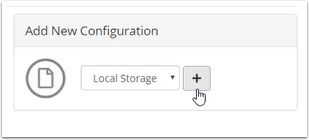
- Enter the new path of the attachments directory and save the changes.
- Repeat the previous two steps for the downloads folder.
- In the Settings tab, select the new path of each directory in each menu.
Click on Switch to complete the process.
Note: Select Switch only when you have moved folders. If you have created new directories, use Migrate to copy the files from the old directory to the new directory.
2. Setting the configuration.php file permissions
The second recommended method is to set the permissions of the configuration.php file in the root directory of your site’s WHMCS. This file contains sensitive information that cannot be recovered without a backup.
Changing the permissions of this file prevents its accidental editing, overwriting, and deletion.
Permission 400 restricts file access to read-only mode and prevents other people from viewing, editing, and executing the file. To grant 400 permission to the configuration.php file, run the following command in the root of the WHMCS directory:
chmod 400 configuration.php
Hints :
While 400 permissions are usually enough for most systems, some system settings may require 440 or 444 permissions. If you have problems reloading the app, try these permissions.
Also, if you need to update the license key, you must apply for license 755. After the update, you can change it to 400.
3. Change the name of the WHMCS system admin folder
By renaming the WHMCS admin folder, you make it harder for bots and hackers to find the WHMCS admin area URL. To do this, we need to create a custom directory and update the WHMCS settings.
Open the configuration.php file in the root directory of the WHMCS installation.
Edit the following line where the word example is the name of your choice:
$customadminpath = "example";
Hints:
a) The name of the admin folder must consist of standard characters, i.e. English alphabets, numbers 0 to 9, hyphen (-) and dash (-) and be available in the root directory.
b) Enter the folder name only. No need to enter its address.
c) If you don’t see this code, add it to the end of the code lines or before the final ?> (if any).
Replace the admin directory with the name you chose for customadminpath and save the changes.
4. Activation of the SSL certificate on the domain
The WHMCS system generally contains important information that is being transferred between the system and the target user’s browser. Having a valid SSL certificate that enables the exchange of encrypted information and the use of HTTPS is essential for any site.
If your site does not have an SSL certificate, obtain an SSL license.
After activating the ssl security certificate in cPanel on the site domain, set the WHMCS System URL settings in the General tab and the Configuration > System Settings > General Settings section by entering //:https before the domain address.
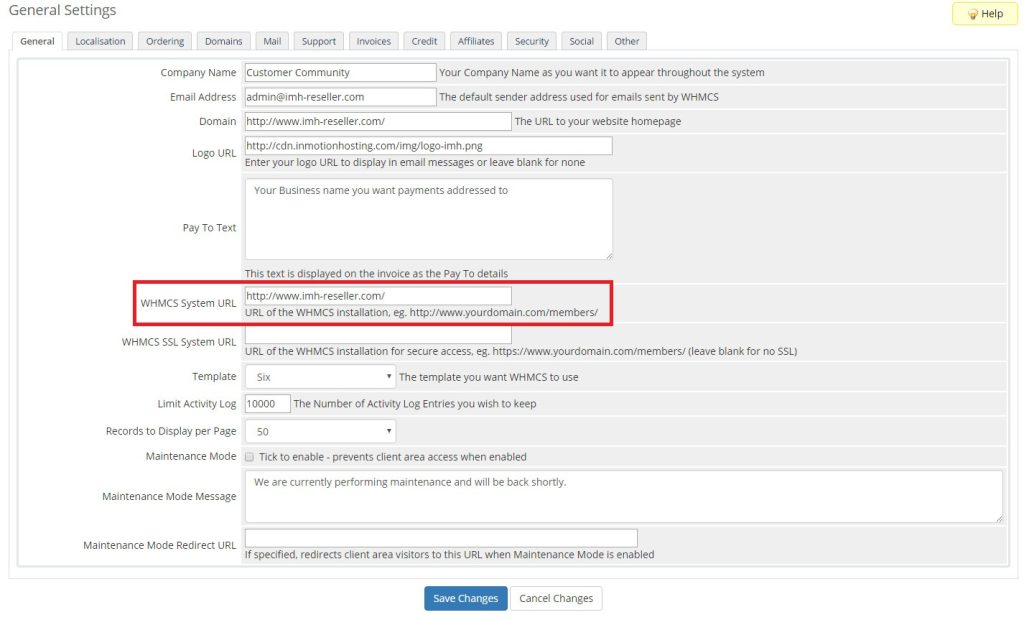
Finally, save the applied changes.
5. Limitation of database privileges
The WHMCS system requires the following privileges to perform daily tasks:
- DELETE
- INSERT
- SELECT
- UPDATE
- LOCK TABLES
For more security, it is better to limit access to other privileges such as ALTER, CREATE, DROP and INDEX. For this, perform the following steps:
Step 1: Enter cPanel through the user area.
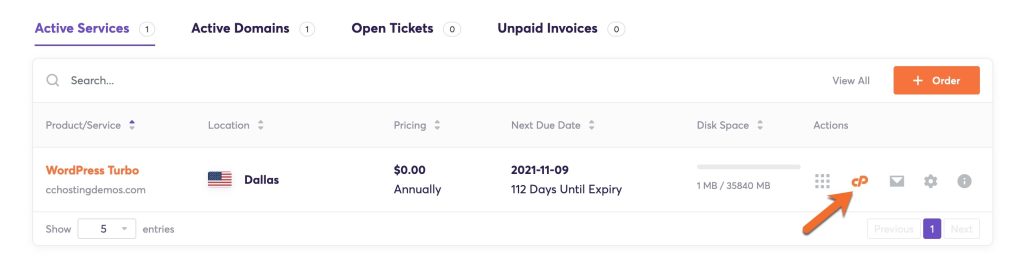
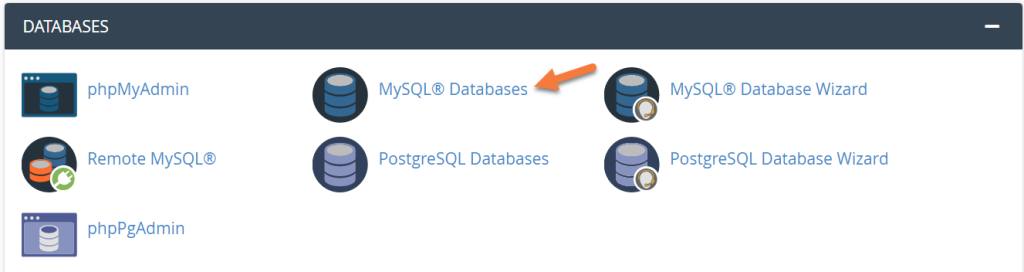
Step 2: Go to the Databases section and open MySQL Databases.
Step 3: Go to Current Databases and select the database you want.
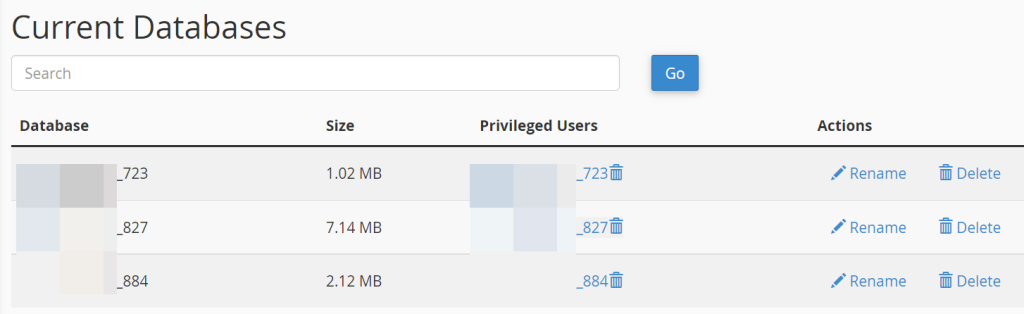
Step 4: Next to the database used for WHMCS, click on the user in the Privileged Users row
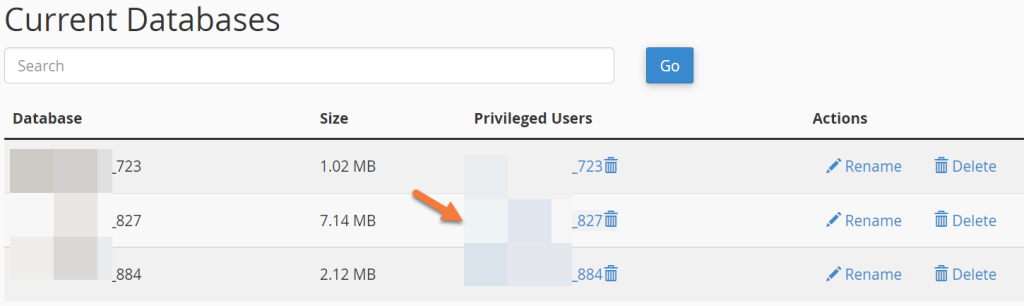
User selection from the used database
Fifth step: Remove ALTER, CREATE, DROP and INDEX privileges from this user’s privileges. Finally, click the Make Changes button at the bottom of the page.
6. Move the Crons directory
Moving the Crons directory can also restrict web access to this directory. After the transfer, we must also update the WHMCS settings.
Step 1: Move the entire /crons/ directory to the new location.
Step 2: If you used Cron Job, update their defined location to the new location of the cron.
Step 3: Rename the config.php.new file to config.php.
Step 4: Open the config.php file and find the whmcspath$ line.
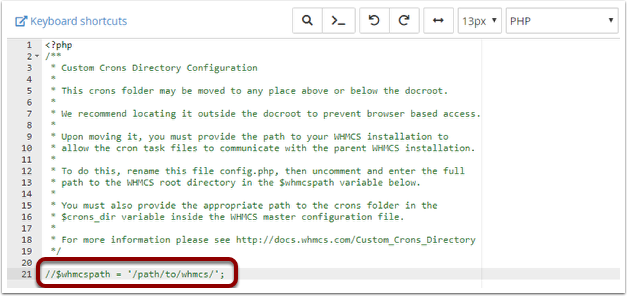
Fifth step: Remove the two characters / from the beginning of the line and replace the phrase /path/to/whmcs/ with the full address of the new folder. for example:
$whmcspath = '/home/username/public_html/whmcs/';
Step 6: Save the file and exit.
Step Seven: Open the configuration.php file in the root directory of the WHMCS installation.
Step 8: Replace /home/username/whmcs_crons/ in the code below with the address of the new directory, then add the resulting code to the end of the code.
$crons_dir = '/home/username/whmcs_crons/';
Step 9: Update the new directory location in the cron job.
Step 10: To complete the update process, transfer all the updated cronjob files from the default location to the new location.
7. Restrict access to IPs
If you and your employees work with fixed IPs, you can restrict access to WHMCS to a specific set of IPs by following the steps below.
- Log in to cPanel.
- Go to the File Manager section.

In this section, go to the location where the WHMCS installation files are, and open the admin folder.
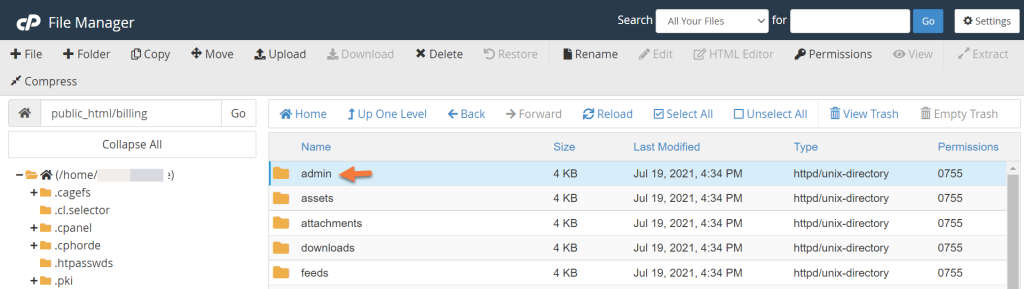
To limit IPs, we need to create a new file inside this directory. To do this, click the File+ button in the upper left corner.
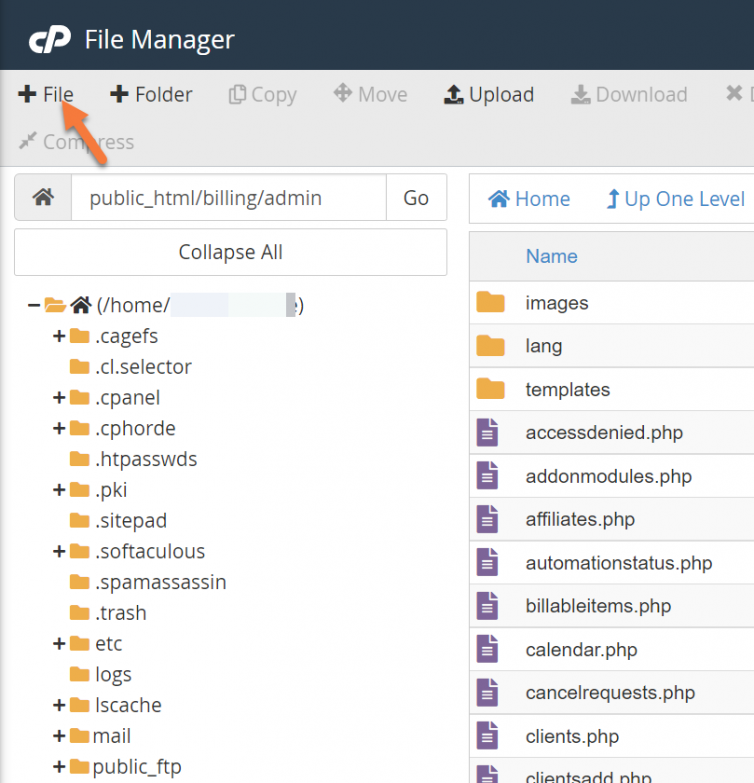
htaccess statement. put as the file name. Now click on Create New File.
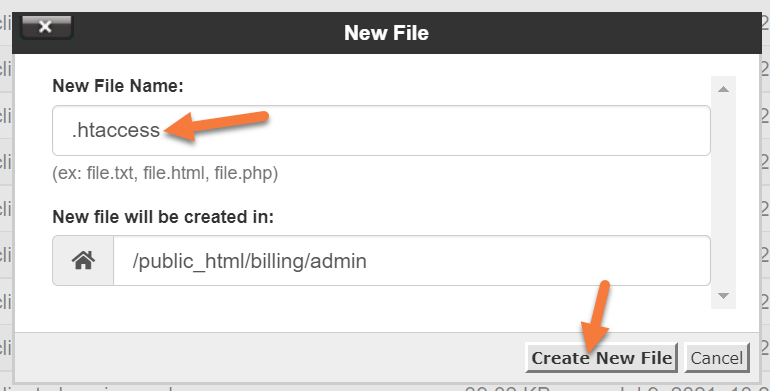
After the htaccess file. created, it will be placed in the admin/ folder.
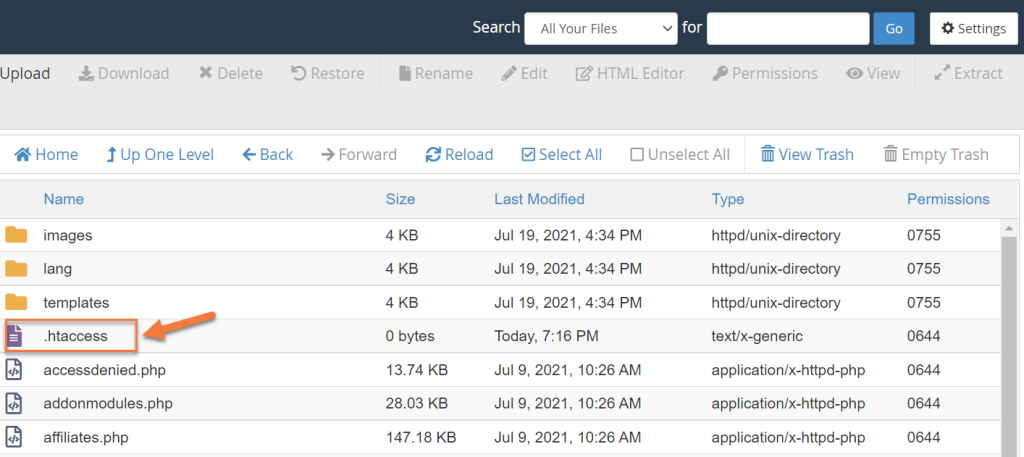
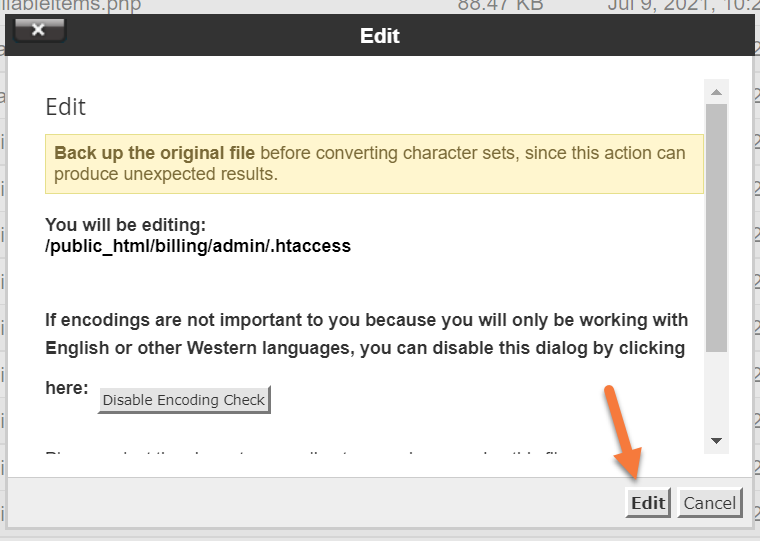
Once on the htaccess file, left-click to activate the Edit option in the tools row at the top of the File Manager. Click on it.
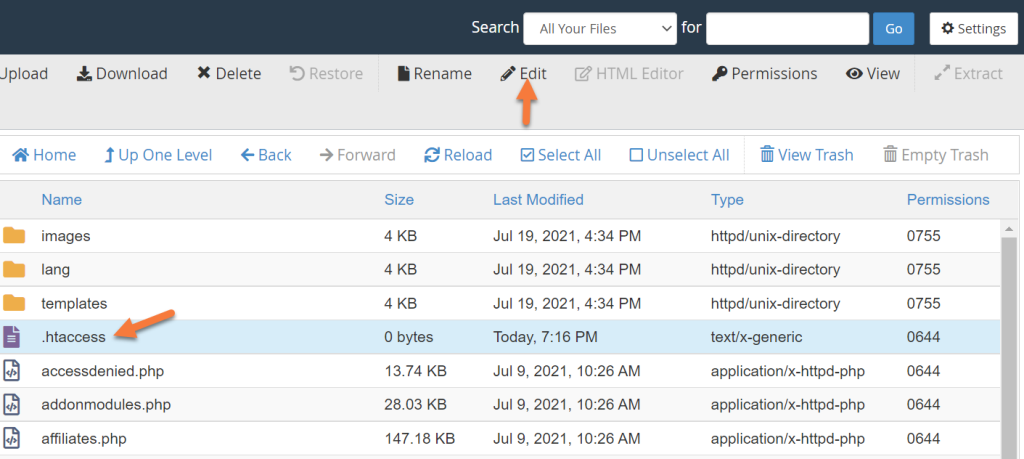
The Edit page will appear, click Edit at the bottom right of the page.
An HTML editor will open in a new tab in your browser. Enter the following text in it:
order deny,allow
allow from x.x.x.x
allow from x.x.x.x
deny from all
For each IP you want to provide access to, start the line with allow from and complete with the IP address. You can define an unlimited number of IPs. With the above code, the access request of all IPs except the defined IPs is rejected.
At the end of your file, there will be a file like the image below:
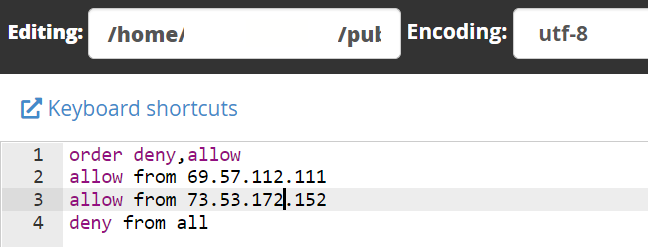
Click the Save Changes button in the upper right corner of the screen. Now, only the IPs that are allowed to access the admin directory can load the login page.
8. Prevent Clickjacking
Clickjacking is a form of online fraud. This attack involves covering a dangerous page with another simple page to force the user to click.
By limiting the elements of a page to a button so that clicking anywhere on the page and on any element will do only one thing, hackers will seek to steal information, delete user accounts, etc.
To secure the site against Clickjacking, do the following:
Enter CPanel and go to File Manager.

htaccess file. Find and left-click on it once. Then click on the Edit button at the top of the page to open the editing page:
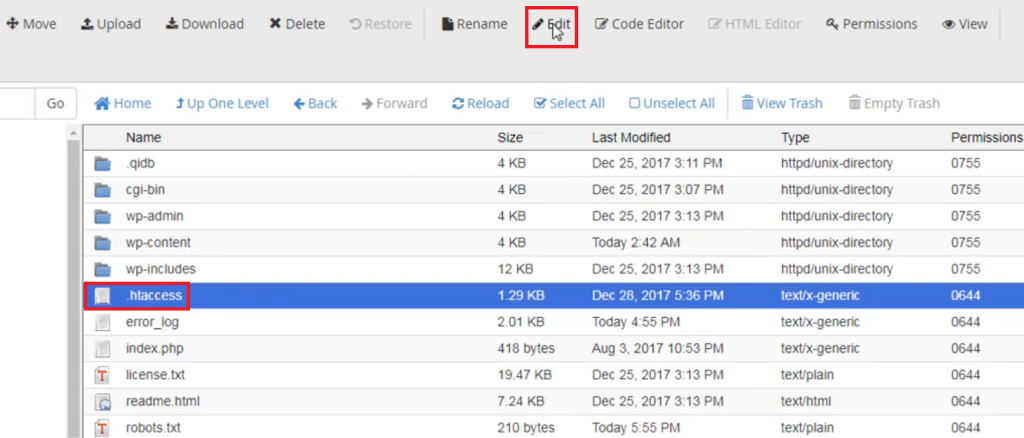
Click Edit on the page that opens.

In the editor that is opened in a new tab, put the following codes at the end of the codes and save the changes:
<IfModule mod_headers.c> Header always append X-Frame-Options SAMEORIGIN <IfModule/>
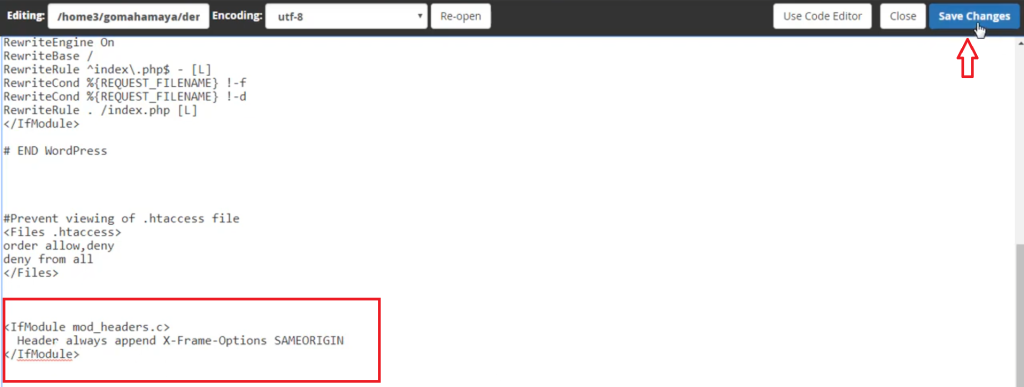
Now your site is protected from Clickjacking.
9. Close unused ports
One of the best ways to prevent unauthorized access is to close unused ports. This will reduce the possibility of unauthorized access to the WHMCS server and system.
In addition to closing ports, there are various ways to protect them, such as Port Knocking, which you can also use.
10. Physical protection of the server
The last way on our list is to physically protect the server. This is the only way to access WHMCS information other than the Internet after all web access is closed.
For this reason, make sure that the server is located in a safe place and that you also physically protect the server.
Conclusion
The WHMCS system is the management center for all customer orders, invoices, and tickets. Because important information is exchanged every moment in this system, its security must be increased to the highest possible level.
We mentioned 10 methods of increasing security, which we suggest you do all 10 methods to achieve the maximum level of security. In case of any problem or question, share it with our experts in the comments section.
Also, if you know another way that is not mentioned in this article, we will be happy if you share it with others in the comments section.
FAQ
Why secure writable directories in WHMCS?
Moving writable folders like attachments, downloads, and templates_c out of public web access prevents unauthorized file access and enhances security.
How does enabling SSL help WHMCS security?
SSL encryption protects sensitive information exchanged between users and your WHMCS site by using HTTPS instead of plain HTTP.
What’s a good way to protect the WHMCS admin area?
Rename the admin directory and restrict access by IP addresses so that only authorized users can reach the login page.