What Is Virtual Desktop In Windows 11?
Windows 11 Allows You To Open Programs In Different Workspaces Called Virtual Desktops And Quickly Switch Between Them With The Help Of Task View.
Virtual desktops are not a new feature in Windows. In Windows 10, creating a separate desktop was simple so that, for example, you could have a different desktop for yourself for any particular purpose.
Creating a virtual desktop in Windows 11 has been improved compared to the previous generation; You can now have a different background for each virtual desktop, making each desktop easier to distinguish from another and providing a different effect depending on your use.
Note that some of these features were introduced in Windows 10, But along with the new features of Windows 11, they have made a helpful tool.
The desktop in Windows is a unique workspace behind all windows and is also a particular type of folder. You can give this desktop a background image and organize its icons in the desired arrangement.
In an older sense from the history of personal computer operating system user interface design, the term desktop refers to the specific arrangement of open program windows against the background.
So, if you imagine a real desk covered with paper, the set of documents on the table can be called a desktop. Before Windows 10, most PCs without multiple displays had single desktop access.
Thanks to the Task View feature in Windows 11, you can have several desktops other than the main desktop on the same computer and easily switch between them. Each desktop has its arrangement of open windows and programs, but the icons on the main desktop remain the same across all virtual desktops.
Thus, with Task View, people who use only one monitor can appear to be using more than one monitor.
Such a feature is very efficient, especially when performing multiple tasks at the same time. It allows the user to have a separate screen for each category of undertakings, projects, or particular purposes and does not require constantly closing and opening applications. This feature allows better program management and reduces time wastage.
How to create and use a virtual desktop
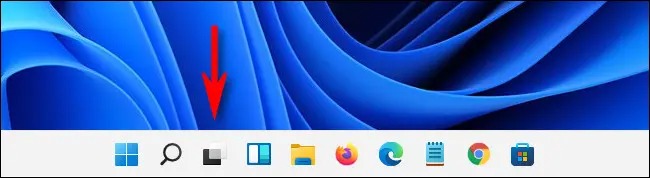
- Click the Task View button on the taskbar or press Windows+Tab.
- If you don’t see the Task View button on the taskbar, right-click the taskbar and select Taskbar Settings, then turn on the switch next to Task View.
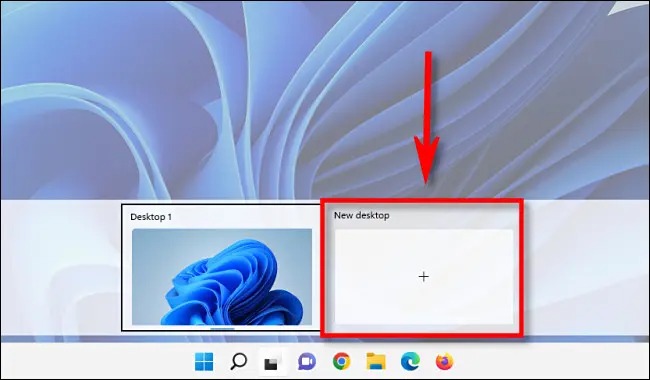
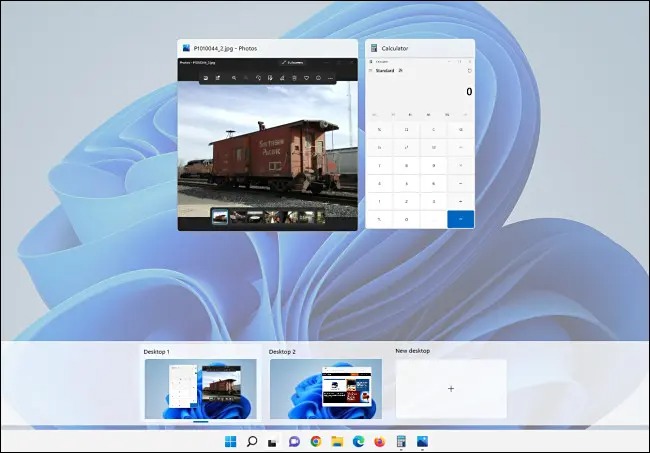
When you open Task View, a page at the top will show all the active program windows if you have a busy schedule. A ribbon at the bottom of the screen displays the available desktops and allows you to create a new virtual Windows.
- To add a new virtual desktop, click New Desktop or press Windows+Ctrl+D.
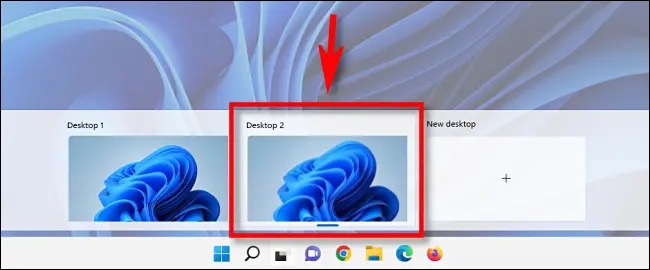
- A new desktop (Desktop 2) will appear in the bar. Click on it to switch to it. The new desktop replaces the old one and works like your first one.
In this mode, you can open applications and arrange open windows on any desktop as you wish. The programs you open also appear on the virtual desktop taskbar. If you switch to another virtual desktop, the window arrangement is preserved, and you can return to it later by clicking Task View again and selecting the virtual desktop thumbnail.
To use programs in another virtual desktop, you can move them between virtual desktops from the Task View area by dragging and dropping the program to the desired desktop or setting a different background for each desktop to recognize the desired desktop faster in Task View. In the following, you will learn more about virtual desktop personalization.
Personalization of the virtual desktop
With Windows 11, you can personalize your virtual desktops to make assigning each desktop to a separate function easier. There are several ways to do this.
Change the virtual desktop background.
- Click on the Task view icon on the taskbar.
- Right-click on the desired desktop.
- Select Choose a background.
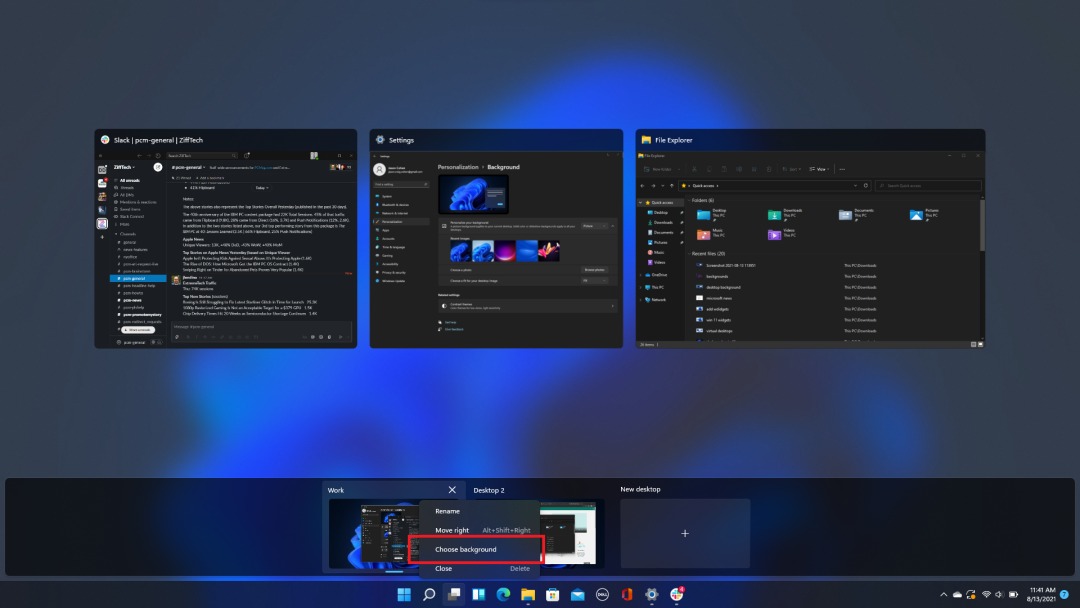
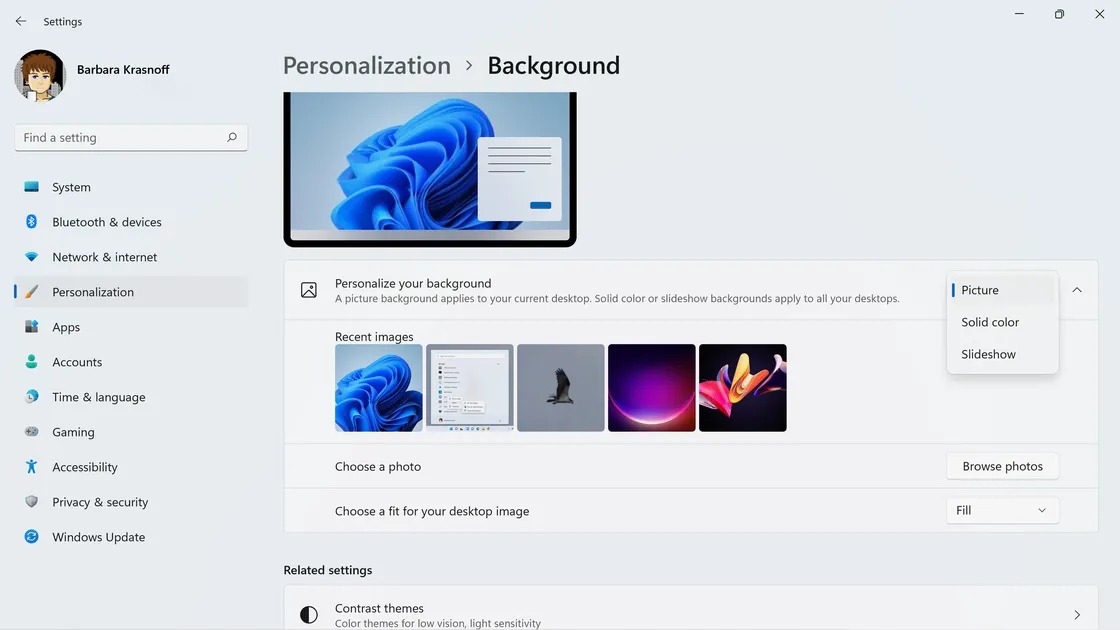
- It will take you to the Personalization > Background page, where you can select your desired background.
Renaming virtual desktops
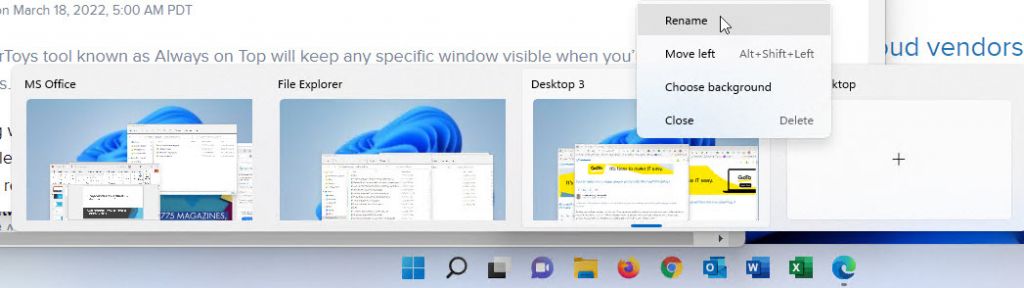
When the number of virtual desktops grows, it can be difficult to tell them apart or to remember which programs and files are on which desktop. To help identify each desktop more efficiently, it’s best to rename them.
- Right-click on the desired desktop. Click on the Rename option and enter a name for the desktop, which indicates which programs are on it. Do this for each desktop.
Change the order of virtual desktops.
- Organize the open desktops by dragging them into your desired order from the list at the bottom of the screen or right-click on the desktop and select Move right to change the order (from the shortcut Win + Ctrl + left/right arrows to cycle between desktops and Alt + (Use Shift left/right hand to move them).

Remove the virtual desktop in Windows 11
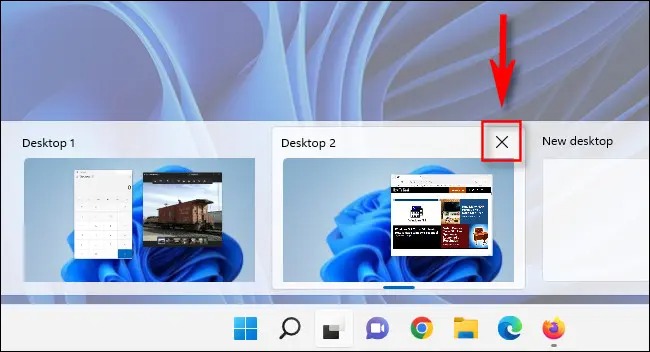
- To remove a virtual desktop in Windows 11, open Task View by clicking its icon on the taskbar or pressing Windows+Tab.
- Please hover over the virtual desktop thumbnail you want to close until you see an X in the right corner, then click it.
- You can also open Task View, use the arrow keys to select the virtual desktop thumbnail, and then press Delete on the keyboard to delete the chosen virtual desktop.
Repeat these steps for any other virtual desktops you want to close. Application windows open in the locked virtual desktop are moved to the virtual desktop to its left (one number lower).
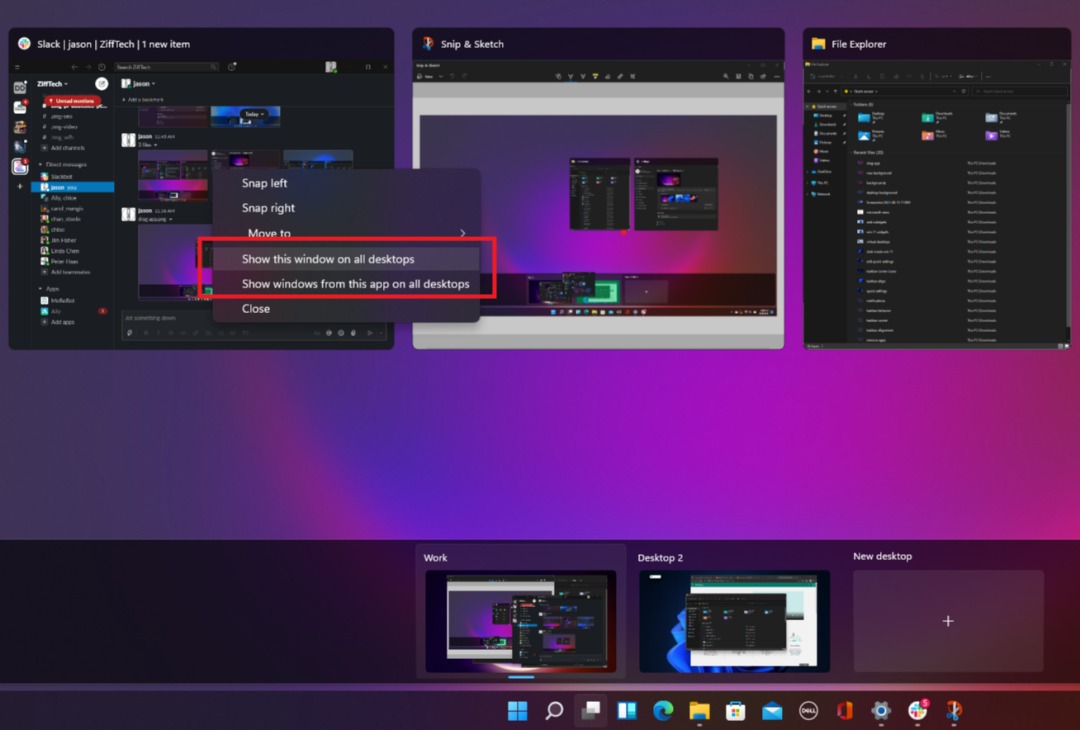
Display a specific window on all virtual desktops.
By default, desktop programs work independently. For example, you can open several work-related tabs in your browser on one desktop, switch to a new desktop, and open a completely different set of accounts for personal use.
- If you want a separate window (or series of windows) available on multiple desktops, open the Desktops view, right-click the application, and select Show this window on all desktops. Selecting Show this window on all Show windows from this app on all desktops will do the same for all available app versions.
Transfer applications between virtual desktops
Open programs on one desktop can be dragged to another empty desktop to reorganize. If you close any desktop containing available applications, the applications will automatically move to the next desktop.

Customize taskbar settings for virtual desktops.
If you want programs open on the taskbar to pop up windows from across your desktop when you click them:
- Go to Settings > System > Multitasking.
- In the Desktops section, open the drop-down window next to On the taskbar, show all the open windows, and select On all desktops.
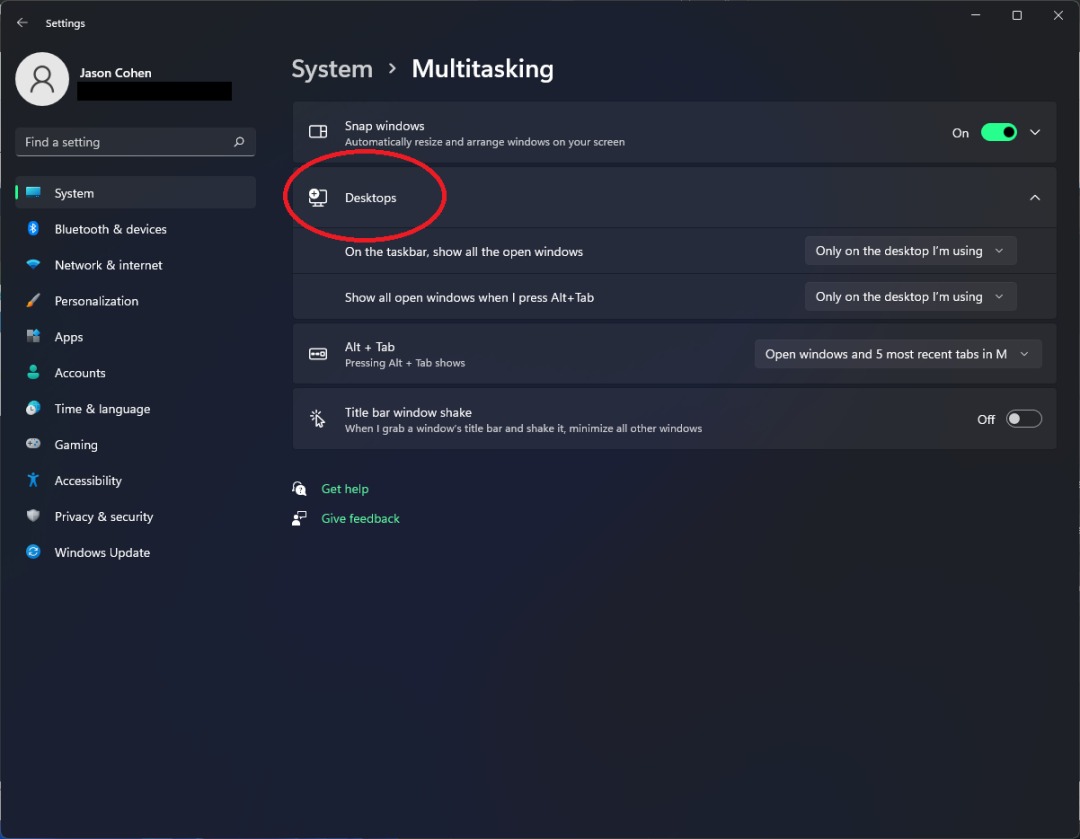
On this page, you can set the Alt+Tab keyboard shortcut to show all windows from all desktops.
Virtual desktop keyboard shortcuts
Windows 11 has a set of easy-to-use keyboard shortcuts that make using a virtual desktop more efficient. Here are some of the most important ones:
- Windows + Tab: Open Task View
- Windows + Ctrl + Left or Right Arrow: Switch between virtual desktops
- Windows + Ctrl + D: Create a new virtual desktop
- Arrow keys + Enter: Select virtual desktop in Task View
- Delete: The selected desktop will be deleted by pressing this key while Task View is open.
- Escape: Close Task View
****
We hope this article has been helpful to you. If you have questions about creating and personalizing a virtual desktop in Windows 11, share them with other users and us.