


What is HSTS and How to fix HSTS Related Error ?
It is a web security policy that forces web browsers to interact with websites only over a secure HTTPS connection and not (HTTP). Instead, it helps prevent attacks like cookie hijacking or deprecation attacks. Also, avert cookie-based login credentials from being stolen by popular tools like Firesheep.
HSTS was created to respond to a vulnerability introduced by Moxie Marlinspike in a 2009 BlackHat Federal discussion entitled “New tricks to defeat SSL in practice.” This vulnerability, which HSTS helps defend against, is the same one Marlinspike’s SSLStrip tool exposed.
The mentioned SSLStrip tool attacks secure HTTPS connections and turn them into insecure HTTP. Therefore, an HSTS policy is implemented that prevents this attack by communicating with web browsers that only HTTPS connections should be placed on.
The creation of HSTS is well accepted among developers and regular users mainly due to its ability to strengthen online security measures and reduce the risk of your data or website being corrupted.
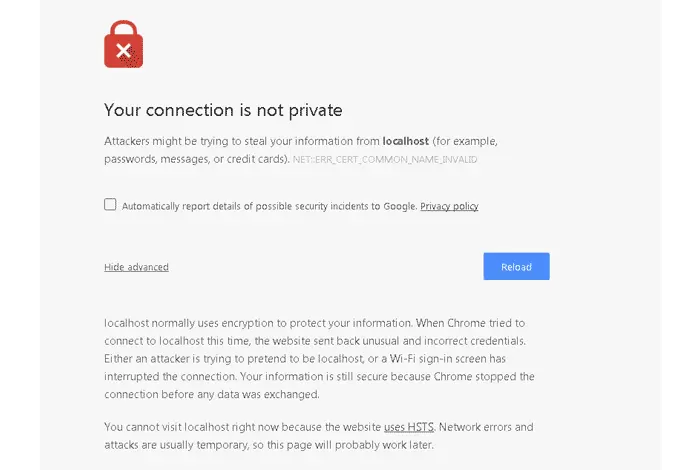
However, the HSTS implementation can occasionally cause problems by displaying HSTS errors in browsers. For example, Google Chrome can display this error:
“Privacy error: Your connection is not private” (NET::ERR_CERT_AUTHORITY means “Privacy error: Your connection is not private.”
If you try to access the same website from another browser and that website opens without any errors, then HSTS settings affect your web browser.
In such cases, you should delete them. Clearing HSTS settings in most web browsers can quickly solve this problem.
What causes HSTS errors in popular browsers?
Unlike other HTTPS errors, HSTS errors cannot be bypassed. Additionally, if a website provides an HSTS header, your browser will likely store it whenever you visit. Some of the common causes of HSTS errors in your browsers are:
- If your browser has saved HSTS settings for any domain and you later try to access that website via HTTP or a broken HTTP connection, you may encounter this error if you connect due to an expired certificate and inconsistent host names.
- If you are a developer, you might get this HSTS error when testing the HSTS configuration.
- If you are a website visitor and getting this error, it is most likely due to the HSTS deployment on the site you are visiting. Therefore, as a user, it is recommended that you remove the
- website’s local HSTS setting or wait for it to expire, possibly based on the “maximum age” set on it.
Also, HSTS errors are not unique to any browser. But the error pages contain HSTS information.
Steps to clear HSTS settings in Google Chrome
Whenever an HSTS settings error occurs in Chrome, you will likely encounter an error message like “Your connection is not private.” Additionally, by looking in the Advanced menu for this error, you will see a message explicitly mentioning the HSTS settings. Be sure to follow the steps below to delete the HSTS cache from your Chrome browser.
- Open your Chrome browser.
- Search in the address bar: chrome://net-internals/#hsts
- Search for the Query HSTS/PKP domain field and enter the website name (domain) for which you want to remove the HSTS settings.
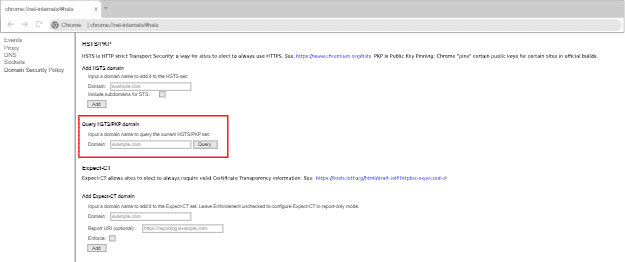
Enter the domain name in the delete domain security policies field and press the Delete button in this field.
Steps to clear HSTS settings in Mozilla Firefox
There are several ways to disable or clear HSTS in the Firefox browser. So, if one doesn’t work, you can check the other one. Some of its simple methods are as follows:
Method 1: Clear HSTS settings by forgetting the website
Close open windows and open your Mozilla Firefox History by pressing Ctrl+Shift+H (Cmd+Shift+H on Mac).
Now go to the site for which you want to clear HSTS settings.
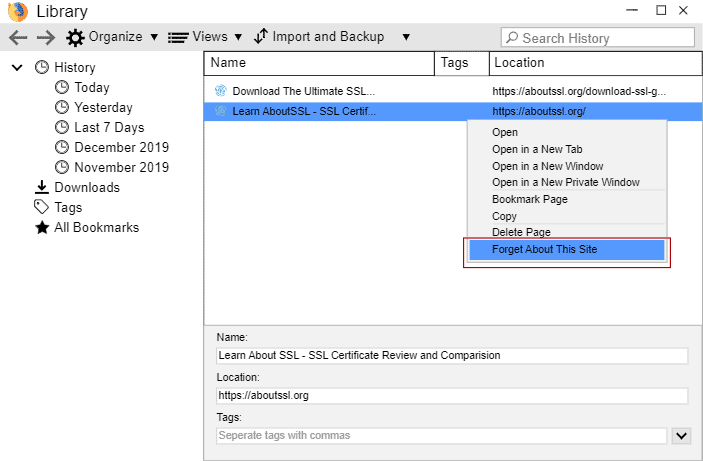
Right-click on the site and click on Forget About This Site option.
Note: This will clear all current website data in Firefox.
Now restart the browser, and the error should be fixed.
Method 2: Delete HSTS settings by deleting Site Preferences
In Firefox, click the library icon and go to History > Clear Recent History.
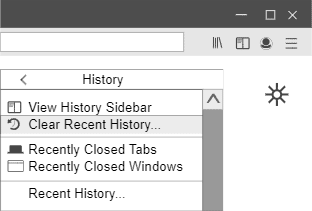
The Clear All History window will appear; setting the time range to clear the drop-down menu to Everything and uncheck all options and select only Site preferences and then click the Clear Now button.
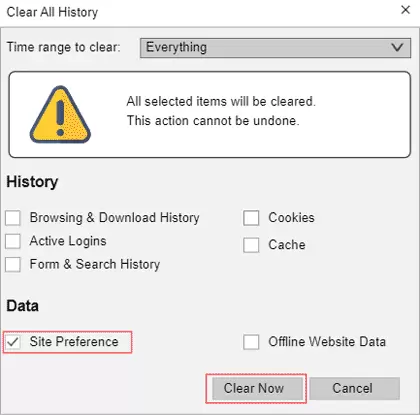
Now if you reopen the browser, the problem should be fixed.
Method 3: Clear HSTS settings by editing the user profile
- Close your Firefox browser completely, including associated tray icons and pop-ups.
- Now go to the Firefox user profile. Possible places where you can find profiles are:
For Microsoft Windows users:
C:\Users*\AppData\Local\Mozilla\Firefox\Profiles
C:\Users*\AppData\Roaming\Mozilla\Firefox\Profiles
For Mac users:
/ Users / * / Library / Application Support / Firefox / Profiles
Or
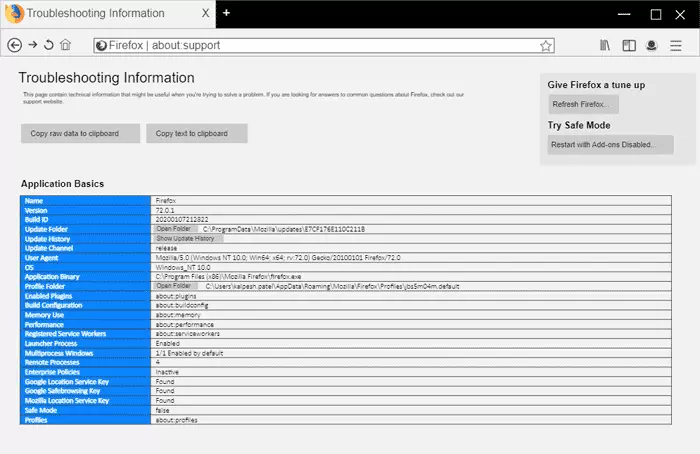
- In the Firefox address bar, type about: support above and hit Enter.
- The Application Basics page will open, go to the Profile Folder section and click the Open Folder option. After opening it, close the Firefox browser.
Once you have opened the Mozilla Firefox profile folder, search for SeiteSecurityServiceState.txt and open it in a text editor program like Notepad. This file contains HSTS and HPKP (key pinning) settings for domains you have visited.
Example of HSTS list:
connect.facebook.net:HSTS 0 18257 1608961528860,1,1,2
Now delete the HSTS data of your desired website.
After deleting the entry, save and close the file and restart your Firefox browser.
Attention:
Be careful to delete only the website information you want.
Another option is to rename the file format from txt to .bak. Therefore, you will have a backup copy of the existing file, and Firefox will create a new file from scratch, which will help remove previously saved HSTS settings.
Method 4: Clear HSTS settings from the browser
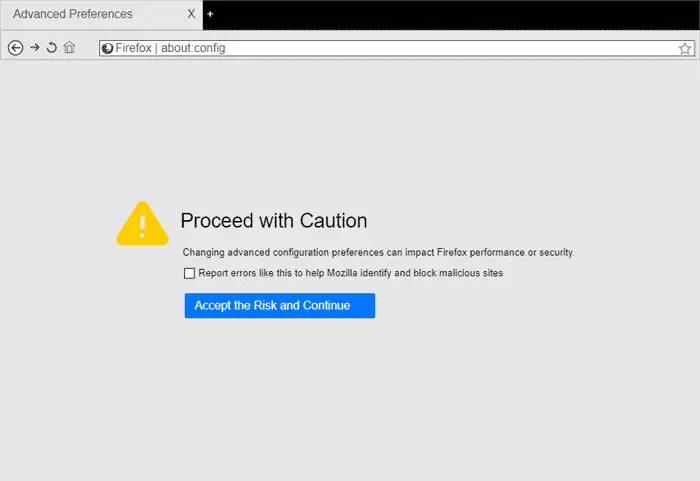
Open Firefox and type about: config. in the address bar. Now you need to click on this button:
I accepted the risk!
And enter the advanced settings menu.
- Now search for hosts from the search bar.
- Select Security.mixed_content.use_hstsc and double-click it to change and disable the settings.

Steps to clear HSTS settings in Microsoft Internet Explorer
- Go to the Run box on your PC and type “regedit” to open the Registry Editor.
- Once opened, locate the following registry key:
HKEY_LOCAL_MACHINE\SOFTWARE\Microsoft\Internet Explorer\Main\FeatureControl\
From the menu, go to Edit, then to New, and select Key.
Now type FEATURE_DISABLE_HSTS and press Enter.
registry-editor-new-key-option
Now, click on FEATURE_DISABLE_HSTS.
Again, from the Edit menu, click on the New option, select DWORD Value, and click on it.
Now type iexplore.exe.
From the menu, click on Edit and select Modify. Type the number 1 in the opened Value data box and click the Ok button to save the change.
Find the following registry subkey:
HKEY_LOCAL_MACHINE\SOFTWARE\Wow6432Node\Microsoft\Internet Explorer\Main\FeatureControl\
- Choose New from the Edit menu again and press the Key button.
- Now type FEATURE_DISABLE_HSTS and press Enter.
- Click FEATURE_DISABLE_HSTS.
- Go to the New section from the Edit menu, click the DWORD value,, and type iexplorer.exe.
- Now click on Modify from the Edit menu.
- Now type 1 in the Value data box and click Ok.
- Finally, close the Registry Editor.
Note: For iexplore.exe, the subkey values are 0 and 1, which means that a value of 0 enables the feature, and 1 disables the feature.
Conclusion
As you can see, HSTS helps to increase the security of your website. Therefore, if you are developing your website, it is recommended to use HSTS. Of course, before doing this, remember that installing a valid SSL / TLS certificate is just as important as not to be overlooked. So, first, install an SSL/TLS certificate and then enable HSTS settings.