How to Take a Professional Screenshot in Windows – Complete Guide
Taking A Screenshot May Be A Normal And Very Simple Thing, But If You Are A Professional Streamer, A Sensitive Editor, Or A User Who Wants To Take Pictures Of Your Computer Screen In Different Situations And Types, Then Following This Article Is The Best Solution.
It will be to improve your skills. We have discussed various methods for taking screenshots in Windows and answered questions on this topic.
It has probably happened to you many times that you want to use all or part of your screen in Windows, whether on a laptop or a PC, to record or plan to save your achievement in a video game, and then show it off to others.
In the term, this is called a screenshot (ScreenShot), and in the following, you will learn how to take a screenshot in Windows and during the game.
Taking a screenshot or recording the content of a laptop or personal computer (PC) screen can have many uses. Regardless of Windows version, Microsoft has built several handy tools into its operating system for this purpose.
Therefore, it does not matter which version of Windows you use; the desktop screenshot tool is available in all versions, and the methods for taking screenshots are very similar.
As a result, taking a screenshot in Windows 10 and 11 is not much different from taking one in Windows 7 or Windows 8/8.1. In the rest of this article, we teach you how to take a screenshot in Windows.
Some of the primary uses of screenshots you are probably familiar with include saving page information in a snap, capturing educational content, and sharing your screen. We will introduce you to the best and most effective ways to take screenshots on Windows.
The best ways to take a Screenshot In Windows
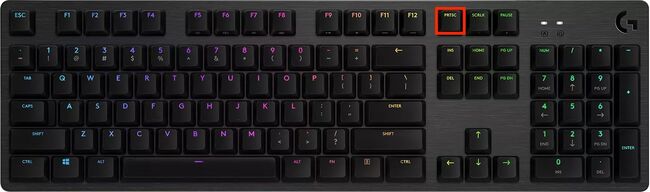
The easiest way to take a screenshot in Windows is from the Print Screen button.
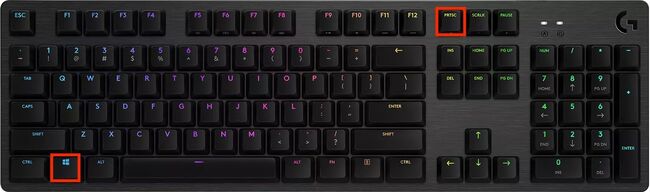
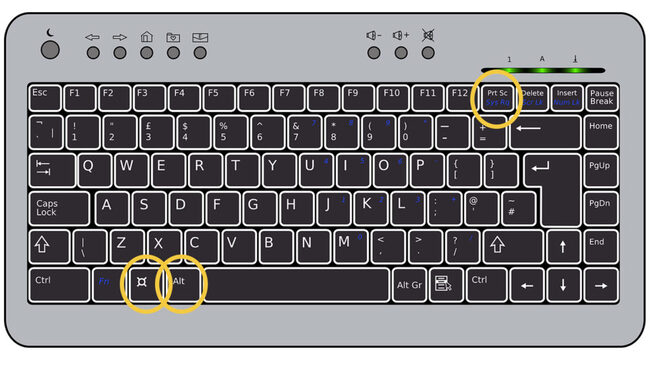
The easiest and fastest way to record your screen is to press the Print Screen button on most keyboards (usually labeled PrtSc or PrtScr), located just above the F1-F12 keys. By pressing the PrtSc button, the entire content of your page is copied to the Clipboard. The system is saved.
Note that on some laptops, you need to press Fn + PrtSc simultaneously to use this button. As mentioned, this method is the easiest for taking screenshots of the desktop screen.
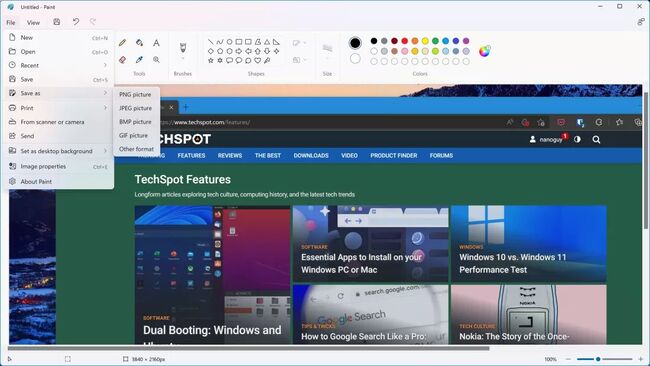
To use and edit the image you saved, you need an image-editing program, such as Photoshop or Paint. Please open it and press Ctrl+V (same as Paste). Transfer the screenshot from the clipboard into the software environment.
For simple tasks such as cutting the image (Crop), writing and marking the image, or saving it with a specific format, the same Paint software is enough, and there is no need to use more powerful programs.
In short, to take a screenshot of your computer screen, first press the Print Screen (PrtSc) button (Fn + PrtSc), then open the Paint program from the Windows Start menu. Then press Ctrl + You to bring the Screenshot to the software environment.
In this section, you can make your desired edit on it by pressing Ctrl + S keys. Save the final image in the desired format. In this case, you also need to determine the screenshot location in Windows 10.
Clipboard (ClipBoard) is a temporary storage location inside the RAM system that stores copied information for transfer from one department to another.
The image format also depends on the content type in the Screenshot and your application. If the information you save in this image is text (Text), a table (Table), or a graph (Graph), the PNG format (default in Paint) produces more accurate, so-called sharper images.
But if, for example, you intend to record a specific frame of a movie, a game, or an image and upload it on social networks, the JPG format is a better option because this format creates an image with good quality and a small size, and as a result, uploading it will be faster.
In addition to using PrtScand and transferring it to Paint software, you can press Win + PrtSc to take a full-screen screenshot in PNG format in the ScreenshotsAvailable folder in the Pictures folder.
This method is practical when you need to capture and save multiple desktop screenshots quickly. This method automatically saves the Screenshot in Windows because you do not specify a save location in Windows 10 or 11.
Also, if you want to save only the active window on your screen, click the top bar to enable it, then press Win + Alt + PrtSc to copy it to the clipboard. Next, open an image-editing program, take a screenshot of the window mentioned above using Ctrl + V, and save the edited image.
A little more professional: From the Sniping Tool software use
Snipping Tool is a built-in Windows program for capturing screenshots and recording screen content. To open this program, search for the name (Snipping Tool Snip & Sketch) in the Windows start menu or run it for quick use of the shortcut keys Win + Shift + S.
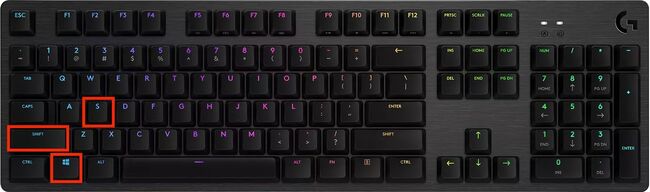
To capture a screenshot of the computer screen, press the shortcut, then click and drag the area you want to record, and save the image. In addition, you can use the Snipping Tool to capture a desired frame (Free-Form Snip) of the display; placing the selected part in a rectangular frame is unnecessary.
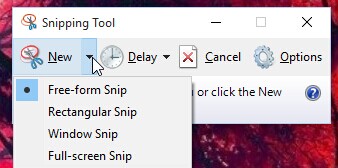
Also, using the options on the top bar of this application, you can write on the recorded image and highlight the parts you want.
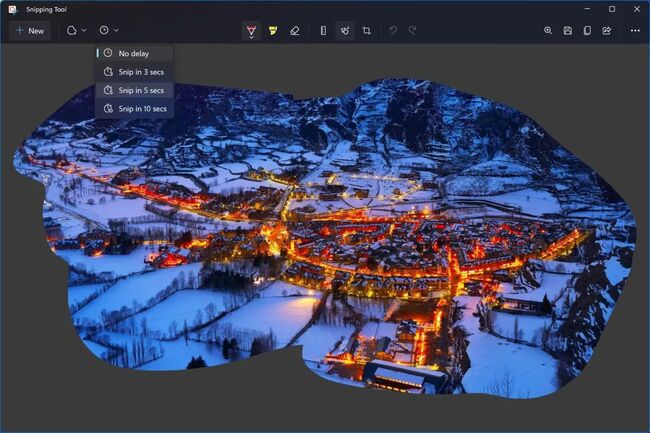
In addition to these capabilities, Snipping Tool lets you automatically capture a screenshot after a delay of several seconds. This feature is useful when you want to use a pop-up window; pressing any button will close it.
In this case, first, specify the amount of delay and select the part of the image that is supposed to appear in that window. After the delay, Snipping Tool automatically captures a screenshot of the designated area.
Entirely professional; Steps Recorder app for producing educational content and taking screenshots from the desktop
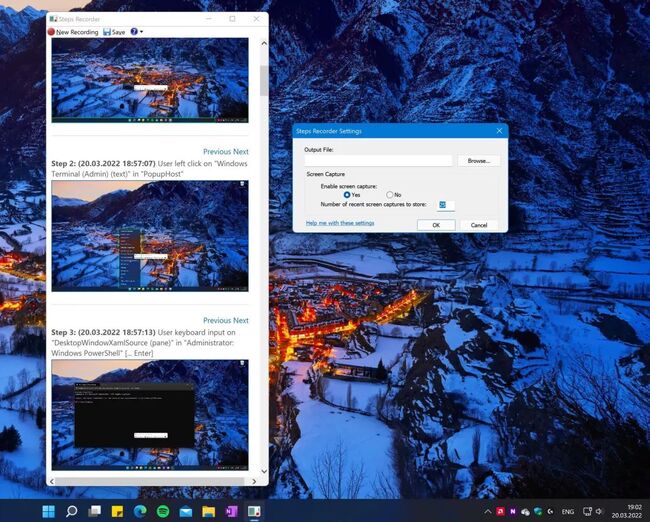
After the release of Windows 7, Microsoft released a tool called Problem Steps Recorder, now called Steps Recorder Added, which is included with Windows. This software is beneficial for creating educational content and taking screenshots in Windows, especially when you want to teach step-by-step how to install or run specific software.
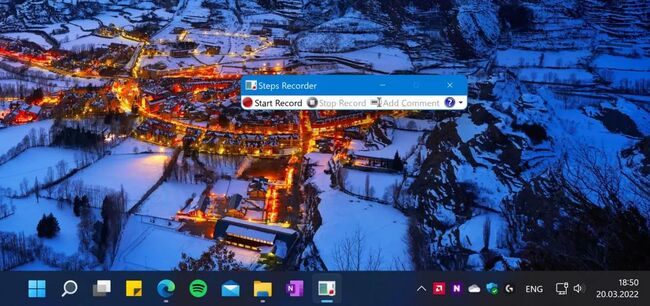
To use this software to take a screenshot on a computer, search for the name “Steps Recorder” in the Windows Start menu and run it. Then click the Record button, perform your desired activities in Windows, stop the recording, and save the result as a ZIP file.
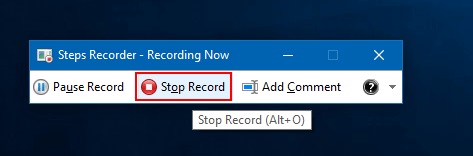
While recording, you can click, open programs, type, copy, and move open windows. Keep in mind that after stopping recording completely (Stop Record button), all work done using the above details is saved and can be displayed as a step-by-step tutorial. Unfortunately, this software is currently in English and cannot be changed to Farsi.
As mentioned, the Steps Recorder app captures screenshots and records the contents of each screen in great detail. Be sure to delete programs that are not part of your training before pressing the Record button. Close completely. With this, you can display your desired subject, especially.
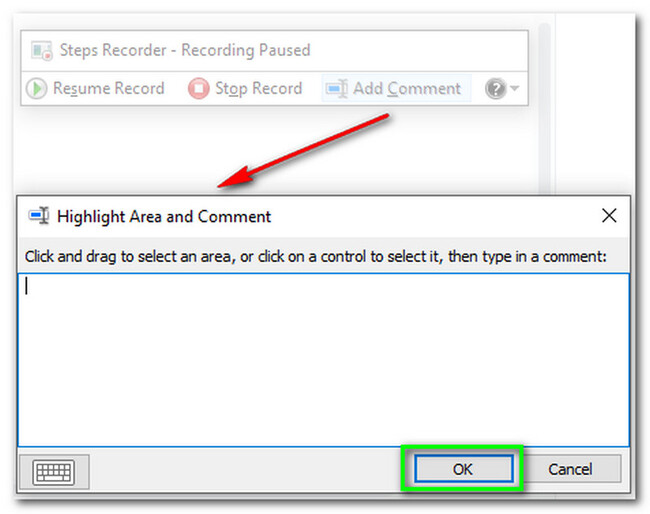
Of course, you can pause the recording whenever you want. And continue again. Also, the Add Comment feature in this screen capture software lets users select a portion of the screen while recording and add their comments and descriptions.
Users can limit the screenshots automatically taken for educational content in the Settings section of the Steps Recorder software. This number defaults to 25 images.
After finishing the work and pressing the Stop Record button, a window will open showing a step-by-step, detailed description of the work. If you are satisfied with the result and have no problem with the captured images, save them as a zip file .) Preserve and share them with others.
A special tool for screenshots from the desktop while playing and recording gameplay
Using the Xbox Game Bar
Another way to take a screenshot on a computer and record the screen is to use the Xbox Game Bar in Windows 10 and 11. Of course, this software is primarily used to record gameplay and chat with other gamers, but users can also use it as a screenshot tool in Windows 10.
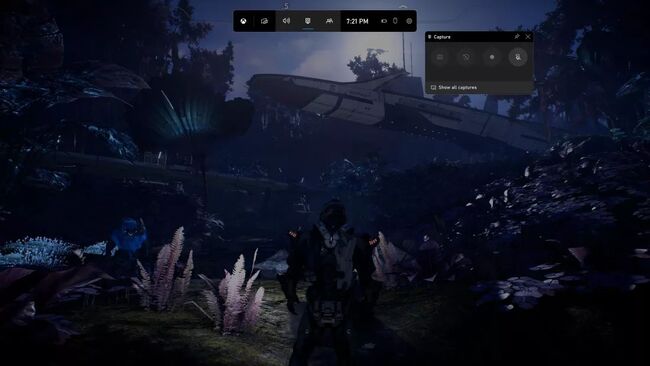
The Xbox Game Bar tool, which opens in Windows by pressing the Win + G keys, is straightforward to use. You need to know that screenshots taken with this program during gameplay are saved in the Capture folder and are also available in the Videos folder. Windows will be saved, and their names will be chosen based on the currently running game.
Using the Steam Client
If you buy most of your games from the Steam platform, you can press the F12 button to take a screenshot of the screen while playing. Then, the captured image will be displayed at the bottom of the screen, a notification will be sent, and its saving will be confirmed.
As you know, Steam has no limitations across Windows versions, and users can use it as a screenshot tool on Windows 7.

The user can view the Screenshot taken on the game page in the Library section and open the Steam software. Steam also allows you to save captured images in two JPG formats and PNG, while the Xbox Game Bar uses the same default PNG format.
Using Nvidia Ansel to take a picture of the computer screen
In the GeForce Experience app, Nvidia provides a tool called Nvidia Ansel for people with systems equipped with Nvidia graphics cards. It is designed to capture screenshots in Windows while gaming. Although this tool is not compatible with all existing games, the list of supported games from AnselSupport grows daily.

This tool lets you pause the game, adjust your field of view, tilt the camera to capture the best angle, and save the desired image. As a result, you can use the Nvidia Ansel software to take quality screenshots in Windows.
You can use Nvidia Ansel by pressing Alt + opening the GeForce Experience app, going to the Photo Mode section, or pressing Alt + F2 directly in Ansel. This program is one of the best ways to take screenshots on a computer.
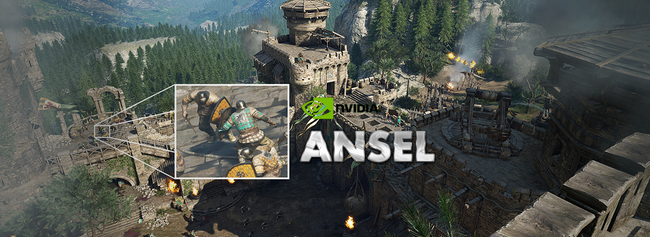
In this section, you can apply many filters to your image, change the camera angle, and increase the resolution of the game scene to more than your screen’s resolution. Some games can even be considered 3D scenes or 360-degree Photospheres. Create and view them through virtual reality (VR) headsets.
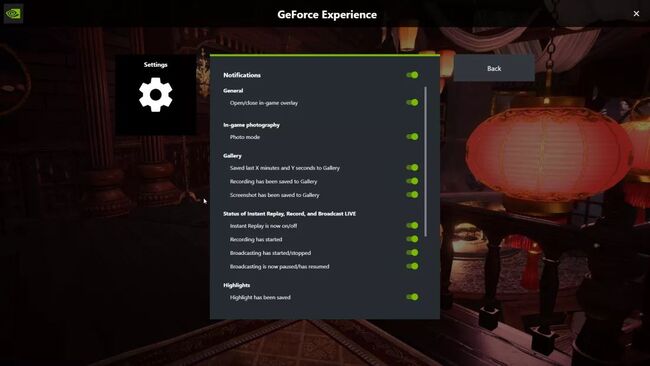
After each Screenshot, you will see a notification confirming the image has been saved. If you plan to take quick screenshots, disable the Notifications option in Ansel’s settings.
Using Lightshot is suitable for taking screenshots from the desktop
Lightshot is a program for taking desktop screenshots. A third party developed it and is available for free download and installation. In addition to Windows 10 and 11, this software can capture screenshots on macOS and a MacBook.

You can download Lightshot free software using this link. After installation and execution, this program provides the user with many editing capabilities.
To take a screenshot of the computer screen, use Lightshot. Run this program first. After running Lightshot, you should see its icon in the lower-right corner of the screen (next to the volume and network icons).
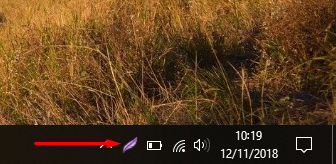
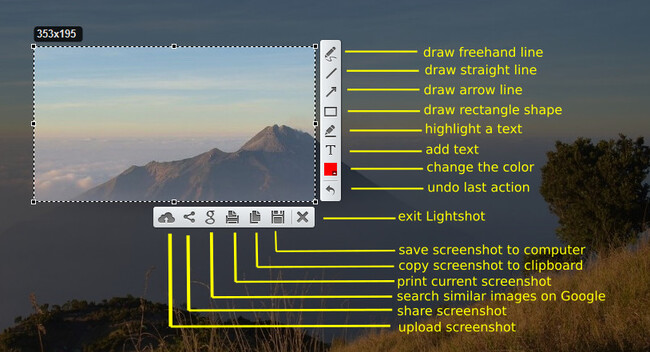
You must click this icon to take a screenshot with this program. After clicking the icon, the desktop screen will briefly darken. In this case, you can select the part of the image you want to save by clicking and dragging the mouse.

After releasing the mouse key, the user can edit the image. But the most important thing is the option to save the Screenshot on the computer (Save Screenshot) next to the exit option (Exit).
Summary of Methods and Final Points
In summary, the screenshot methods from the desktop in the Windows operating system can be presented as follows:
- Use the PrtSc button (Fn + PrtSc on some laptops) and then transfer it to an image editing software with Ctrl + V buttons
- Using the Snipping Tool program and choosing the part of the page that we want to save
- Using the Steps Recorder software to produce educational content step-by-step
- Using programs to take in-game screenshots and record gameplay, such as Xbox Game Bar, Steam Client, and Nvidia Ansel.
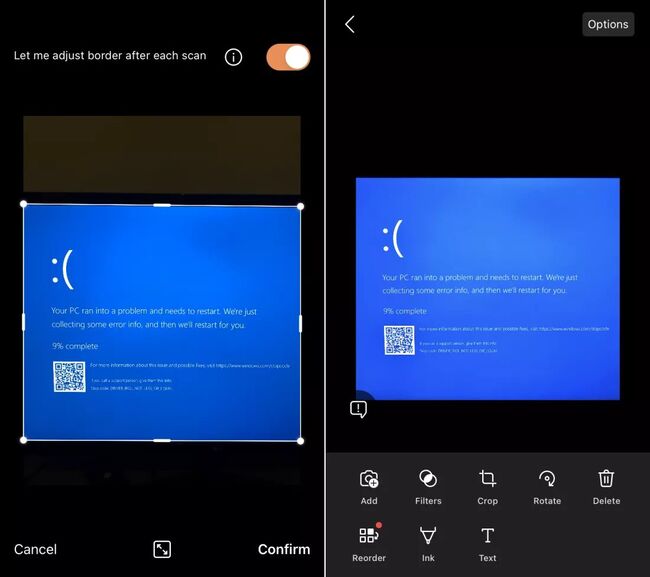
Of course, all these programs are the answer when your operating system has not encountered any problems. Still, if, for example, you want to get rid of a specific error message or even a Blue Screen of Death (BSOD), Windows takes a screenshot. It is recommended that you use your mobile phone.
For the best results, you can also use applications such as Microsoft Office Lens (Available for Android and iOS) and Adobe Scan (Available for Android and iOS).
Finally, note that taking in-game screenshots, like photography, requires some art and creativity and takes practice. As a result, to capture the best possible screenshots of the game’s interesting scenes, it is necessary to adjust the program’s settings.
In your experience, which of the abovementioned methods is the most used? Do you know any other way or program to take a screenshot of the desktop or photograph the computer screen?
FAQ
What key tools can you use for screenshots in Windows?
Use Snipping Tool, Print Screen, or Windows + Shift + S for different capture types.
How do you capture a specific area of the screen?
Press Windows + Shift + S and drag to select the area you want to capture.
Can you edit screenshots after capturing them?
Yes — open the captured image in Snipping Tool or Photos to annotate and crop before saving.