Migration from Windows to Linux: A Practical Overview
Microsoft Announced At The End Of January that the Company Would Stop Supporting Windows 7, which means there will be no more updates or Security patches from Microsoft.
Linux OS is so much faster if you know exactly what you’re looking for and use the Command line. If you’re one of the final Windows 7 holdouts and don’t want to get stuck with an unsafe System, you have a choice to make: upgrade to Windows 10 or switch to something else entirely.
The following path that Microsoft made for Windows 10 might not look good to everyone, especially for the old-time Windows XP and Windows 7 users, since it came with a lot of significant changes and was different from the other ones, like everybody we don’t want to stick with an old version of Windows 7 with many Security holes and the danger of getting attacks by malware or hacker and end up losing our Information and data, so today we tried to guide you through the installation of Linux.
Choose Your Distro
By saying ‘Distro,’ we mean distribution; unlike the Windows OS, the Linux OS has many versions, each providing different features, looks, and usage. One of them might have a Windows-style interface, another might have the interface and look of Mac OS, while another displays a blank space with a terminal for entering the codes and commands.
Exploring the multitude of Linux distributions available is a fun aspect of the hobby. Still, for your first installation, you will likely want something popular and beginner-friendly, making it easy to get help.
There are a lot of distributions that aim to mimic Windows in layout and functionality, like Zorin OS, but they’re on the smaller side, and you won’t have as big a community to tap as you learn your way around. That’s why I recommend starting with Linux Mint.
On the other hand, Ubuntu is the most popular Distro of Linux OS on Desktop PCs, but it isn’t very Windows-like these days. Linux Mint is a perfect in-between option: it’s designed for beginners, offers a familiar Desktop environment, and it’s based on Ubuntu, so you can make use of the enormous Ubuntu/Mint community when you need help.
There’s no forcing you to use Linux Mint or anything. You’re free to check out other distros instead, but I’ll be using Mint for the goals of this guide, and I suggest you do too.It’s not my particular Distro of choice, but it’s excellent for new Windows migrants, and it’s more comfortable to explore other distros once you’ve nailed down the basics on a beginner-friendly System.
If you’re planning on running a server, you’re looking for long release cycles, compatible versions of the software you plan on deploying, support, and general reliability. For desktops, you don’t necessarily want long release cycles. You probably wish to have newer versions of your applications. And you might even want a rolling release that keeps you on the bleeding edge.
You will also be using a graphical Desktop environment. You want a distribution that provides something visually pleasing and functional, and you certainly don’t like something bloated and clunky. You also want some stability, but it’s not as critical.
Again, we recommend using Linux Mint for the remainder of this article.
Creating Installation Drive
To create and install files, first, download the image files from the website. Then, head to the Mint download page and select the 64-bit “Cinnamon” version. Cinnamon is the Desktop environment I suggest for former Windows users, although MATE is also notably Windows-like, albeit a bit less modern.
XFCE is excellent for old or low-powered PCs thanks to its light resource usage. Try downloading this one; Mint’s download page offers several links, depending on your location. If you use BitTorrent, I recommend grabbing the torrent File, which will download much faster.
The installation image comes as an ISO File or disk image File. To install it on your System, you will need to burn it to a DVD (by right-clicking it and choosing “Burn Disc Image” in Windows 7) or a USB flash drive.
We’re going to do the latter using a tool called Rufus. (If you have a fast USB 3.0 drive, all the better.) Install Rufus, open it, and insert a flash drive that is 2GB or larger.
Then you should see it appear at the top of the Rufus window.
Now, click on the “Select” Button next to “Disk or ISO image” and choose the downloaded File. Then, select Linux Mint, press the “Start” Button, and if prompted to download new versions of Syslinux, click “Yes”. Note that this will erase your flash drive, so ensure there is nothing important on it before proceeding.
In the meantime, you can get a coffee or something to eat. When it’s finished, you’ll see a success message, and your flash drive will be named ‘LINUX MINT’. Please back up your data, reboot your computer, and buckle your seat belts: it’s Time to install Linux.

Install Linux
As your computer is about to turn on, you should start seeing messages that instruct you to press different keys to enter the boot menu. It’s often something like F12. If not, you’ll see a key to enter Setup (usually the Delete key). Press one of those keys, and look for the option to boot from the inserted USB drive.
(If you enter the entire setup menu, it’ll be in a Boot settings menu somewhere, and you’ll have to exit the menu to reboot again when you’re done.)
After that, you should start seeing GRUB, Linux Mint’s boot menu, where you can choose to boot into Linux Mint. You may need to search for a fix if you encounter any errors. For example, I had to enable the nomodeset option for my graphics card. Others should have to tweak or disable Secure Boot in the BIOS.
This installer is what we call a Live CD, which means it is not fully installed on your PC, but it can run around the OS and let you work with the features; this will provide you with an opportunity to see if this particular Distro appeals to you without it touching your System drive.
Once you have thoroughly reviewed the interface and the operating System, you can click on Install. Double-click on the Linux Mint icon to go through the wizard, and be sure to check the box next to ‘Install third-party software’, as it contains valuable drivers and codecs that you almost certainly won’t.
From here forward, you have only two options: wipe your hard drive entirely, resulting in the complete removal of all traces of Windows, and use Linux as your sole operating System.
(Make sure you’ve backed up your data before doing this.) Alternatively, you can split your drive into two partitions and dual-boot Linux alongside Windows.
This will allow you to reboot into either one whenever you want. Keep in mind that Windows 7 will be left insecure, so you don’t want to spend too much Time there. If nothing else, it’s comforting to know you have that safety net during the transition before you thoroughly remove Windows.
Select the appropriate option from the Installation Type menu and click ‘Install Now’. The process may take a little while, but you’ll receive a success message once it’s complete. Click the “Restart Now” Button to boot into Linux Mint and begin getting acquainted with your new operating System.
Familiarized With Linux, Some Apps
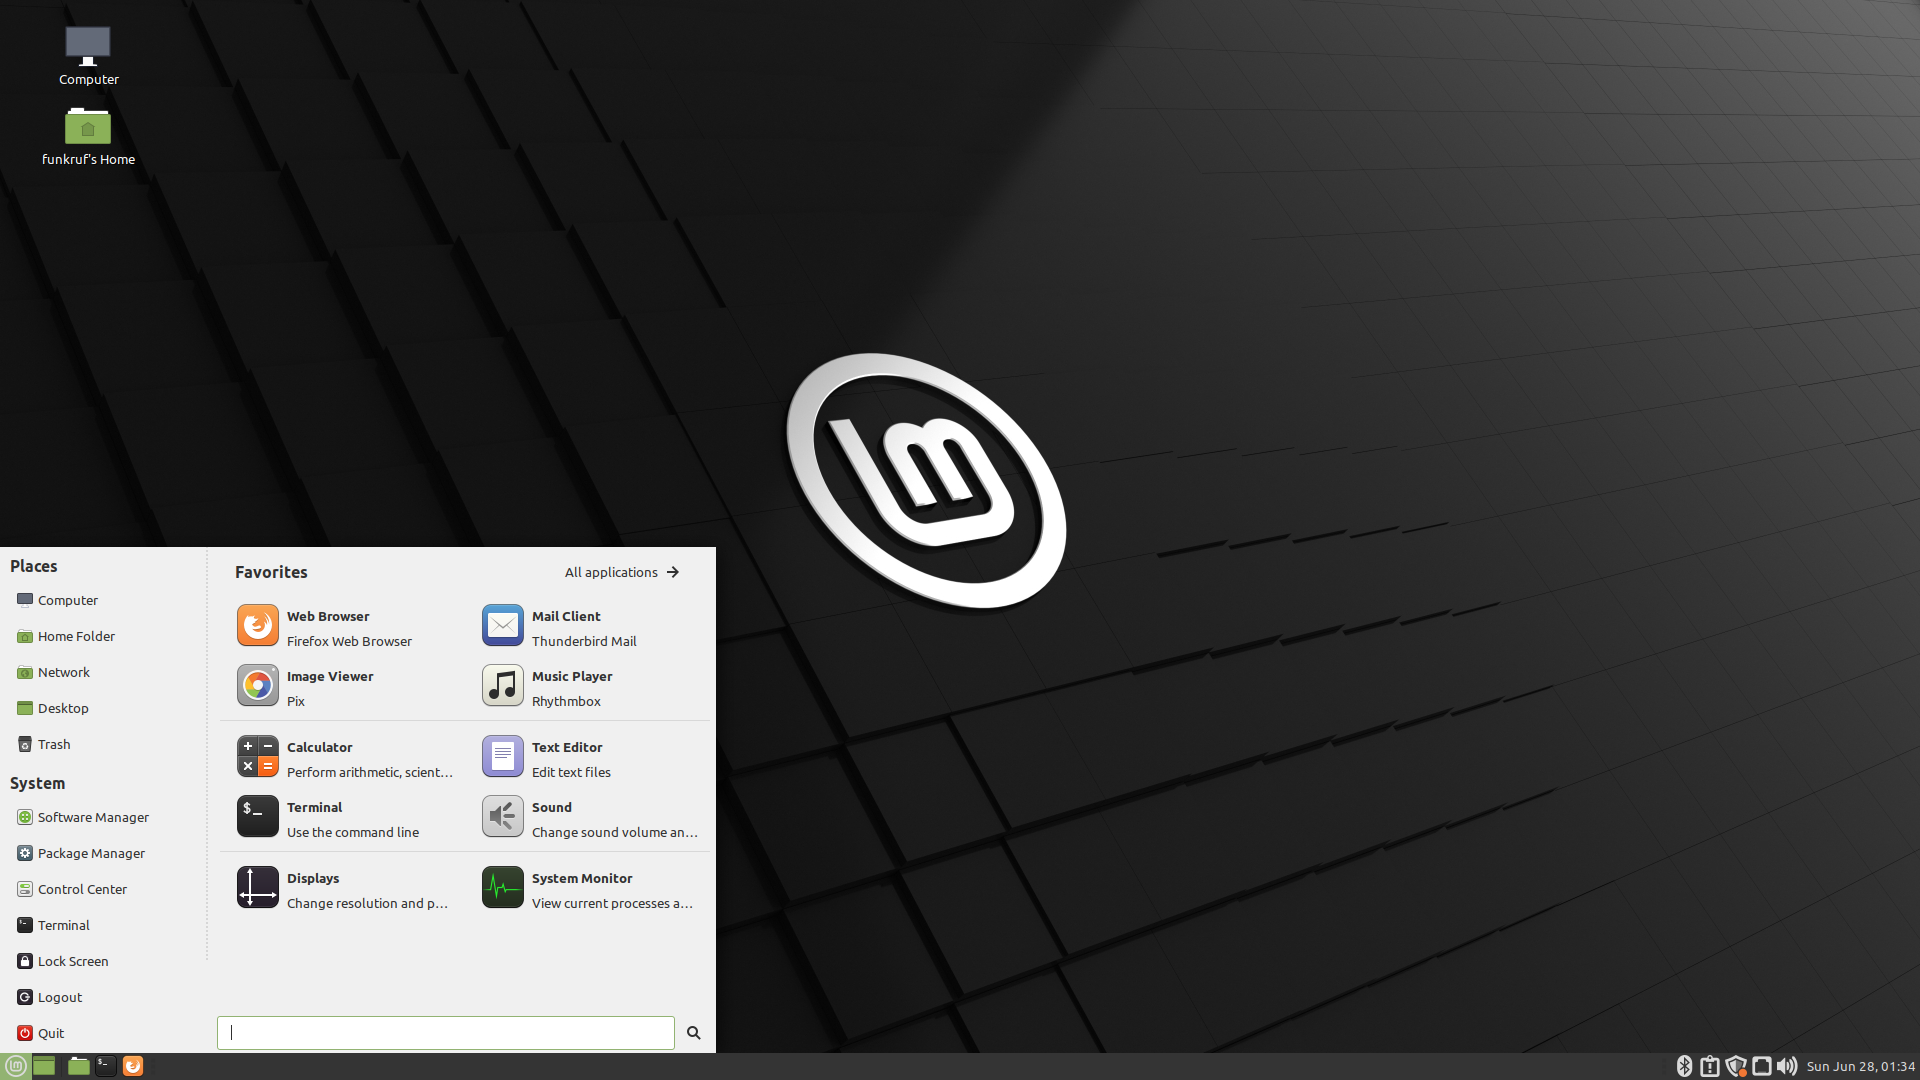
During the reboot, you’ll be dropped into the Linux Mint Desktop once again—only this Time, it’s installed on your PC. The basics are pretty familiar: click the Button in the lower-left corner to see applications, manage windows from the bottom Taskbar, and so on. However, a few things in Linux work differently than in Windows, with applications being the most notable example.
In Linux, it’s less simple to download apps from the web. Instead, each Distro has its repository, similar to a free app store, with a directory of popular apps. You can install an app from the warehouse in one of two ways: through a graphical software manager (which resembles an app store) or from the Command line.
To open Linux Mint’s Software Manager, click the menu Button in the lower-left corner and head to Administration > Software Manager (or start typing “software manager,” as you would in Windows). From here, you can download plenty of free, open-source apps.
Some are ported versions of Windows apps, such as Steam and Spotify. In contrast, others are open-source choices to common apps (Banshee is a music player similar to iTunes, and Gimp is an image editor similar to Photoshop). You can browse here or search for apps using the bar at the top.
How to Update Software
You’ll also want to update those apps regularly to the latest versions. Again, you can accomplish this in two ways: either through the graphical tool or the Command line. For the visual tool, click the shield icon in the lower-right corner, which opens the Update Manager app. You can then click the Install Updates Button to update all your software.
Also, another option for you is to open up a terminal and run these two commands:
sudo apt update
Install and Uninstall applications.
First, Linux still relies on the Command line for various tasks, so it would be beneficial to become comfortable with it. Installing an application in Linux OS is much faster if you know exactly what you’re looking for and use the Command line for it; it may seem intimidating. To install an app—let’s say the open-source media player VLC—open a Terminal window and run:
Sudo apt update
sudo apt install vlc
Let’s break that down: sudo tells the System to run the Command as root (or, as it might be called in Windows, as an administrator), apt is the name of Linux Mint’s package manager, and Update ensures the List of available apps is up to date.
The second Command, which includes installing LLC, is self-explanatory. You should run ‘sudo apt Update’ before installing any app, and you can replace ‘vlc’ with the name of any app you want to install. If you’re unsure what the repository calls it, you can run’ sudo apt-cache search vlc’ to see what comes up.
To uninstall an application, you need to run this Command:
sudo apt remove vlc
FAQ
Why do users migrate from Windows to Linux?
Common reasons include better performance, stronger security, open-source flexibility, and lower licensing costs.
Is it difficult to move from Windows to Linux?
For basic usage it is not difficult, but there may be a learning curve when adapting to new tools and workflows.
Can I keep my data when migrating to Linux?
Yes, files can be backed up and transferred safely during the migration process.