How to Request a Certificate from a CA Server (Windows Server 2019)
Once We Have Successfully Created Our Certificate On The CA Server and It Is Ready To Be Published, We Must Then Test It On The Client Computers To Make Sure It Works Properly.
Note that the method for submitting a certificate request from client computers may vary. Some users prefer, or are required to, submit a certificate request via a web interface rather than the MMC console. In this article, we will show how to use both methods.
Request a certificate through the MMC console on Windows Server 2019
Our new certificate template has been created, successfully embedded in the CA console, and officially released. Now is the time to test the pattern. To do this, log in to one of the regular client computers. There are two standard ways to apply for a new certificate through client computers.
The first method is to use a good, old MMC console. Run the MMC client from the computer, select Add / Remove Snap-in from the File menu, and select Certificate.
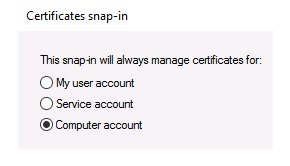
When you select certificates from the list of available snap-ins and click the Add button, several additional options let you choose the Certificate you want to open. You can select from an available user account, Service Account, or computer account certificates.
Since we want to test the new certification template we created and published within the CA console successfully, we are ready to use it formally.
We also want to test the new Certificate we created and have it ready to use on the same client computer. Select the Computer account, then click Finish.
Next, click the Finish button again to select the default option: Local computer. If you type CERTLM MSC in the Run dialog, MMC will automatically execute and open the required snap-in and store the local machine certificate inside.
Newer operating systems, such as Windows 8 and 10, and Windows Server 2012, 2012R2, 2016, and 2019, include the MSC shortcut that opens the Certificate Store directly on the local computer.
It is where you need to go when installing certificates on a computer or server.
A special place inside the Certificate Store lets you install your Certificate in the Personal folder. This can be bypassed, but not unless you’re a techie who knows what he’s doing. If you click on this folder, you will see that we have not added anything to that list at this time:

To apply for a new certificate to our CA server, right-click on the Personal folder, All Tasks, and Request New Certificate. In the wizard that opens, click the Next button once. We are going.
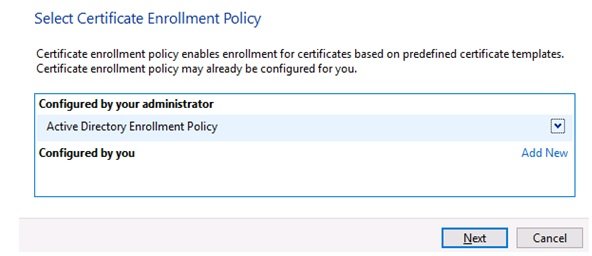
Now you see a screen that looks like something needs to be done; in most cases, we send the certificate request to one of the business partners or domain machines, so we do not have much to do on this page.
For this reason, click the Next button. The wizard will then query the Active Directory and show all available certificate templates ready for release:
The Request Certificate page displays a list of available templates.
It is a dynamic list, and its contents depend on the computer you are logged in to and your account’s permissions. When creating the new certificate template, I went to the Security tab and set it up.
We defined who can get the new certificate template and what they can get in the tab. If we represent a specific group of domain computers, the new DirectAccess Machine template will likely not be displayed in the list above.
However, I will see my Certificate here since I have defined this template so that all computers can receive it.

If you do not see your new template in this list, click the Show All Templates check box. This will give you a complete list of all the templates available on the CA server for each explanation and explain why certificates are not available.
Check the box next to each Certificate you need and click Enroll.
The console will now spin for a few seconds as the CA server processes your request to obtain a new certificate for your computer, using the criteria specified in the Certificate.
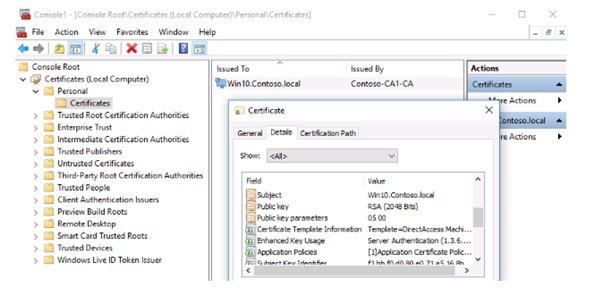
When the process is complete, you will see that our new machine certificate is now in Personal | The Certificate inside the MMC. If you double-click on the Certificate, you will be able to check the properties to make sure that the settings you are considering are listed in the Certificate:
Request a certificate through the web interface.
We typically use MMC to apply for certifications, but there is another platform that you can use to apply for and issue certificates. Of course, applying the above solution depends on how the CA server is built.
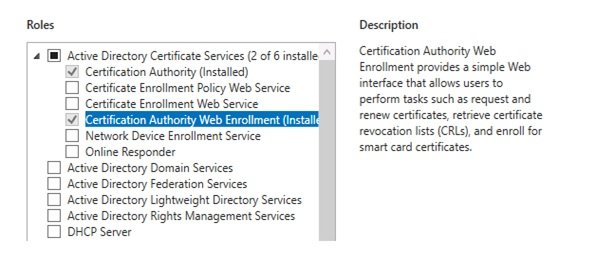
When we installed the AD CS role, we ensured that the Certification Authority selected Web Enrollment options. The second option is essential, and we will examine it later. We do not have a web interface to run our CA server without Web Enrollment, so the above section is unavailable.
If the CA server does not have the above role, you need to go to the Server Manager and add the current position to it:
Once the Certification Authority Web Enrollment is installed on the CA server, a website will run on your server that you can access through a web browser and within your network. This website is handy for users to apply for a certificate through the web interface.
It’s good to provide documentation or tutorials on the website so that users can follow the certification process instead of using the MMC console.
Additionally, if you want to allow computers outside your CA server network to request certification, this is difficult for them through MMC.
For example, if a home user has to apply for a new certificate but does not have a full VIP tunnel, the MMC console will likely not connect to the CA server and receive the Certificate.
We must use the client’s computer again to access and test this website.
This time, instead of opening the MMC, open the browser and enter the address HTTP: // <CASERVER> / certsrv into the browser.
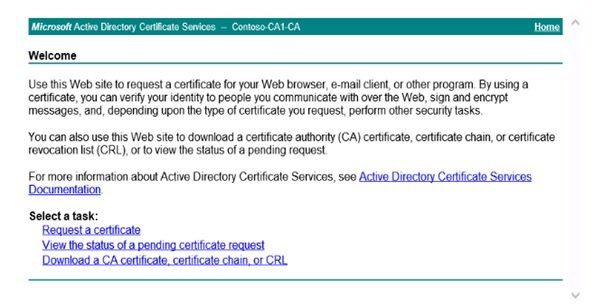
Our URL starts with the HTTPS protocol. This website is configured to use the HTTPS protocol instead of the HTTP protocol to allow the website to issue certificates.
When a website uses HTTPS on a CA server, you will ensure that the Certificate issued is encrypted when sending. Certification is impossible via HTTP, as this information is sent to the client without encryption.
The clicking request will show a certificate link that you can use to request a new certificate from the CA server on Windows Server 2019.
When you have users who intend to receive the Certificate through the web interface, you are typically issuing a user-based certificate, in which case we have a straightforward solution to automatically automate the Certificate of the computer without any interaction with a user to export it.
Since we ask our users to log in first and then request a new User Certificate, on the next page, we have to select the relevant link:
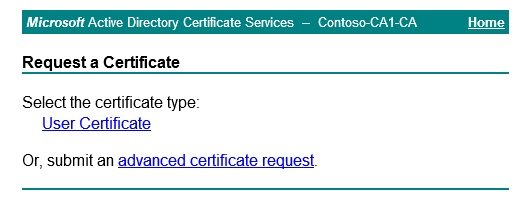
You can behave. Suppose you are not interested in a user certificate. Instead of clicking on the link above, you want to use the web interface to get a machine certificate, a web server certificate, or any other type of Certificate. In that case, click the advanced certificate request link and follow the instructions on the view page.
By clicking the link above and pressing the Submit button, the Certificate will be generated and received from the CA server. A link will then appear, allowing you to use it to install the Certificate. Click on the link.
It will install the Certificate for you on your computer.
The image below shows that the website has responded to my request and announced that the Certificate has been successfully installed. You will also know that I have opened the current user certificate in MMC to make sure the certificate exists:

In the next Windows Server 2019 free training issue, we will continue the above topic.
FAQ
How do I request a certificate using a Windows CA Web interface?
Open a browser to https:///certsrv, select “Request a certificate”, choose “User Certificate” or “Advanced certificate request”, fill in the required info (or paste a CSR), then submit and download the issued certificate.
Can I submit a certificate request from command‑line instead of web UI?
Yes — if you already have a CSR file, use the tool certreq.exe to submit it to the CA for signing (especially when Web Enrollment isn’t available).
What happens after the certificate is issued?
You download the signed certificate (and optionally the certificate chain), then import it into the local certificate store or bind it (e.g. for IIS) for use.