


How To Optimize Your Windows 10 To Run Games?
Windows 10 is a great operating system for gamers. There are several games for this operating system and it is even possible to stream Xbox One games on it.
Of course, Windows 10 is not great for gaming from the beginning, so we decided to optimize Windows 10 for gaming in this article.
To get the best gaming experience in Windows 10 , you need to make some changes yourself. In the following, we intend to teach you how to apply these changes.
Use Game Mode
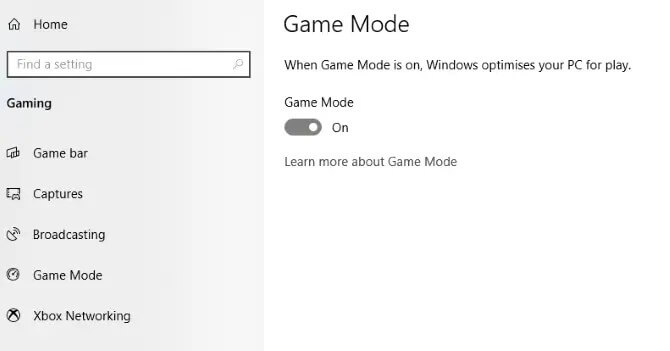
Are you looking for a feature that can bring you a better gaming experience? Newer versions of Windows 10 have Game Mode. This feature internally optimizes Windows 10 for running games. To enable this option you must:
- Press “Windows + I” keys.
- Type “game mode” in the search box.
- Click on “Game Mode settings” or “Turn on Game Mode”.
- On the Gaming page, you must click on “Game Mode”.
- To use Game Mode, you must change the status to “On”.
If your computer supports Game Mode, then your system hardware resources will be managed to provide the best frame rate. In addition, the Windows update process will be suspended. Using Game Mode may be one of the best ways to optimize Windows 10 for gaming, but it’s not perfect. We suggest you try the following as well.
Disable the Nagle algorithm
The Nagle algorithm packs data packets at the cost of losing a smoother internet connection. This feature is somewhat useful, but using this algorithm can cause you to experience delays when playing online titles. To disable this feature, you must first check your IP address:
- Press “Windows + X” keys.
- Select the “Windows PowerShell” option.
- Enter the word “ipconfig”.
- Look for “IPv4 address” so you can identify your IP address.
Once you know the IP address, you need to edit the Windows registry:
- Click on Start.
- Type the word “regedit”.
- Select “Registry Editor”.
- In the address bar, you must copy and paste the following path:
5. On the left page, you will see a set of folders. File names also consist of letters and numbers. To access the correct file, you must match your IP address with the “DhcpIPAddress” file in one of those folders.
After finding the right folder, you should:
- Right-click on that folder.
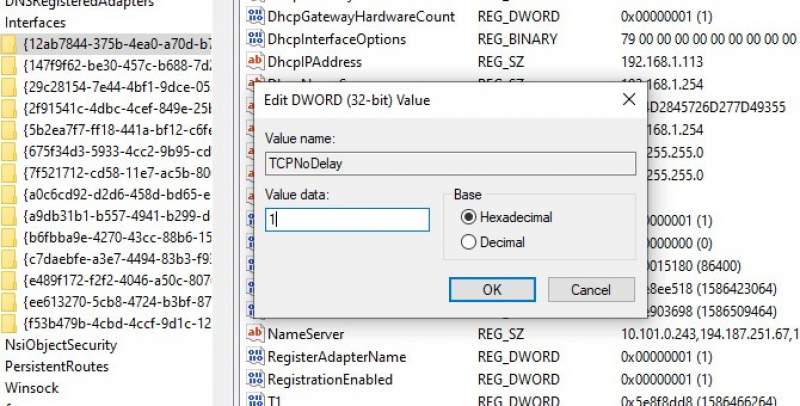
- Select “New> DWORD (32-bit) Value”.
- Rename it to “TcpAckFrequency”.
- Click “OK”.
- Select “New> DWORD (32-bit) Value” again.
- Rename this one to “TCPNoDelay”.
- Double-click on each and then set their barometers to “1”.
This disables the Nagle algorithm. If you have a problem, then just change the value of the parameters to “0”.
Use faster DNS to run better online games
If you are playing online multiplayer games or your computer relies on a remote server to play games, then network traffic can be a problem for you. It is true that using a faster internet can help you in this regard, but applying the following changes will be cheaper and faster.
- Press “Windows + I” keys to enter the settings window.
- Find “Network and Internet> Change Adapter Settings”.
- Right-click on the network you are using.
- Select the “Properties” option.
- Double-click on “Internet Protocol Version 4”.
- Note the two DNS values entered for future use.
- Replace these values with “1.1.1.1” and “1.0.0.1”.
- Click “OK” and then “Close”.
- Restart your default browser.
Disable Windows Automatic Updates
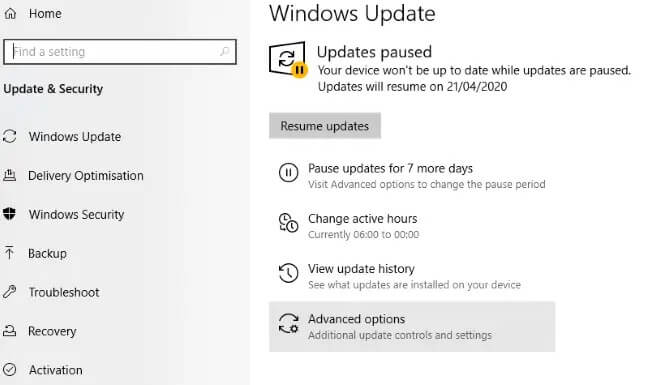
Windows 10 receives operating system updates without your knowledge and programs your computer to restart. Although this feature is not very active, in any case, no one wants it to happen suddenly without his knowledge. Not only can automatic updates restart your Windows without warning, but it also reduces the speed and bandwidth available to your network due to downloads. Normally you can not disable these updates, you can only postpone them. To reduce the risk of interference with downloading updates while you play, you should:
- Press “Windows key + I” to go to the settings page.
- Click “Update and Security> Windows Update”.
- Look for “Advanced options” and then click on “Update Options”.
- Disable the “Restart this device as soon as possible when a restart is required to install an update” option.
- Enable the “Show a notification” option. That way, Windows will notify you before it restarts.
- Using the “Pause updates” option, you can postpone the installation of updates for up to 35 days.
By specifying when to use Windows 10, you can prevent updates from being downloaded during business hours.
Disable notifications
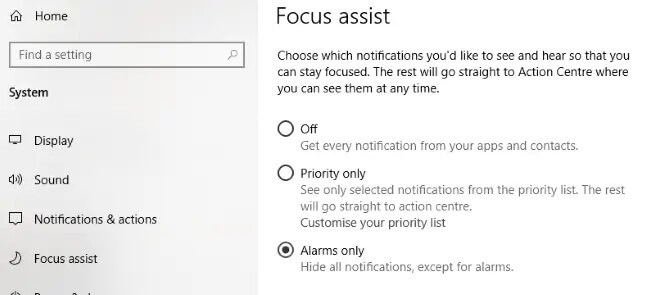
Using the Focus Assist feature in Windows 10, you can specify when and how to receive notifications in Windows 10. Pop-up pages and ringtones are usually accompanied by notifications and can interfere with your games. The solution is to use the Focus Assist to minimize the effects of these notifications. With this feature, you can manage the amount of focus on your affairs.
- Press “Windows + I” keys to enter the settings window.
- Click “System> Focus Assist”.
- Select “Alarms Only” to hide other non-alert notifications.
- Close the settings window
Avoid updating games on Steam
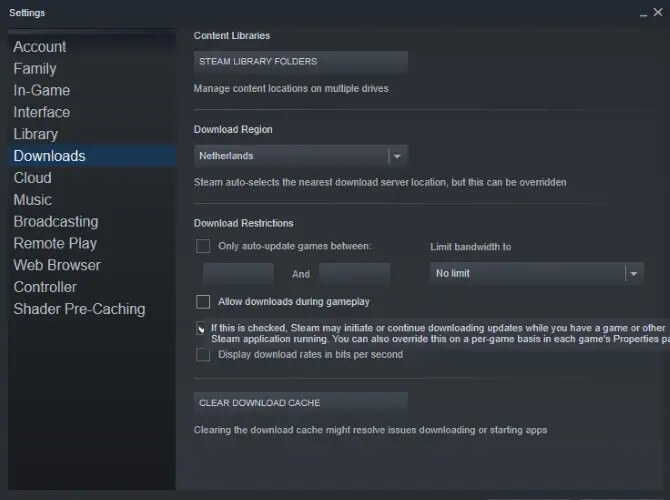
Windows gamers are familiar with Steam ; A store where you can buy games. Update capability is one of the disadvantages of this platform. This feature allows you to download automatic updates for all your games. This feature occupies storage space and limits network speed by updating unused games as well as downloading updates in the background, respectively. In Steam, to prevent background games from being updated, you must:
- Launch the Steam app.
- Open “Steam> Settings> Downloads”.
- Uncheck “Allow downloads during gameplay”.
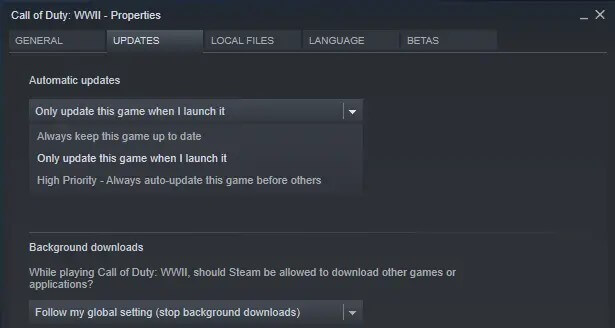
You can also prevent downloading updates for a wide range of unused games:
- Go to your Steam Library.
- Right-click on your less used game.
- Select “Properties” and then find “Automatic Updates”.
- Change the “Always keep this game up to date” option to “Only update this game when I launch it”.
By optimizing your Steam, you can have a better experience playing AAA games .
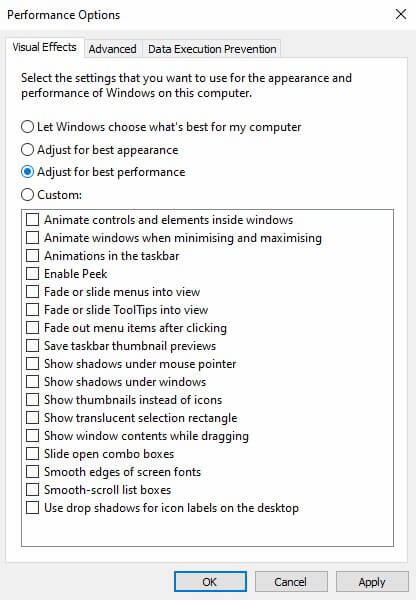
Change the visual effects of the Windows environment
Your computer’s graphical user interface (GUI) can take up some of the system power. By default, your Windows will look good. Your games running in the background can interfere with the current graphical user interface in the background. By changing these settings in Windows 10, you can improve the performance of your games.
- Press “Windows key + I” to open the settings menu.
- Type the word “performance”.
- Select “Adjust the appearance and performance of Windows”.
- In the search box, select “Adjust for best performance”.
- Click on “Apply”.
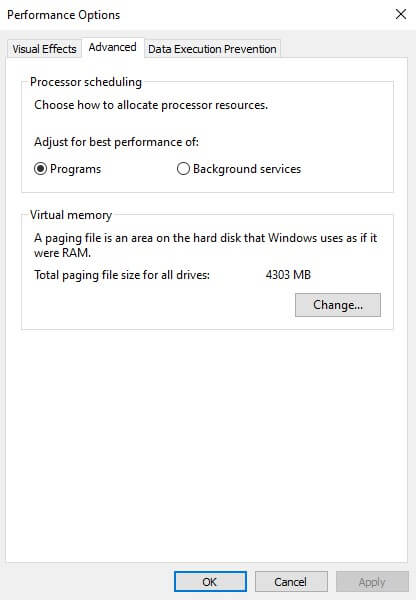
- Go to the “Advanced” tab.
- Make sure “Adjust the best performance of” is set to “Programs”.
- Finally, click on “Apply” and then “OK”.
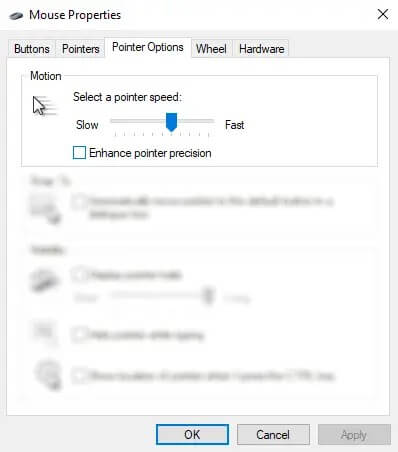
Change mouse settings
Can your mouse affect the performance of games? It is best to optimize your mouse settings to find out. A feature called “pointer precision” can affect the performance of your mouse in games. Disabling this feature may improve the performance of your games.
- Go to your Windows settings menu.
- Click on “Devices> Mouse”.
- See the “Pointer Options” tab.
- Uncheck “Enhance pointer precision”.
- Click on “Apply”.
- You can click “OK” to exit. You may want to change the speed of your mouse before doing this.
If the performance of your games improves, then it can be concluded that your mouse was to blame in the meantime.
Change the power consumption of your computer
Power options are usually not considered by many users due to their minimal effects. Some users claim that this option can increase the performance of their system. While others do not have such a view. The best thing you can do is find out for yourself. To change the power settings of your computer, you must:
- Go to the Windows 10 settings menu.
- Search for “power”.
- Click on “Power & sleep settings> Additional power settings”.
- Select the “high-performance” option.
- If no such option is available, then you must use the “Create a power plan” option to apply the settings you want.
This option allows your computer to consume more energy as well as generate more heat, but instead perform better. That’s why it’s best to enable this option only on desktops, not laptops.
Keep your computer drivers up to date
Your graphics card is the most important piece of hardware in gaming. However, your graphics card needs up-to-date drivers to deliver its best performance. All graphics cards (old or new) will benefit from driver upgrades. To check the name and specifications of your graphics card, you must:
- Right-click on the desktop.
- Select “Display settings> Advanced display settings”.
- At the bottom of the page, select “Display adapter properties”.
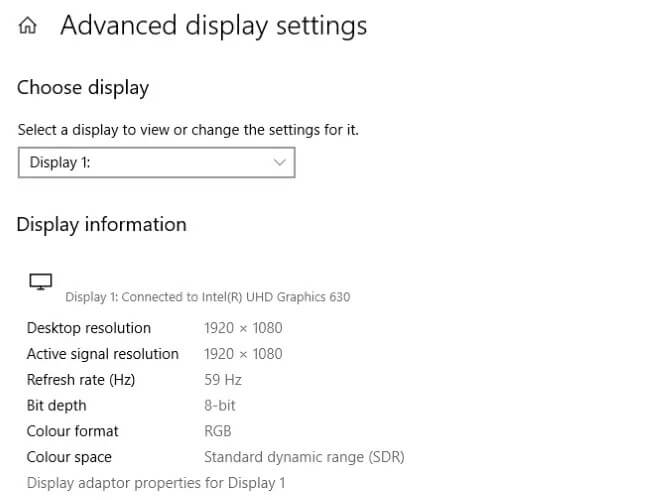
In this window, through “Properties> Driver> Update Driver”, you can update your graphics card driver. Of course, you can also visit the website of your graphics card manufacturer to ensure this. GPU manufacturers also offer free upgrades and gaming software to keep their graphics card drivers up to date. An example in this regard is AMD Gaming Evolved.
For best performance, it is recommended that you keep your motherboard chipset and LAN drivers up to date. Since these pieces are vital to games, it will be important to update them as well. The easiest way to check the motherboard chipset driver is to use PowerShell and enter the following:
Next, the name of your manufacturer and product will be displayed. Using the above information, you can search the Internet for new drivers. You can usually find a new version of your chipset driver in the “Support” section of the motherboard manufacturer’s website. In addition to your chipset driver, you can also find your onboard LAN drivers (for optimal internet connection).
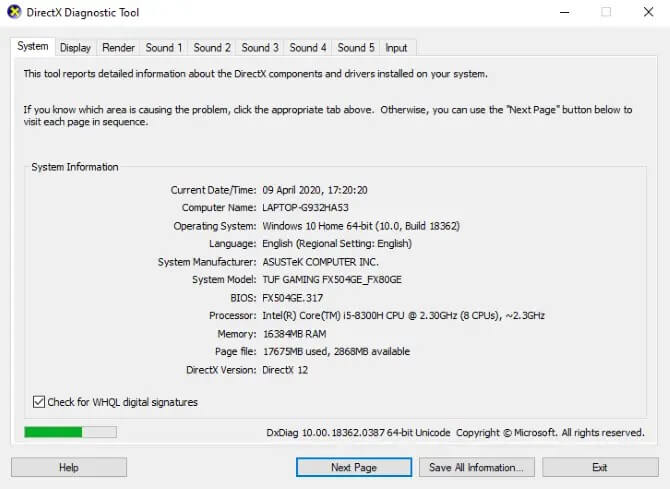
Install DirectX 12
Another thing to consider when optimizing Windows 10 for gaming is installing the latest version of DirectX. DirectX 12 is the latest version of this popular Microsoft API and is naturally an essential element of Windows 10 gaming. DirectX 12 supports multiple GPU and CPU cores. In addition, it can offer better frame rates, lower power consumption, as well as improved graphic effects. For information on installing the latest version of DirectX, you must:
- Open Windows PowerShell.
- Type the word “dxdiag”.
- Press the “Enter” key.
Moments later, a “DirectX Diagnostic Tool” window will appear in front of you.
Is DirectX 12 not installed on your computer? Sometimes some users who have upgraded from Windows 8.1 to 10 have this problem. To resolve this issue, you must:
- Press “Windows + I” keys to enter the settings menu.
- Select “Update and security”.
- Find “Windows Update> Check for updates”.
- Wait for updates to be installed.
DirectX12 automatically optimizes many Windows 10 gaming settings.
Apply the following changes to optimize Windows 10 for gaming
Windows 10 can be considered the best operating system for modern games. With so many options, compatibility with Xbox One and game-specific software, it is clear that gamers have a special place in the future of this operating system. After all, nothing is perfect. Finally, below we bring you a brief summary of Windows 10 game optimization tricks.
- Enable Windows 10 Gaming Mode
- Disable the Nagle algorithm
- Use DNS servers faster
- Disable automatic updates
- Disable Windows 10 notifications
- We prevent automatic updates
- Reduce the visual effects of the Windows environment
- Change mouse settings
- Enable more power consumption option
- Keep drivers up to date
- Install DirectX 12