


How to Create and Modify Lists in Microsoft Word
In this article, we will teach how to add a list in Word and update and manage it. In general, you can add three types of indexes to Word. Each list type has its unique options and features:
- Automatic table based on your saved format (Automatic Table)
- An index that is 100% customizable (Custom Table of Contents)
- The manual table that you have to do all the settings yourself (Manual Table)
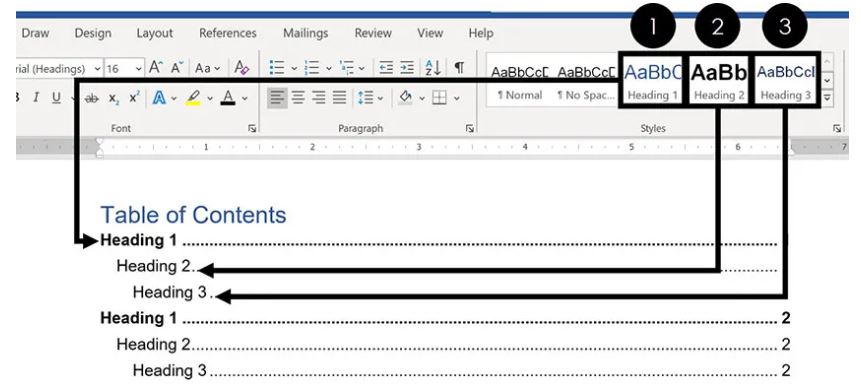
The most important thing to know when adding a table of contents to Word is that you need to put your document in Heading format. This is because Headings (as you can see in the picture below) make up the content of your list. We explain this in more detail.

The first thing you need to Word list in Word is to format different parts of the document using Heading 1, Heading 2, and Heading 3. If you have already done this formatting, you can skip this step and go to the next step.
Note: You are not limited to the default Heading formats. Below we show you how to change the Heading style format your style.
Since it is not possible to teach all the principles and tricks of working with the Word software in the form of an article, before proceeding to the rest of the article, I would like to introduce the extracurricular Word training series to you so that by receiving it, you can learn practical tips in Learn the field of work with Word text editing software; To get this training, you can refer to the following link:
Add Heading format
To properly format the Word document, you must use Heading styles correctly. To do this, you must go through the following steps:
Step 1: Select the section you wantext’s title of the text.
Step 2: Go to the Home tab and then the Styles section.
StEadingctwo one of the Headings 1, Heading 2, and Heading 3 options. Only these three options are automatically added to your list.
Of course, you can also use must manually enter it. You have to enter it manually in the list.
Tip: Instead of the Styles gallery, you can use the Add Text option in the References tab to make your work easier.
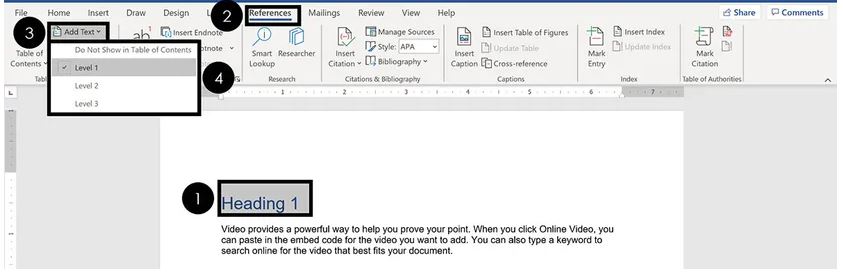
To work with the Add Text option, follow the steps below.
Step 1: Select the text you want to be the title.
Step 2: Go to the References tab and precisely your Heading style. You have the same options as Heading 1, 2 and Heading 3 as Level 1, Level 2, and 3 here.
Step 3: If you select the Do Not Show in the Table of Contents option, your text will be considered standard.
Heading shortcuts
You can use shortcuts if you have a large Word file and want to speed up formatting. These shortcuts can double your speed.
To add a table of contents in Word, remember that you need three headings whose shortcuts are:
Shortcut Heading Style 1: Alt + Shift + 1
Shortcut Heading Style 2: Alt + Shift + 2
Shortcut Heading Style 3: Alt + Shift + 3
In addition, you can add any normal style you want to the rest of the text outside your list:
Shortcut Normal Style: Ctrl + Shift + N

When adding a list in Word, only content that is correctly formatted with the help of Heading Styles will be entered into the list.
Also, if you plan to convert the Word file to PowerPoint later, this formatting is necessary.
Changing the Heading Style format
If you don’t like the way the header styles look, you can easily change them. For this job:
Step 1: Go to the Design tab and select the desired format from the Document Formatting section.
Step 2: If you click the down arrow to the Right of this section, you will see more options (as shown below).

Note: Document Formatting styles change the entire format of your Word file. Therefore, looking at your complete text to see if your chosen design is suitable for you is not a bad idea.
Create a new Heading Style format.
If you don’t like the Document Formatting options, you can create your Heading Styles. For this, it is enough only:
Step 1: Format your Heading Style as you wish.
Step 2: Go to the Home tab and right-click on the Heading Style you want to change.
Step 3: Select the Update Heading to Match Selection option.
This will change the Heading Style to look like the formatting you applied to the text. In addition, all subheadings in your Word document will be updated automatically.
How to add a list to Word
Adding a list in Word is a breeze once you have formatted the text correctly using headings. To do this, follow the simple path below:
Step 1: Click on the document to which you want to add the list.
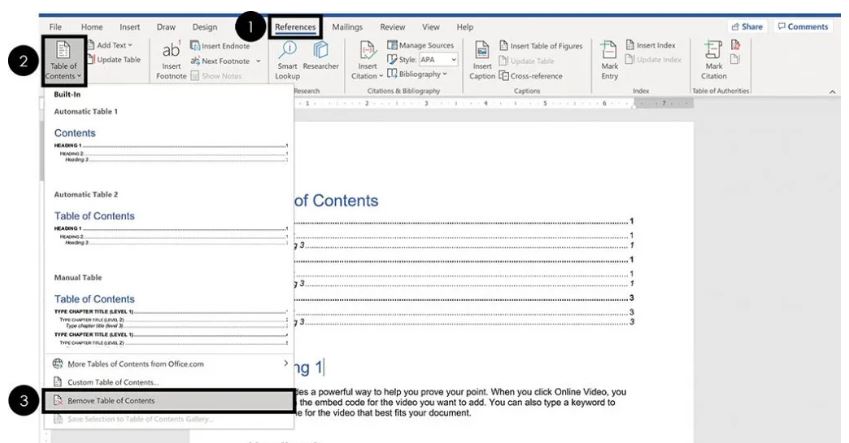
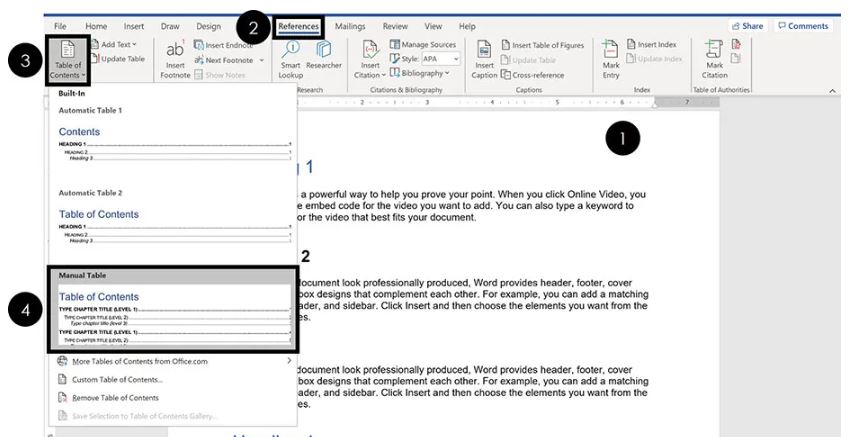
Step 2: Go to the References tab and open the Table of Contents menu.
Step 3: Select Automatic Table 1 or Automatic Table 2. By selecting any of these two, your titles will enter a list.

Your list may differ from what we’ve provided, depending on the look you chose for your Headings.
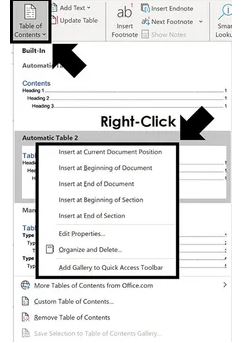
Note: If you right-click on the Table of Contents in the mentioned menu, you will see options for where to enter the table of contents.
You’ll need to change the break between pages to use some of these options so that the list fits correctly.
In order, you will see these options in the menu:
- Add an index at the current document location
- Add an index at the beginning of the document
- Add an index at the end of the document
- Add a list at the beginning of the section
- Add a list at the end of the section
By setting these options, you can add more than one list to different sections of the Word document.
What is the difference between Automatic Table 1 and Automatic Table 2?
They are not much different. Their main difference is in the title. One title is a table of contents; the other is contents, which you can change by clicking each title. You can add your own table if you need more formatting options than Automatic Table styles.
Note: If you have not formatted the Word document correctly using the Styles gallery, by adding a list in Word in this way, you will encounter this error: No table of contents entries found.
If you encounter this error, refer to your text and correct the headings.
If you need more than 3 heading levels for your list, create your own Custom Table.
List formatting
To format the content in Word, it is enough:
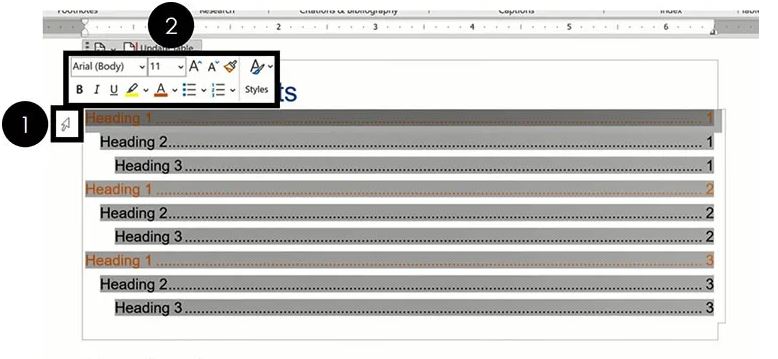
Step 1: Move your ruler over the list (the ruler arrow will become a diagonal arrow).
Step 2: Select the Heading Style you want to change.
Step 3: Format it as you like (change its appearance using the Font tool).
Sometimes you have to try several times to select the Heading Styles so they all change correctly. So if it doesn’t work the first time, try again.
How to save the directory format
After you’ve formatted all levels of the list, you’ll see a message when you try to close Microsoft Word.
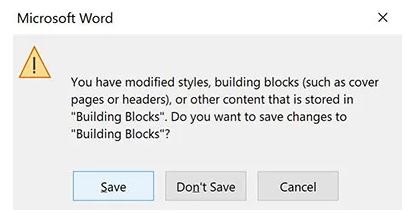
If you click Save, your manual formatting settings will be saved in Word. This means that your manual settings will be shown by default the next time you want to create a list.
Once you’ve reformatted the various elements of the new list, you’ll see the Save option again when you close Word.
Update list
Your table of contents in Microsoft Word does not update automatically.
You have to manually update the list by adding and removing content to the text. So be sure to do this after making changes to the reader.
Add a list in Word
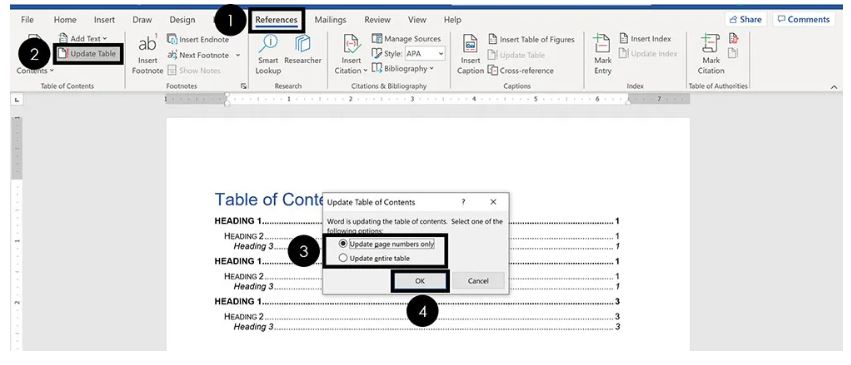
Step 1: Go to the References tab and the Table of Contents section.
Step 2: Click the Update Table button.
Step 3: Select the Update page numbers only option to update the page numbers or the Update entire table option to edit the whole list, then click OK.
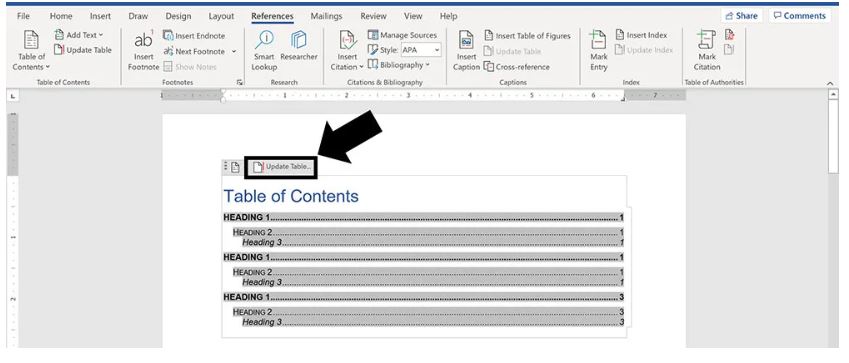
If you use Automatic Table templates, select Update Table from the top menu (like the image below).
Shortcuts for navigating through the menu
An exciting feature of the automatic Table of Contents is that you can quickly navigate the text using shortcuts.
This is because your table of contents acts as a hyperlink to any part of the text. All you have to do is hold down Ctrl and select the item in the list.
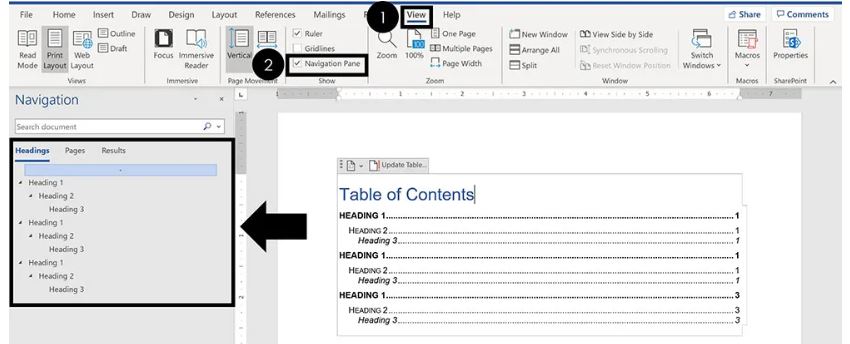
Another way to quickly move between different menu parts is to use the Navigation Pane, which shows you all the details.
Step 2: Select the Remove Table of Contents option.
To open the Navigation Pane, go to the View tab and click Navigation Pane.
Delete list
To remove an index from Word:
Step 1: Go to the References tab and open the Table of Contents menu.
Step 2: Select the Remove Table of Contents option.
If you use Automatic Table, you can also use the top menu in the image below.
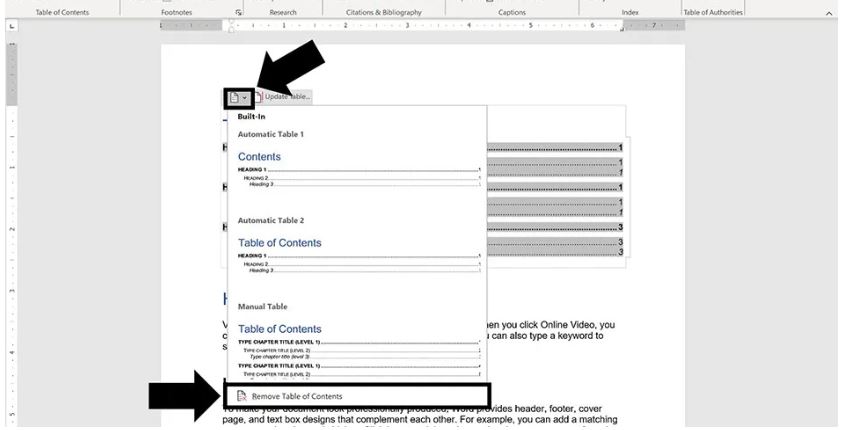
Note: If you use Automatic Table, sometimes your table is not entirely deleted. This is especially true when you use lists at the beginning or end of text sections.
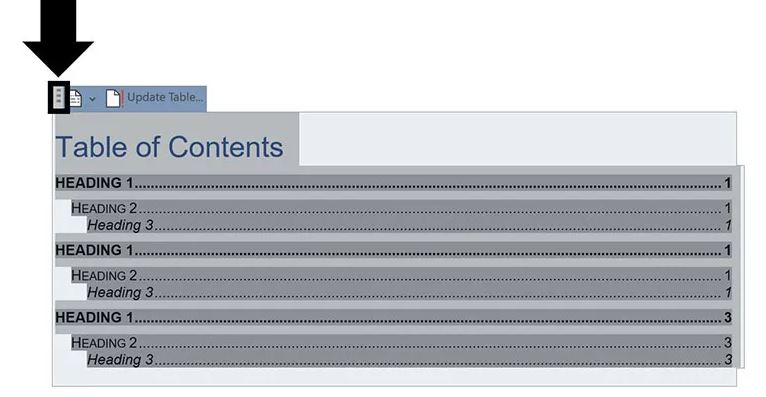
To solve this problem:
Step 1: Click on the three dots in the upper left corner of the list.
Step 2: Once the list is selected, either press Ctrl + X to cut the list from the text or hit the Delete button multiple times to remove the list (don’t hit the backspace key).
Creating a custom table of contents in Word
You should create your custom list if you want more formats available than the automatic list. For this job:
Step 1: Go to the References tab and open the Table of Contents menu.
Step 2: Select the Custom Table of Contents option.
Step 3: Customize the list elements to your liking and click OK.
Note: Custom Table of Contents is also created based on Heading Styles, and here you must use the Update option to apply changes.
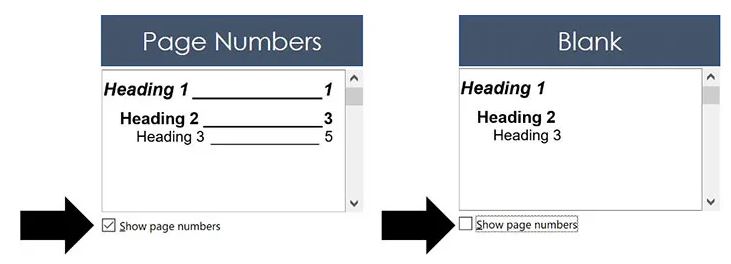
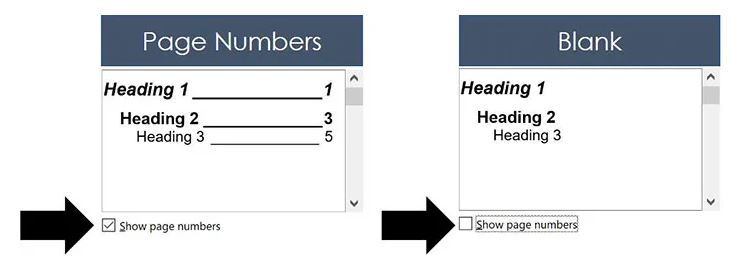
Page number display options
Selecting or not selecting Show page numbers makes the index page numbers be displayed. We suggest leaving this option’s tick active because the list needs page numbers.
Arrangement of numbers
By activating the Right align page numbers option, your numbers will be displayed on the right side, and if you turn it off, the numbers will be placed next to the titles.
Tab Leader options
There are four tab leader options that you can use to format your list.
The Tab leader menu is activated only when you have used the Right align page numbers option. If you don’t like these tab leaders, you can use Manual Table.
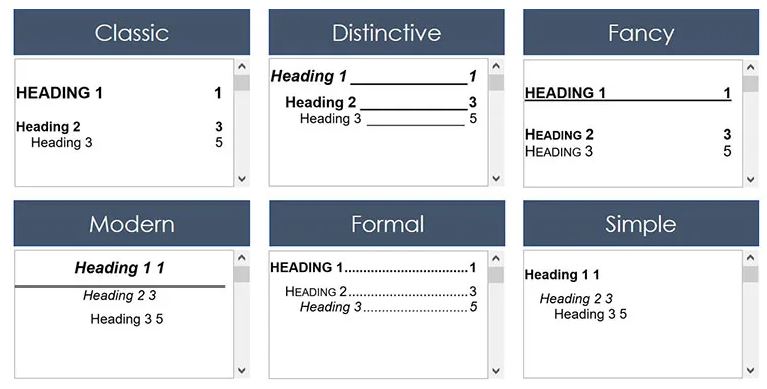
Format options
There are several pre-made templates for formatting and changing the appearance of the list, each of which can be modified as well. The default formatting options are as follows:

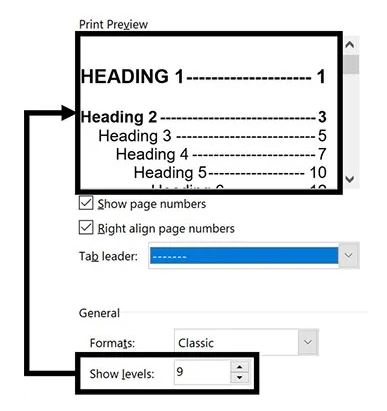
List level display options
The Show levels option determines how many levels your list consists of.
Adding a list in Word manually (Manual Table of Contents)
Please note that adding the list in Word manually means that you are responsible for all the work and changes to the list, and these changes will take some time and require high accuracy.
To add a list in Word manually, follow the steps below:
Step 1: Click on the place of the text where you want the list to be added.
Step 2: Go to the References tab and open the Table of Contents menu.
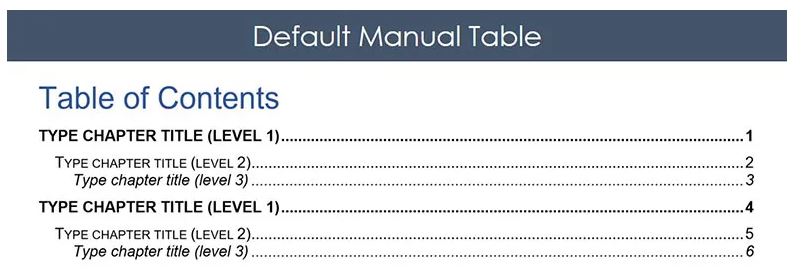
Step 3: Select Manual Table.
By choosing this option, a default menu will open for you, which is not related to the content of your text in any way.
It doesn’t matter if your text is 1 page or 100 pages; the Manual list only shows space for levels 1 to 3. This means that all the work is on you.
Below, we have provided some tips for updating and editing the manual list.
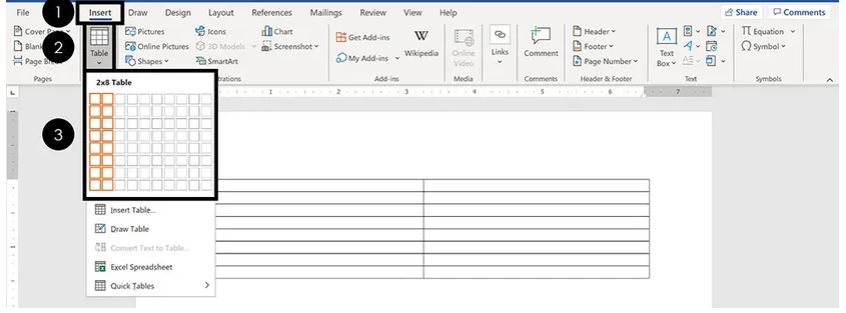
An alternative solution to using a manual index is creating a two-column table and using one column for titles and the other for pages.
Add a new part to the Manual list.
To add a new section to this list type, you must first add a new empty column. The fastest way to do this is to move the arrow to the end of the page number and press Enter.
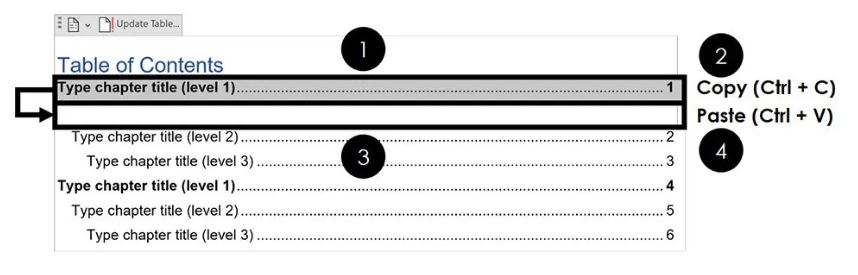
To add a new column to the Manual list:
Step 1: Select a column section that you want to copy.
Step 2: Press Ctrl + C to copy the column.
Step 3: Click on the empty column.
Step 4: Press Ctrl + V to paste the column.
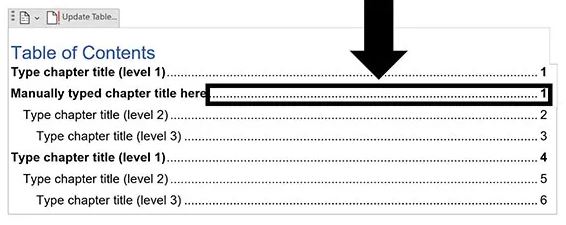
Once you paste the queue, you can type any text in it.
Edit page numbers
To edit the page numbers in the Manual list, click and drag the page number and type or format it.
Right-align the entire text.
The list will be automatically added in the right-align mode by right-aligning the entire text. We recommend doing this before adding text to the file. But if you do this after writing, make sure that the structure of the text is not messed up.
Step 1: Go to the Layout tab and click on the arrow in the lower right corner of Paragraph.
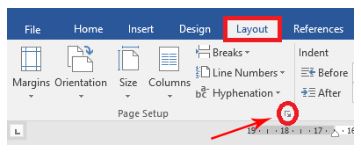
Add a list in Word
Step 2: After the new window opens, go to the Layout tab and select Right-to-Left from Section Direction.
Step 3: Then, at the bottom of the window, set Apply to Whole Document and click OK.
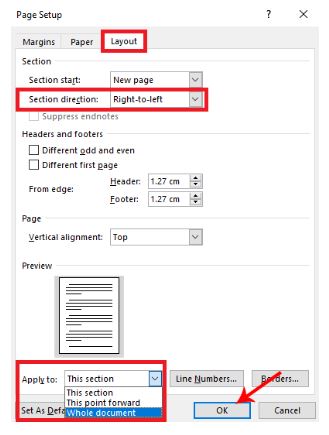
Add a list in Word
Remember to update the list after making these changes.
Conclusion
On this page, we have provided you with everything you need to know about adding a list in Word. The most important thing to remember in this period is that the Heading Style plays a fundamental role in formatting the Word file. After you’ve set up the headings correctly, as we’ve taught in this article, you can add a table of contents in Word in three main ways.