How to Create an Email Address in cPanel
Let’s read a few lines about cPanel before the video tutorial on creating emails in the cPanel control panel. When you start your website hosting and a domain after buying a virtual server, the first environment you enter to manage the website is called the control panel, which most hosting companies offer to their customers. cPanel is a graphical interface that makes managing websites and servers easier.
The email assigned to the website domain, also called corporate email, gives more credibility and legitimacy to the emails sent and the brand image. For this reason, almost all professional brands use at least one corporate email address or info to communicate with their customers. You can create your desired email address through the cpanel control panel for free, according to the following instructions.
Of course, CPanel has competitors, including DirectAdmin, Plesk, OpenPanel, ZPanel, and Klexo. The main control panel is WHM server management and is not limited to one website. It is possible to create multiple accounts in WHM. In this way, the server manager has a WHM in which he establishes several cPanel versions and presents them to his clients, who are website owners.
All the necessary tools for website management, such as statistics, data tracking, security, etc., are available in CPanel, and there is no need for the presence and assistance of technical teams to manage the website. Now that you are reading this article, I guess you are somewhat familiar with cPanel, but if necessary, you can refer to the article What is cPanel to get to know cPanel and its environment.
In this article, we will explain how to create an email in the cPanel control panel, along with images, so that you can make your company email easily and for free by following these steps.
Table of Contents
- Why do we create a free email address for our website in cPanel?
- How to create an email in the cPanel control panel
Why do we create a free email address for our website in cPanel?
Suppose you received an SMS containing your bank account information from 012. Do you trust this or the SMS sent from ‘Bank’? This also happens on the internet; for example, you receive an email from your university sent to you from the address Chicago university@gmail.com.
Do you trust this email more or the email sent to you from publicrel@ut.ac.ir (the primary email address of the University of Chicago)?
Now that you own a website, your audience has the same opinion about the email you send them. In the business world, email addresses under the domain name of a company’s website have more credibility and legitimacy than emails registered in free email platforms such as Gmail and Yahoo. These emails are also called corporate emails and info emails.
This is where the importance of creating an email in cPanel appears. The difference between a professional brand and a new company is that it does not communicate with customers through a personal email address (such as Yahoo or Gmail). It only sends with an email address assigned to its website domain, such as (info@ded9.com.com). emails
In fact, by creating an email in cPan, also known as an info email, you authentically communicate effectively with the customer, giving credibility to your brand.
According to Statista, 70% of people prefer to communicate with businesses through email. It is better if these emails are sent from a valid email address connected to the website’s domain to show off the company’s reputation and unconsciously repeat your brand name as a professional brand in the customer’s mind.
How to create an email in the cPanel control panel
In this part, we will explain the simple method of creating an email address in cPanel step by step with pictures. Follow these steps to complete an email for your website successfully:
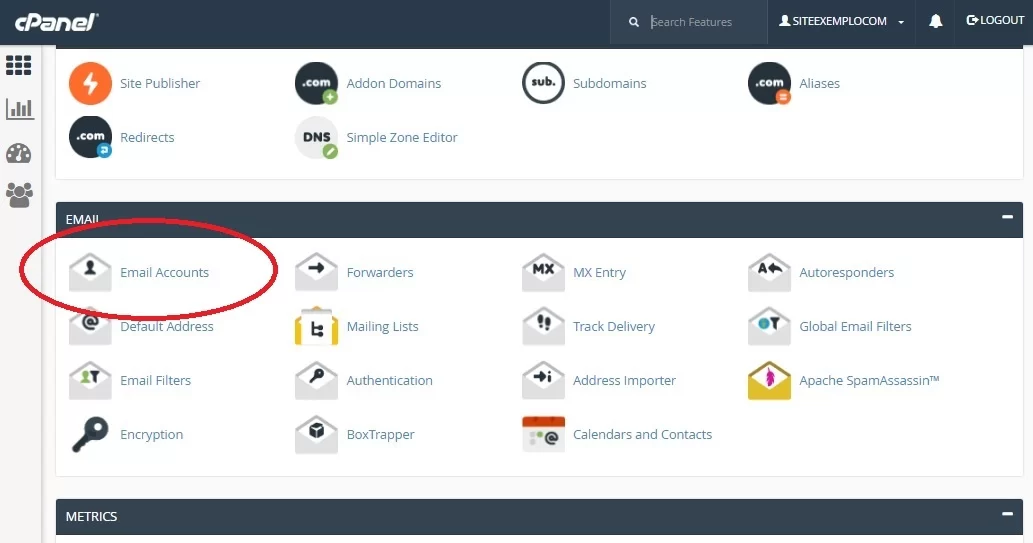
1. Log in to cPanel
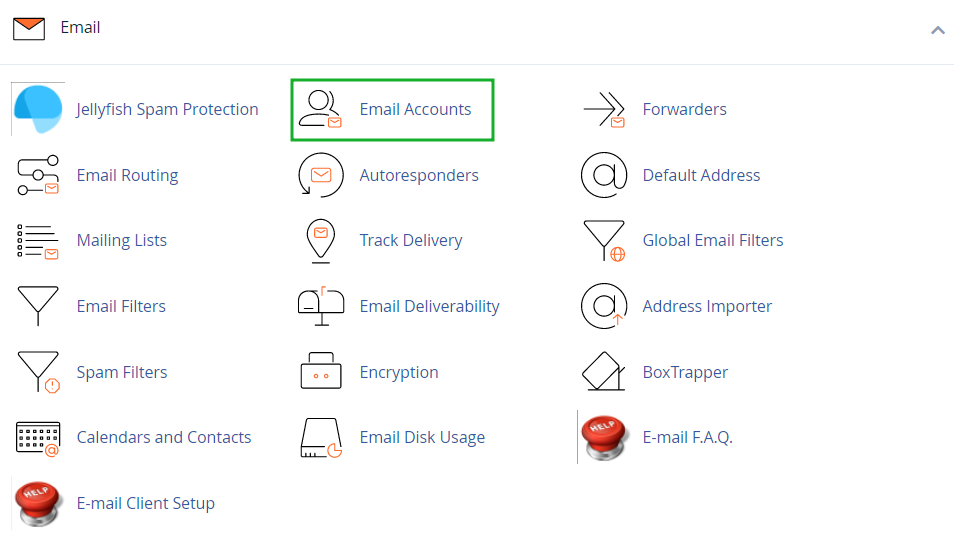
First, log in to cPanel on your website. Go to the Mail section and then to the Email Accounts section.
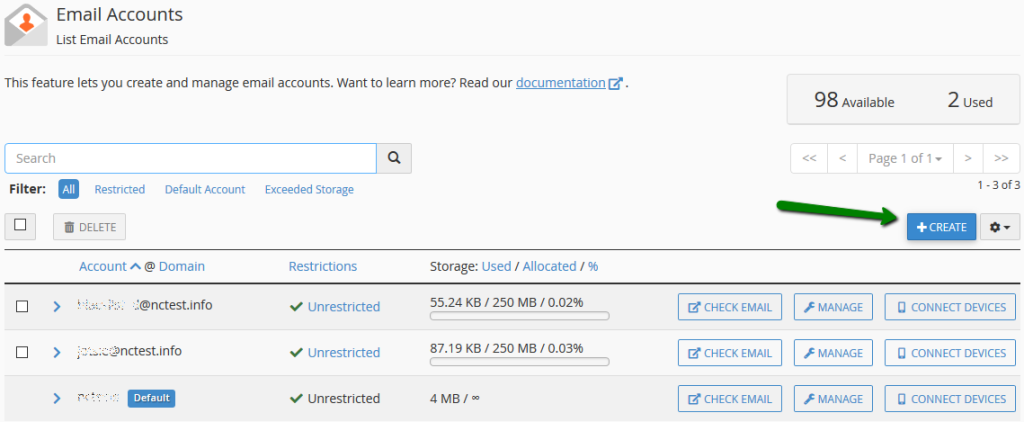
2. Entering the email creation section
Go to the “Create+” section.
3. Creating a corporate email
If more than one domain is connected to cPanel, select the domain name to which you want the email created in cPanel to be secured from the drop-down list. Then, define a username and a strong password for it. Above the Create+ option, you can choose the space you want to allocate to email in the Storage section.
We have taken 250 MB here so that emails do not fill the hosting space. You can consider a distance of more or less at your discretion through the relevant menu.
Finally, check the Send a welcome email with mail client configuration instructions option and click the Create+ button.
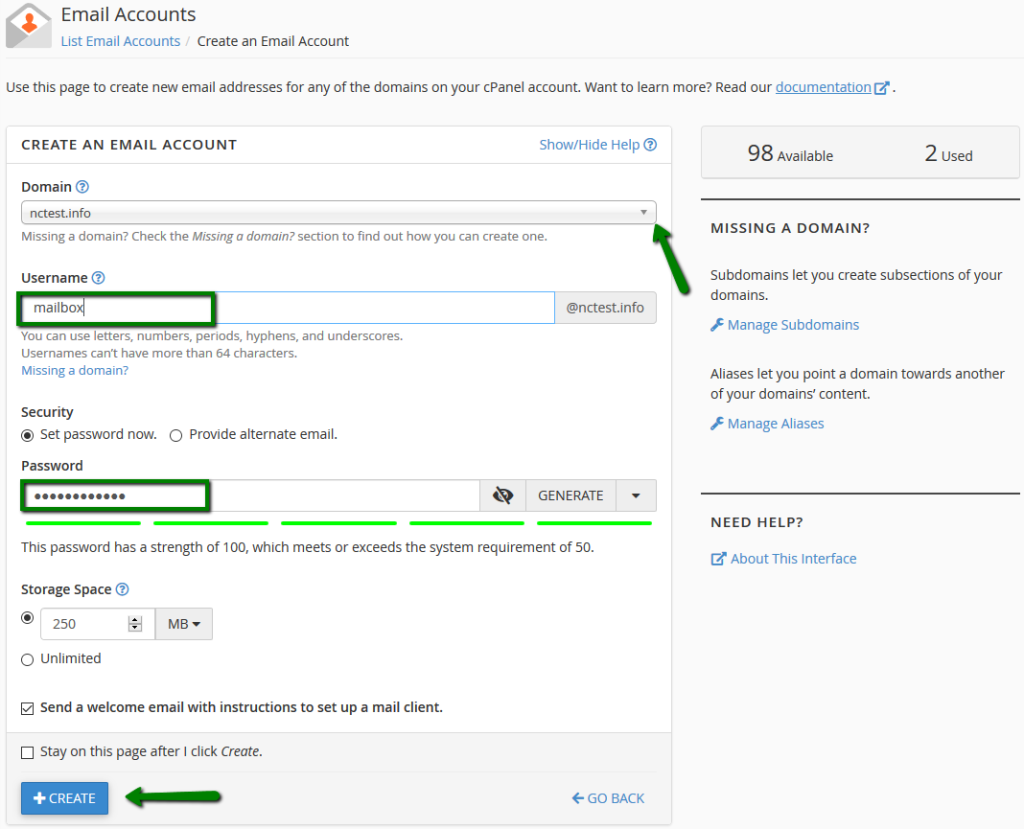
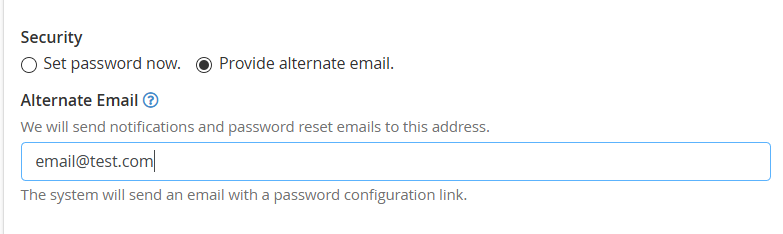
You can also not set a password for the new email by selecting the ‘Provide alternate email’ option, and the password creation link will be sent to the alternative email you define.
If you select the option to add an alternative email, this page will be displayed for you to enter your desired email address in the specified box:
4. Log in to email info
You can use the following addresses to access the created info email. Replace ‘yourdomain.com’ with your website domain:
- https://webmail.yourdomain.com/
- https://yourdomain.com/webmail/
Conclusion
For a long time, email has been considered one of the most important communication and marketing tools. A corporate email address gives your emails a professional and legitimate look. The email address impacts the customer’s view of your brand. This is why business owners use the email info created in cPanel.
It should also be noted that your email address will be distributed in cyberspace and used in many places. So what’s better if it has your brand name with it? In this article, we have thoroughly explained how to create a corporate email in cPanel. I hope you can create your company email in cPanel using this tutorial.
Also, as an additional point, to avoid overtime and spamming and speed up the customer’s work, it is better to assign separate email addresses for each part of your collection through cPanel. In this way, customer emails are divided at the beginning of work, and each one goes to the relevant section, so you will no longer have to deal with a pile of emails to categorize.
FAQ
How do I begin creating an email account in cPanel?
Log into your cPanel, go to the Email → Email Accounts section, then click Create or + Create to set up a new mailbox.
What information do I need when creating the account?
You’ll need to select the domain (if you have more than one), enter the username part of the email, choose or generate a secure password, and optionally set a storage quota.
Can I access this email account from my phone or an email client?
Yes — after creating the account you can log in via Webmail or download automatic configuration scripts under Connect Devices to set it up in Outlook, Thunderbird, iOS/Android, etc.