How To Create A Gmail Account Without Phone Number (Android, PC and iPhone)
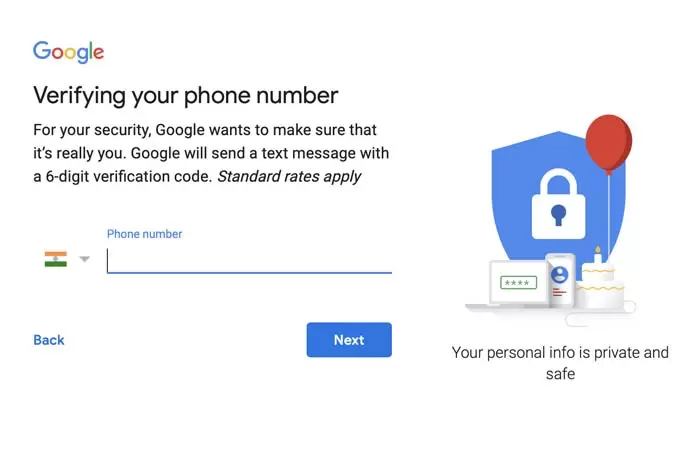
If you want to create a new Gmail account, Google may ask you for a verification number. This option used to be optional, but recently Google has made it mandatory. If you don’t want Google to have your number, you may not want to share it. So you’re probably looking for another way to create an account that frees you from entering your phone number into Google.
You’re lucky because there are many ways to get past this hurdle without entering a phone number. So if for any reason, you don’t want to enter your phone number when creating an account, you can use the following solutions.
How can we create a Google account without getting approval?
There are many ways you can create a Google account without getting approved. One of the easiest ways to do this is to delete the Gmail app so that it doesn’t matter how many times you log in and don’t have to enter a number for verification. Another way is to enter your age of fifteen, in which case Google will assume you don’t have your phone and number.
Keep in mind that although these steps work, sometimes, when you log into Gmail for the second time on a computer or other device, Gmail will ask for your phone number. To avoid this, before signing in with another device, add another email to get confirmation to enter when asking for confirmation. Remember to create another email at fifteen, so you don’t have any problems.
If these things are useless, you can get doping software from a phone number. This way, Google has a phone number that is not yours.
Below, we will teach you the steps to create Gmail without entering a phone number.
Creating a Gmail on your Android phone or iPhone
You can create a Gmail account through the app’s settings if you have an Android phone or an iPhone. This way, you can skip the phone number request stage by Google. To do this, follow the steps below.
1- Go to the Settings section of the program
2- Find the account menu (or the cloud and accounts section, depending on the version of the system you are using)
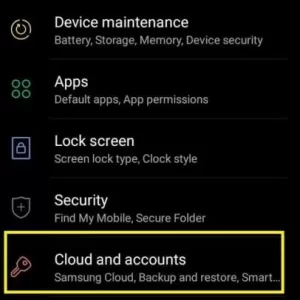
3- Tap on accounts
4- Click Add Account at the top of the list.
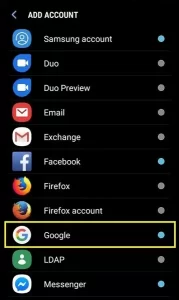
5- Select Google from the opened list. A Google page should open.
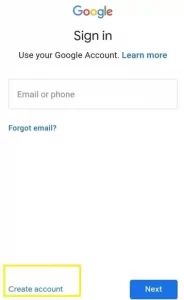
6- Click on Create Account in the upper left part of the page.
7- Enter your first and last name and press Next.
8- Enter your date of birth and gender and press Next.
9- Choose a new Gmail address (based on the suggested options) or enter your address.
10- Enter the password
11- Google asks you to enter your phone number.
12- Either click Skip or More options.
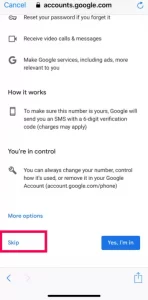
13- If you click on the option of more settings, an option will open that gives you the option to choose.
14- Click on the option: Don’t add my phone number, or No, don’t add my phone number.
15- Now, it asks you to review your account information; Click on the Next option.
16- Accept the Terms of Service.
After this, you don’t need to add more information. You can use your new email, and you don’t need to get confirmation.
First way: Write your age of fifteen years
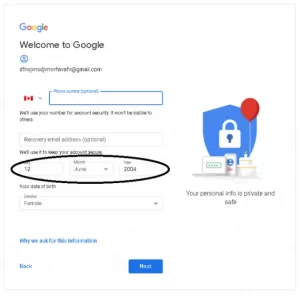
This is another trick to get past not entering a phone number. If you are fifteen years old or younger, Google assumes you do not have your phone or number. Just enter another date of birth and follow the steps below.
1- Open your browser.
2- Go to Gmail.
3- Click on Create account at the top of the page.
4- Choose one of the options: For Myself or Business.
5- Enter your account information.
6- Click on the Next option.
7- Set your age to fifteen years; for example, if the year is 2019, you should choose 2004.
8- Leave the phone number entry option blank.
9- Accept the terms and conditions.
This also works, but keep your age under 18 because Gmail may ask you for your phone number. Also, if you want to add security options, such as adding a support email, create a new email like the previous one and add your age. Make yourself under fifteen years old.
Tip: This option comes in handy when you log out of your email. If you don’t do this, Google will default to your previous email address. You can also use another browser for this.
Second way: Use a virtual number
A virtual number is a service where you can get a confirmation code through your phone. You can use one of the numbers available on these websites.
Then Gmail will send your verification code to this virtual number, and you will be able to see and copy your verification code.
Keep in mind that you can only use this virtual number once. So if you put your phone number as the only way to recover your account, you may lose your email.
Third way: Using a phone number to create multiple Gmails
Yes. If you use a real number, you can use it for multiple Gmail accounts (usually 3). But if you use one of the methods we explained above, you cannot do this.
Common problems of users
Also, keep in mind that adding your real phone number to your Gmail account will have many benefits for you. If you have a problem with the issues listed above, it can be caused by many things.
For example, if you have a number and you don’t want to enter it in your Gmail, you can delete it from the settings.
Go to your account settings and click on the profile option in the upper right corner. Then enter the management section of your Gmail account, then click on personal information on the left side of the page. From there, you can delete your phone number.
Make sure your username is legitimate.
Google has made it mandatory to enter the phone number to get the verification code to prevent bots and spammers from creating an account. If you use the name Kerber, I am a robot 123; the above tactics will not work.
Make sure you follow the steps listed above.
Many users have reported that these solutions were not useful for them. This is probably because they reach down with their phone and hit the skip option.
Adding your phone number to your Gmail account keeps your security information safe, and Google does not sell your personal information. If you don’t have a phone number or don’t want to use it, these options can help you.
