Master DNS Configuration on MikroTik: Setup & Best Practices
If you are active in the internet world, you know that DNS is like a phone book. The phonebook that you receive the domain name and gives the IP address to the browser (or vice versa) so that the user’s request can be answered correctly. Configuring DNS in Mikrotik also lets your router act as a DNS server. Therefore, by purchasing a Mikrotik virtual server, you will improve your network’s performance and access its various features, allowing you to use your router in multiple fields.
By configuring DNS in Mikrotik, the router acts as a DNS server that can easily translate domain names to IP addresses and vice versa.
For this tutorial, we have used the Winbox tool. Suppose you follow all the steps carefully and set the addresses and options according to your needs. In that case, you can be sure that you will not encounter any problems or errors in the process of configuring DNS in Mikrotik:
What does DNS do?
The same is valid for web users. When a user enters a domain name (www.example.com) in the browser bar, the browser first sends this request to the DNS server. The server returns the IP address of that domain to the browser. Then, using this IP address, the browser can communicate with the web server, receive the necessary information, and provide it to the user.
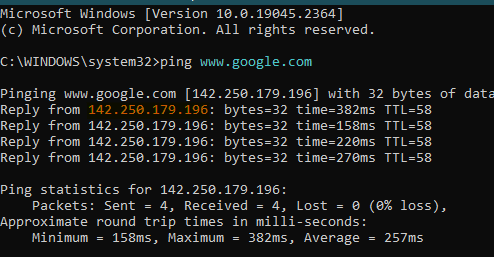
Using the ping command, you can see the IP address of a specific domain!
Run CMD as Administrator:
The DNS protocol is client-server. In this way, the DNS Client requests that the server convert the domain name to the IP address, and the DNS Server responds.
The Mikrotik router has DNS Client and DNS Server features that translate the domain name to the IP address. In addition, the DNS Server converts domain names to IP addresses for all clients connected to the server itself (not the router).
So why should we use Mikrotik’s DNS server?
If you want to use the ISP’s public DNS server, you need bandwidth for every request made through the WAN connection, which you have paid for. Too many requests lead to delays.
But suppose you use your router as a DNS server by configuring DNS in Mikrotik. In that case, you can cache DNS information related to the server, save bandwidth, and quickly respond to client requests. The Mikrotik DNS server is more reliable, faster, and secure than a public one.
How to configure DNS in Mikrotik
The following steps will show you how to configure the DNS service on your MikroTik router.
1) Open the inbox.
Open the Winbox program and enter the Mikrotik router’s main dashboard by entering your router’s address.

2) Go to the DNS section.
From the left menu, find the IP option and click on it. Select DNS from the corresponding submenu.
3) Complete the fields of the DNS settings window.
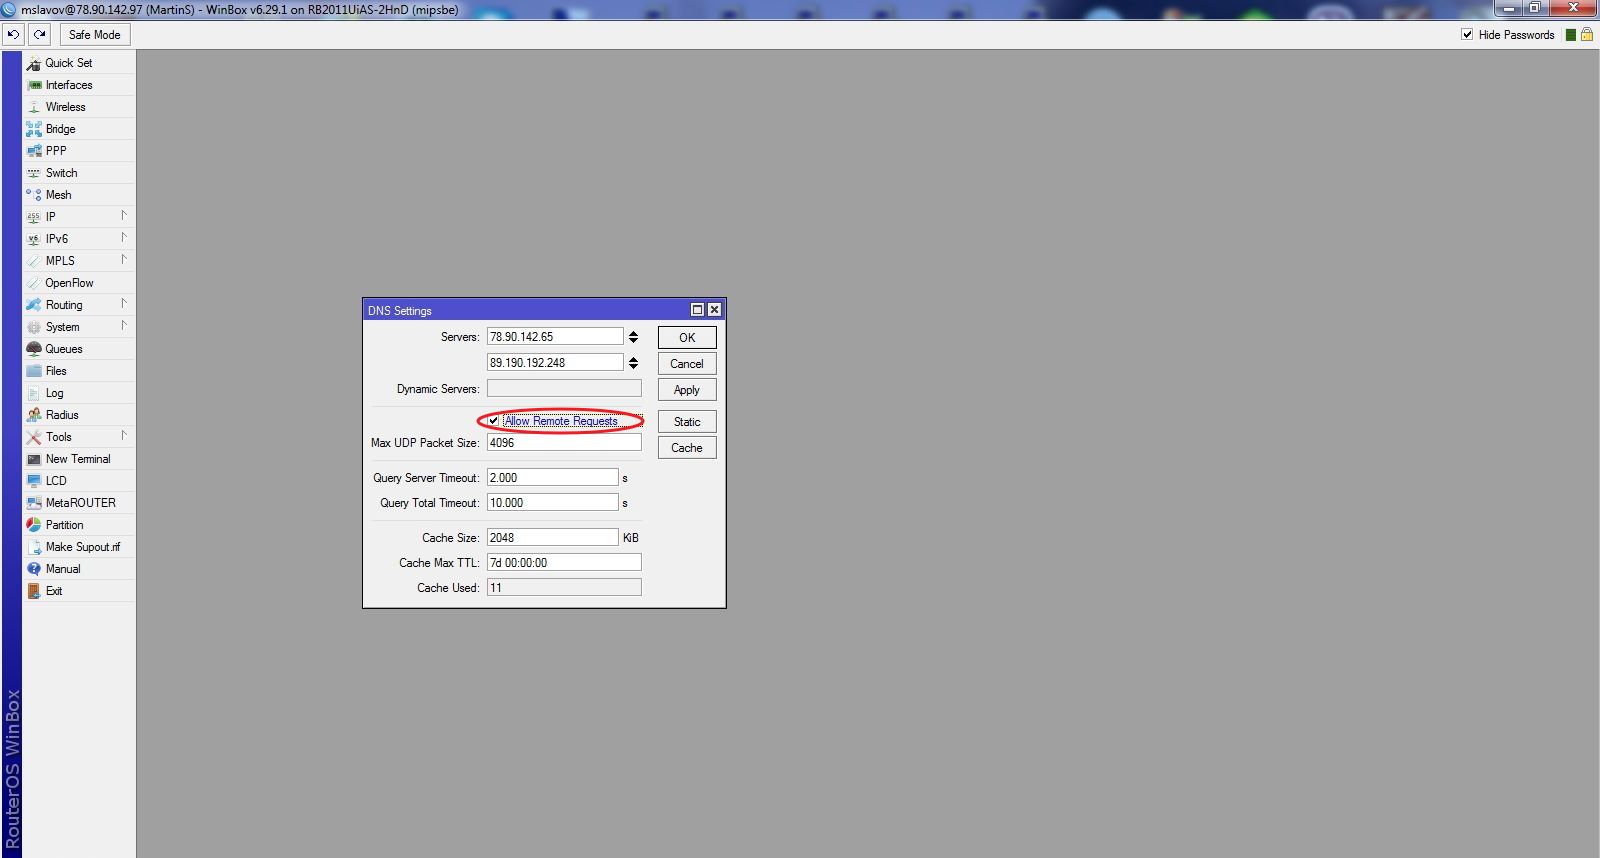
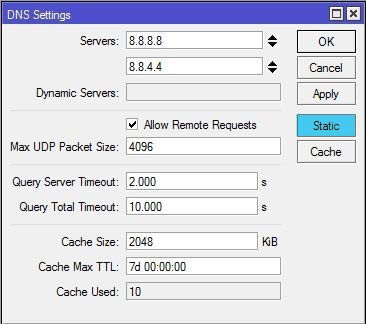
After clicking on DNS, the following window will open:
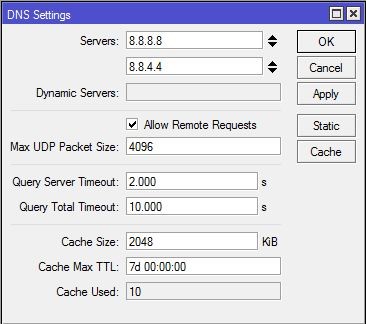
In the Servers section, enter the IP address of your network’s DNS server or the public DNS IP, such as 8.8.8.8 and 8.8.4.4, which belongs to Google.
If you use a dynamic server for DNS, enter its IP in the Dynamic Servers section. Otherwise, ignore this section.
Tick the Allow Remote Request option to use your Mikrotik server as a DNS server and respond to users’ requests. This option also activates the router’s DNS server’s caching feature.
The Max UDP Packet Size section determines the maximum UDP packet size.
Using the Query Server Timeout field, you can determine the waiting time for the router to receive a response from the DNS server (in seconds).
The Query Total Timeout field corresponds to the total waiting time you have considered for the DNS response (in seconds).
The Cache Size field determines the size of the cache space.
Determining the time required to cache a query before a new request is made through the Cache max TTL field.
The Mikrotik router itself determines the amount of Cache Used.
4) Apply the settings.
After specifying the values of each of the fields, click Apply and then click OK.
Set DNS entry statically
Even though the DNS server receives and processes each entry, it saves the cache memory’s corresponding domain and IP address. Still, if, for any reason, you want to statically link a specific domain and IP address and store it in the DNS cache, put your Mikrotik router server, you must act as follows:
Open Windows and click on IP to open the DNS window.
Click on the Static button to open the DNS Static window.
Then click on +.
Enter the name of the desired host or domain in the Name field and then enter the corresponding IP address.
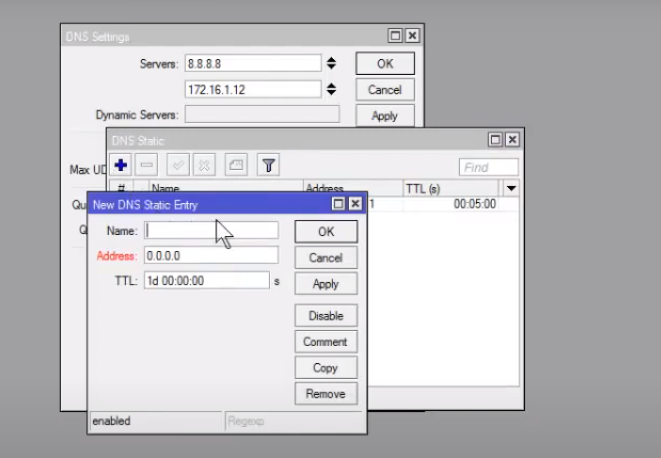
Enter static input
The TTL section is set to 1 day, which is enough, so there is no need to change its value.
Finally, click Apply and OK to save this new entry in the static DNS list.
Conclusion
Using the Mikrotik router as a DNS server brings many advantages, the most important of which is high speed and security in responding to user requests. Configuring DNS in Mikrotik is done in a few short and simple steps, and we owe this simplicity to the simple graphic interface provided by the Winbox tool.
FAQ
What is DNS forwarding in MikroTik?
DNS forwarding allows your MikroTik router to send DNS queries it can’t resolve to external nameservers.
Can I add custom DNS records on MikroTik?
Yes — you can create static DNS entries (like hostnames) directly on the router.
How do I improve DNS lookup speed?
Use reliable upstream DNS servers, enable DNS caching, and minimize unnecessary queries.