


How to Change Server Name in Windows Server
Change the server name.
A computer or hostname is a unique label assigned to a machine or device connected to a computer network in Windows. The hostname is automatically assigned by default. However, the server name can be changed at any time. Most Windows users don’t know how to change the Hostname in Windows Server. Changing the server name is a very easy and simple process. It does not require learning advanced skills.
Today, in this article, I want to teach you how to change the server name or computer name in Windows Server 2022 using two different possible methods.
The change server name in Windows Server
We can change the server name using the following two methods:
Changing the server name using the server manager (graphical user interface)
Rename Server Using PowerShell (Command Line)
Method 1: Changing the server name using Server Manager (graphical user interface)
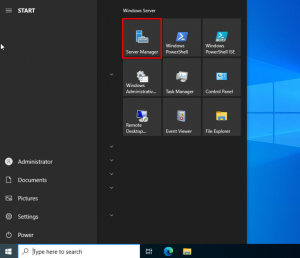
Using the “Server Manager” graphical user interface, you can easily change the computer’s name. When you start your system, it will automatically run on your desktop. Alternatively, you can launch Windows Server Manager from the Start menu of your Windows server.
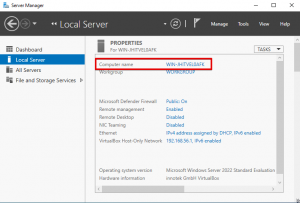
From the left sidebar menu, click Local Server and then click Computer name.
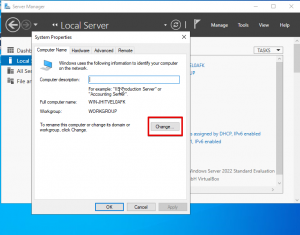
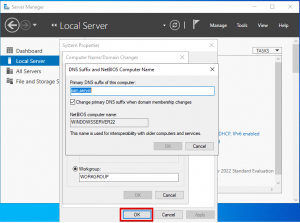
The System Properties window appears on the screen. Click the Change button on the Computer Name tab.
Enter the server name in the Computer name field that you want to use as the server name. Next, click on More.
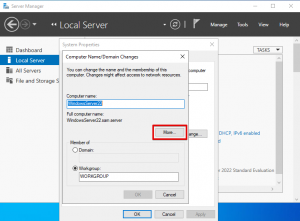
Enter the default DNS extension for your computer. Click on “OK.”
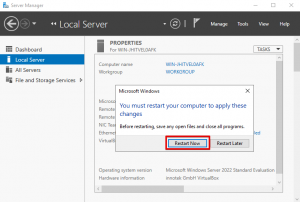
You must restart your Windows server to apply the above changes at this stage.
Now click on “Restart Now” to restart your computer immediately.
Open Server Manager again to see the changes, and you will notice that the computer name has been successfully changed or updated.
Method 2: Change the Server name using the command line
You can change the server name using command line commands. Most Windows users prefer to use PowerShell when working on Windows Server. Therefore, to change the server name in the Windows server through PowerShell, you must do the following steps:
Open a command line PowerShell window from the Windows Server Start menu. Now use the following command to change the server name:
> Rename-Computer -NewName [Server-name] -Force -PassThru
Replace the server name with the name you want to set for your computer. For example, here, we choose the name “Win-Server2022”. Now run the following command with admin access:
> Rename-Computer-NewName “Win-Server2022”-Force-PassThru
After executing the above command, the following output will be displayed in the PowerShell terminal:

It would help if you restarted your computer for the changes to take effect. So, restart your system using this command:
Restart-Computer
Conclusion
In this article, we have shown how to change the computer name in Windows Server 2022 using both graphical user interface methods and using the command line. I hope you can easily change your server name by following the mentioned steps.