


How To Benchmark GPU?
GPU Benchmarking Is A Great Way To Find Out The Technical Specifications Of A Graphics Card And Make Sure How It Performs. In This Article, We Teach How To Do This.
The first thing new PC owners should do is benchmark their GPU. Additionally, it’s best to run benchmarks before and after replacing a major component, such as a graphics card. By doing this, you can pinpoint any performance improvements or degradation.
Many computer owners mistakenly believe that the specifications listed on the packaging are always accurate. However, the exact performance can vary even between identical components. By taking a benchmark, you can confirm that there is no major problem with the performance of the computer components. This article teaches you how to get a benchmark, So stay with us until the end.
What is a GPU benchmark?
As the name suggests, a GPU benchmark is a measure of performance that you can use as a starting point for further testing. The benchmark is a reference for additional adjustments and component changes when discussing PC components such as GPUs. In short, benchmarking allows you to verify that you have the best GPU.
Benchmarks act like stress tests for computers. The benchmark program pushes GPU performance to its peak performance. After completing the testing process, users can view graphs with their GPU specifications. FPS and how it is reduced by passing the GPU test are two of the main criteria that gamers should consider.
Several websites post graphics card benchmarks and provide information on how each card stacks up, But these do not represent the actual results of your piece.
How to benchmark GPU?
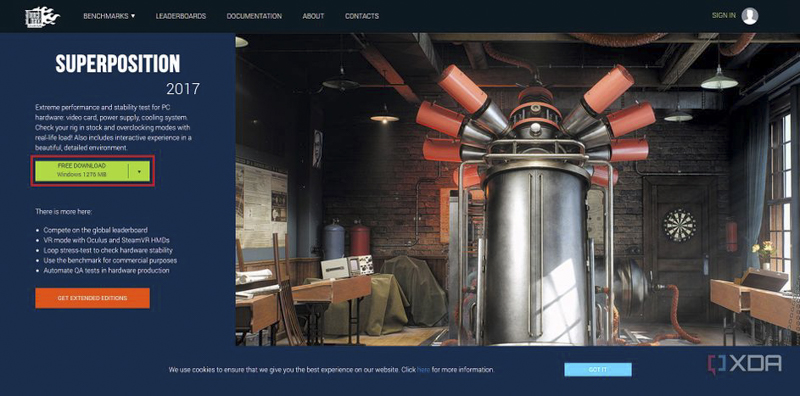
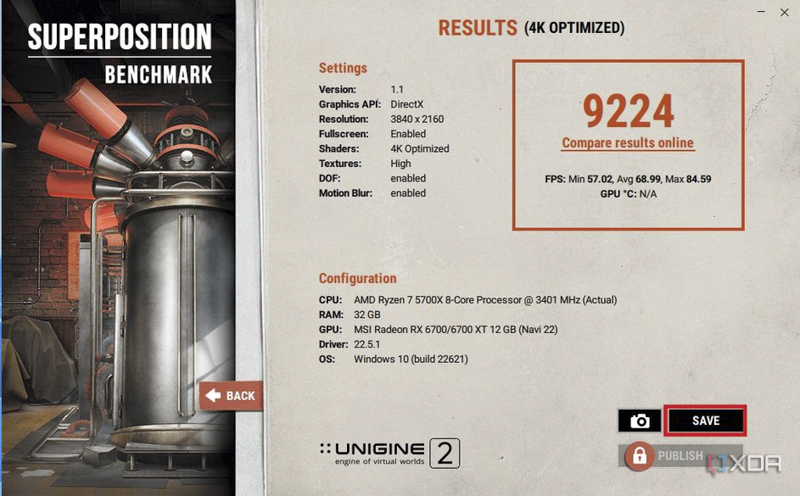
Now that we better understand GPU benchmarking, it’s time to do some reading. For the graphics card benchmark, we use Superposition 2017. Of course, there are several other software, Including Blender modeling software. This free software allows users to test GPU benchmarks and supports VR testing. To get the graphics card benchmark, follow the steps below:
- Download and install the benchmark software you want.
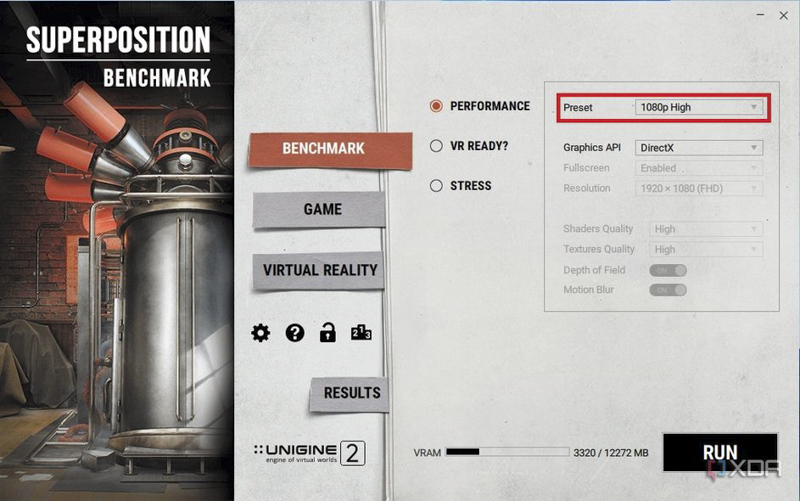
- Run the GPU benchmark program.
- Select a preset to test. It is better to use 1080p resolution and run further tests at a higher resolution.
- Click the Run button.
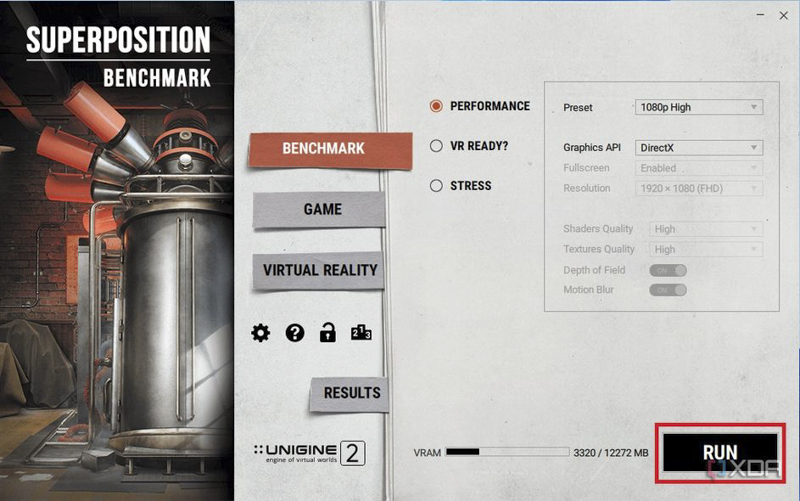
- Wait for the program to test the GPU. It is recommended not to use any other programs in the background Because they may distort the results or cause the benchmark program to fail.

- Once complete, view the data. Also, saving the results for comparison with later tests is a good idea. The easiest way to do this is to hit the save button to save them to your computer.
GPU benchmark execution time
Running a benchmark test is not a one-time thing. While running benchmarks after replacing a major component like the GPU is proper, you should run them regularly to ensure your computer performs at its best. Many users run a benchmark at least once a year to monitor the gaming capabilities of their graphics card. On the other hand, others prefer to run benchmarks more, Especially when changing settings like clock speed.
It doesn’t matter how often you run the graphics card benchmark Because running it before and after changing the GPU is very important. Doing so will help quantify the improvement of the new graphics card. It’s worth noting that some video games like Forza Horizon 5 and Red Dead Redemption 2 have built-in GPU benchmarking tools that allow users to test the graphics card’s performance against the game they’re playing.
Decoding benchmark data
Depending on the benchmark tool used, interpreting the data can be overwhelming. Fortunately, tools like Superposition make it very easy. The tool provides average FPS alongside high and low readings, making comparing results in future tests easy.
However, some programs provide additional data such as CPU usage, temperature, error count, latency, and correct time. All this information is practical, But it’s more than the average person needs when taking simple GPU benchmarks.