Configuring MikroTik Port Forwarding: Step-by-Step Guide
If you are looking for a way to access your internal or local network resources or services from outside the network, Mikrotik’s port forwarding technique is one of the best solutions.
Port forwarding in Mikrotik is the same technology that helps employees of a company or organization and users access and use internal network services and domains without being physically present in the place or at a point outside the local area.
In this article, you will first get to know the concept of Mikrotik and its importance, and then the steps you need for port forwarding and access to internal network addresses will be reviewed. So let’s get started asap:
What is Mikrotik?

As a manufacturer of routers and wireless, Mikrotik plays an essential role in the network field. One of its products is a powerful router that acts as an interface between external users and internal services and increases the speed and flexibility of the network. This router has an independent operating system called Router OS, which is based on Linux. Although it is used with network equipment, this is not the only thing that MikroTik RouterOS can do, and it is more than an operating system for routers.
In this way, installing this operating system on a PC turns that personal system into a router with all the necessary features such as routing, Firewall, bandwidth management, VPN server, etc.
A system that benefits from RouterOS also powers other devices and equipment in the network and has high flexibility in network management. Mikrotik is suitable for ISPs and hotspot providers due to its features, which are ideal for IP and wireless networks.
Of course, keep in mind that most network administrators buy a Mikrotik virtual server to perform tasks related to routing, data protection, etc., to increase the security and efficiency of their equipment.
But the feature you teach in this article is how to configure port forwarding in Mikrotik, and of course, it is better to mention the importance of this feature before checking the steps of this process.
What is port forwarding in Mikrotik, and why do we need it?
Port forwarding in Mikrotik, or port mapping, is a NAT application that redirects data traffic from the Mikrotik router’s IP/port combination to another internal or local IP or port. For example, you can use this trick if you have a web server or FTP server in your dedicated/local area and you want to access this server from a point outside your local area.
A Mikrotik router or any system running RouterOS can easily do this process.
With port forwarding, you can assign a specific port to a specific service so that the intended user can only access that service by entering the port number of their software or browser.
Of course, port forwarding has other uses, such as outsourcing the domain or internal IP address, making the home or business network available to other computer devices on the Internet, and responding to users’ requests to access a virtual or dedicated server without sharing the IP address. Setting up security cameras or downloading files are also among the most important.
Configuring port forwarding in Mikrotik is not very difficult. If you follow the rest of the article, you will find that you can easily handle this task.
How to do port forwarding in Mikrotik
Before anything else, let’s point out that you have two ways to connect to the router:
- Enter the IP address of the router in the browser and go to the Webfig section as an admin
- Using Winbox
Note: Winbox is one of Mikrotik’s special server tools. It provides a simple graphical interface that helps the administrator perform management actions more easily and quickly. To use this program, download it from the Mikrotik website’s inbox page, run it, enter the router’s IP or Mac address, and click the connect button to enter your user area.
After you enter the desired section in these two ways, you will come across this page:
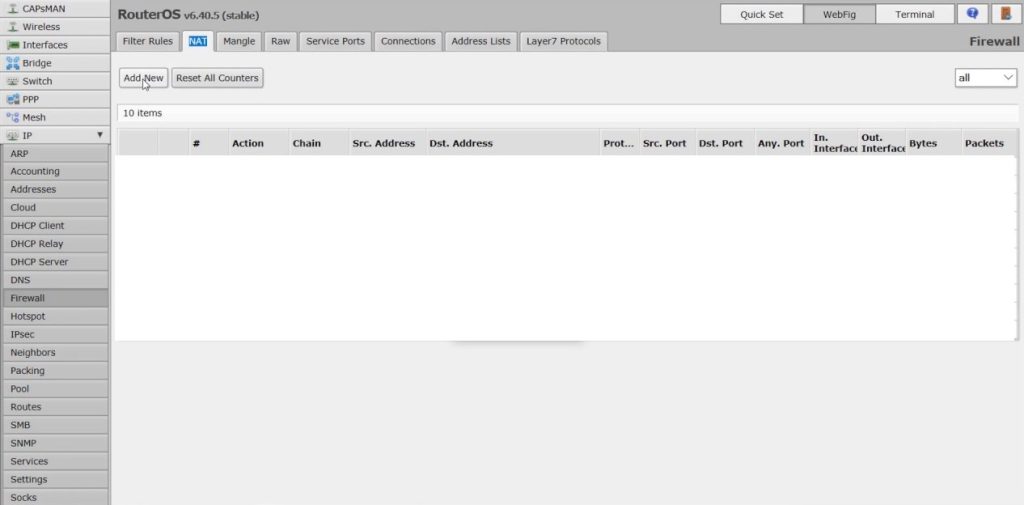
Step 1 – From the right section, click on IP.
Step 2 – From the opened menu, click on Firewall.
Step 3 – Click on NAT from the top tabs.
Step 5 – To create a new rule, click on the + sign or add a new one.
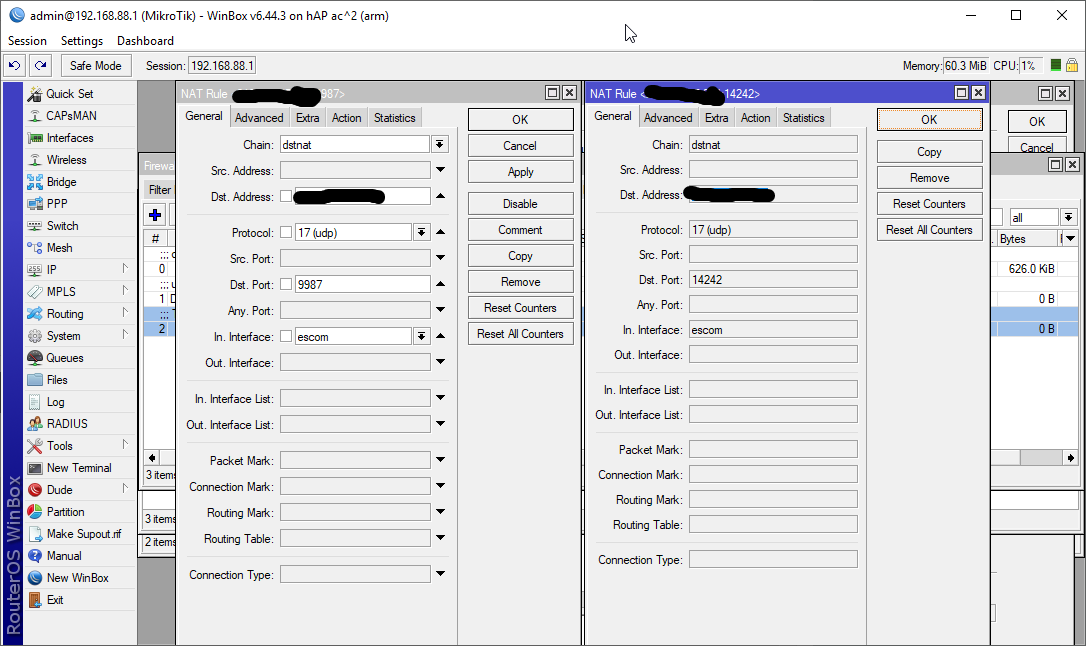
Step 6 – Now, it’s time to enter the IP address and port and set the protocol.
Note: A public and unique IP is also provided when buying a Mikrotik router from the provider, which is required in this section.
Click on the General tab.
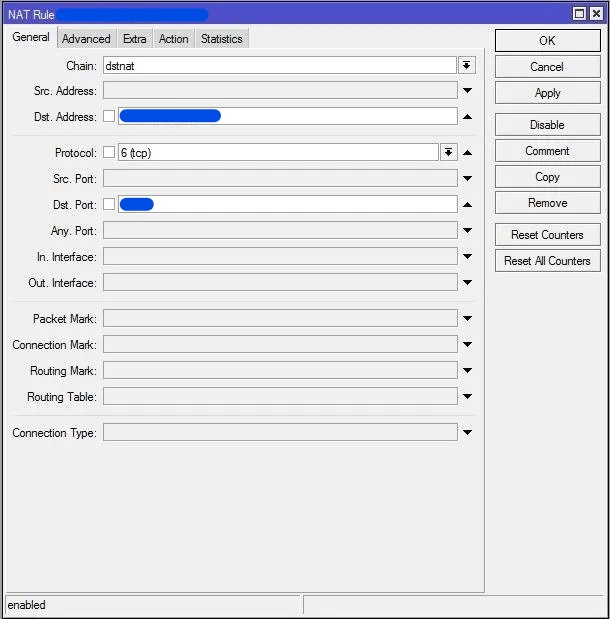
From the chain drop-down list, select distant.
In the Address section, enter the address of the Mikrotik router.
Select the connection protocol from the list in the Protocol section, for example, TCP.
In the Port field, enter the port number you want to forward requests to. (e.g., 2356)
Step 7 – Now, click on the Action tab.
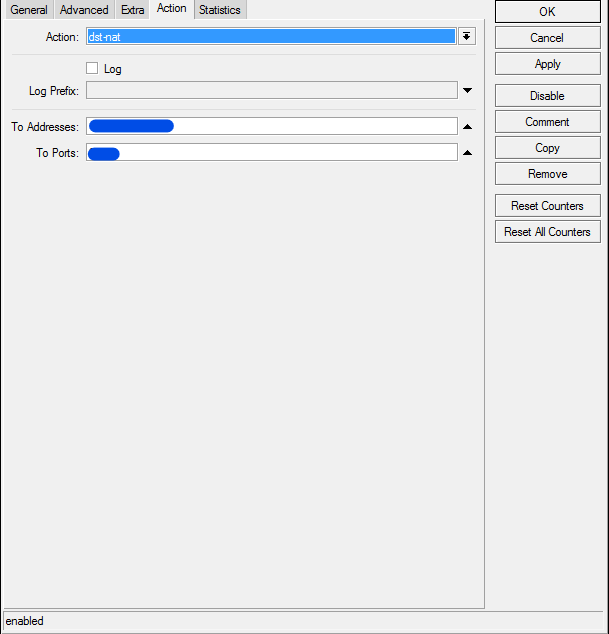
Select DST-nat from the Action drop-down list.
In the To Addresses section, enter the address to forward all requests.
In the To Ports section, enter your desired port for forwarding requests. (e.g., 6782)
Step 8 – Finally, click Apply and OK to save the information and add a new rule.
Finally, implementing these steps successfully performs the port forwarding operation in Mikrotik. Requests sent to the router’s public address with the desired port are forwarded to the address with the new port.
Conclusion
Under special conditions, network professionals need to access internal resources and domains from outside the network and perform the necessary operations. Port forwarding in Mikrotik is one of the most effective ways to do this and can be implemented in a few simple steps.
Thank you for staying with us until the end of the article. We hope that reading this article was helpful for you. If you have any questions or requests and need guidance, you can contact us by registering your opinion so we can answer you as soon as possible.
FAQ
What is port forwarding on MikroTik?
Port forwarding (NAT) directs incoming traffic from a public IP address and port to a specified internal (LAN) IP and port on your network.
What steps are involved in creating a port forwarding rule?
Go to IP → Firewall → NAT Add a new NAT rule Under General tab: set chain to dstnat, protocol (TCP/UDP), and destination port Under Action tab: choose dst-nat, set the target internal IP and port Apply and save the rule