An Introduction to Disk Partitions on CentOS 7: Structure and Best Practices
If you are the first to install CentOS 7 on your disk or virtual machine, you need to pay attention to one crucial thing: how to best manage your disk’s partitioning (how the operating system divides the disk space).
For example, if you have a 100 GB disk, the operating system will probably partition 50 GB for /home (users) and about 50 GB for opt or root and boot. SMx installations in the OS are placed in /opt by default, meaning you only have 50GB for SMx on a 100 GB disk.
If you’ve never manually partitioned a disk before, don’t worry. In this article, we will help you step by step. We create a virtual machine in ESXi with eight processors, 32 GB of RAM, and a 250 GB virtual disk. I also use CentOS 7 with minimal capabilities. (Using the full install means you’ll get a GUI that uses more resources.) You can replace VMware ESXi with other hypervisors, but at the time of writing this article, ESXi is the most widely used.
Here, we assume that you have placed the CentOS 7 ISO file into the virtual drive of the VM or inserted the disc into the server’s CD-ROM and are booting into the CentOS 7 installer. If your disk is blank and no operating system is installed, you should see the following screen in the ESXi/vSphere console or on the monitor.
To continue the CentOS 7 partitioning process, follow the steps below.
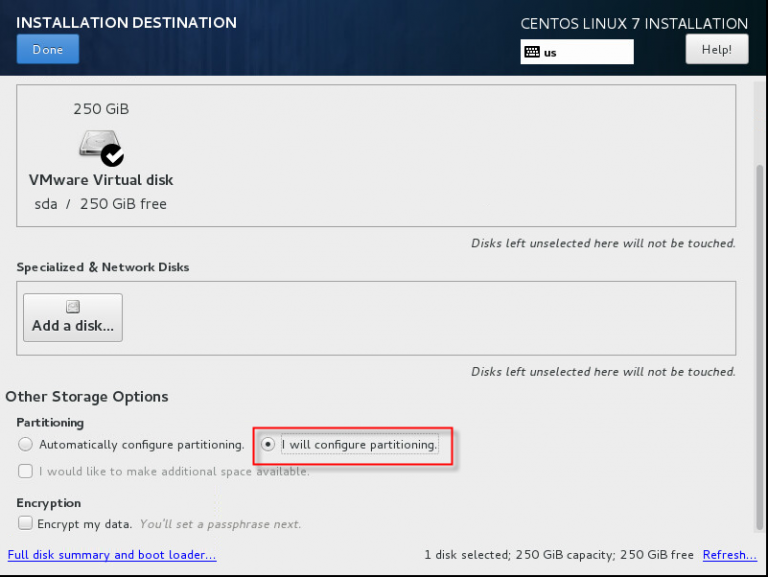
1. On the page that opens for you, first select the “Installation Destination” option.

2. Select “I will configure partitioning” and click “Done”. For this example, we want to create:
- partition boot/ with a volume of 500 MB
- swap partition (LVM) with 32 GB of space (because we have 32 GB of RAM)
- Setting the remaining space for the root/ of LVM type
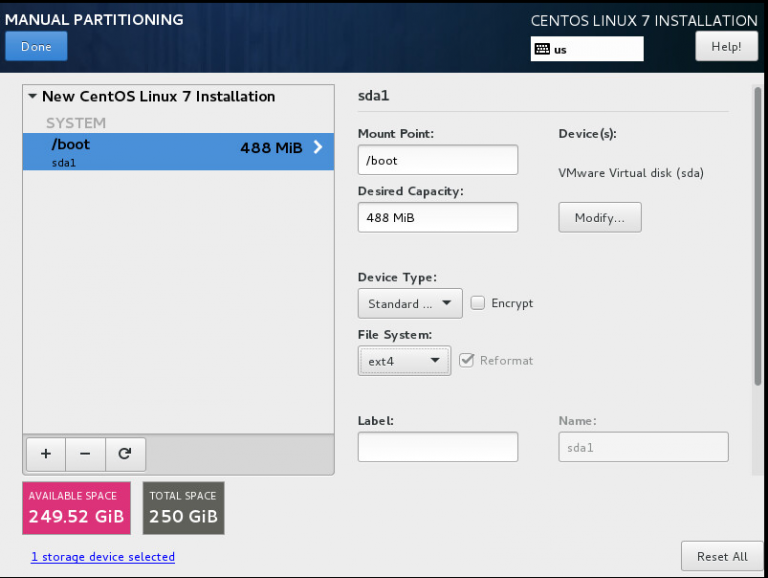
3. Click the [+] button to start. Then, select “boot/” for the “Mount Point” option. For the desired capacity, we will use 512 MB, as shown below.
![Click the [+] button to start. Then, select "boot/" for the "Mount Point" option. For the desired capacity, we will use 512 MB, as shown below.](https://ded9.com/wp-content/uploads/2022/09/rtaImage-3-768x573-1.png)
4. Next, set “Device Type” to “Standard” and “File System” to “ext4”.
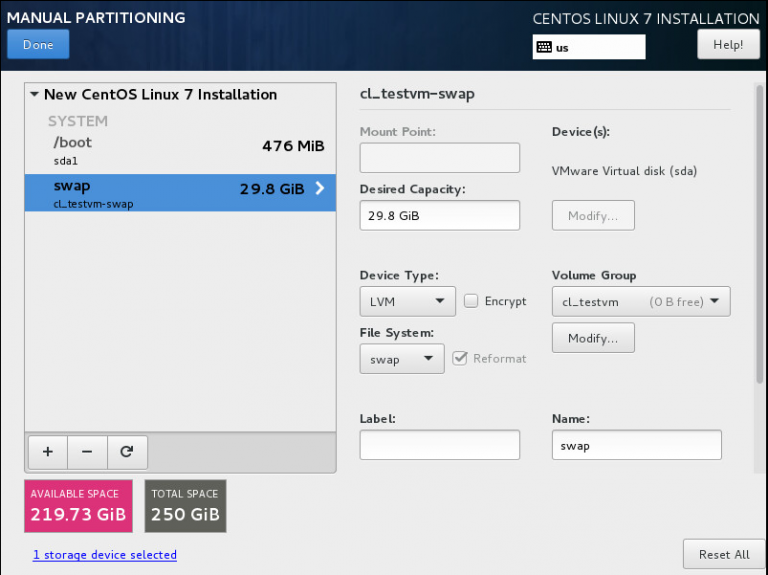
5. Then you need to create the swap partition. Click the [+] icon again. Enter the mount point “swap” and the desired capacity, which should be at least 32 GB of RAM, as shown below:
![Then you need to create the swap partition. Click the [+] icon again. Enter the mount point "swap" and the desired capacity, which should be at least 32 GB of RAM, as shown below:](https://ded9.com/wp-content/uploads/2022/09/rtaImage-5-768x579-1.png)
6. To do this, set “Device Type” to “LVM” and “File System” to “swap.”
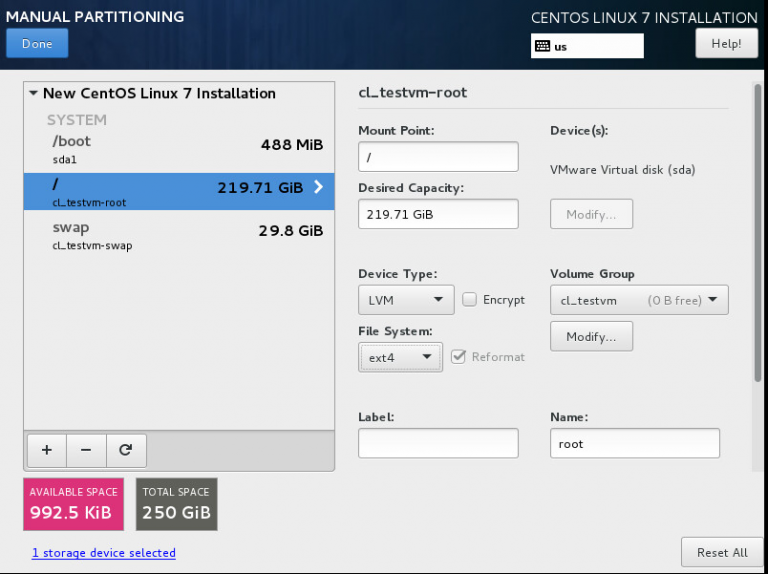
7. The last step of this tutorial is to create the root partition. Click the [+] icon and select “/” as the mount point. Set the desired capacity to “max” to use all remaining space.
![The last step of this tutorial is to create the root partition. Click the [+] icon and select "/" as the mount point. Set the desired capacity to "max" to use all remaining space.](https://ded9.com/wp-content/uploads/2022/09/rtaImage-7-768x576-1.png)
8. Finally, select LVM and ext4 for settings.
9. Finally, click Done and continue the installation.
Conclusion
As you can see, we were able to partition our server disk easily for the CentOS 7 operating system without any problems.
FAQ
What are disk partitions on CentOS 7?
Disk partitions divide a physical disk into separate sections, each used for mounting different filesystems like /, /home, and /var.
Why is partitioning important?
Proper partitioning improves performance, isolates system and user data, and helps manage storage more safely and efficiently.
How do I create partitions on CentOS 7?
Use tools like fdisk, parted, or the CentOS installer’s partitioning interface to define size, type, and mount points for each partition.