What Is PowerShell in Windows — And What Can It Do for You
PowerShell in the Windows operating System is a task automation tool Microsoft developed to reduce the workload of administrators and users. This feature helps you automate simple Windows tasks and processes, allowing you to focus more on more complex tasks.
Many Windows users are familiar with the Command Prompt, but this may not be true with PowerShell. In the following, we will focus more on the latter.
What is PowerShell in Windows?
First of all, what is Shell? Shell is a computer program that receives commands from the keyboard, processes them, and then sends them to the operating System for execution.
The shell acts as an interface between you and the operating System. It can be a graphical user interface (GUI) or a linear interface (CLI).
Shell has existed since the release of the Multics operating System in 1969, and Windows introduced its version of Shell in November 1985. The original shell, MS-DOS Executive, was a valuable file management tool. The Development of this tool continued after its initial release.
In the past, users used various tools to manage systems and automate tasks, until 2006, when a significant improvement, PowerShell, was released.
PowerShell allows users to perform a wide range of tasks, from automating repetitive tasks and network management to tasks that require more precision and creativity (such as web design). This saves you time and control over the operating System and its processes.
What is a PowerShell Cmdlet?
The cmdlet is one of the most critical aspects of PowerShell. Cmdlets are powerful PowerShell commands that allow you to perform simple tasks, such as copying, and to go on to more advanced actions.
For example, the Get-Help command is the most useful in this regard, and you can use it to see what a particular Cmdlet has done and its parameters. You can also become familiar with the various ways to use it.
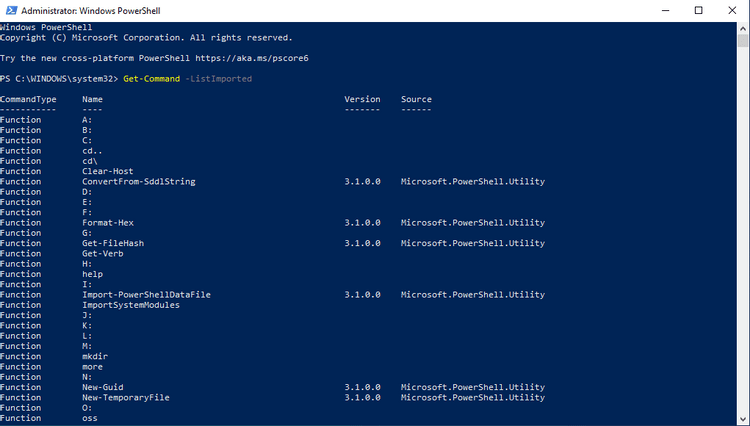
The Get-Command command is also used to troubleshoot PowerShell. This command displays all the commands installed on your System, including Cmdlets, functions, aliases, filters, scripts, and applications. When you use this command with a parameter, all the specific commands associated with that parameter will also be displayed.
For example, the following command takes the different types of stores installed on your computer and displays them:
Get-Command with the ListImported parameter only receives commands from the current Session:
How to run Windows PowerShell
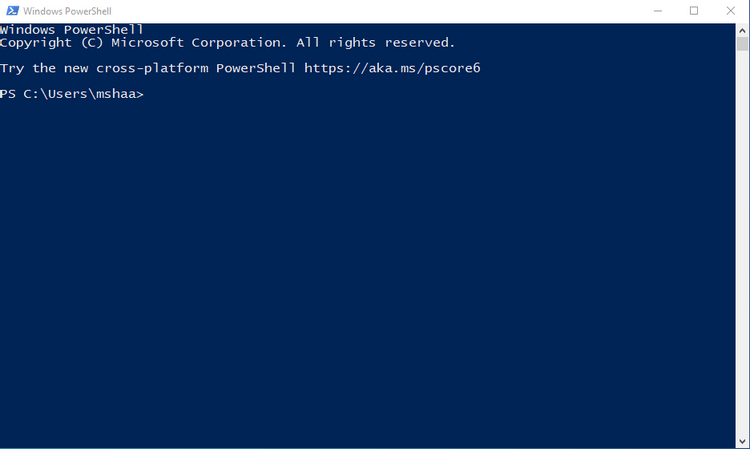
To run PowerShell, search for it in the Start menu and then run it as an administrator. Of course, you can also do the same by pressing “Windows key + R”, typing the word “PowerShell,” and then pressing “Enter.”
How to use PowerShell
As we said, PowerShell is a tool for automating duplicate Windows tasks, managing tasks, and saving time. Here are the most critical PowerShell commands.
1. Create scripts
Scripts are collections of commands that are part of a larger program. Using PowerShell, you can create and reuse scripts. The easiest way is to create a PowerShell script using Notepad.
Search for “notepad” in the Start menu and then run it.
In Notepad, you have to enter the desired script, for example:
Then click “File”> “Save As”, enter the name, and select “Save”.
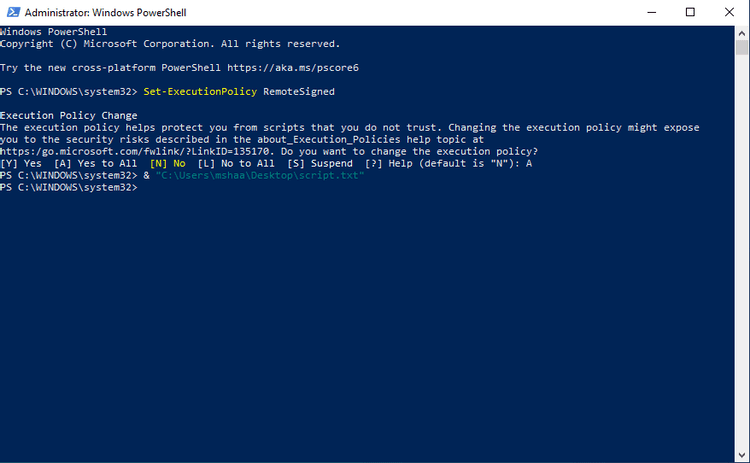
To run the script, you must run PowerShell as Administrator, type the following command, and finally press the “Enter” key:
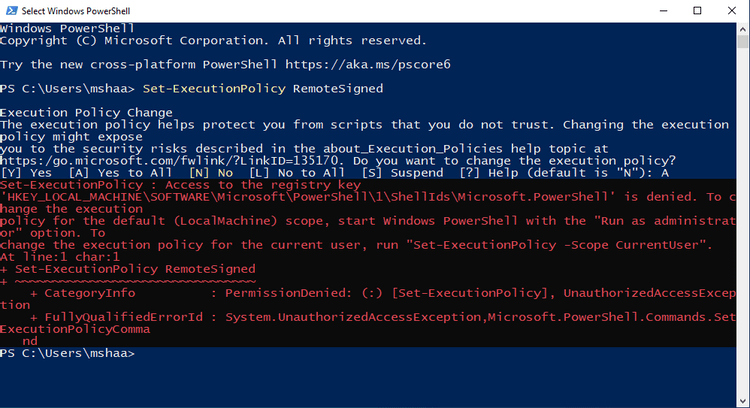
This way, you can change the execution Policy on your device (permanently) and therefore re-run the scripts on re-run hell. The execution policy is a Security feature that prevents malicious scripts from being executed.
Finally, type “A” and then press “Enter”. Type the following command, but replace “mshaa” with your username.
If you enter the commands correctly, the script will run without problems.
You cannot change the run policy if you do not run PowerShell as an Administrator. In this case, your program will stop running, and the PowerShell user interface will look like the image below.
2. Delete the content of a specific file
Using the clear-content command, you can delete a file’s old content while leaving the file intact.
Change the file path to the file you want.
3. Execute commands on a remote computer
PowerShell Remoting allows you to execute a command on multiple remote computers. To do this, you need a computer and a stable Internet connection.
First, connect the computers. Then, you can execute remote commands using the PSSession command.
You can run the commands once you’re connected to the computer, as if it were a local computer.
To run a command on multiple remote computers, you must run the following command:
This command runs the DiskCollect.ps1 script on the remote computers Server01 and Server02. For more remote commands, visit the Microsoft website.
4. Scan for malware
To run a quick scan, enter the following command in PowerShell and then press “Enter”:
To run a full scan, you must also run the following command:
Since a full scan can take a long time, run it in the background. It’s best. In this regard, you should use the following command instead:
5. Work with files and folders
You can also work with your files and folders using Windows PowerShell. These changes include transfer, open, rename, and so on. Here, you have to change “mshaa” with your username.
Rename files and folders. You can do this using the Rename-Item command in PowerShell:
Transfer files and folders
You can also get help from PowerShell in this regard.
Open files
You can open random files on your computer using the following command:
By making a few changes to the above comment.
You can use the file name you want instead of the “*” symbol so that the Invoke-Item command instantly opens several files for you.
FAQ
What is PowerShell?
PowerShell is a command-line shell and scripting language by Microsoft that enables automation, system management, and configuration tasks on Windows (and also on macOS/Linux, in newer versions).
How does PowerShell differ from the traditional Windows Command Prompt (CMD)?
Unlike CMD which handles plain text commands, PowerShell works with .NET objects — allowing more powerful, structured data manipulation and integration with system APIs, and providing advanced scripting capabilities.
What kinds of tasks can I automate with PowerShell?
You can automate file/folder operations, system configuration, services and process management, network settings, remote administration, and even cloud or server management through scripts and cmdlets.