
How to Transfer Windows Using Hard-Disk Simulation — Step-by-Step Guide
Hard Disk Simulation: This article teaches you how to simulate a hard drive without losing data and transfer its contents to another drive without modification.
Transfer Windows, (B) Based on an article by Pocket-Lint, perhaps, consider upgrading to an SSD faster hard drive, and transmission is disabled; But even the thought of installing Windows on a new drive and restarting it scares you.
This process can be even more tedious if you set up System tools, software, and System shortcuts the way you like. Restoring all the previous settings is not easy.
A new version of Windows can offer great speed, but installing it may take a long time to restore the previous data and settings. There is no need to worry. There is a solution to this problem that can help you have a System with new Windows and previous settings. One method that can help you with this is cloning. With the right software, you can clone your entire current hard drive to another drive.
This method is very effective when upgrading your System by replacing an old hard drive with an ultra-fast NVME drive. You do not need to worry about the complexity of the implementation process, as it is straightforward.
Hard Disk Simulation
Buy and install a new drive.
First, we assume you are using a hard drive to start this tutorial. This may be the only drive for your gaming device or business, so you plan to replace it with a newer, faster model. You may also want to move your data to a larger drive for more space.
If you have Windows installed on your hard drive, you can add another drive and use this process to clone the old hard drive to the new model. After this, you can format your old drive for other tasks, such as saving images, movies, games, and whatever you like.
The first step is to buy a new drive. There are some great examples on the market, and you can choose the best one based on your budget. You do not need an NVMe SSD to do this; it is just a reasonable upgrade.
Once you get the new drive, insert it into the dedicated slot in the System and prepare for the next step.
Download Macrium Reflect software.
There is a lot of software to simulate the System drive, from which you can choose the best option. Some of this software is free, but you have to pay for the rest.
We recommend Macrium Reflect for this process because it is easy to use, and you can even do it with the free version. This software also offers paid options, and by activating them, you can easily back up your device regularly if needed.
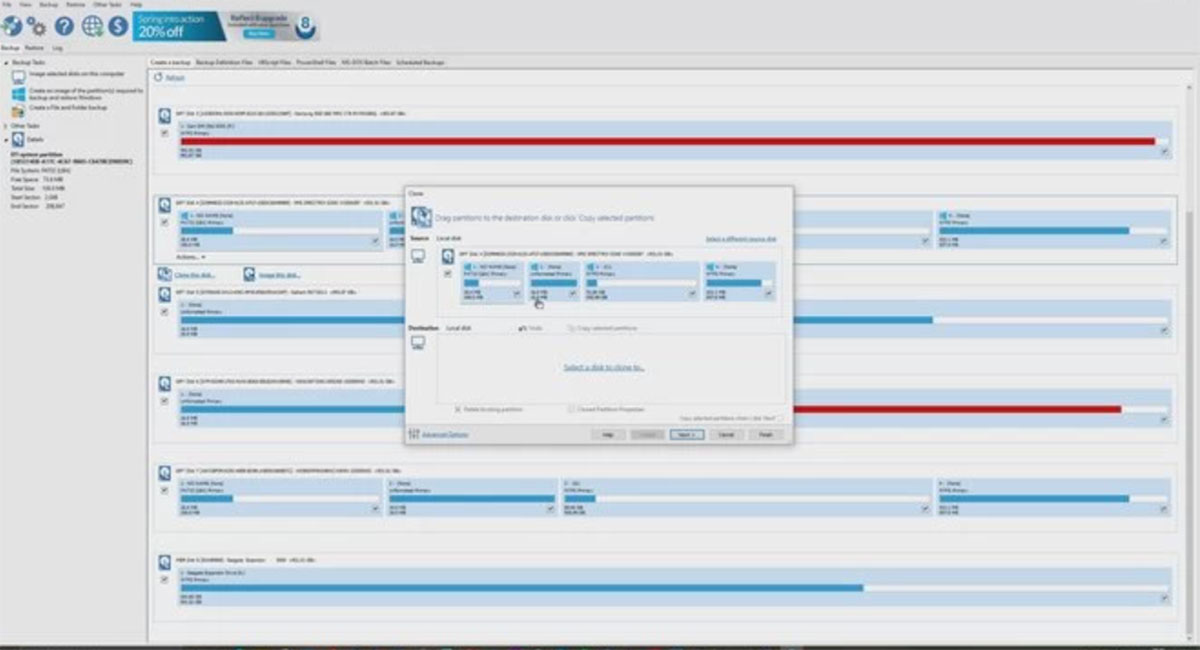
The next step is to download Macrium Reflect and install it on Windows. Once the installation is complete, run the software and make sure you are in the Backup tab. Then, you need to find the drive on which Windows is installed and which you want to emulate.
You should see a small Button under the Windows drive name with “Clone this drive” written on it. Click on it and follow the on-screen instructions.
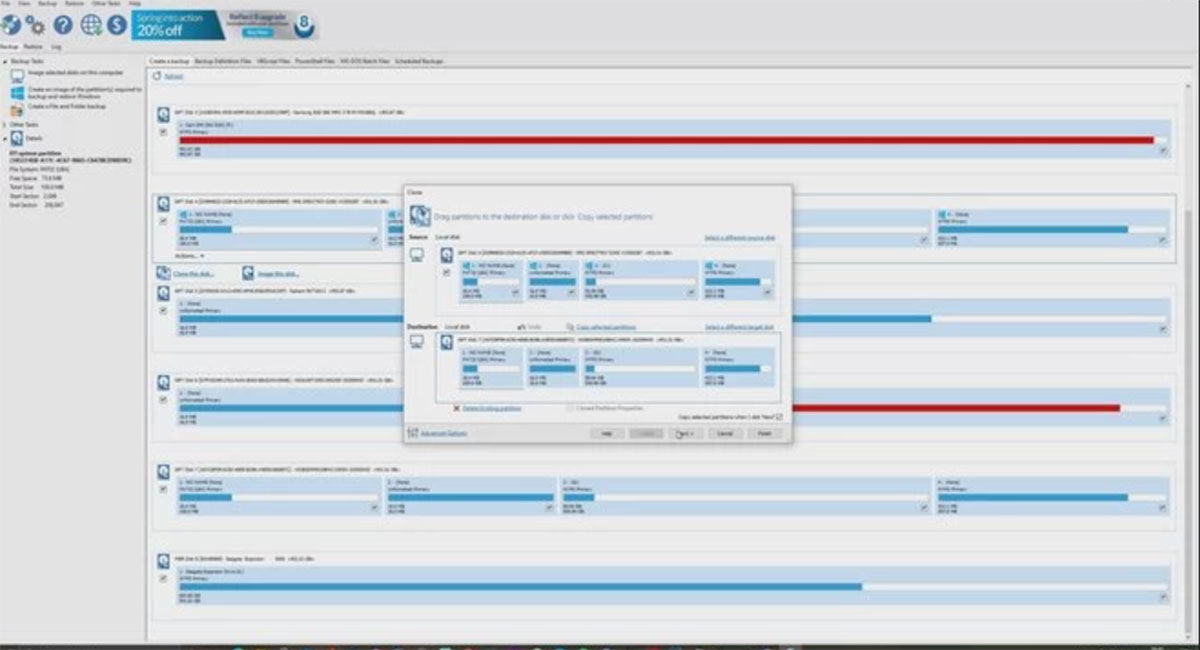
When done, you will see an option to select the drive you want to clone; Select it and start the simulation process.
In this process, all your data is simulated on the new drive.
The interesting thing about this method is that all software, settings, and other things are copied. In addition, permissions for various software are transferred to the new drive; As a result, you no longer have to worry about restoring multiple permissions on your System.
Everything should work smoothly if you use the new drive on the same computer and do not make any other significant hardware changes to your System.
After completing the simulation steps, you have two versions of Windows on two different drives. You will need to make final BIOS fixes to ensure your device boots from the correct drive in the future.
So, restart your computer and press the Delete Key on the Keyboard several times before Windows fully loads to open the BIOS screen.
Change boot options in the BIOS.
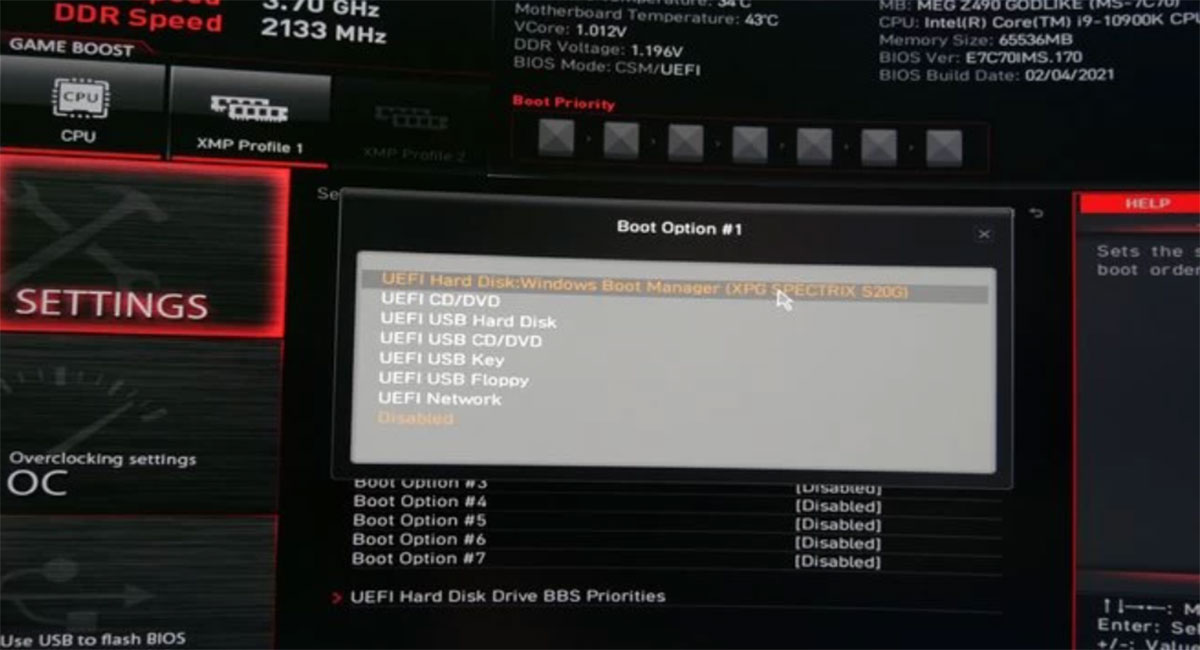
After entering the BIOS, you will see options under the settings section that let you change the boot order of your drives. This tells your computer which drive you want to use to load Windows, or at least which one to download from the beginning.
This section is usually under Advanced Options > Settings > Boot (Advanced Options > Settings > Boot). There, you will probably see two options: Hard disk drive boot priority and fixed boot order priority.
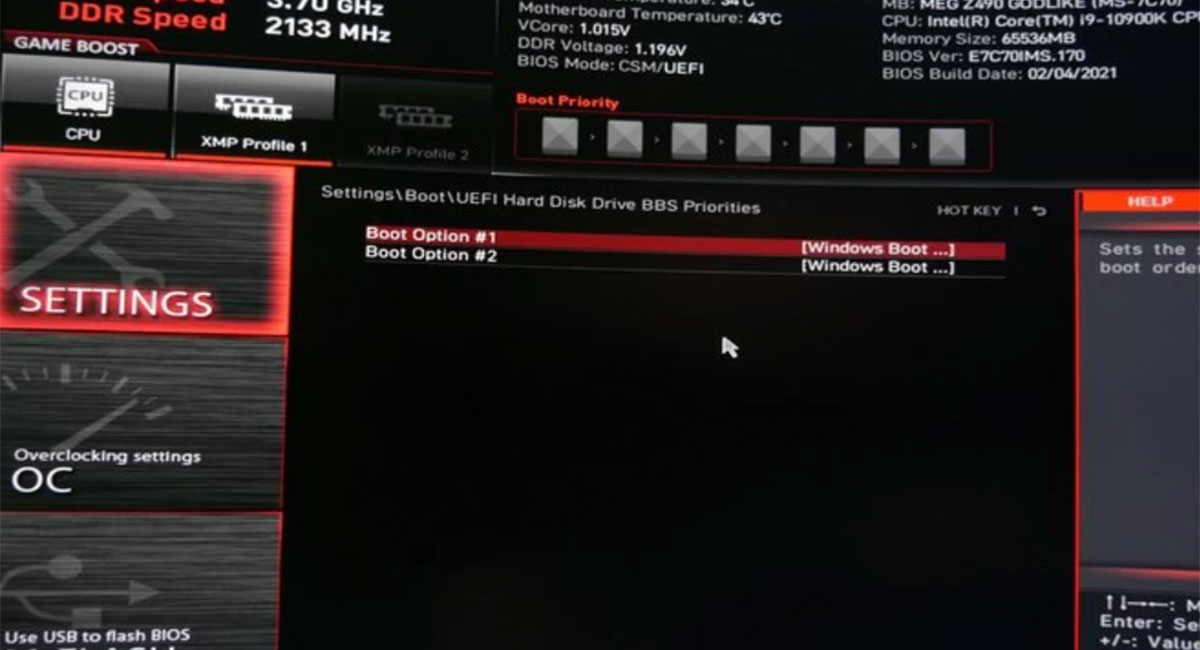 With two identical versions of Windows on different drives in the device, you will probably see that both drives are listed.
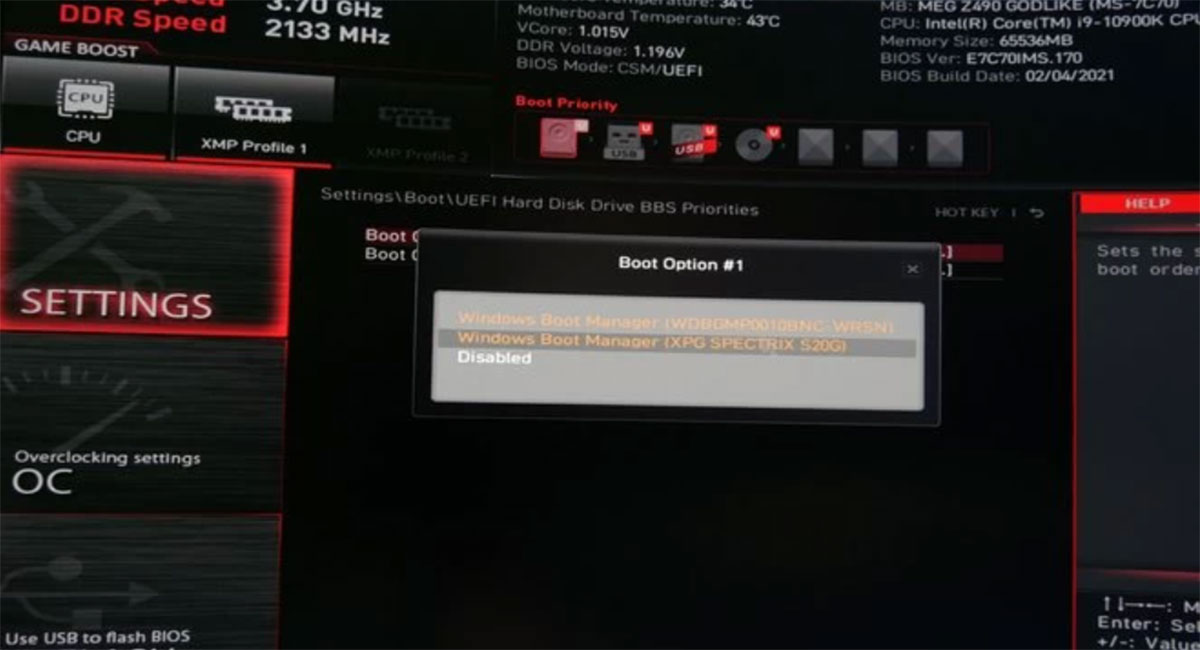
All you have to do now is set the boot option (boot option # 1) on the new drive and make sure it is used as the first drive to boot the System. You should remove another drive from the list and turn it off.
After completing this step, click the Save Changes Button and exit the BIOS. This will restart your computer and try to load Windows.
Congratulations. You now have a new drive with the usual Windows settings installed, and you can use it easily. You can also format and use the previous drive for other tasks, such as saving the required files or deleting them entirely from the System.
Important Note
Remember that simulation does not save your drive from trouble. For example, if a virus infects your device and destroys it, you can clone it to a new drive and infect it again.
Sometimes, you can speed up your device by installing a a new version of Windows and deleting all the old files and other unwanted items on your drive; you may be in a situation where your device needs to do so.
The simulation method is generally very efficient, and you can easily use it to prevent File deletions and even Windows. Do you know any other software that does this? Please share its name with us in the comments section.
FAQ
What does “hard-disk simulation” mean in this context?
It refers to creating a virtual-disk image (e.g. a VHD or VHDX file) or cloning a physical drive so the entire contents — OS, files, partitions — are replicated in a different storage medium.
Can I move my Windows system to a new HDD/SSD without reinstalling?
Yes — by cloning the original disk or converting it into a virtual-disk image, then applying that image onto the new drive; this carries over Windows, installed applications, and settings intact.
Are there tools to help with this kind of transfer?
Yes — utilities like Disk2vhd can convert a physical disk into a virtual-disk file (VHD), which you can then deploy or restore; similarly, disk-cloning software supports full system migrations to another disk.