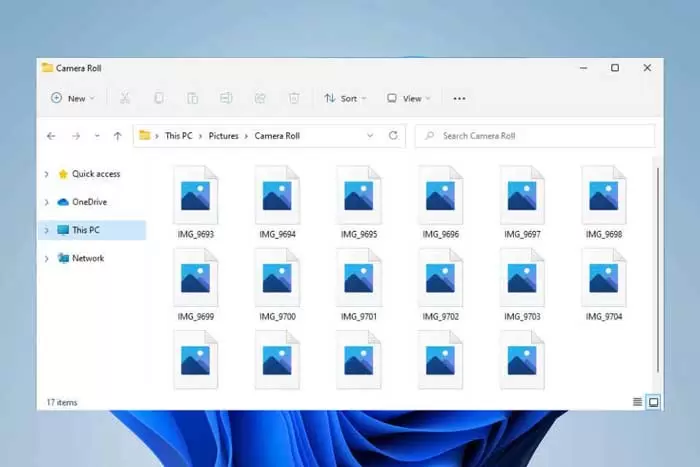
How to fix Windows 10 and 11 Thumbnails not showing Issues?
Thumbnails play an important role in helping to identify content within image and video files. However, Windows 10 and 11 interfere with their display for various reasons. Older versions of the operating system had the same problem.
In most cases, you’ll see empty thumbnails due to misconfigured File Explorer (formerly Windows Explorer) settings or the thumbnail cache. But rarely can you encounter something as bad as a malware infestation.
Note: Due to its design, Windows 11 can display thumbnail images of folders. For this reason, the following solutions will only help you to preview files in the latest Microsoft operating system.
Check the folder view settings.
The first thing you should do is check and see if Windows 11 or 10 is set to show thumbnails in File Explorer. You can also do this through the File Explorer Options dialog.
1- Select the icon or the search box in the taskbar and type File explorer options.
2- Select Open.
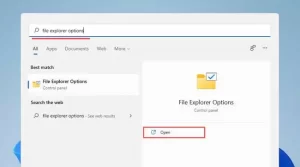
3- Go to the View tab.
4- Remove the check box next to Always show icons, never thumbnails.
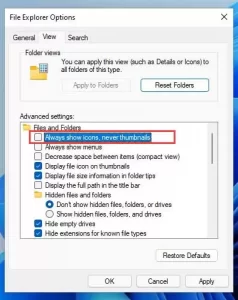
3- Select Apply and then OK.
If you had to enable the option mentioned in step 4, File Explorer should generate thumbnails immediately. If you don’t have to do this, try the other solutions.
A forced restart of File Explorer
File Explorer can generate bugs for no reason, and its performance can be disrupted. The fastest way to fix this problem is to restart it using Task Manager.
1- Press Shift + Ctrl + Esc to open Task Manager.
2- Select More details (if needed) to open the default Task Manager view.
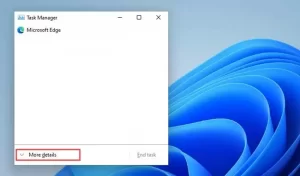
3- In the Processes tab, find and select Windows Explorer.
4- Select the Restart button to restart File Explorer.
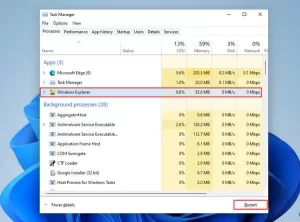
5- Exit Task Manager.
If the image or video files (and folders in Windows 10) still appear empty, you need to restart the operating system.
Clear the cache of thumbnails
If the thumbnails are still not showing, you are most likely dealing with a corrupted thumbnail cache. Clearing it will help File Explorer rebuild the preview images from scratch.
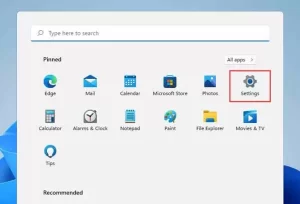
1- Open the Start menu and select the Settings option.
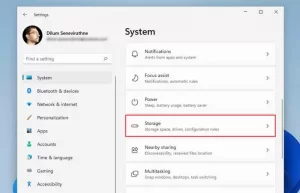
2- Select System > Storage.
3-Select Temporary Files.
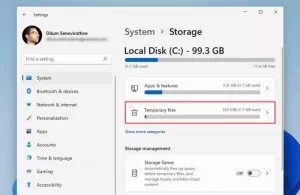
4- Check the box next to Thumbnails and select the Remove files option.
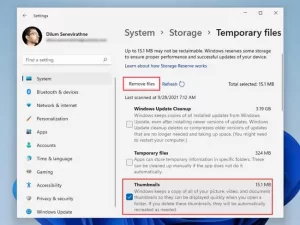
5- Finally, restart your computer.
Clearing the cache of thumbnail images (second method)
If you’re having trouble clearing the thumbnail cache with Storage Settings in Windows 11 or Windows 10, try this alternative method that involves the old Disk Cleanup program.
1- Press Windows + R to open the Run box.
2- Type cleanmgr and select OK.
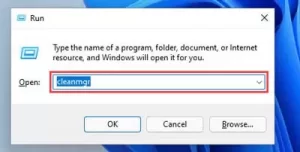
3- Check the box next to Thumbnails.
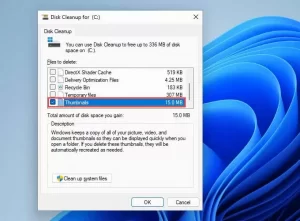
4- Select OK.
Returning the default settings of File Explorer to the previous state
Returning File Explorer’s View settings to their defaults may resolve issues that prevent thumbnails from displaying correctly in Windows 11 and 10.
1- Search and open the File Explorer Options dialog box.
2- Go to the View tab.
3- Select Restore Defaults.
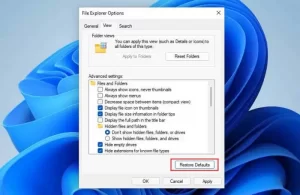
4- Apply and then select OK.
Open the File with the default program.
If the problem is with a specific image or video format, running it with a different default program may fix it. Make the File open with one of Microsoft’s native programs.
1- Right click on any file with the desired file format and click on Open with.
2- Select Choose another app.
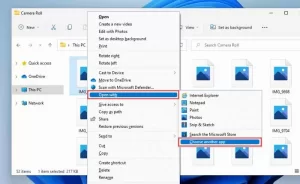
3- Select a native app like Photos (for photos) or Movies & TV (for videos).
4- Check the box next to Always use this app to open files.
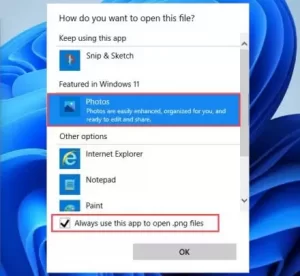
5- Select OK.
Install the relevant codecs
Image and video files of unsupported formats in Windows may not display thumbnails. You can fix this problem by installing the relevant codecs.
For example, the iPhone’s default HEIC image format won’t display thumbnails in Windows unless you install HEIC image plugins.
On the other hand, K-Lite Codec Pack (Download) can help you with unusual video formats.
Update graphics drivers
Old graphics drivers cause performance problems and interfere with the proper functioning of various Windows functions (thumbnail previews). To get the latest version of the driver, contact the graphics card manufacturer’s website (such as NVIDIA or AMD) or use the free driver update tool to update.
It’s also good to check Windows Update for any Microsoft-approved display driver updates.
1-Open the Settings app.
2- Select Windows Update.
3- Select Check for updates. After Windows Update finishes, select Advanced Options. In Windows 10, select View optional updates and skip the step.
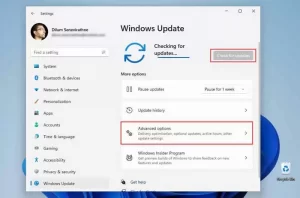
4- Select optional updates.
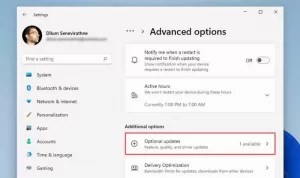
5- Select each display driver update and click on Download & install.
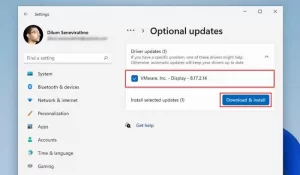
Although you probably know it yourself, we recommend that you get the latest updates for Windows itself. These updates usually fix system feature bugs and maybe help fix File Explorer problems forever.
Run an SFC scan
Scan using System File Checker. It is a command line tool that helps to solve possible problems related to file corruption in Windows 11 and 10.
1- Press Windows+X and select Windows Terminal (Admin) or Windows PowerShell (Terminal).
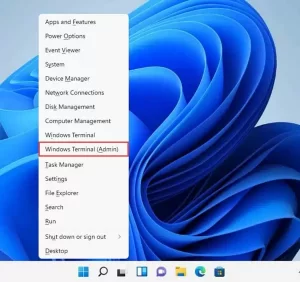
2- Type the following command code:
SFC /scannow
3- Press Enter.
The SFC scan usually takes some time to complete. If this scan finds and fixes the problems, it is better to continue running the DISM (Deployment Image Service and Management) tool.
Run an anti-malware scan
If the problem of not displaying thumbnails continues or reoccurs, you are probably dealing with a file hijacker in Explorer. Use Windows Security to scan your computer for malware thoroughly.
1- Search for Windows Security and open it.
2- Select Virus & threat protection.
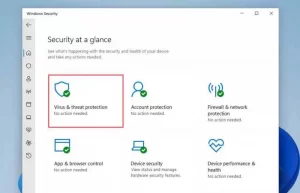
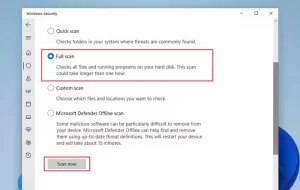
3- Go to the Virus & threat protection settings section and install any pending anti-malware updates; Then scroll up and select Scan options.
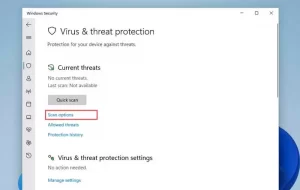
4- Tick the radio button next to the Full scan.
5- Select Scan now.
Alternatively, you can use a dedicated malware remover such as Malwarebytes to find and remove dangerous malware in various forms.
File Explorer displays thumbnail previews.
A Thumbnail preview is really necessary if you work with images and videos. We hope the above solutions have helped you and File Explorer will display them correctly again. This feature is essential and worth the time to fix the problem. If the problem reoccurs, proceed through the solutions above.
