Learning How to Activate and Use the Laptop Microphone for Sound Recording in Windows
The Laptop Microphone Is One Of The Essential Components Of A Laptop Or PC, Especially When You Have To Use It In Voice Or Video Calls. Does your laptop have a microphone, and how do you enable it?
In this article, we discussed methods for detecting the presence of a microphone in a laptop. After that, we learned how to activate the laptop microphone in Windows 11, 10, and 7.
The Microphone is one of the essential input devices for laptops and computers. With this vital component, you can communicate with others.
For example, the Microphone has become an essential tool for making video calls and a necessary part of the lives of professionals and students when conducting online classes.
Detecting the presence of a microphone in the laptop
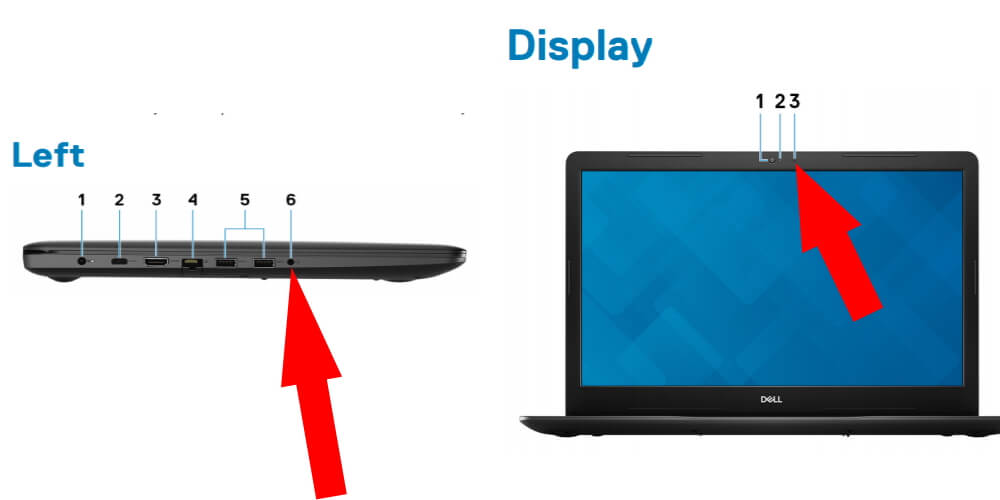
This section of the tutorial on activating the laptop microphone will help you determine whether a Windows computer or notebook has a microphone. To do this, press the Windows key.
In the Windows search box, type Control Panel and press the Enter button. Or open the Start Menu in Windows 10 or 11. From this menu, select Windows System and then Control Panel.
Click Hardware and Sound in the left menu in the Control Panel section. Then click on Manage audio devices on the right side of the screen. You can also directly click on the Sound option.
Click on the Recording tab at the top of the page that appears. At this stage, if you have an internal or external microphone, the microphone icon will be displayed in the middle of the screen.
How to activate the laptop microphone in Windows 11
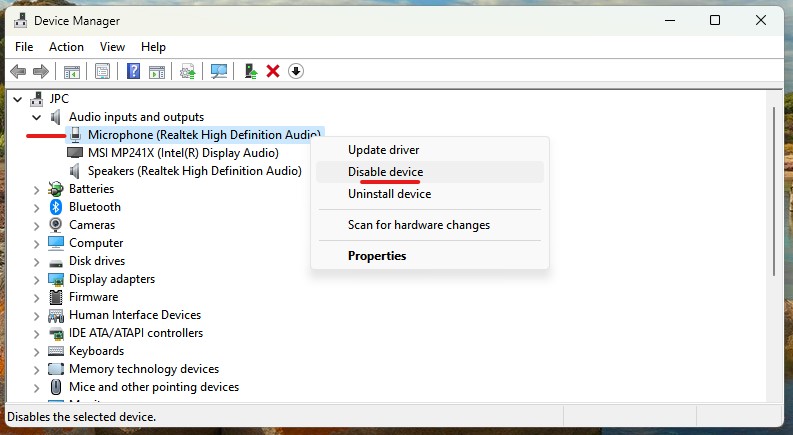
Click the Win button to activate the Windows 11 microphone. Then, search for and open Device Manager. Open the Audio Inputs and Outputs section. Right-click on the Microphone and then select Enable device. If the Microphone is enabled, you will see Disable device instead.
Another way to fix the Windows 11 microphone problem is to press the Windows button. Then, search for and open the Change system sounds. Click the Recording tab, then select your desired Microphone or Headset. Then click on Properties.
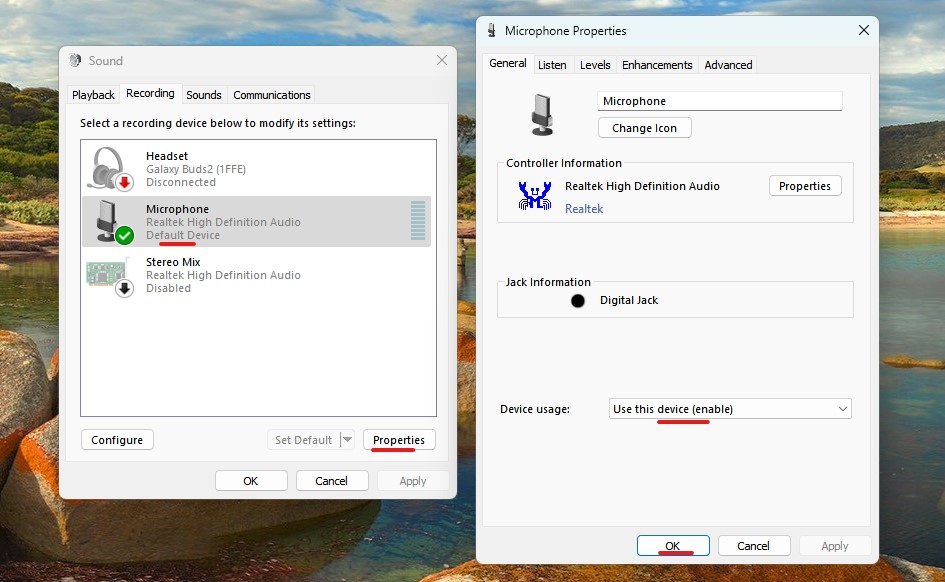
The second method is suitable when you connect several microphones to your system, but your computer cannot select the desired microphone. Check the Device usage section. You should see the message Use this device (enable). If it is not set, click the menu and fix it. Finally, click Apply and OK.M
Activate the laptop microphone in Windows 10
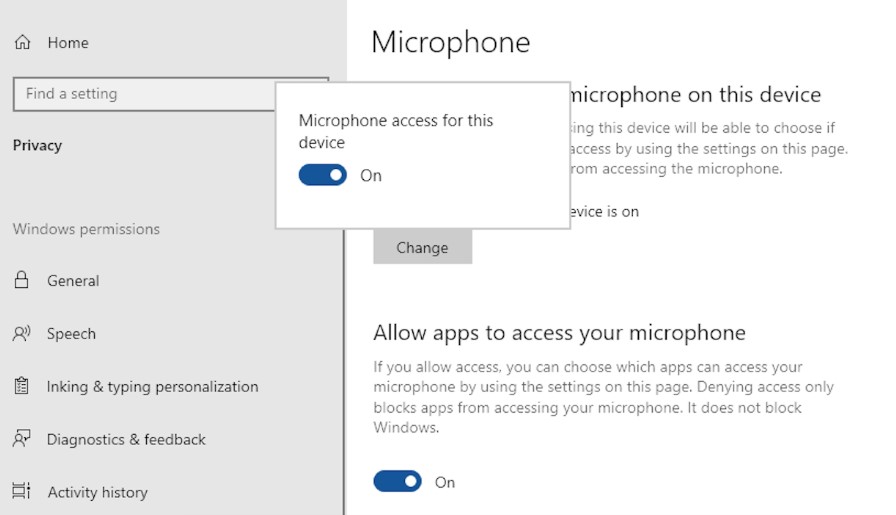
To activate the Microphone in Windows 10, as in Windows 7, on the keyboard screen, press the key with the Windows logo. Then search for the word “Microphone” in the search bar. A window will appear. Select the Microphone Privacy Settings option.
Press the Windows key on the keyboard and search for the word “Microphone”. After that, like the Microphone Privacy Settings option, allow the laptop to access the Microphone.
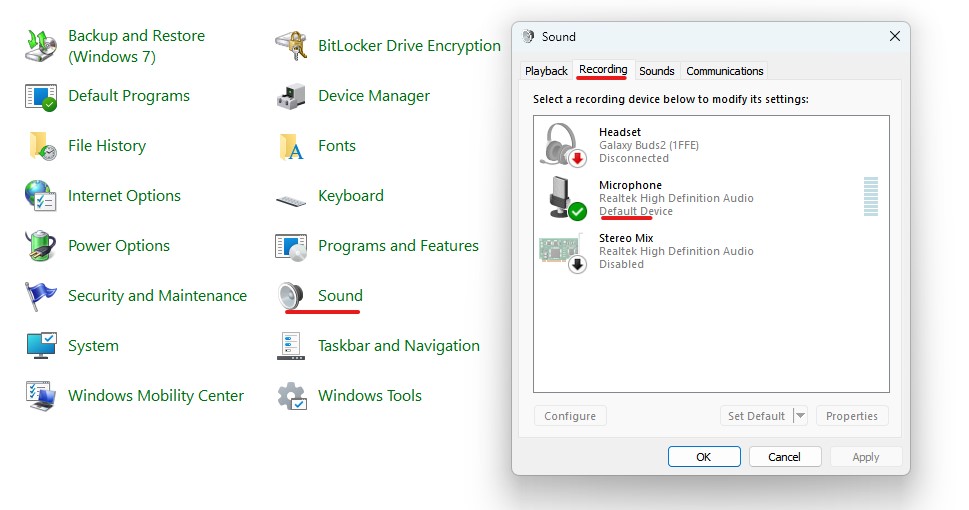
The Microphone may not be set as the default device in your Windows. If you tried this method, your microphone still didn’t work. Try another method. On the screen, click the speaker icon. Then tap the Sounds option.
In the window that opens, select the Recording option. From the Select a recording device list below, modify its settings, then select the Microphone option and click Set Default.
How to activate the laptop microphone in Windows 7
To activate the Microphone in Windows 7, go to Start> Control Panel. Click on the Hardware and Sound option in the control panel. Go to the Manage Audio Devices section, as shown below. A window will appear. In this window, select the Recording tab.
You will see a list of audio-sending devices when you visit this tab. As you make a sound and speak, you’ll see a green bar oscillate on one of these devices. This means that the device is active.
Click on the device you want to select. Then select the Set Default button, as shown in the image below. If you see the green bar oscillating, your Microphone is configured correctly.
Click on the desired device again. After this, a window will appear. In this window, go to the Levels tab. Then adjust the volume and click OK.
Summary
As mentioned, the Microphone is a functional component of a laptop or computer, and its failure causes problems for users. In the tutorial on the laptop microphone, we first discussed how to detect the microphone on the laptop, and then how to enable it in Windows. Below, we answer some frequently asked questions.
FAQ
How do you enable a laptop microphone in Windows?
Open Sound Settings, select Input, and choose your microphone to activate it.
Which tool can you use to record sound in Windows?
Use Voice Recorder or similar built-in apps to capture audio easily.
Why check microphone levels before recording?
Adjusting input levels ensures clear audio without distortion or low volume.