
How to Install Python on Different Operating Systems — Including Anaconda, macOS, and Linux
Install Python On Anaconda, Mac, And Linux; Python Plays A Role Similar To The French Wrench In The World Of Information Technology And Can Be Used In Almost All Fields Of Technology.
This issue has led experts across fields such as artificial intelligence, security, networking, web, and mobile to use Python to perform their work.
This article will teach how to install Python in different environments.
Install Anaconda and Python
In this article, we use Python to learn about the machine. Accordingly, installing Python and integrated development environments on our computer system is necessary. Anaconda Distribution is a free, open-source Python and R programming-language distribution.
This distribution can be easily installed on any operating system, including Windows, Linux, and macOS. It provides more than 1,500 data science packages for R and Python programmers to develop deep learning and machine learning models efficiently.
Anaconda distribution possibly installs Python, which integrates with various development environments such as Jupyter Notebook, Spyder, Anaconda Prompt, etc.
Anaconda automatically installs Python, its core integrated development environments, and associated libraries. Hence, it is an efficient packaged solution you can download and install on your system. Here are the steps you need to download and install the Anaconda package and integrated development environment:
Step 1: Download Anaconda Python
- To download Anaconda on your system, open your favorite browser, type Download Anaconda Python, and click the link. We suggest you use the following direct download for this purpose:
https://www.anaconda.com/distribution (Link)
After clicking on the link above (or the first link), you will reach the Anaconda download page, as shown in the image below:
- Since Anaconda is available for Windows, Linux, and macOS, choose the option compatible with your operating system and the choices shown in the image below.
Step 2: Install Anaconda Python (version 3.8)
- When the download is complete, click the Anaconda3-2020.07-Windowsx86_64.exe file to run the Anaconda installer.
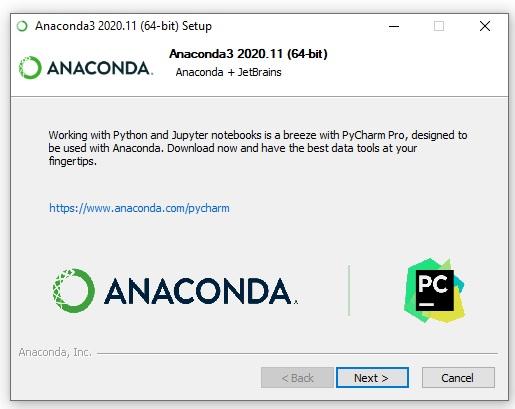
- It will open the Anaconda installer window, as shown below. Now click the Next button.

Next, click the I Agree License Agreement option to see the following window.

You must select two installation options in the next window, as shown in the image below. Select the first option (Just me) and click the Next button.

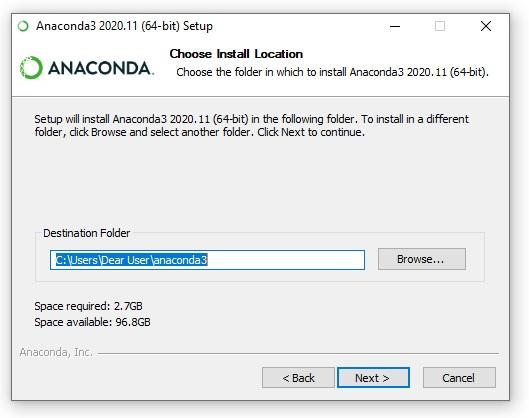
You will now see a window asking for the installation location. Select the default option and click the Next button without changing the installation path.
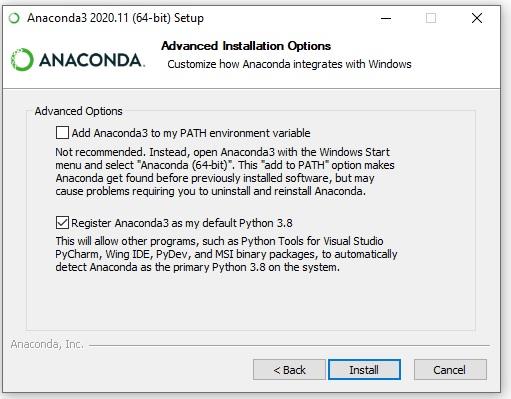
Select the second option, then click the Install button in the next step.
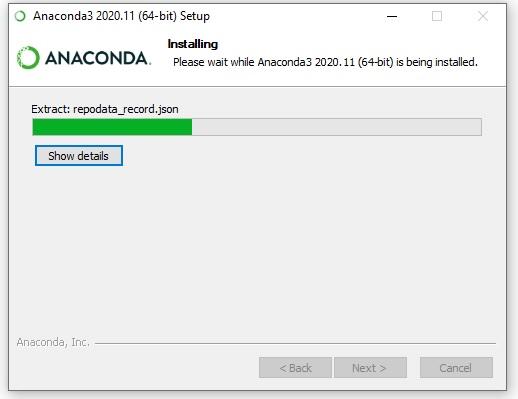
It will start the installation process. Fortunately, this process is not time-consuming and will be completed very soon.
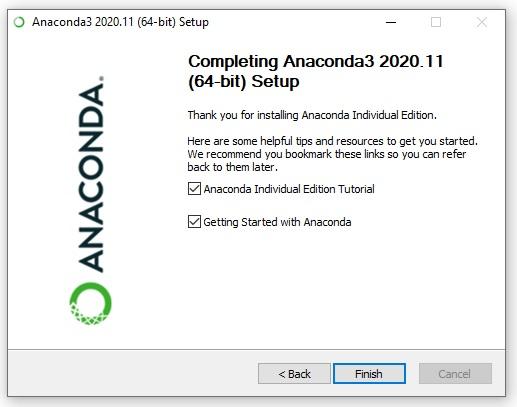
When the installation is complete, click Next.
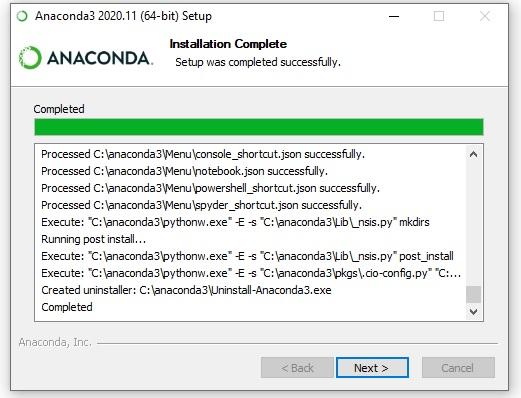
- The installation is now complete. Check the box to get more information about Anaconda and Anaconda Cloud. Click the Finish button to complete the installation.
Note: We use Jupyter Notebooks to run Python applications.
Step 3: Open Anaconda Navigator
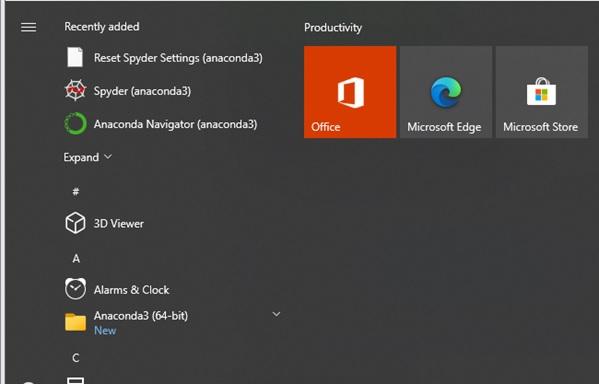
- Once the Anaconda installation is complete, use Anaconda Navigator to launch an integrated development environment (IDE) such as Jupyter Notebook. Click the Start menu in Windows 10 to open the Anaconda Navigator and click the Anaconda Navigator option.
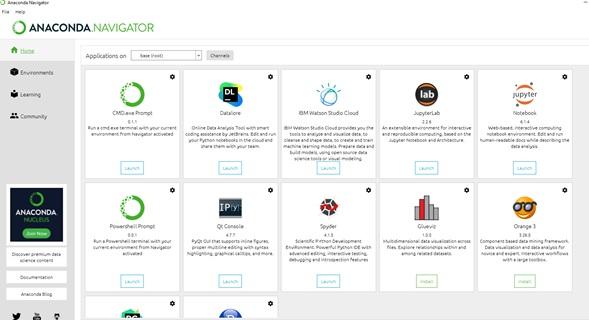
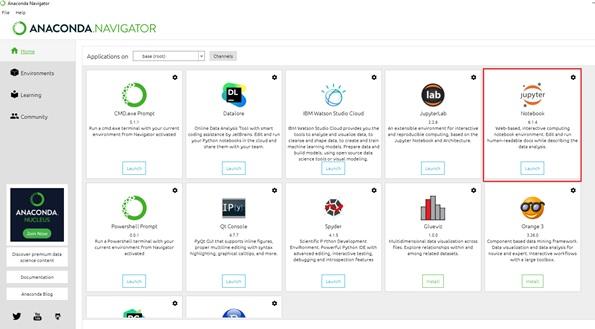
- You will see a window like the one below, which provides access to the tools Python programmers and data science experts need.
- In the preview window, click the Lunch button at the bottom of the Jupyter Notebook. It will run Jupyter Notebook with a browser-centric interface. This interface provides an interactive environment for performing calculations. Note that clicking on the button above will show a window for selecting the browser in which Jupiter Notebook is to be run.
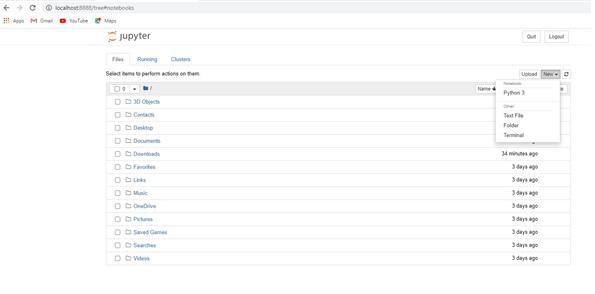
- Now, you need to run the Python interactive environment to be able to write your Python applications in the Jupyter Notebook. To do this, click the New button on the right side of the image and select the Python Three option. Clicking the button above will run Jupyter Notebook, as shown below.
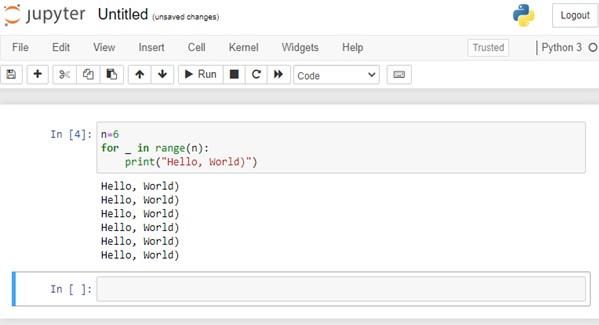
- Write the code in the cell shown. Then click the Run button (the triangle icon) to run the program.

- The output of the command you type is displayed in the lower window.
Working with Mac
If you are using a Mac, you probably already have Python installed. However, you may install an older version on your system, or Python may remove it for some reason. For example, Leopard (OS X 10.5) uses an older version of Python 2.5.1. This particular version does not have direct access to the IDLE program.
Depending on how you use Python, you may need to upgrade your installation. Part of that process involves installing the GNU Compiler Collection tools so that Python can access the low-level resources it needs. Follow the steps below to install the new version of Python on Mac OS X.
1. First, go to https://www.python.org/downloads/macos (Link)
2. Click on the appropriate link for the Mac version. We recommend selecting the 64-bit version. We recommend you click on Python 3.10.4 – March 24, 2022, the latest version of this article released for the Mac.
Clicking the link above starts downloading the Python image. Wait for the download to finish. Your Mac will automatically open the image disc when the download is complete.
The disk image looks like a folder. Inside this folder are many Wi-Fi files, including Python files. Pkg. You see the Python—pkg file, which contains the Python program. Text files contain information about the build, license, and any notes associated with your downloaded version.
3. Double-click on Python. Pkg.
You’ll see a welcome dialog box about this particular Python build.
4. Click Continue three times.
The installer displays notes about Python, such as license information (click Agree when prompted), and a dialog box that specifies the destination.
5. Select the volume, hard disk, or media on which Python will be installed and click Continue. The Installation Type dialog box appears. This dialog box does two things:
- Click Customize to change the installed feature set on the system.
- If you want to install Python in a location other than the default option, click the Change Install Location button.
6. Click Install.
The installer may request the administrator’s password. Enter the administrator name and password in the dialog box, then click OK if necessary. You will see a Python installation dialog box. The contents of this dialog box update as the installation progresses, providing information about the installer’s activities. After installation is complete, you will see the “Install Succeeded” dialog box.
7. Click Close.
Python is now ready to use. (At this point, you can close the disk image and delete it from your system.)
Working with Linux
Some Linux distributions include Python. For example, suppose you have a Red Hat Package Manager (RPM) -based distribution (SUSE, Red Hat, Yellow Dog, Fedora Core, and CentOS). In that case, you probably already have Python on your system and do not need to do anything special.
Depending on the Linux distribution you are using, the Python version may differ, and some systems do not include the Python IDE (IDLE). If you have an older version of Python (2.5.1 or earlier), we suggest installing the latest version to access IDLE.
You have two techniques for installing Python on Linux, both of which we will explore. The first technique works on any Linux distribution, while the second requires you to follow specific criteria.
Using the standard Linux installation option
The standard Linux installation option works on any system. However, you must work in a terminal and type commands to complete it. Some orders must be adjusted based on the Linux version. See https://docs.python-guide.org/starting/install3/linux (Link) for more information.
1. First, go to https://www.python.org/downloads/source (Link).
2. Select the appropriate option for the Linux version.
3. When asked if you want to open or save the file, select Save. Python source files start downloading. Be patient until all files are downloaded.
4. Double-click on the downloaded file. The Archive Manager window opens. Unzip the file to see the Python folder in the Archive Manager window.
Double-click the Python folder. The archive manager opens the files under the Python folder.
6. Open a terminal window. If you have not installed the software, you must install Build Essentials, SQLite, and bzip2; otherwise, the Python installation will fail. If there are basic requirements, go to step 10.
7. Type sudo apt-get install build-essential, and press enter. Linux begins the Build essentials required to build packages. See https://packages.debian.org/sid/build-essential (Link) for more information.
8. Type sudo apt-get install libsqlite3-dev, and press enter. Linux installs the SQLite database required by Python. See https://packages.debian.org/squeeze (Link) for more information.
9. Type sudo apt-get install libbz2-dev and press the Enter key. Linux installs the required Python bzip2. See https://packages.debian.org/sid/libbz2-dev (Link) for more information.
10. Type CD Python 3.3.4 (note that you must enter the correct folder name during installation) in the terminal window and press Enter. The terminal changes directories to a Python 3.3.4 folder on your system.
11. configure /. Type and press the Enter key.
A script is run to check the system, and then a series of background tasks are performed on your system. This process may take a minute or two due to the extensive list of items to review.
12. Type make and press Enter. Linux runs the make script to build the Python application. The build process may take up to a minute, depending on your system is processing speed.
13. Type sudo, make alt install, and press Enter. At this point, the system may ask you for an administrator password. Type the admin password and press Enter.
Installation via Linux Graphical Interface
All versions of Linux support the standard installation mentioned above. However, some versions of Debian-based Linux distributions, such as Ubuntu 12. x and later also offers a graphical installation technique. This method would help if you had the admin group password (sudo).
The following describes the graphical installation technique for Ubuntu, but this technique can be used on other Linux distributions :
- Open the Ubuntu Software Center folder. (The folder may be called Synaptics on other platforms.) You can see a list of the most popular software available for download and installation.
- Select Developer (or Development) tools from the All Software drop-down list box, and you will now see a list of development tools, including Python.
- Double-click the Python 3.3.4 entry. Ubuntu Software Center provides details on Python 3.3.4 and recommends installing it.
- Click Install. Ubuntu begins the Python installation process. In this case, the progress bar shows the installation progress. Once the installation is complete, the Install button changes to the Remove button.
- Close the Ubuntu Software Center folder. The Python icon has been added to the desktop, and you are now ready to use Python.
FAQ
What is the easiest way to install Python with an environment manager?
Installing the Anaconda distribution gives you Python plus conda (a package and environment manager) for Windows, macOS, and Linux in one bundle.
How do I install Python on Windows?
Download the Python installer from the official site, run it, check Add Python to PATH, and follow the setup wizard, or install Anaconda to include Python with tools and package management.
How do I install Python on macOS or Linux?
macOS users can install Python via the official installer or Homebrew (brew install python), and Linux users use the package manager (sudo apt install python3 on Debian/Ubuntu), or install Anaconda by running the downloaded installer script.