
Private Mode: How To Change Your Network From Public To Private Mode In Windows 10?
If You Want To Connect Multiple Devices On Your Internal Network Using Wi-Fi Or Ethernet Cable, You Need To Change The Network From Public To Private.
Public To Private Mode: In The Following, We Will Teach You How To Change The Network In A Few Simple Steps.
Note that setting up a network connection to Private does not enhance security or privacy; Changing a network to Private makes it recognizable to other devices on the web. Therefore, only do this for trustworthy networks.
How can the Network be changed from Public to Private Mode?
After connecting to the Wi-Fi network, follow the steps below to change it from Public to Private.
Note: You must be logged in as an Administrator to change the Network from public to private or vice versa.
1. Select the Wi-Fi icon in the Windows taskbar. Select the up arrow to display the options if you do not see the icon. 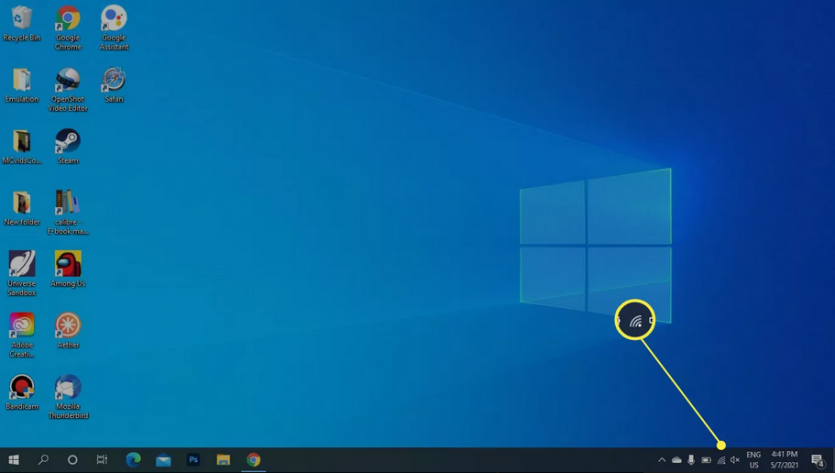
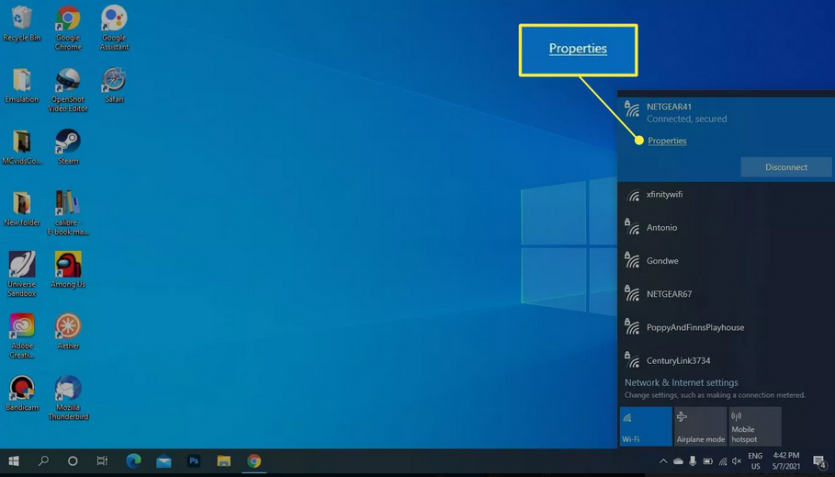
2. At the bottom of the Properties network, select Wi-Fi.
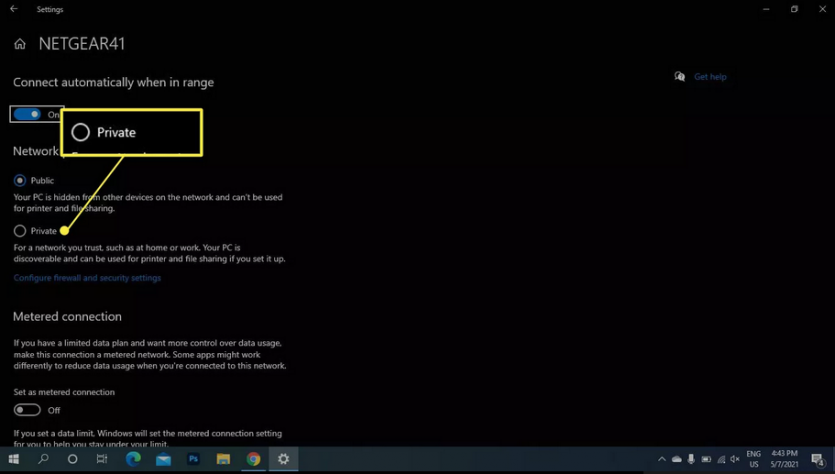
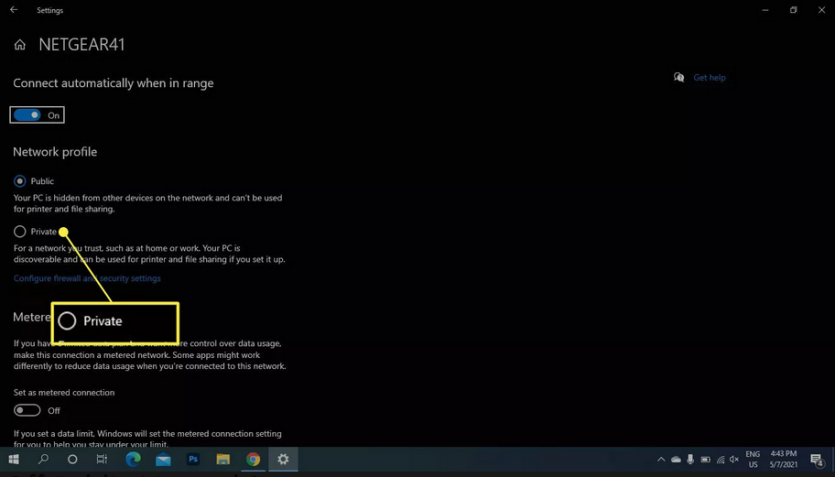
3. At the bottom of Private, select Network Profile.
4. Close the Setting window. Changes will take effect soon.
Set up a network to Private if connected via Ethernet
The process is slightly different when connecting to the Ethernet cable network. You can also apply this method when connecting to Wi-Fi.
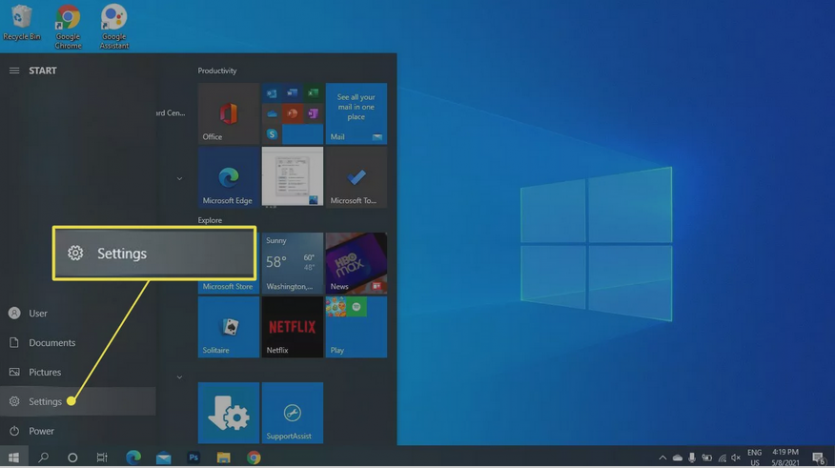
1. In the Windows start menu, select setting.
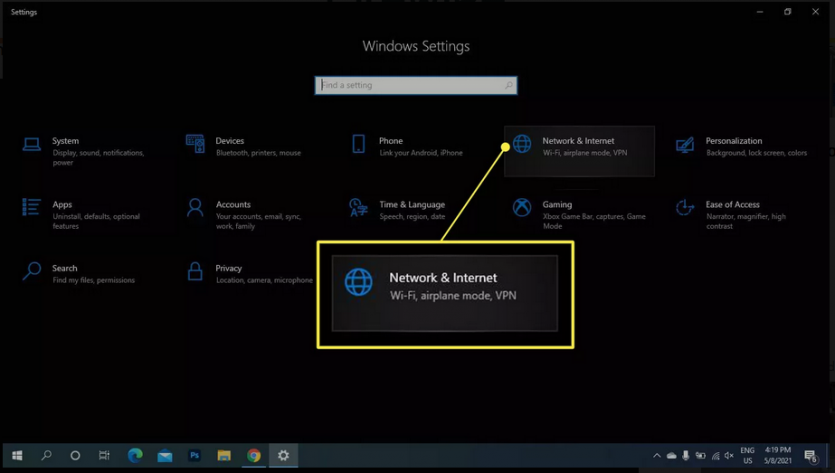
2. In the Windows setting, select Network & Internet.
3. At the bottom of the Properties network, select Ethernet.

4. At the bottom of Private, select Network Profile.
5. Close the Setting window. Changes will take effect soon.
How to disable Public Network?
When you connect to a new Wi-Fi network, its mode is set to Public by default. It would help if you changed Network Properties to turn off this feature.
Setting the Network to Public or Untrusted ensures that other devices on the web can not access your computer. When using a Public Wi-Fi Hotspot, we recommend keeping your connection in Public mode.
Frequently Asked Questions
- How do I change my Windows 7 network from public to private? If you are using Windows 7, right-click on the Network icon in the Windows taskbar. Then select Open Network and Sharing Center. Under View Active Networks, click on the Network you are using. You will have three choices: Public Network, Home Network, and Work Network. Select Private Network, Work Network, or Home Network.
- How do I change my Network from Public to Private in Windows 8.1? If using Windows 8.1, open the Charms Bar and select Change PC Settings. ClicNetworkrk to see active connections, then enable Find Devices and Content. This changes Networkwork from Public to Private because this option is unavailable for Public networks.
Connecting a Windows 10 PC to the Internet When you first connect a Windows 10 PC to the internet, you’ll be prompted to choose a network type. This setting helps Windows determine the appropriate security and sharing permissions when using Wi-Fi, Ethernet, or a USB modem.
You can select either a public or private network, depending on your location and purpose. Below is an explanation of these network profiles and how to switch from public to private if needed.
Public vs. Private Networks on Windows 10
- Private Network: Ideal for trusted environments like home or work. Devices on the same network can discover each other and share files or printers.
- Public Network: Designed for public spaces like coffee shops or airports. Device visibility, file sharing, and printer sharing are disabled for better security.
When connecting to a network for the first time, you’ll choose a profile, but this can be changed later based on your needs.
How to Change Your Network Profile from Public to Private in Windows 10
- For a Wireless Network:
- Click the Wi-Fi icon in the taskbar.
- Under the connected network, click Properties.
- Select the Private option.
- Alternatively, go to Start > Settings > Network & Internet > Status, then select your connection and change its profile.
- For a Wired Ethernet Connection:
- Open Start > Settings > Network & Internet > Ethernet.
- Select the Ethernet connection name and choose Private under Network Profile.
- You can also right-click the Ethernet icon in the taskbar, select Open Network & Internet settings, and adjust settings from there.
Customizing Advanced Sharing Settings Private and public networks offer specific sharing options:
- On a Private network, network discovery is enabled by default, allowing devices to connect and share files or printers. You can disable this via the Network and Sharing Center.
- On a Public network, sharing and discoverability are off, which is safer in untrusted environments.
Switch to a Public network when you don’t need to share files or devices to enhance security.
FAQs
- Should I choose public or private?
- Use Private for trusted networks (e.g., home or office) to allow sharing.
- Use Public in untrusted places to protect against unauthorized access.
- Why can’t I see other devices on my network?
- Ensure network discovery is enabled under the advanced sharing settings. If it’s still an issue, check your firewall to enable file and printer sharing.
- How can I hide my Wi-Fi network?
- Log into your router’s settings and disable the SSID broadcast in the wireless network options. This hides your network from being visible to others.