
The Priority of Wi-Fi Networks in Windows 10
The priority of Wi-Fi networks in Windows 10 should be changed. Sometimes, we use multiple Wi-Fi networks in the office or at home to ensure no Internet problems. Remember when you could easily prioritize connecting to your Wi-Fi networks in Windows?
As you know, Windows 10 was released with many enhancements and capabilities. In some cases, Windows 10 has returned to functionality that existed in earlier versions of Windows but was removed in recent versions. One such application is the ability to prioritize Wi-Fi networks.
Priority Of Wi-Fi Networks
In the following sections, we will show you how to use this feature.
Use the Command Prompt environment.
Using the Command environment may seem difficult. Contrary to many people’s beliefs, working with this environment is not complicated. To access the Command environment, search for ” cmd from the Start menu. In the list of results, right-click on Command Prompt and select Run as administrator. In this command-line environment, type the following phrase and press Enter.
netsh wlan show profiles
As a result, this Command displays a list of all Wi-Fi networks detected by the computer. To change the order of priority of these networks, you need the exact names of all the networks, so we suggest you write the actual names of all the networks somewhere.
List of all Wi-Fi networks detected by the computer
Now, enter the following Command to prioritize each Network. Instead of using the Wi-Fi name, type the name of your desired Wi-Fi Network. Instead of interface-name, type Wi-Fi, and in the priority field, enter a number based on the number of networks and your desired priority, and press the Enter key.
netsh wlan set profileorder name = ”wifi-name” interface = ”interface-name” priority = #
Change the priority of Wi-Fi networks.
To confirm the changes you want, run the command netsh wlan show profiles again and verify your new prioritization.
New prioritization of Wi-Fi networks
Do you know other ways to change the priority of Wi-Fi networks in Windows 10? Please share them with us.
Managing Wireless Network Priority in Windows
Ensuring your device automatically connects to the right wireless Network is crucial for stable and efficient connectivity. Whether at home, in the office, or switching between multiple locations, controlling Network priority can enhance your experience.
Understanding Wireless Network Priority in Windows
Windows determines which Network to connect to based on several factors, including:
- First-connected networks → Generally prioritized over new connections
- Manual settings → Users can override automatic selections
- Network type preference → Private networks are favored over public ones
- Connection history → Frequently used networks get higher priority
- Signal strength → Windows might connect to a weak but familiar Network instead of a stronger, newer one
However, this automated approach can sometimes lead to suboptimal connections, requiring users to adjust priority settings manually.
Methods to Change Network Priority in Windows
There are two primary ways to manage wireless Network priority:
1. Using Windows Network Settings (Graphical Interface)
Best for: General users who prefer a simple GUI approach. Steps:
- Press Windows + I to open Settings.
- Navigate to Network & Internet > Wi-Fi.
- Click Manage Known Networks.
- Remove lower-priority networks by selecting Forget.
- Reconnect to networks in the desired order to prioritize them.
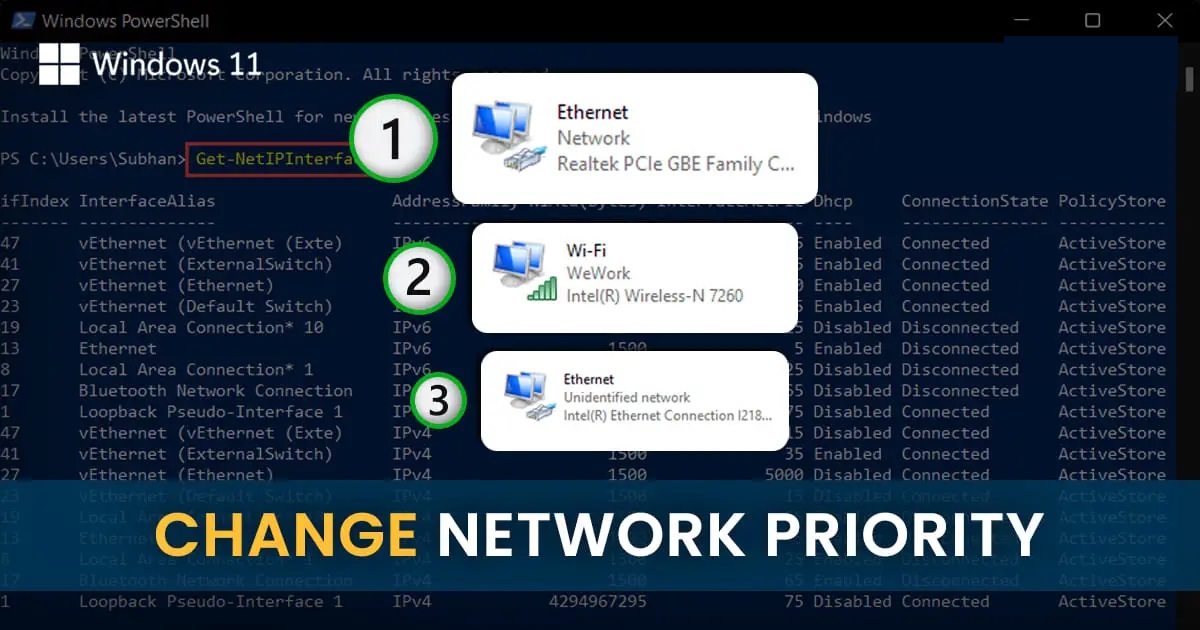
2. Using PowerShell (Advanced Users)
Best for: IT professionals needing precise control over Network configurations. Steps:
- Open PowerShell as Administrator (Press Windows + X, then select Windows PowerShell (Admin)).
- View current Network profiles using:powershell
Get-NetConnectionProfile - Set priority for a specific Network using:powershell
Set-NetConnectionProfile -Name "NetworkName" -NetworkCategory Private -InterfaceIndex 12
Best Practices for Network Priority Management
✅ Regular Maintenance: Review Network priorities monthly, remove outdated profiles, and update settings based on usage. ✅ Security Considerations: Prioritize secure networks, avoid storing credentials for public Wi-Fi, and use authentication methods for saved networks. ✅ Performance Optimization:
- Assign the highest priority to your home and office networks.
- Lower the priority of guest/public networks.
- Consider signal strength when setting priority. ✅ Troubleshooting Tips:
- Ensure administrator privileges when making changes.
- Restart the WLAN AutoConfig service if changes don’t persist.
- Update Network adapter drivers and firmware to maintain stability.
Optimizing Network Priority for Different Scenarios
🏠 Home Office: Prioritize your leading Network while setting secondary priorities for backup connections (e.g., mobile hotspot). 🏢 Corporate Environment: Set a higher priority for the leading business Network, with separate rules for department-specific connections and failover networks. 🌍 Multi-Site Management: Configure regional priorities for traveling employees and implement VPN priority rules for remote access. 🏨 Public Spaces: Adjust network preferences based on Security level, available bandwidth, and congestion scenarios.
Troubleshooting Common Network Priority Issues
❌ Are priority changes not saving? → Ensure admin privileges, restart WLAN AutoConfig, and check for Windows updates. 🔄 Network switching issues? → Verify adapter settings, update drivers, and clear problematic profiles. 📶 Connection instability? → Check for overlapping Network ranges, update router firmware, and optimize channel settings.
FAQ
What does Wi-Fi network priority mean?
It determines the order in which Windows 10 connects to known Wi-Fi networks.
How can you change Wi-Fi priority in Windows 10?
By adjusting network settings or using command-line tools to reorder preferred connections.
Why is Wi-Fi priority important?
Proper priority ensures Windows connects to your most reliable or preferred networks first.