How To Add And Remove Fonts In Google Docs
Did you know that it is possible to choose fonts with different styles in Google Docs? This article will teach you how to find, delete, and add fonts with different styles.
Note that Google Docs offers more font styles. If you need a beautiful script or a font with uniform spacing, finding and managing additional fonts is possible.
How to view font styles in Google Docs
If you want to change the font style in Google Docs, you can easily use the font drop-down box in the toolbar. You need to click on the Font drop-down bar and select More Fonts.
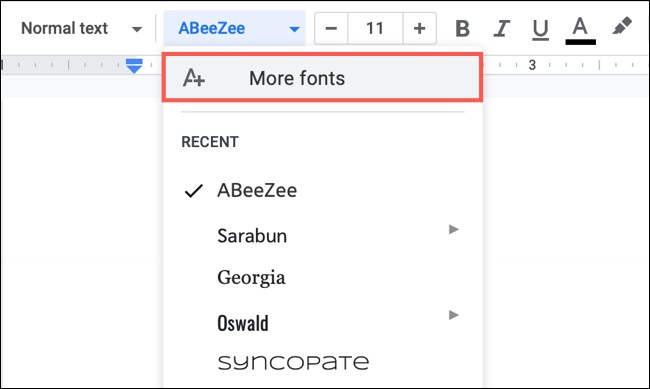
You will then see a pop-up window where you can find or add or even delete fonts in the list.
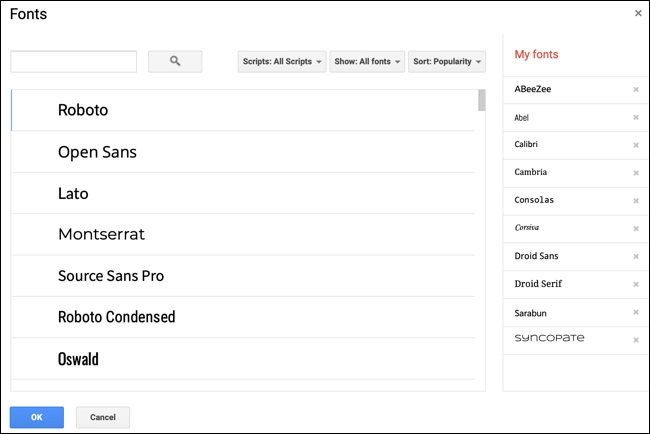
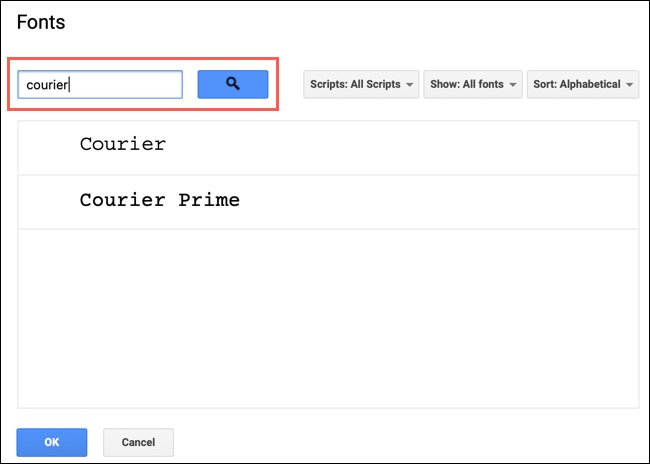
If you have a specific font style in mind, you can use the search box on the top left. It is also possible to search for a specific name.
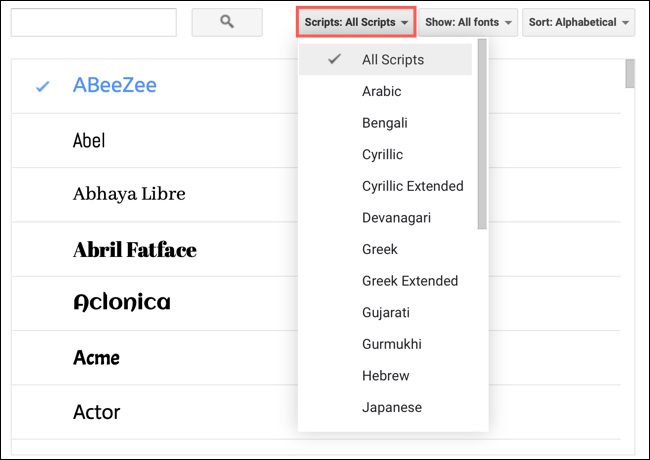
In the first drop-down menu on the right side of the search bar, you can also select fonts for languages that use different writing systems. So if you need Japanese, Greek, or Thai lines, you will definitely find them in this section.
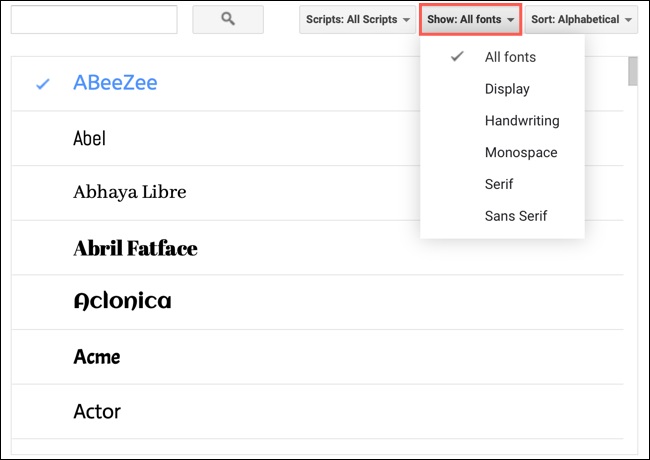
In the Show menu, you can filter font styles by Display, Handwriting, or other options.
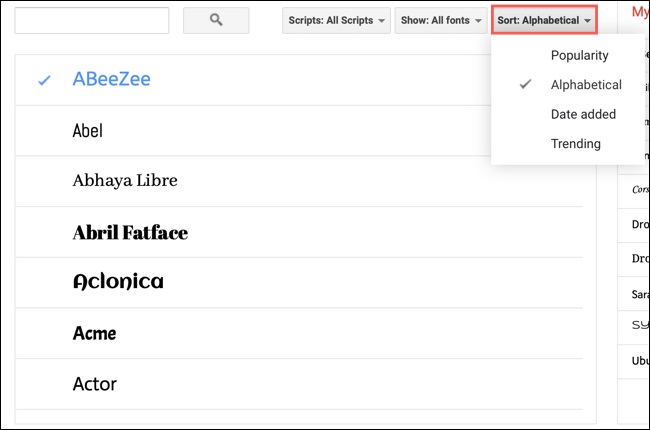
Finally, in the Sort menu, you can sort fonts based on their popularity or other items such as alphabetical order; This is a great way to view fonts that have just been added or are currently the most popular.
How to delete or add fonts to a list
Once you see the font you want to use, just click on it to place a checkmark next to it and add it to the list on the right as My Fonts.
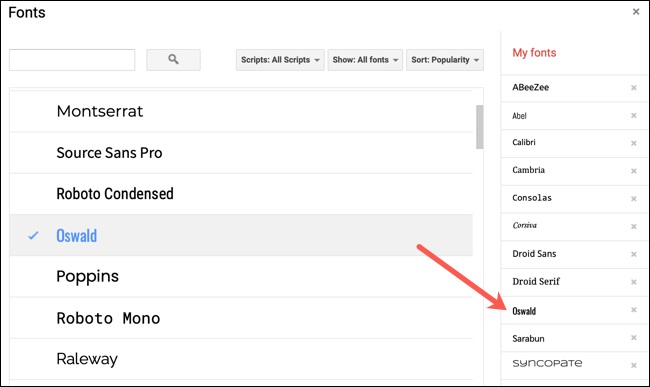
If you want to remove an item from the list, just click on the cross icon next to it.
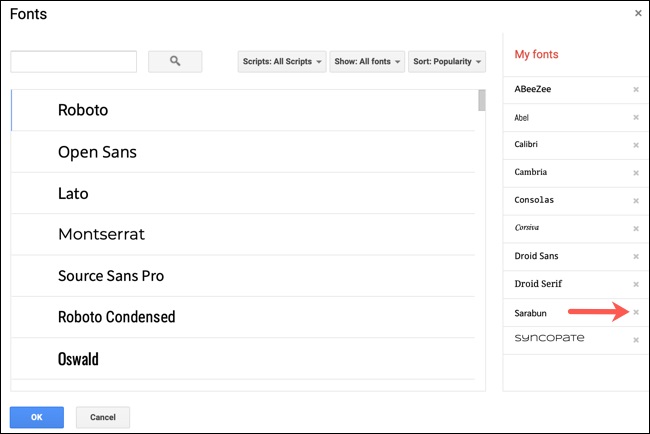
When you have finished adding, finding, or deleting fonts, just click OK. Then You will find the changes you make to the My Fonts list in the Font drop-down box on the toolbar. You must also use the drop-down list to select the font you want to use in the current document.
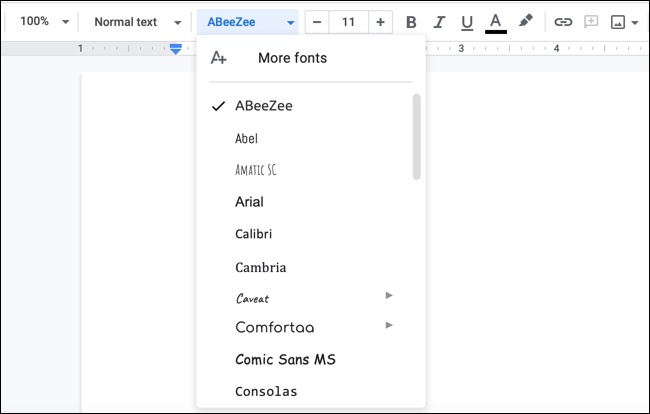
You will probably find fonts like Arial and Times New Roman in the list that cannot be removed. These models are standard font styles by default.
Software Word set of Office, Microsoft is one of the best software for typing papers, projects and types of documents and even books are long, but the benefits of web applications Google Docs that are similar in features can not be ignored. Google Docs is similar to Word and other similar software in terms of editing and typing features, but it also has the ability to share files with others and work on a file and sync.
In this article, we want to get acquainted with the interesting service of Google Docs and its advantages over Word software. Join the planet of verse.
Introducing Google Docs and its important features
Until a few years ago, most users used offline software such as Word to type and edit text documents and used various email services or messaging apps to send files, but now web applications such as Google Docs, Google Sheets, etc. They are used alongside Microsoft Word and Excel, although not all users are familiar with these softwares. In fact, if Internet access is easy to use, it is highly recommended to try this type of web-based software as it simplifies the online work process.
For example, when you create a new file in Google Docs, the file is available to you through Internet browsers on your phone, tablet, and other devices. Just log in to your account and open it. In addition, web applications usually have an add-on for better and easier use. Especially Google services, which all have Android and iOS apps.
Google Docs’ most important and interesting features and web applications, sync or Sync is. The sink is that the latest version and the latest changes with internet access files downloaded If the file changes create new changes Upload is. In this way, the file can be edited from a device with only Internet access.
Familiarity with backup and synchronization by cloud or cloud services
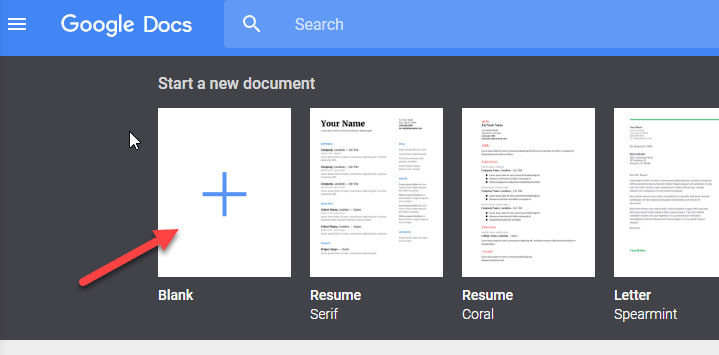
To get started with Google Docs, go to the Google Docs website, log in with your Google Account, and create the first file by clicking on the Blank template at the top of the page, and explore its capabilities.
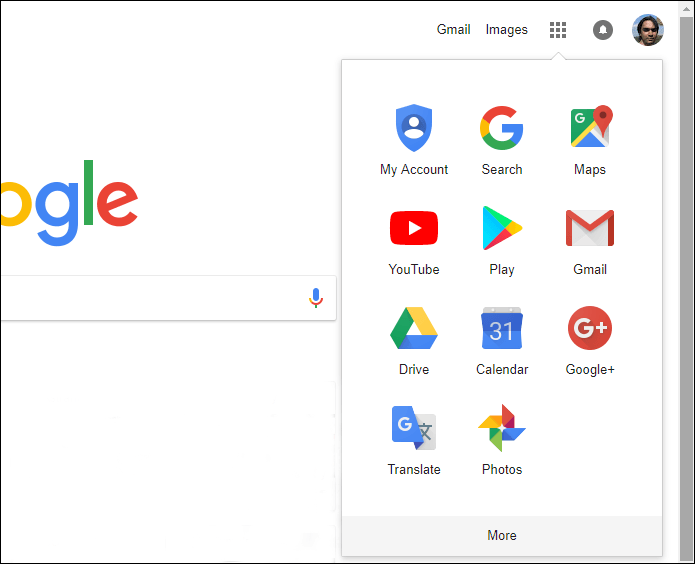
To access Google Docs after entering the main page of the Google website, you can use the apps menu and click Drive.
In Google Drive, various services such as Google Sheets, which is similar to Microsoft Excel, and Google Docs, as well as Google Slides, which is similar to PowerPoint, can be selected from the side panel.
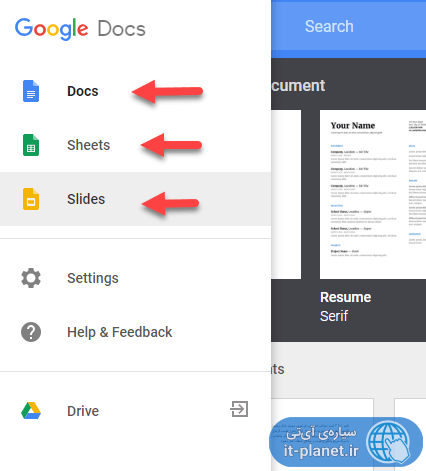
The following is a list of useful benefits and features of Google Docs that encourage any user to use this web application.
Get acquainted (gain, obtain) with present-day techniques that came from Google Docs
Google Docs launches your business without software and online.
This feature, like other services created by Google, is very useful so that you can generate and share the Excel and PowerPoint you want online. How familiar are you with these Google Docs features?
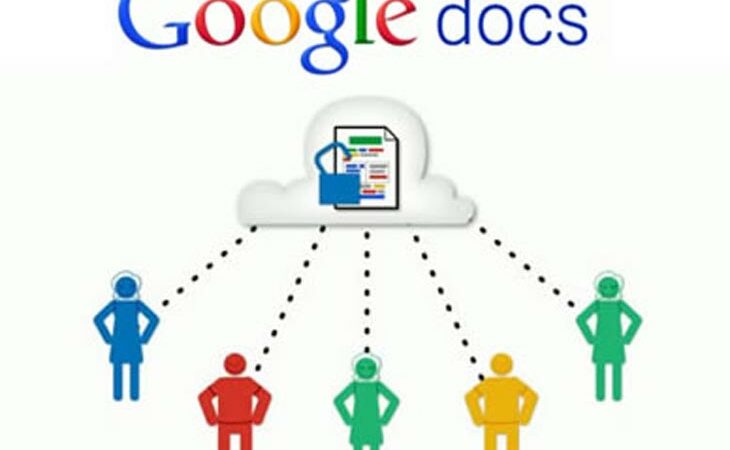
Google Docs is an excellent service in every way, providing you with these free features so you can create all your documents, excel, slides, and more in cyberspace without worrying about losing them. Keep. Sharing this service is such that you can even work on a file as a group. But what you may not know is that Google Docs’ built-in tools and features enable the user to do more in addition to the basic actions on their documents and files. Once you know all these features and tools while working with Google Docs, you can do everything in this service as a professional in every sense of the word.
See what others have changed
Open a document in Google Docs and select See revision history from the File menu. This will put your document in a different position and add a sidebar to the right. Here is a list of times when changes were made to the document and who made those changes. This way you can see who made the changes and edits to the document.
But in addition to what has been said above, you can reverse that change by selecting each item in the list of changes on the side of the page. If someone else working on your document saves you hours of hard work with incorrect changes, you can easily undo that file by resetting that person.
Create descriptions and suggestions
Creating descriptions in text editing software is not a new feature. Simply select a text, sentence, or entire page and select Comment from the Insert menu. Then a bubble-like section will appear where you can add your own description inside the text box. Anyone else who has access to your document can comment on your description. Posting Comments For added comments, no two people need to be online at the same time.
One of the unique features of Google Docs is the ability to switch between work modes. Especially from the edit mode to the bid submission mode. At the top right of the screen, a pencil mark indicates that you are editing. If you select Suggesting by selecting this menu, you can suggest only them in this case instead of making changes.
Submitting a proposal means that any changes you make, including word changes, spaces, punctuation, or fonts, will be visible as a comment to the person who has access to the document, and if he or she has made the changes. If you Approve, then that change will apply to the desired document. This tool works really well and you can use it to give different people different access to your documents depending on their role.
Define your work plan for each project exactly
This is one of the key points when doing a job and you need to know exactly what you are doing on your project. If the people you work with do not know what your overall plan and purpose are, you can use a tool called MindMeister, which is actually a Google Docs plugin that allows you to easily map your project roadmap to a specific list. do.
First, create the main goal in the first and highest place of the list and then add other ideas and work plans after that. If some of the items in this list need a subcategory, then press the Enter key and then press the Tab key to go to the subcategories of the item in your list. Once you have created the list of sub-categories of the item, select that list, then select MindMeister from the Add-ons menu, and then click Insert as Mind Map.
You will now have a very clear picture of what you have in mind and what you want to apply to your project that anyone can easily see by looking at your goal.
Create hierarchies for folders
When your project requires more than one document, you can share and work with that folder, and give anyone you want specific access to do certain things. If you add any file to a shared folder, that file will automatically grant the same access to the people you created for the folder in the previous step.
But one folder may not be enough for your work. You may need to add several more folders. All you have to do is create the folders you want in the shared folder and name them appropriately.
For example, drafts, need to edit, finished. You can also create multiple sections with the ability to use multiple folders. For example, news, features.
By doing this, you can determine exactly how far the project and its parts have progressed and what parts need more work to be completed.
Extra trick!
By coloring your folders, you can easily determine what exactly the contents of each are. To do this, right-click on the desired folder and select Change color. In this section, you can apply the desired color to the desired folder according to your needs and tastes.
