
Dual Boot Setup for Windows 11 and Windows 10 — Two Methods Explained
Users Are Always Interested In Installing Trial Versions Of New Windows, but it does not make sense to install a trial version as the primary operating system.
This article will install Windows 11 and Windows 10 as a dual boot.
Many users like to install and check Windows 11 before the final release. Still, there are concerns about the stability of Windows test versions, and it does not make sense to install a test operating system as the primary one.
Fortunately, setting up DualBoot in Windows is simple enough. You only need a Windows 11-compatible system and a Windows ISO file.
This article will teach Windows 10 and Windows 11 dual boot methods differently.
Dual boot requirements of Windows 11 with Windows 10
We need a series of prerequisites before we start. First, we need a computer that meets the minimum requirements for Windows 11. If your computer meets the minimum requirements to run Windows 11, boot the ISO from a flash drive. If you do not have access to the flash drive, mount the ISO in Windows.
Step 1: Create a new partition to install Windows 11
We must first shrink one of the partitions; That means taking part of that partition space and turning it into a new drive. Generally, if we want to create a new partition, there is no other way but to delete and rebuild that partition.
However, with Shrink, you can get a new partition from the heart of the previous partition without deleting the data.
To do this, press the Win + R key combination together, and on the Run page, type diskmgmt.M, Sc. Finally, it is OK to run the Disk Management tool.
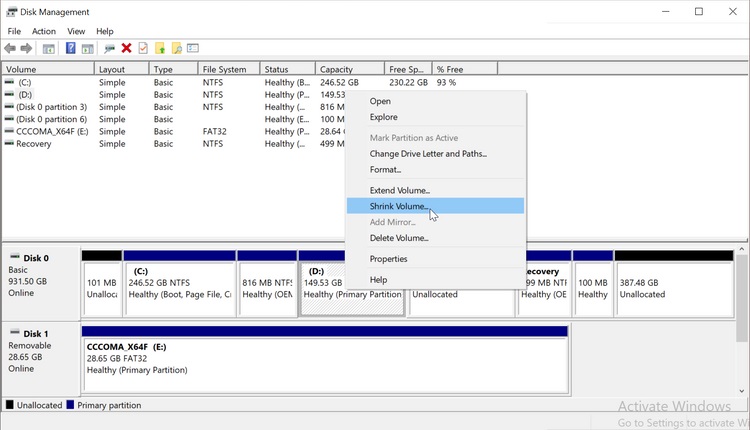
Right-click the desired partition, then select Shrink Volume.
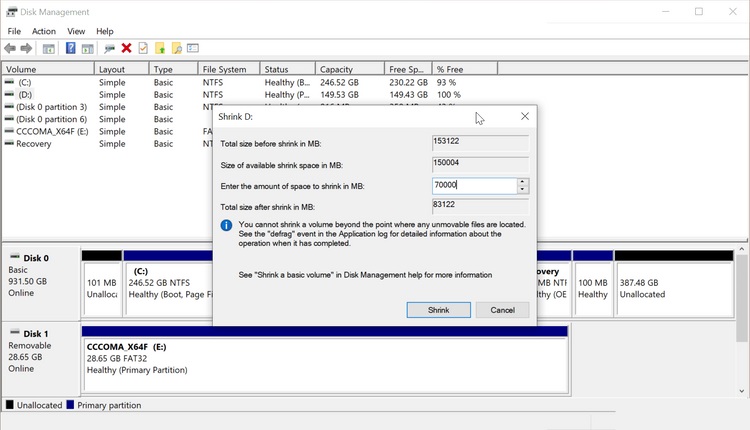
In the open box, enter the space you want from the drive in megabytes. For example, if your drive size is 153122 MB (150 GB), enter about 70,000 MB in the Shrink field. This reduces the size of your drive to 80 GB and shows 70 GB as unallocated space.
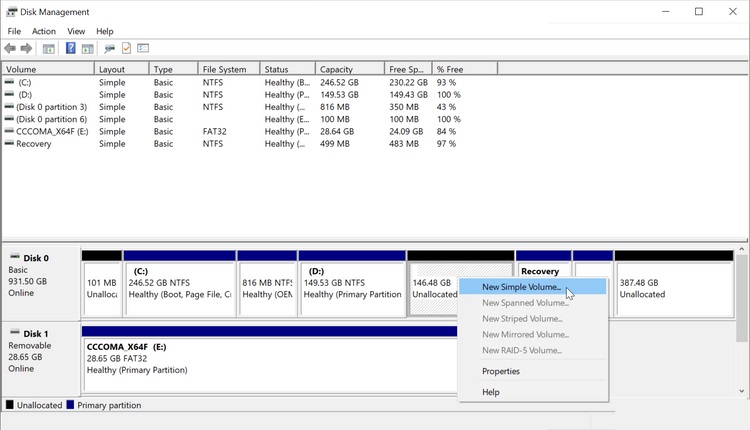
Step 2: Build a new drive.
To create a new drive, right-click on Unallocated space and select New Simple Volume.
In the New Simple Volume Wizard window, click Next and enter the size of the new driver. Note that this value is sufficient to install Windows 11. Finally, select the Assign the following drive letter option and click Next.

Now, we come to the settings of the new drive, which should be in the following order.
- File System – NTFS
- Allocation unit size – Default
- Volume Label – Windows 11
Selecting the Windows 11 name for the drive during installation makes it easier to identify it. In the same window, select the Perform a Quick format option and click Next to create the drive.
Step 3: Install Windows 11 from within Windows 10
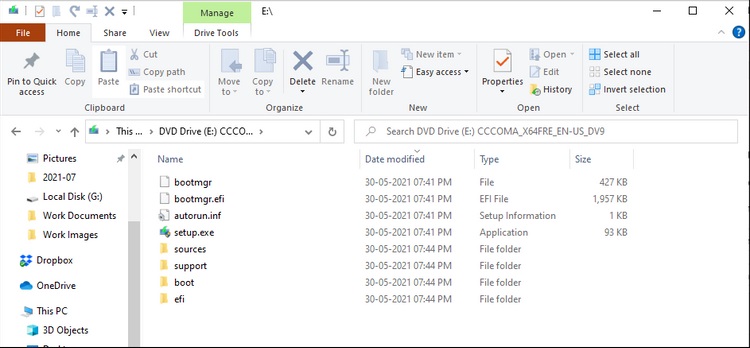
Connect the Windows 11 bootable flash drive to your computer. If you do not have a Windows 11 bootable flash drive, use the Windows 11 ISO file. To install via the ISO file, right-click on it and select Mount to add Windows to your computer as a new drive.
Next, enter the Windows 11 drive and run the setup.exe file from the Sources folder. If Windows 10 asks you to rent the file, click Yes.
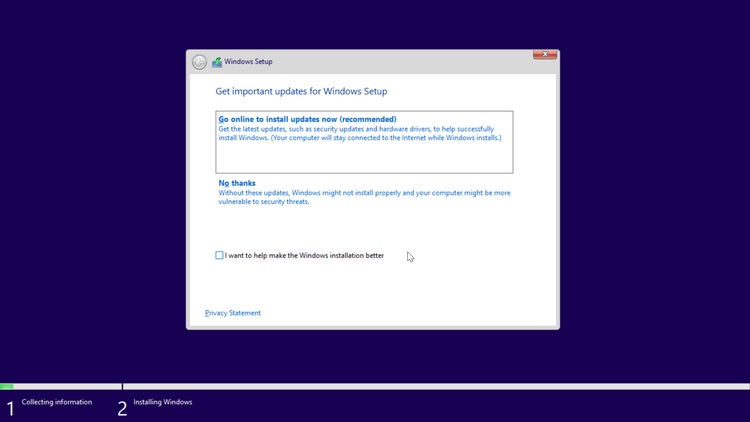
After running the setup.exe file, select the No thanks option. In the next step, activate the license check and click Next.
Select the Custom: Install Windows only (advanced) option in the next step. In the Windows Where to Install to Install screen section, select the drive you previously specified as Windows 11.
Now, the Windows 11 installation will start and may take a long time, depending on your computer’s hardware. During installation, the computer will restart several times. After each restart, select the Windows 10/11 Setup option. After the installation, you will see Windows 10 and Windows 11 as dual boot when you reset the computer.
Method 2: Install Windows 11 via a bootable driver
If you wish, you can install Windows 11 from a bootable drive. First, follow the steps in the first step and shrink part of a drive. When the title Unallocated space is created, connect the bootable flash drive to the computer and reset it. Now press the F12 key to enter the BIOS settings.
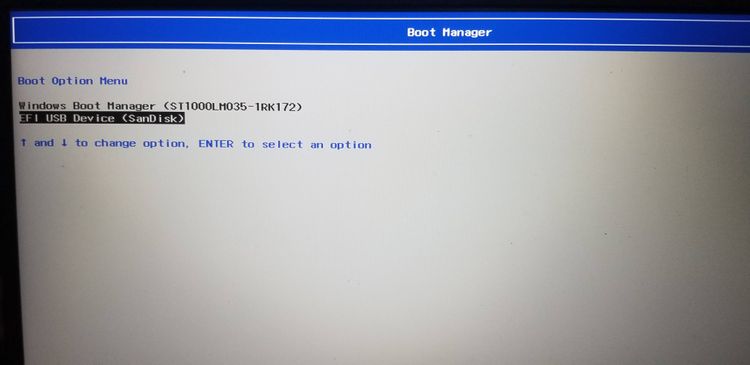
In this step, select the bootable drive from the Boot Manager section. Select English in the United States language selection window and click Install Now. On the next screen, select Custom: Install Windows only.
On the “Where do you want to install Windows” page, select the drive you created and click Next to start installing Windows 11. After Windows 11 is installed, the computer selects this operating system by default.
How to select the default operating system
You can change the operating system at boot time with the following settings.

Key to Win + I together hold to open the Settings section.
- Select the About option from the System section.
- Click Advanced System Settings on the right side of the window that opens
- From the Startup and Recovery section, select the Settings option.
- From the Default operating system section, select Default Windows.
- Set the duration of Timeme to display a list of operating systems and Recovery options when Timeme is 30 seconds.
- Finally, OK the settings and reset the computer.
- After the reset, the system will ask you to select an operating system. If you do not select any, the default operating system will boot.
Disable Fast Startup in Windows 10 and Windows 11
If you still do not see the dual boot option after the above settings, turn off Fast Startup as follows.
- In the Windows search section, search for Control Panel and enter this section.
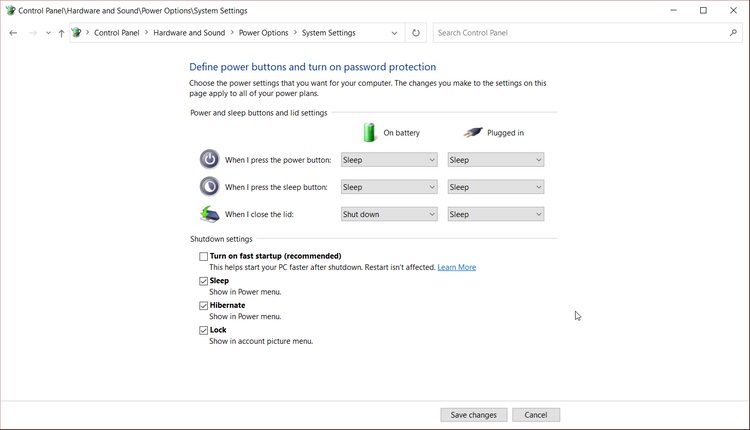
- Go to System and Security> Power Options> Choose what the power buttons do
- Click Change settings that are currently unavailable.
- Turn off the Turn on Fast Startup option in the Shutdown settings section.
With dual boot, you can use the Windows 11 trial alongside Windows 10. Of course, dual boot is not entirely flawless and may negatively affect system performance.
FAQ
What is dual-booting?
It’s installing two operating systems on one PC and choosing which one to boot each time the computer starts.
What are the two ways to set up dual-boot Windows 10 and Windows 11?
Method 1: Install Windows 10 first, then install Windows 11 on a separate partition — ensuring boot loader shows both OS options. Method 2: Use separate hard drives or SSDs for each OS and configure boot order or boot menu to select which OS to launch.
What should I watch out for when dual-booting two Windows versions?
Keep each OS on separate partitions or drives, back up data before installation, and ensure boot loader or BIOS/UEFI settings are configured correctly to avoid boot issues.