
What Is Magento — A Robust E-Commerce Platform
Since the need to start an internet business has strengthened, we decided to introduce you to one of today’s powerful store builders with a step-by-step tutorial on installing Magento on your host. In the article, what a store maker is, and store software is discussed in detail, and its types are explained. In this article, we will say what Magento is. Then, we will discuss the benefits of setting up a store with the powerful global Magento. Finally, we will teach you step-by-step instructions for Magento installation and plugin installation in Magento with pictures.
What is Magento?
Magento is an open-source e-commerce platform. Among its features are a flexible shopping cart system and the possibility of managing how to display and control the performance of the store website. In addition, Magento is equipped with an optimized search engine and catalog management tools.
Magento is the most popular platform for store websites. This platform allows you to create a store website quickly. However, beginners may not be fully confident in their abilities and may be a little afraid of installing this platform.
In the rest of the article, we will teach the installation step by step.

This platform is designed so that people who are not developers or programmers can use it. Even in its simplest form, this system is amazing. If you increase the number of products on your website, you will need the help of expert developers. But to do the basic work, you can do it yourself, and you must get help from Magento training.
Benefits of installing Magento
- Its installation process is easy, and templates and plugins can also be installed.
- It uses open-source technology. For this reason, it has high flexibility.
- It is an effective and price-sensitive program.
- Compatibility of the majority of Magento templates with different devices (responsiveness)
- Support for many languages and the possibility of switching the language of the store according to the customers’ IP addresses
- Compliance with SEO principles in Magento architecture
- Applying promotions and discounts while logging into the system is also possible.
- It supports more than 50 payment gateways.
How to install it on the host
To install Magento on the host, you must follow the following steps:
1- Checking the installation prerequisites:
The things we mention below are your minimum requirements for installing Magento on the host:
- At least 2 GB of free RAM
- Web server (Apache 2.2 or nginx)
- Database (MySQL)
- PHP version 6 or higher
- FTP client
2- Download:
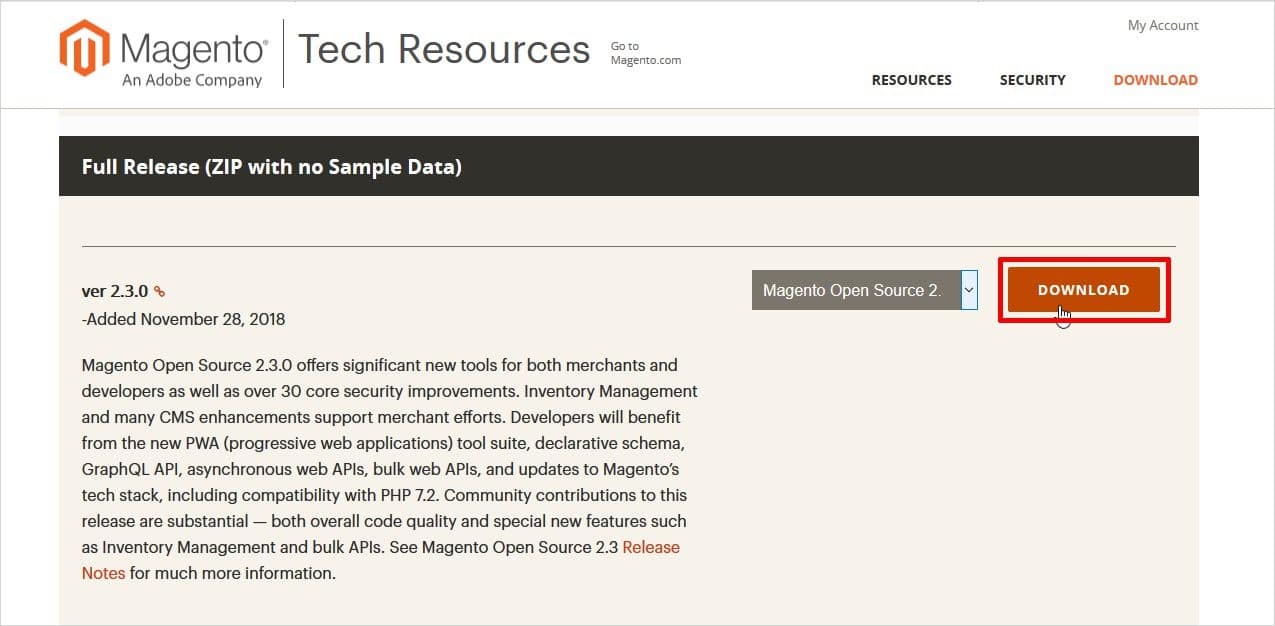
To upload the Magento installation file, you must first unzip it. You can extract the files to your desired location with the help of an FTP client like Filezilla; we have previously explained how to install Filezilla. Now, upload the files to your host and learn how to use them. Upload all files in the Public_html path.
3- Creating a database:
To install, you need a database. Therefore, using MySQL software, create a database with a desired name on your “host.”
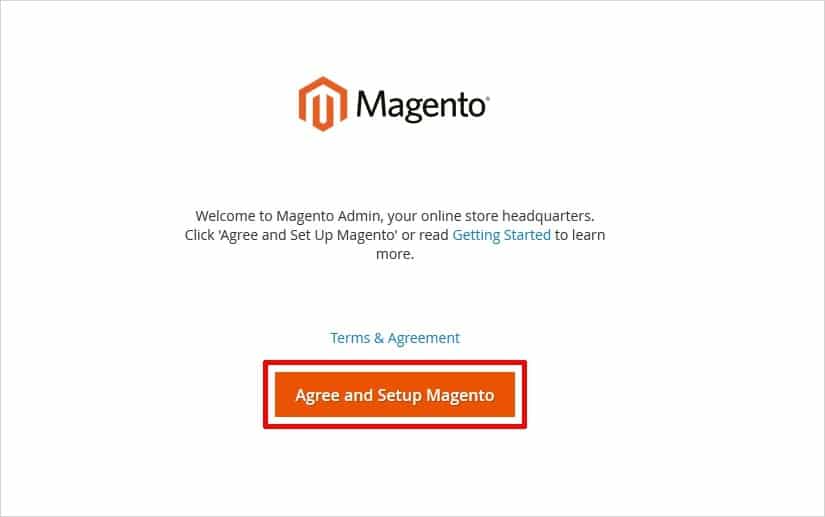
4- Installing on the host:
After creating your database, open a browser and enter the installation address. You will see the following image if you have done the above steps correctly. Click Agree and Setup in this window to start installing on the host.
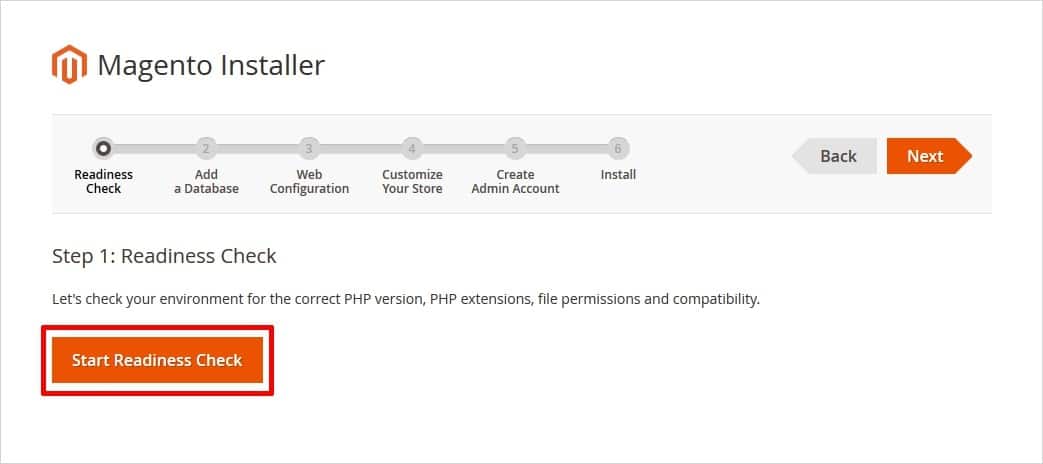
The main stages of installation include six parts.
settings
In the first step, Setup checks the host settings, PHP version, PHP plugins, compatibility, and file permissions. Click on Start Readiness Check to start this step.
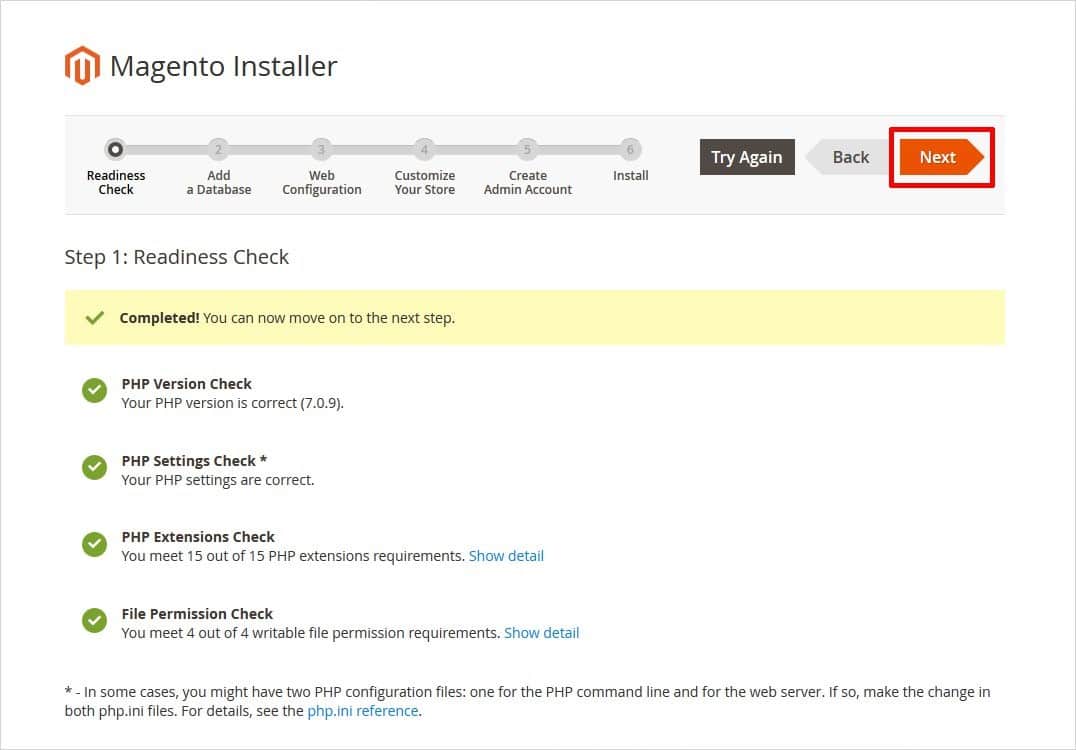
If there is a problem, the corresponding error will be displayed. If the check is completed successfully, you should see the following images in the window.
In this section, you should enter the details of the database you created earlier. It is mandatory to enter information about the database host server, server username, and database name. After entering the above information, click on the NEXT button.

In the next step, enter the store’s and admin’s addresses.
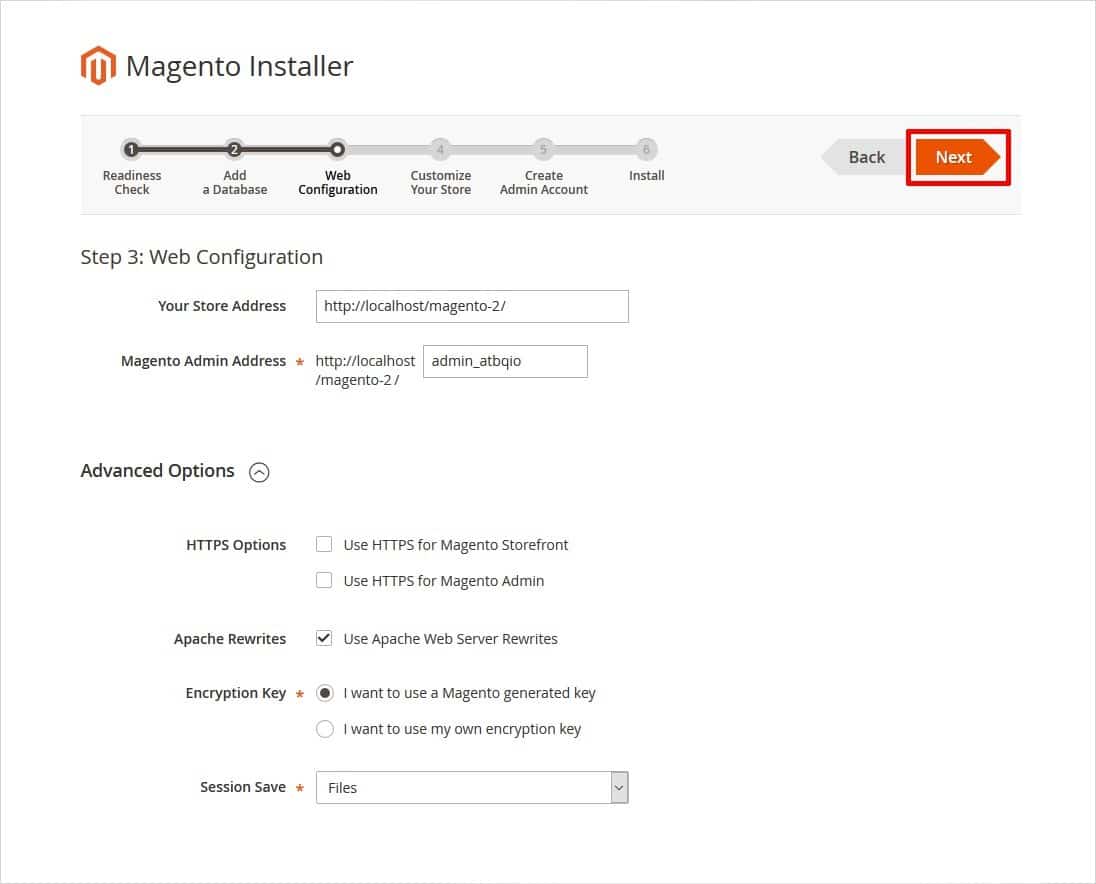
Your Store address: This field should remain in the default state and not change unless you want to change the store address.
Admin Address: You must use this address to enter the admin panel. This section is critical in terms of security. We recommend changing this part and using unconventional names.
FAQ
What is Magento used for?
Magento is used to build and manage online stores, providing tools for product catalogs, order processing, promotions, and customer management.
Is Magento free or paid?
There is a free version called Magento Open Source, and paid versions such as Magento Commerce and Magento Commerce Cloud.
Why choose Magento for e-commerce?
Because it’s highly customizable, scalable, supports SEO, integrates with third-party systems, and allows businesses full control over their storefront architecture.